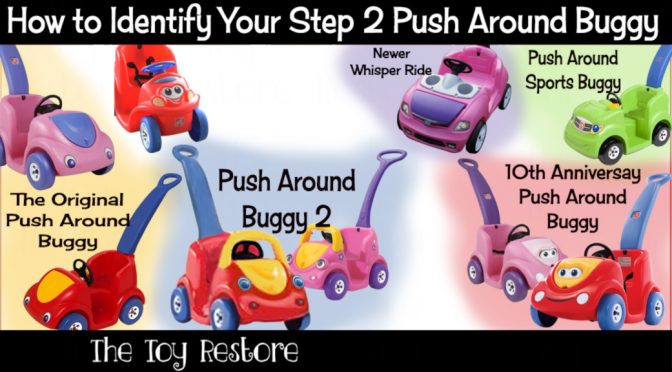
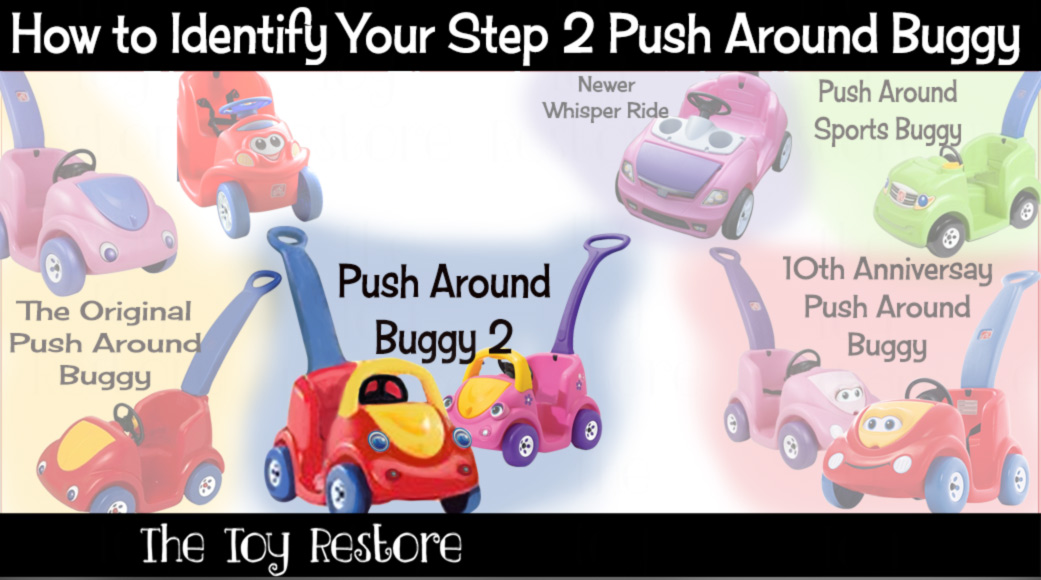
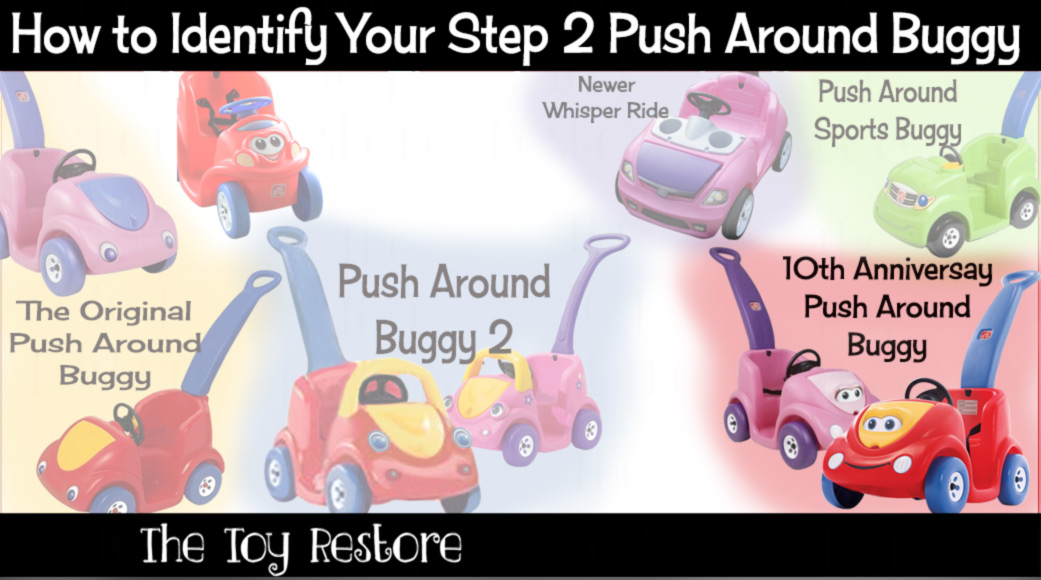
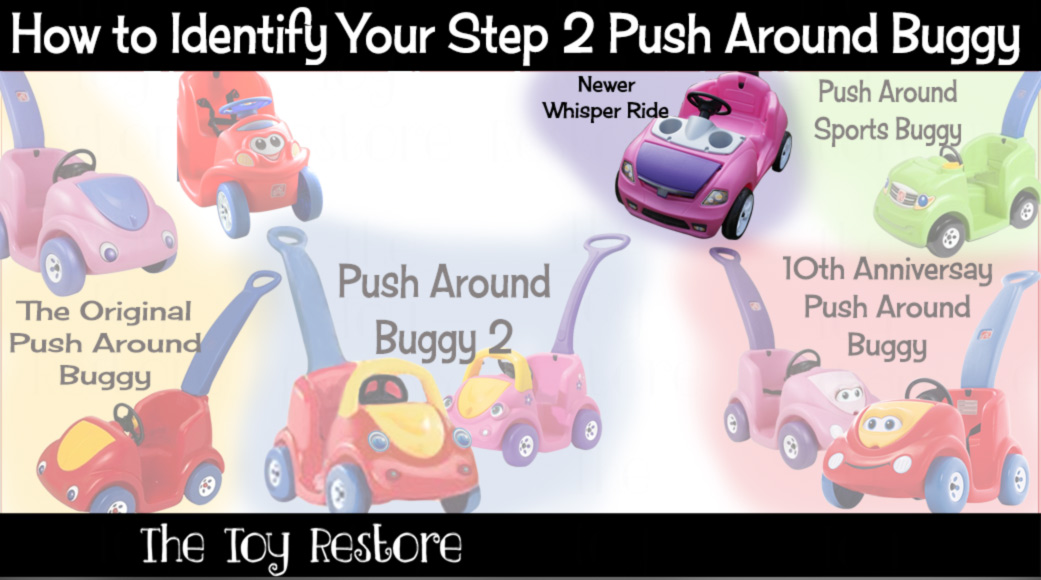
Identify Your Step 2 Push Around Buggy . There are several different models of Push Around buggies. Most are made by Step 2 but there are some similar ones made by Little Tikes. Here is some information on each of the more popular models.
Identify Your Step 2 Push Around Buggy : The Original Push Around Buggy
The Original Step 2 Push Around Buggy
Identify Your Step 2 Push Around Buggy. The Original Step 2 Push Around Buggy.
Click here for more detailed info on this model. Including what kinds of replacement parts should work for this model, and ideas on different themes you can make with them. Also to get more information on the different sets of replacement decals I offer for this model.
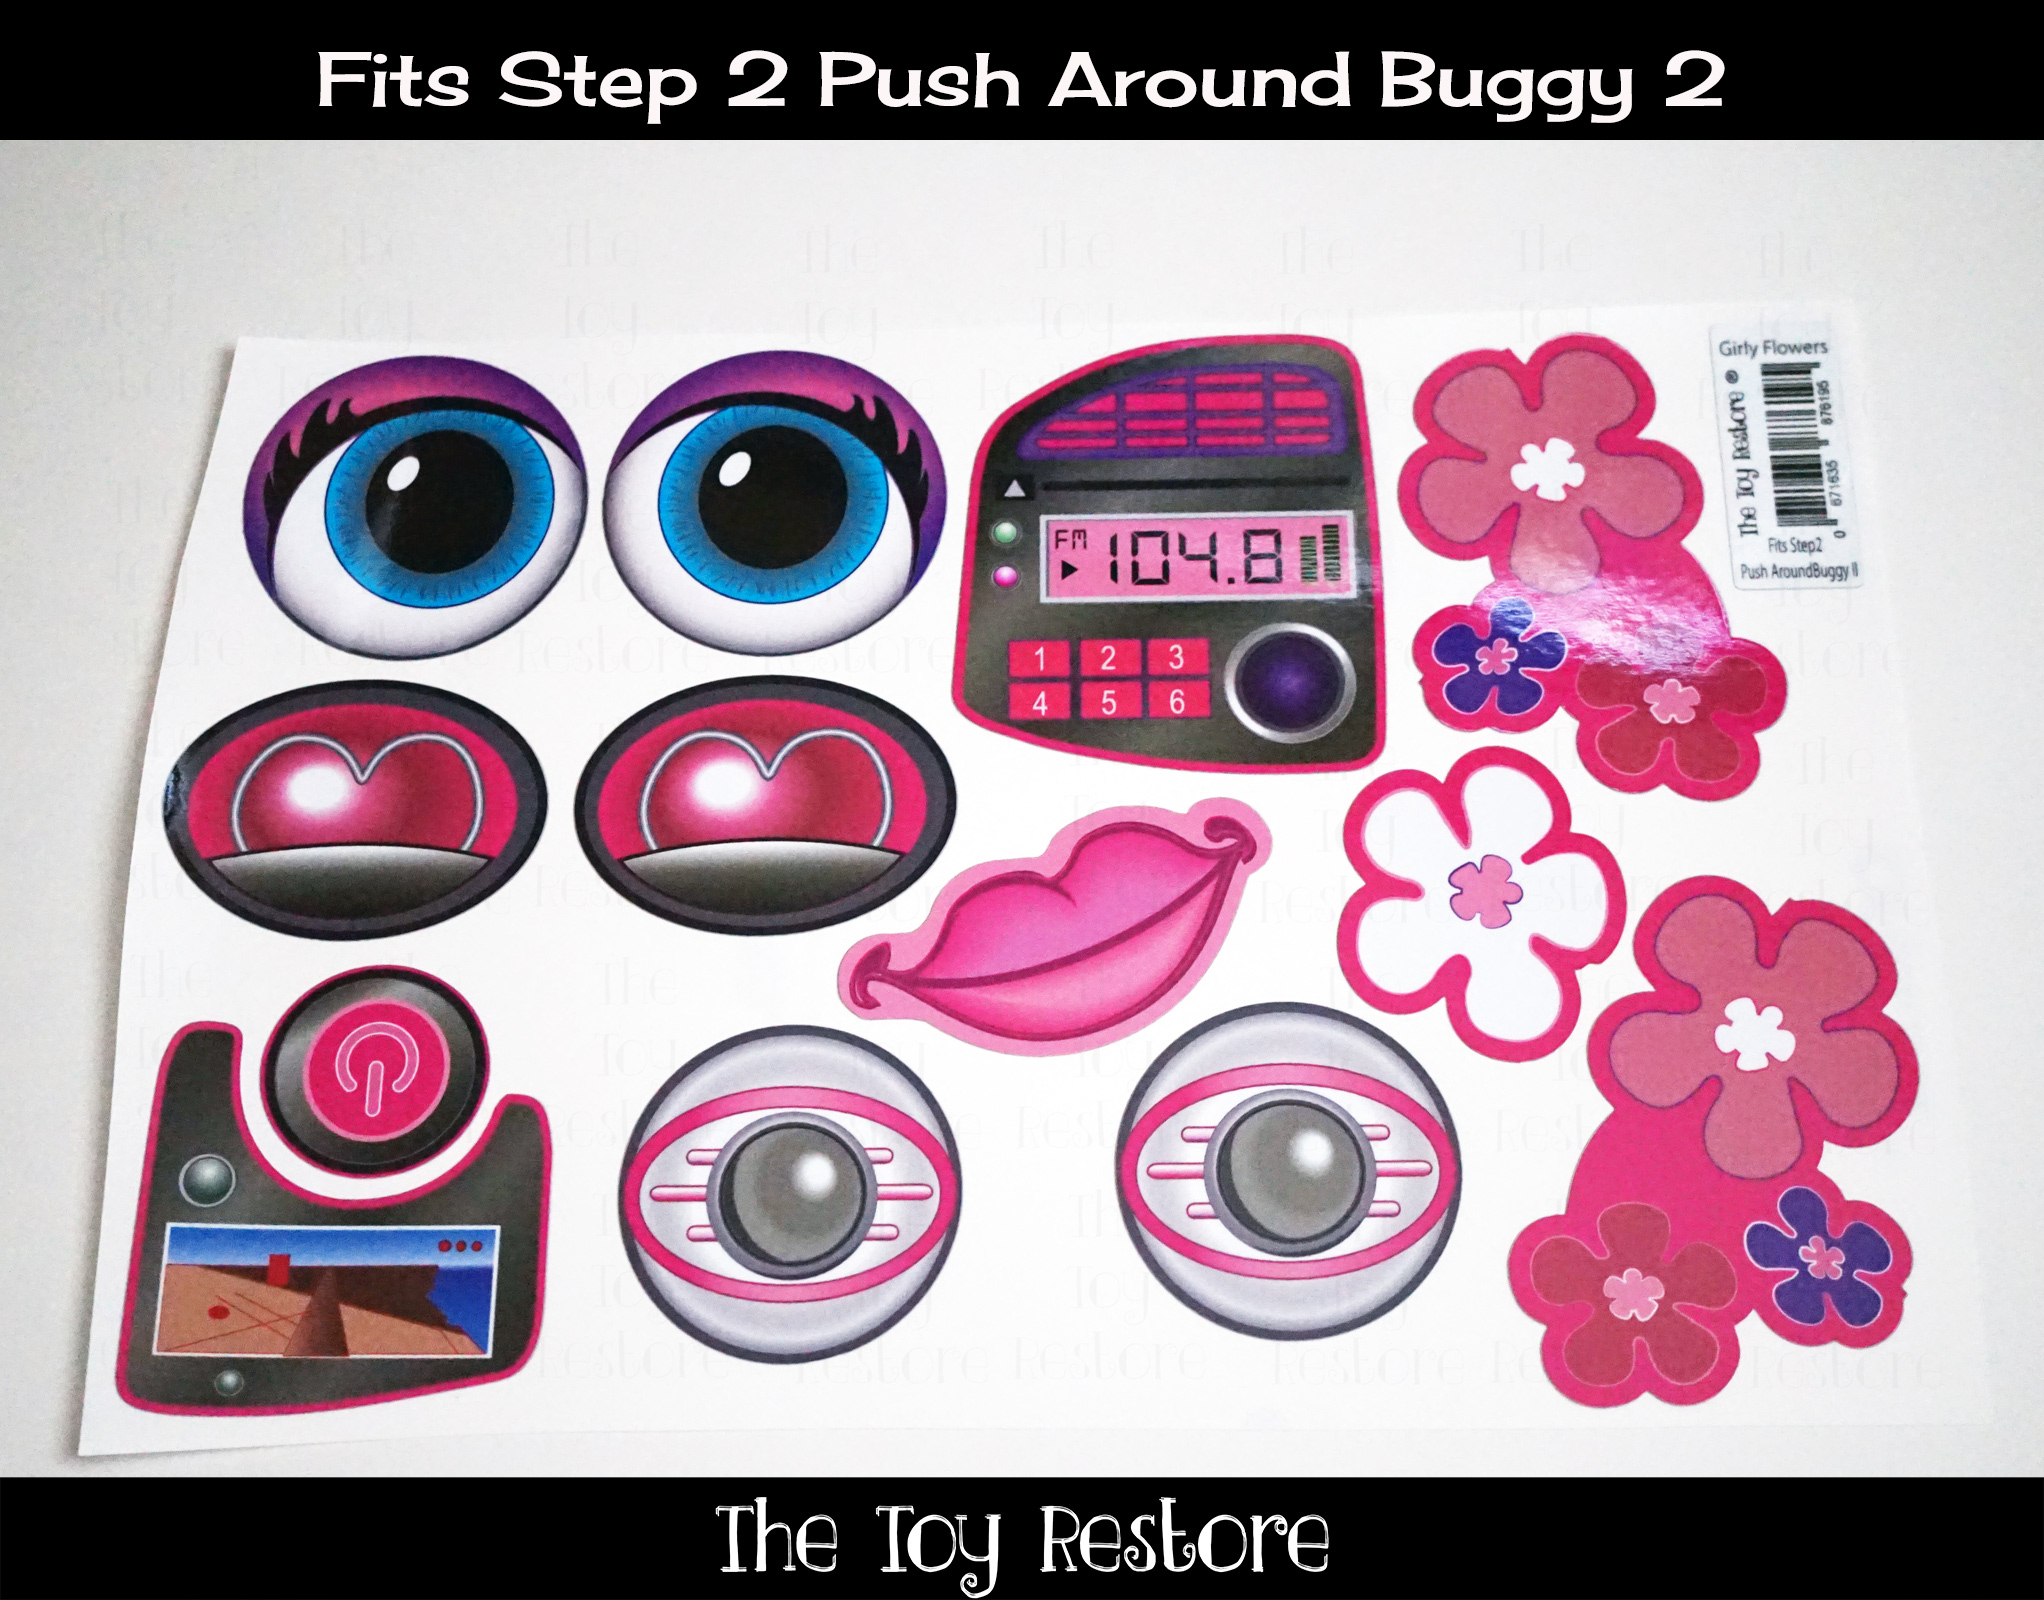
Identify Your Step 2 Push Around Buggy : The Push Around Buggy 2
The Step 2 Push Around Buggy 2
Identify Your Step 2 Push Around Buggy. The Step 2 Push Around Buggy 2.
Click here for more detailed info on this model. Including what kinds of replacement parts should work for this model, and ideas on different themes you can make with them. Also to get more information on the different sets of replacement decals I offer for this model.
Identify Your Step 2 Push Around Buggy : The 10th Anniversary Push Around Buggy
The Step 2 10th Anniversary Push Around Buggy
Identify Your Step 2 Push Around Buggy. The 10th Anniversary Step 2 Push Around Buggy.
Click here for more detailed info on this model. Including what kinds of replacement parts should work for this model, and ideas on different themes you can make with them. Also to get more information on the different sets of replacement decals I offer for this model.
Identify Your Step 2 Push Around Buggy: The Push Around Sport Buggy
The Step 2 Push Around Sport Buggy
Identify Your Step 2 Push Around Buggy. The Step 2 Push Around Sport Buggy.
Buy Replacement Decals for this model:
Amazon US Boy Girl
Ebay Boy Girl
Etsy Boy Girl
Amazon UK
Click here for more detailed info on this model. Including what kinds of replacement parts should work for this model, and ideas on different themes you can make with them. Also to get more information on the different sets of replacement decals I offer for this model.
Identify Your Step 2 Push Around Buggy : The Newer Whisper Ride
The Step 2 Newer Whisper Ride
Identify Your Step 2 Push Around Buggy. The Newer Step 2 Whisper Ride.
Click here for more detailed info on this model. Including what kinds of replacement parts should work for this model, and ideas on different themes you can make with them. Also to get more information on the different sets of replacement decals I offer for this model.
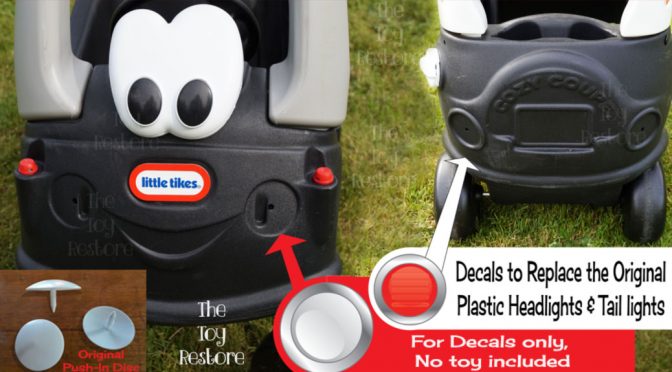
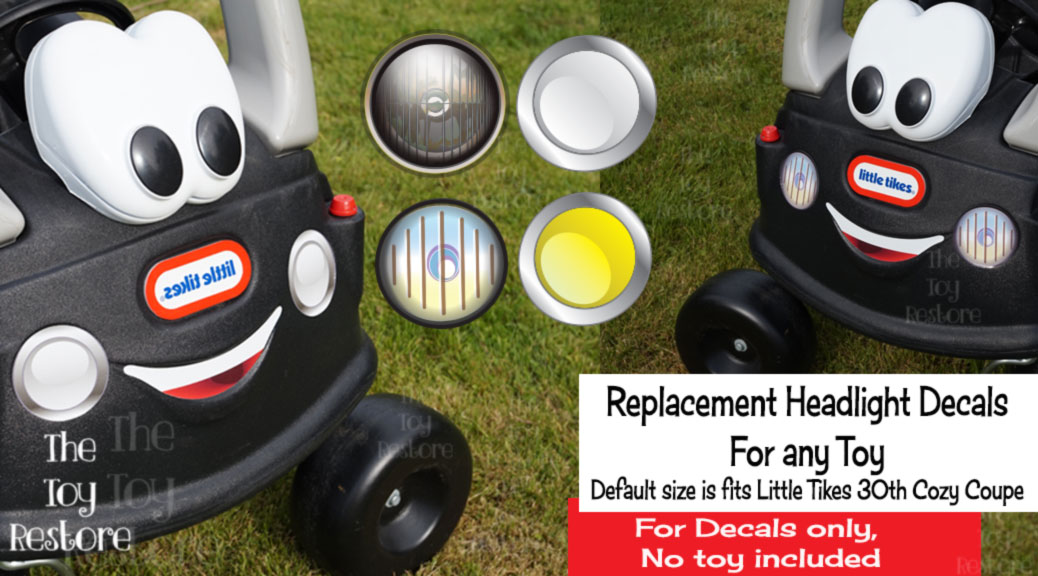
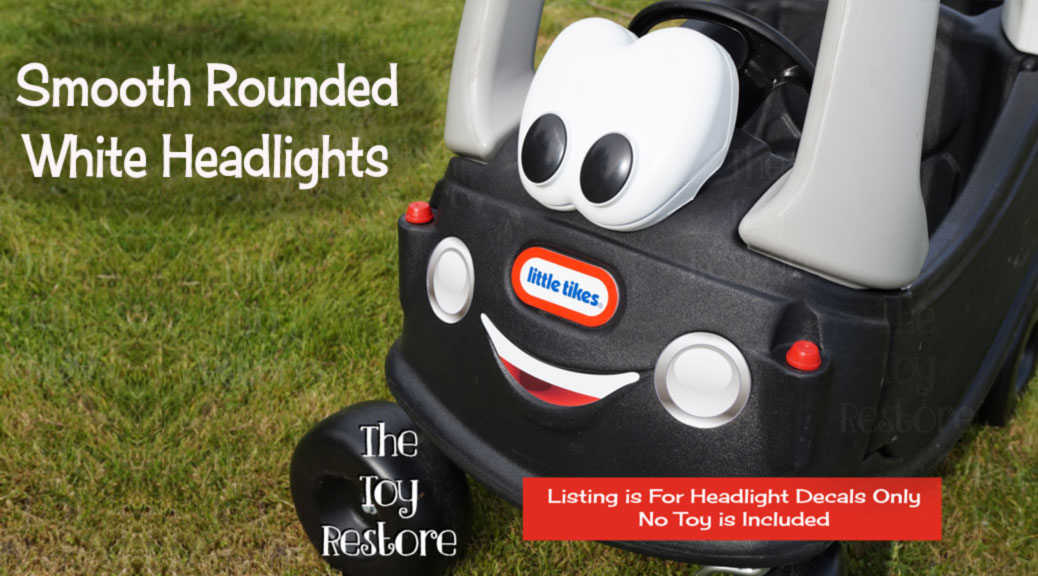
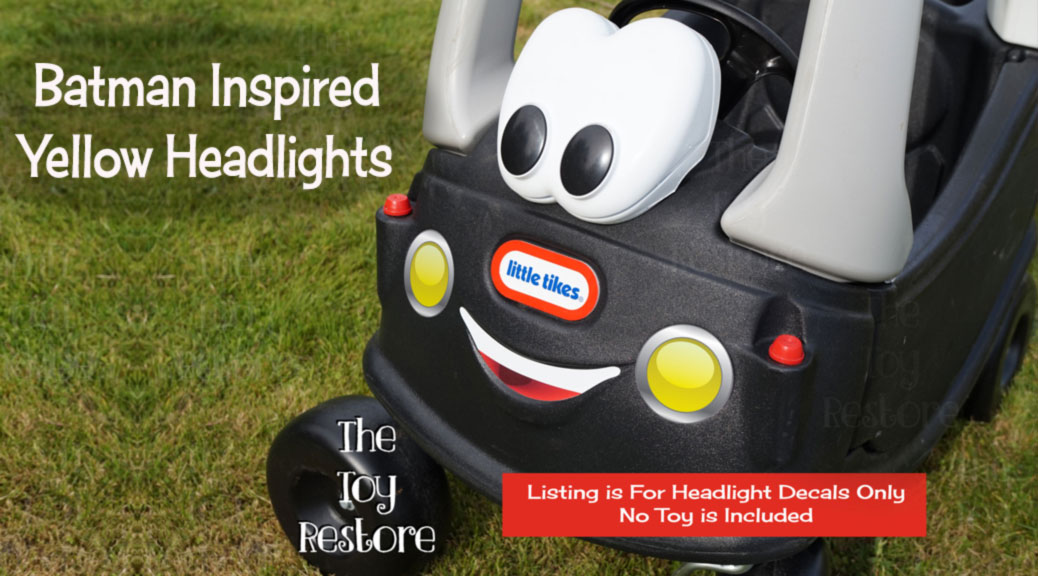
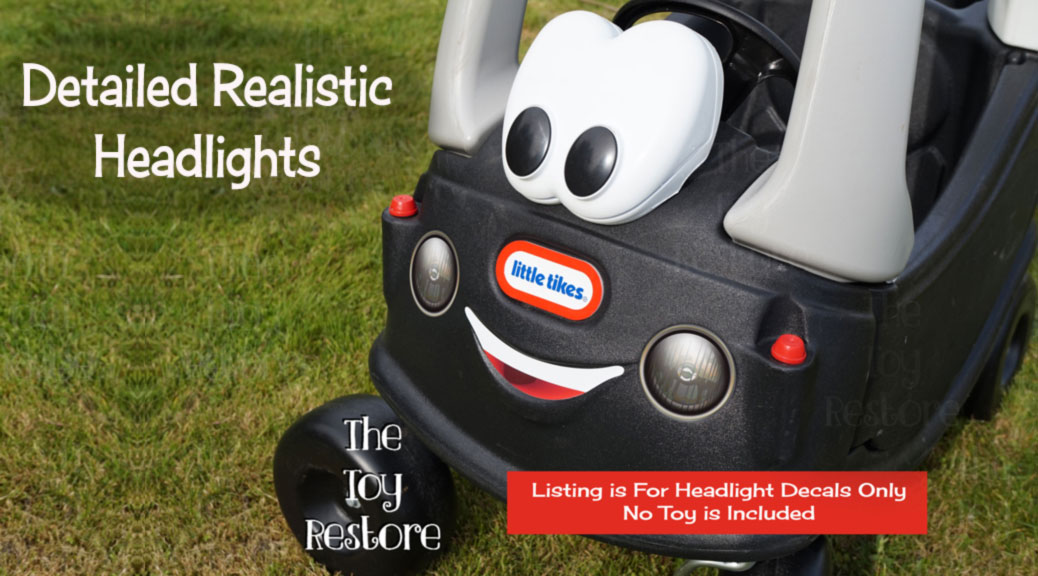
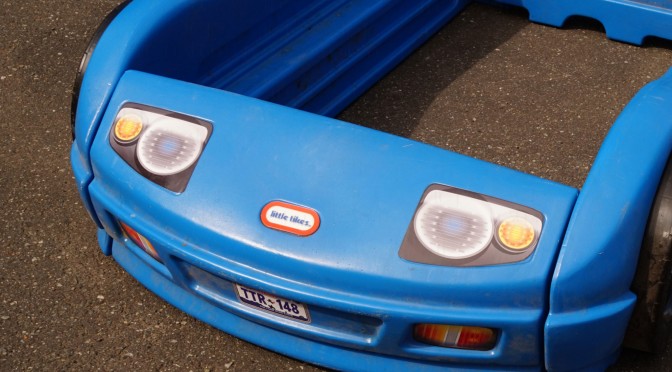
How to Fix the Headlights on your Little Tikes 30th Anniversary Cozy Coupe
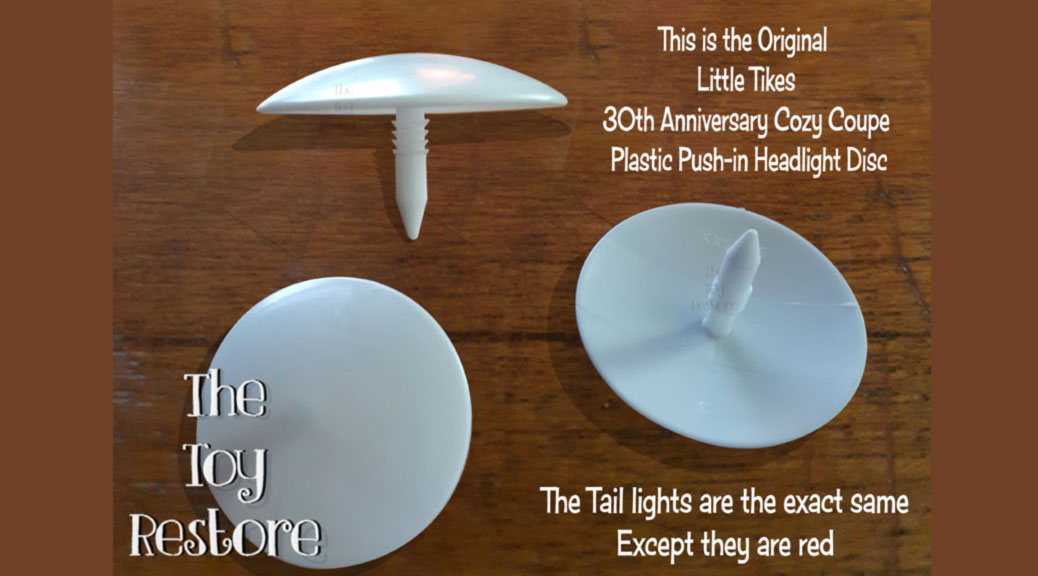
How to Fix the Headlights on your Little Tikes 30th Anniversary Cozy Coupe. This model originally came with plastic push in discs for the headlights and tail lights. They can get pulled off, or broken, so I designed a couple of choices for decal replacements.
It is important to note, that you must place these directly on the body of the coupe. So you must remove the plastic push-in discs first. You can use a flat head screwdriver to pry them off.
I can also change the colors as well, so if you have a custom coupe you have in mind, just send me an email. These can even help you to customize your coupe to suit a particular look you are wanting. It still may be possible to contact Little Tikes for replacement plastic parts, but at the time of writing this, it was not possible. To check, call the 1-800 number on your toy.
These can be easily resized to suit any car, I have this listing for most diameters, but I can custom size it for any project. Just send me an email.
How to Fix the Headlights on your Little Tikes 30th Anniversary Cozy Coupe. Headlights and Tail lights decals regular set.
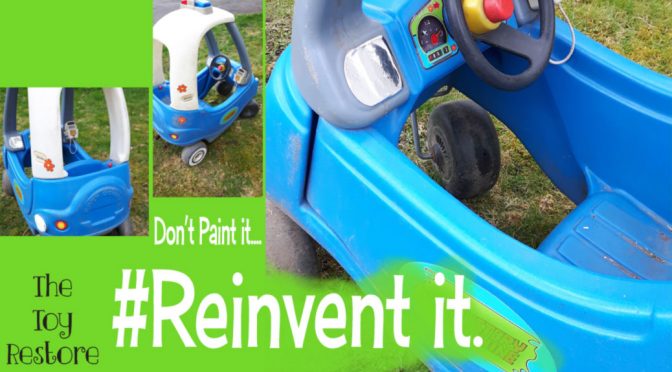
Reinventit Reinvent It to keep it out of the landfill
Reinventit Reinvent It to keep it out of the landfill. I don’t bother painting my kids toys anymore… Honestly, I am too busy for that. But I interchange the parts, or I just use the colors that are with it…..
I like to design things around what is given to me. So my son LOVES Scooby, and we have an older blue Little Tikes Cozy Coupe II Patrol Car, and I just made him some stickers. No paint involved. He’s happy, and I can use it for a Police car again in the future.
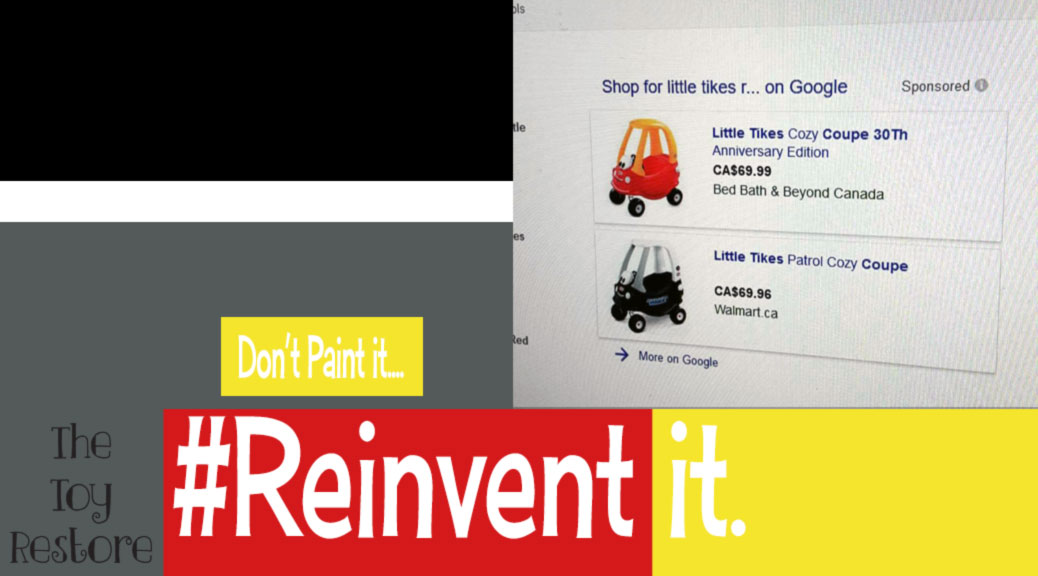
Even some of the more popular mods, you could just buy two cars, and swap out the parts to get different color schemes.
For example the Little Tikes 30th Anniversary police car, with the red 30th Anniversary Cozy Coupe. Then you would have two yellow columns, yellow roof, grey columns, and a white roof, and a red body, and a black body. So you would have yellow and black for one car, and red, grey and white for the other…. Minnie mouse? Batman? Princess? VW? The possibilites are endless… And they would be brand new. You could resell them, without wasting anything. Or mixing these parts with older coupes, and making them new again… #outofthelandfill.
#reinvent I like that… I want my customers to be able to sell their toys again after their kids are done with them. I want families, to pass these toys on to the next generation. I am tired of wasting, I am tired off seeing things thrown away, because we had too much.
I will try to add posts, where I change around my kids toys, without painting. I got a lot of them…..
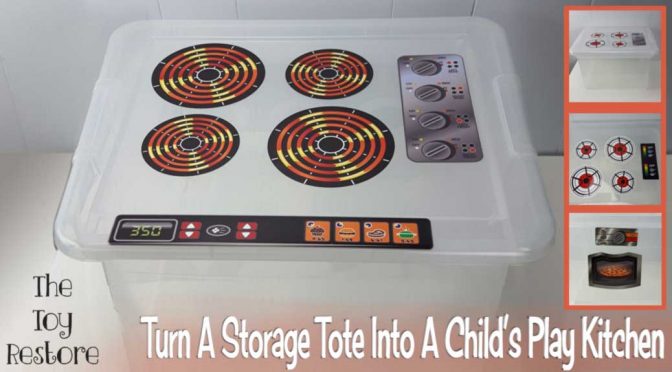
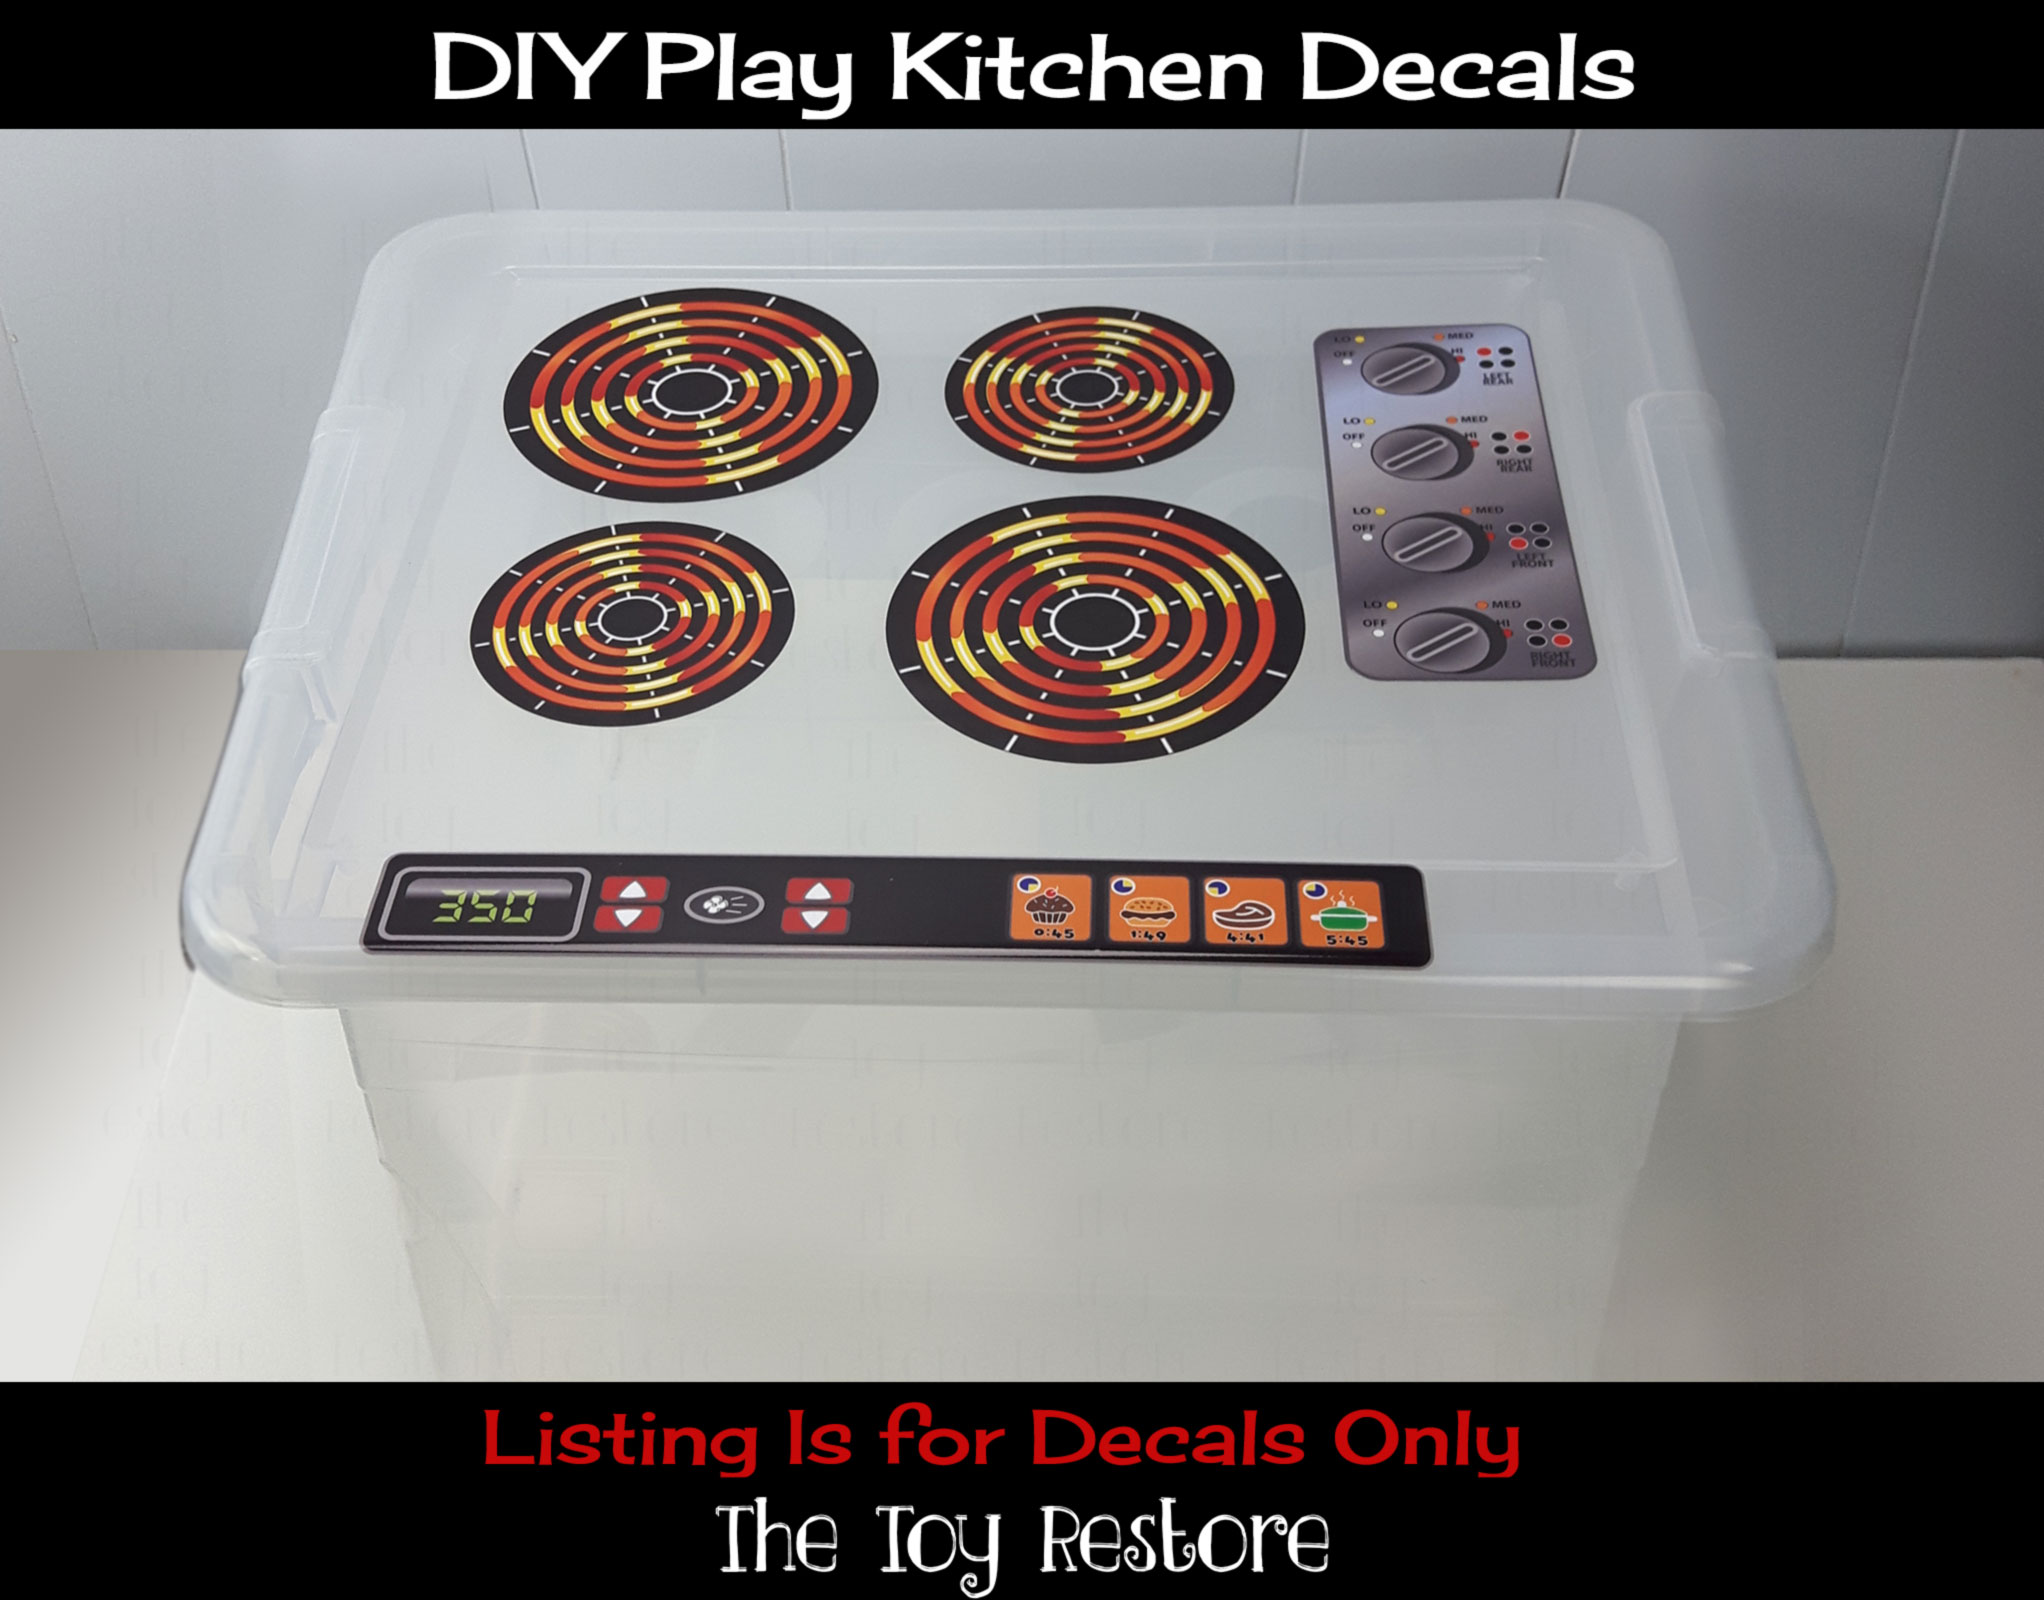
DIY Kids Play Kitchen using a Plastic Tote. For a quick and simple play kitchen, try using a plastic tote, along with some decals. We have decals to make a regular Plastic tote into a child’s play kitchen with room to store all the food, dishes and pans. All you have to do is peel and stick. Custom sizes are available, just email for details. You can also use these for entertainment unit and cupboard remakes. Any thrift store find can be converted into a play kitchen using paint, and some decals.
DIY Kids Play Kitchen using a Plastic Tote: Decal Sets
Our decals have a strong adhesion, so they will stick to most surfaces, including wood, plastic, and metal. Even painted plastic surfaces, just be sure the paint adheres to the plastic. Most paint that is intended for plastic will adhere strong enough.
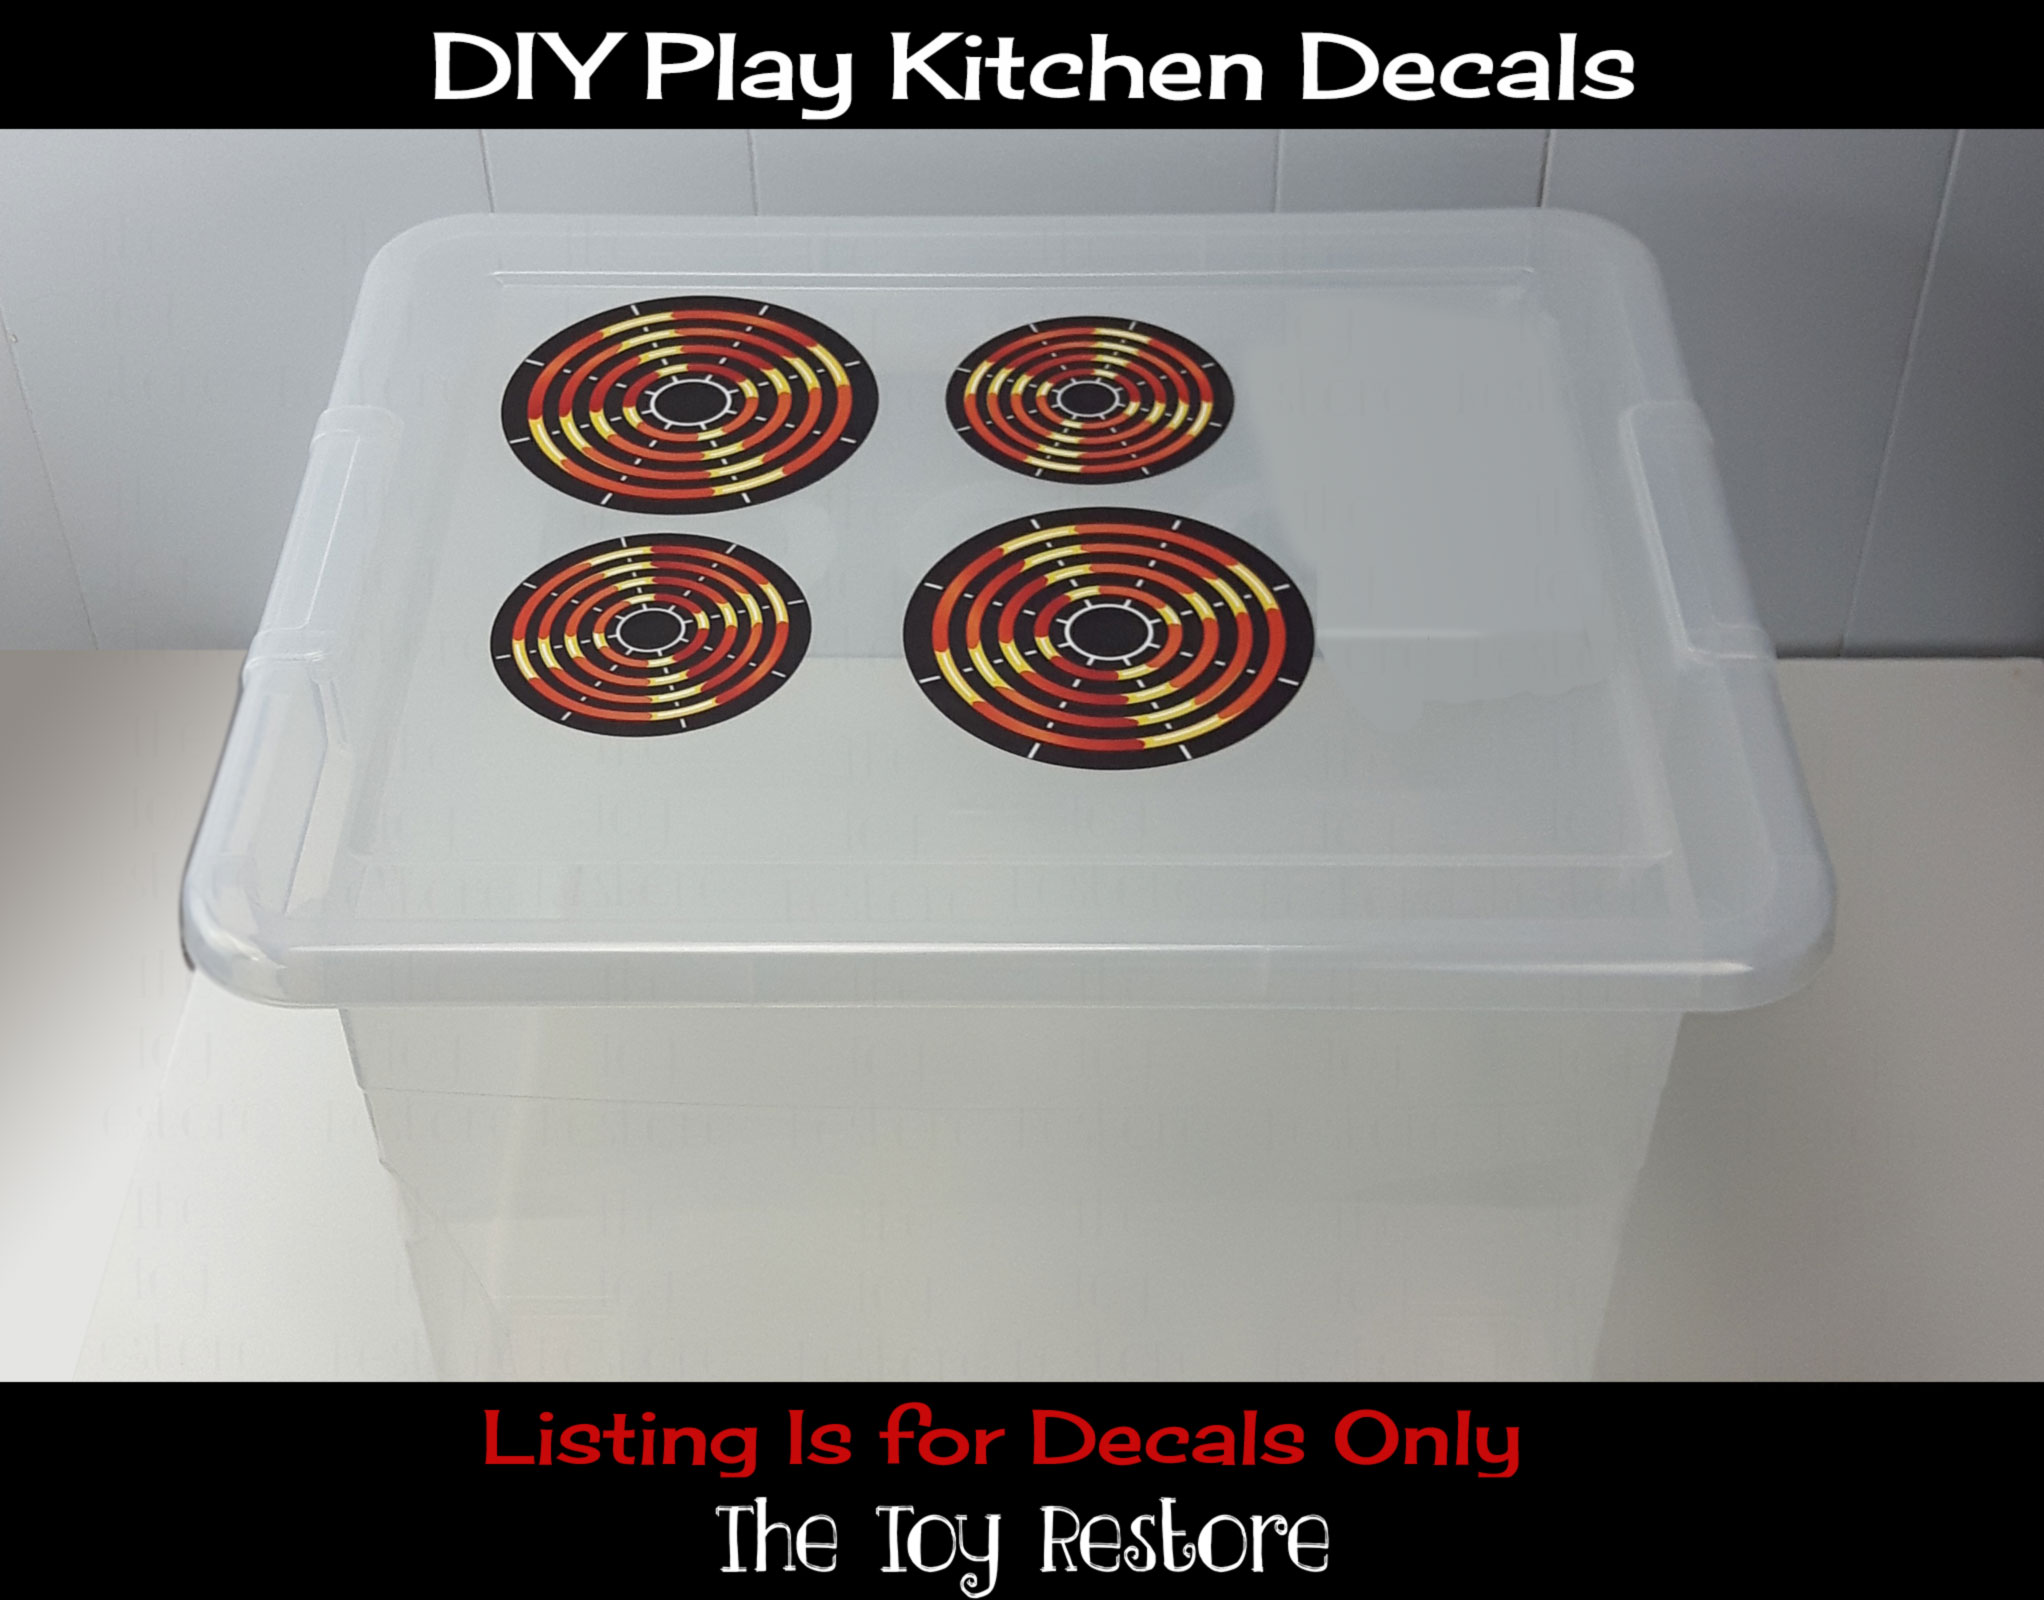
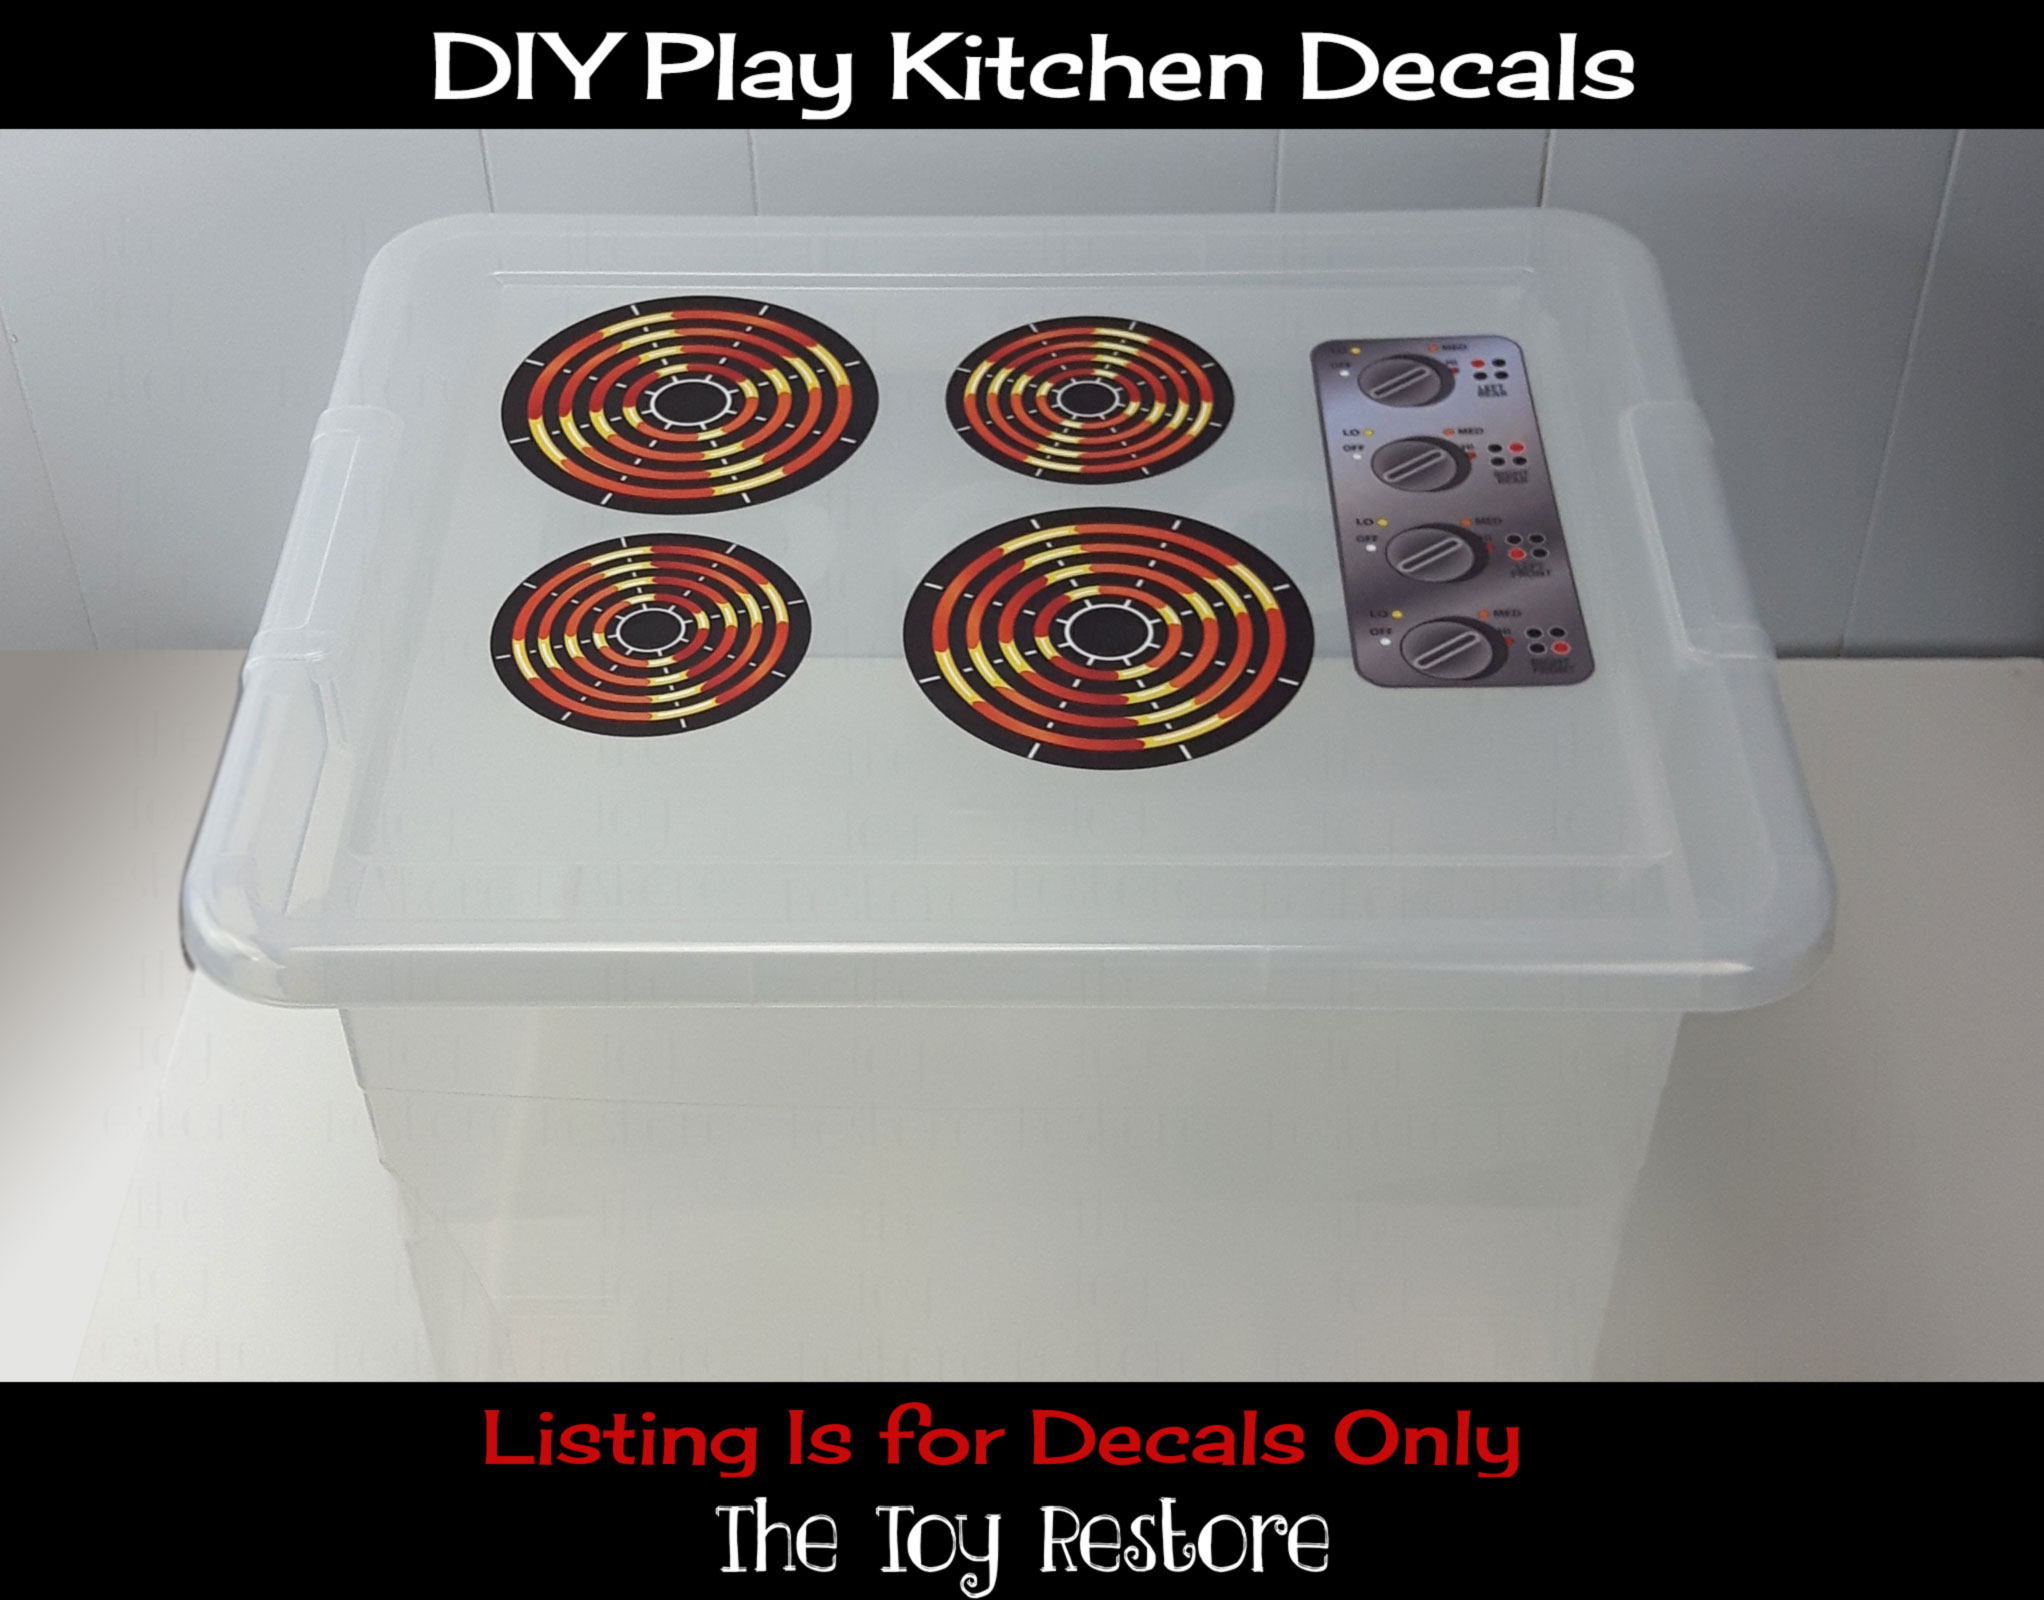
DIY Kids Play Kitchen using a Plastic Tote
This set, which consists of four burners, can be found here:
There is two 3 3/4 inch burners, and two 5 inch burners with this set, plus a dial decal, and an oven panel. All are high quality decals, along with high quality graphics.
There are many more designs to come. All the colors can be changed, and all the decals can be resized. This service is only available if we have the time, and a fee may apply. As the size increases, so will the price. Please email us for further information.
Plastic toys, especially vintage ones, often develop a yellowish tint over time. This yellowing occurs due to the migration of bromine from the plastic to the surface. Bromine helps keep plastic flexible, but as it migrates, the toy begins to turn yellow.
Key Reasons for Yellowing:
Heat Exposure: Heat accelerates the migration of bromine. Toys in sunny windows or close to heaters will yellow faster.
UV Light: UV rays from sunlight break down the chemical bonds in plastic, causing discoloration.
Aging: Over time, even without direct sunlight or heat, plastic naturally undergoes a process of degradation.
How to Whiten Yellow Plastic Toys: My Personal Experience
Restoring yellowed plastic toys can be a rewarding project. After experimenting with hydrogen peroxide, bleach, and sunlight, I’ve developed a method that works well for me. Here’s a step-by-step guide to whitening your toys:
Start Slowly: Test a small, less valuable toy first to understand how your materials react.
Safety First: Always wear gloves, protective eyewear, and ensure good ventilation when handling bleach or hydrogen peroxide.
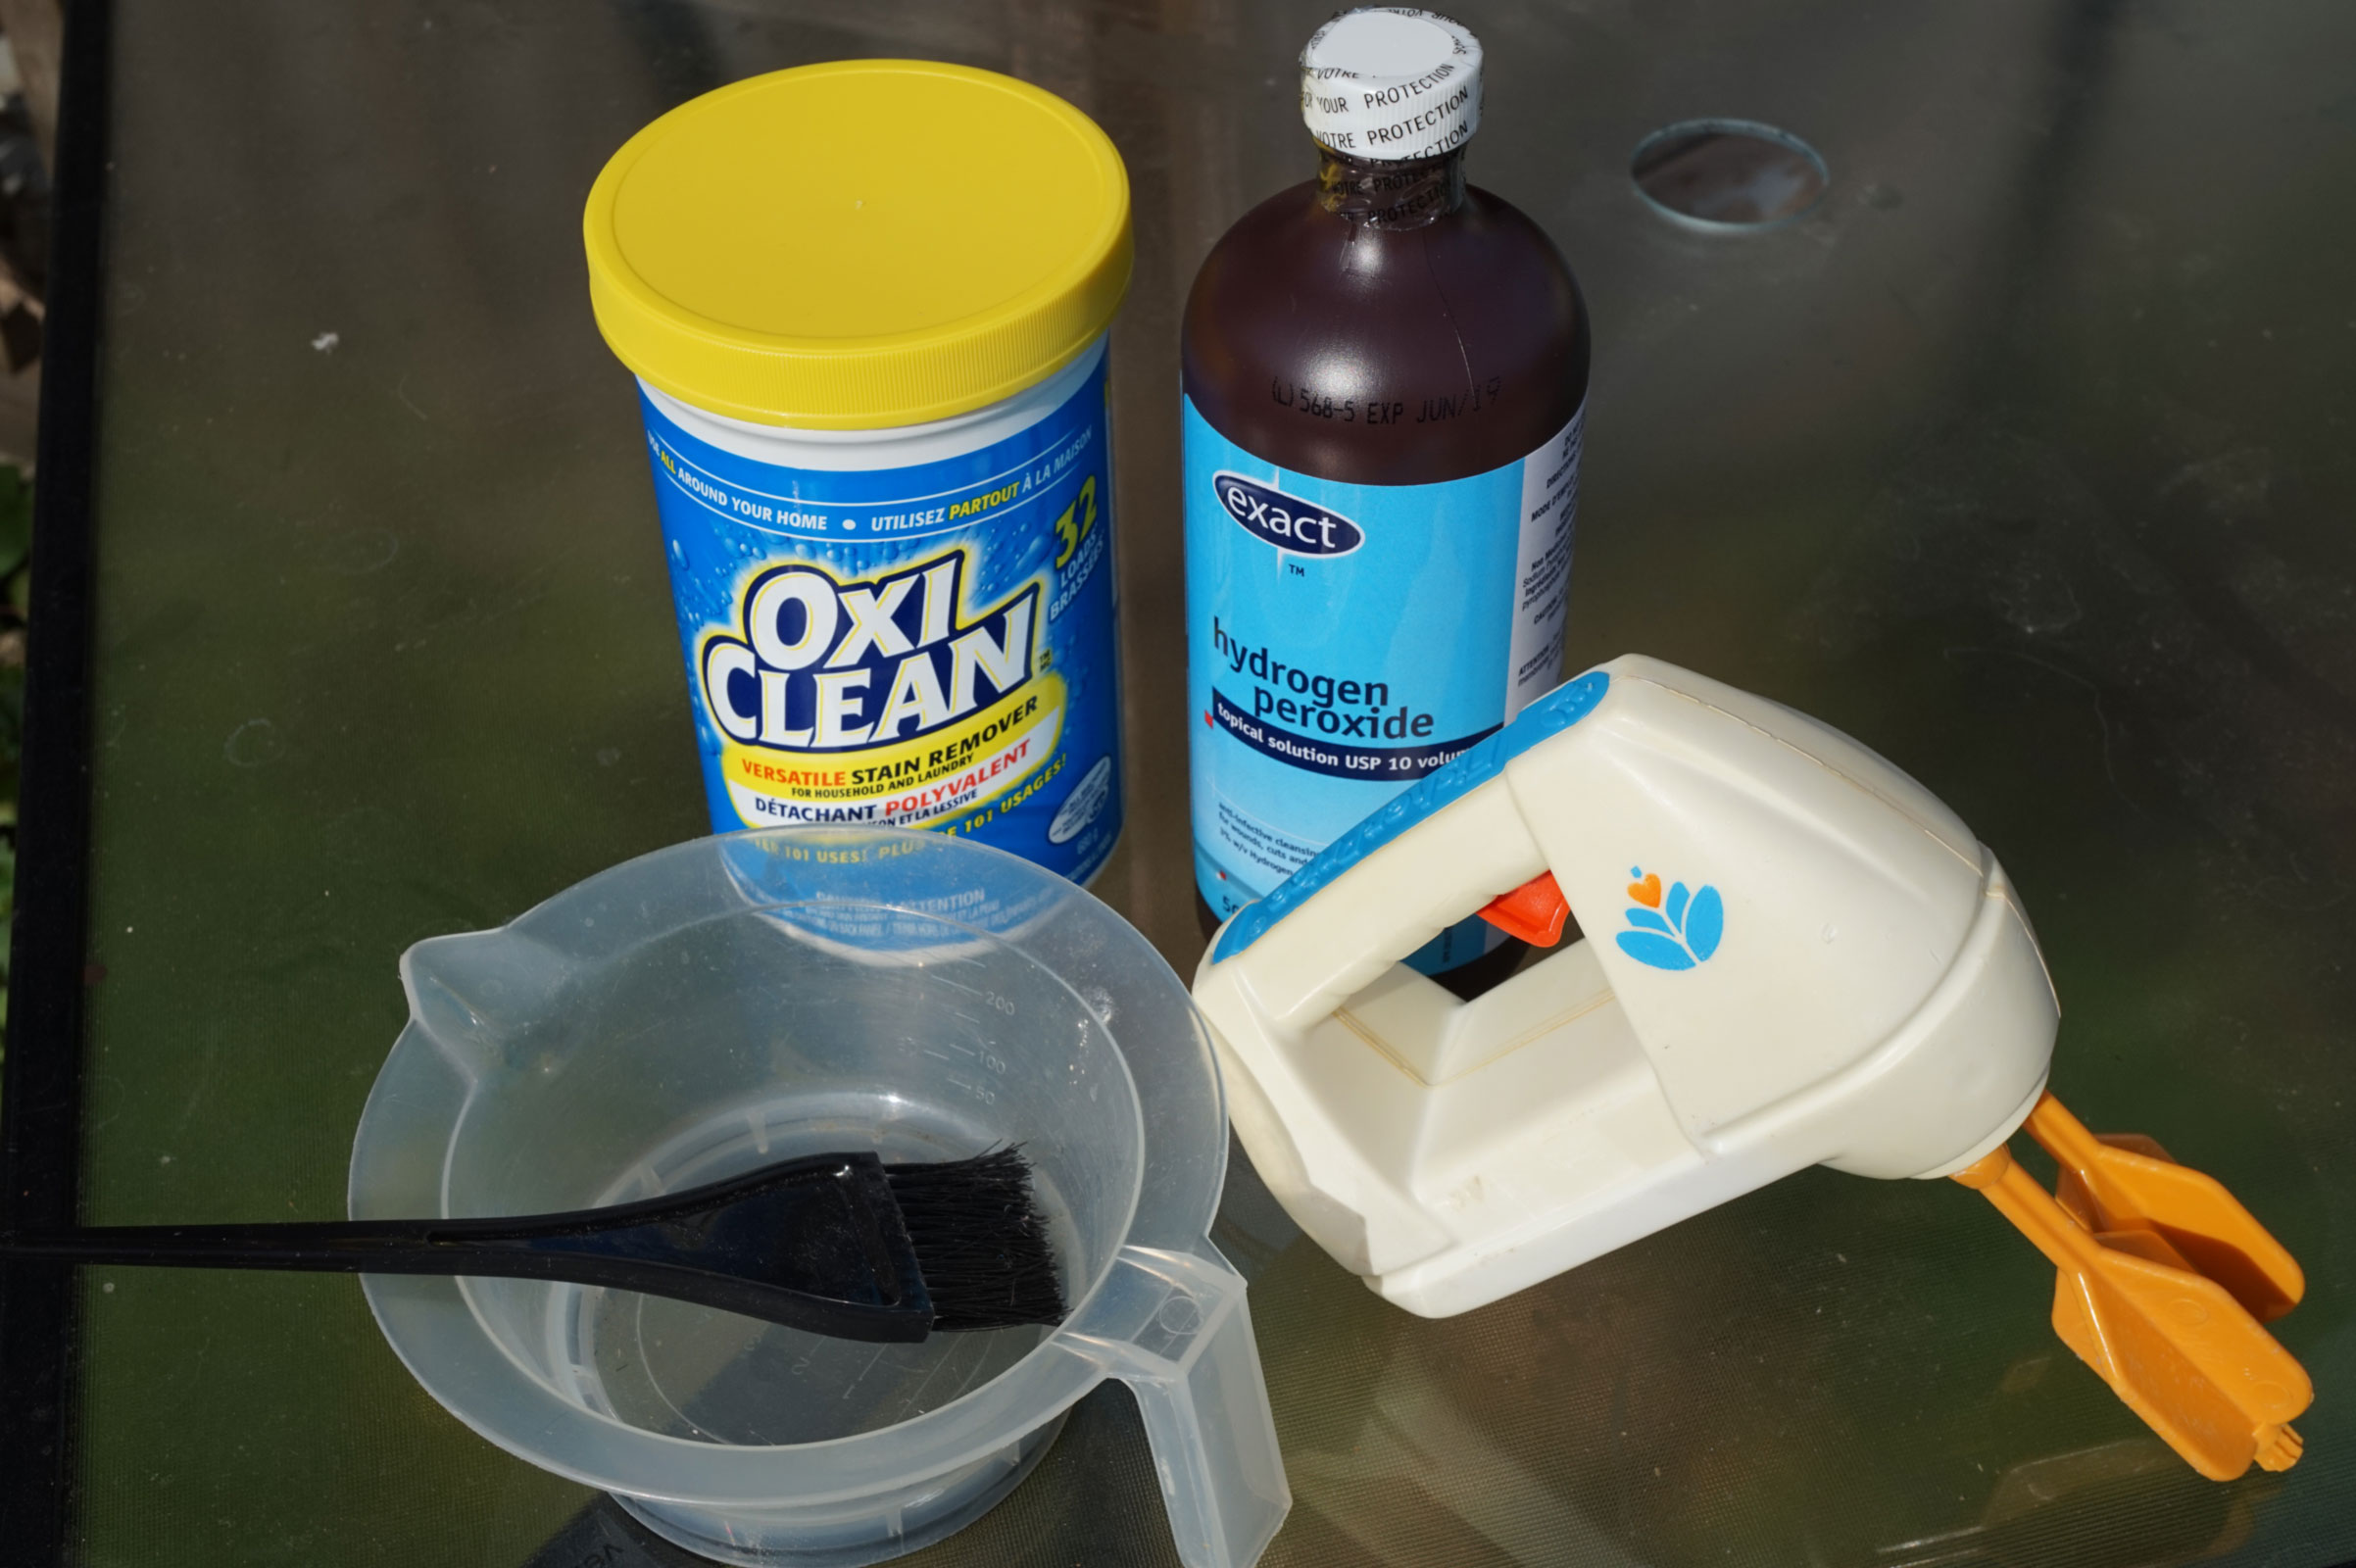
Materials You’ll Need:
Hydrogen peroxide (available at most drugstores)
Bleach
Sunlight (natural light works best)
Plastic container or recycling bag (for the toy)
Paintbrush (to apply bleach evenly)
How to Bleach and Whiten Yellow Plastic Toys
Here’s the technique I use to remove yellowing:
Prepare the Bleach Solution: Mix hydrogen peroxide and bleach in a container. Be sure to wear gloves and eye protection when handling bleach.
Apply the Solution: Using a paintbrush, apply the solution evenly to the yellowed areas. Make sure you coat the plastic evenly to avoid blotches.
Use Sunlight: Place the toy in a clear plastic bag or container that allows sunlight to shine directly on it. This process works best during summer months when sunlight is strongest.
Monitor Progress: Keep an eye on the toy to prevent over-bleaching, which can make plastic brittle. Don’t leave it out for too long.
Rinse and Dry: After the desired whiteness is achieved, rinse the toy thoroughly with water and dry it.
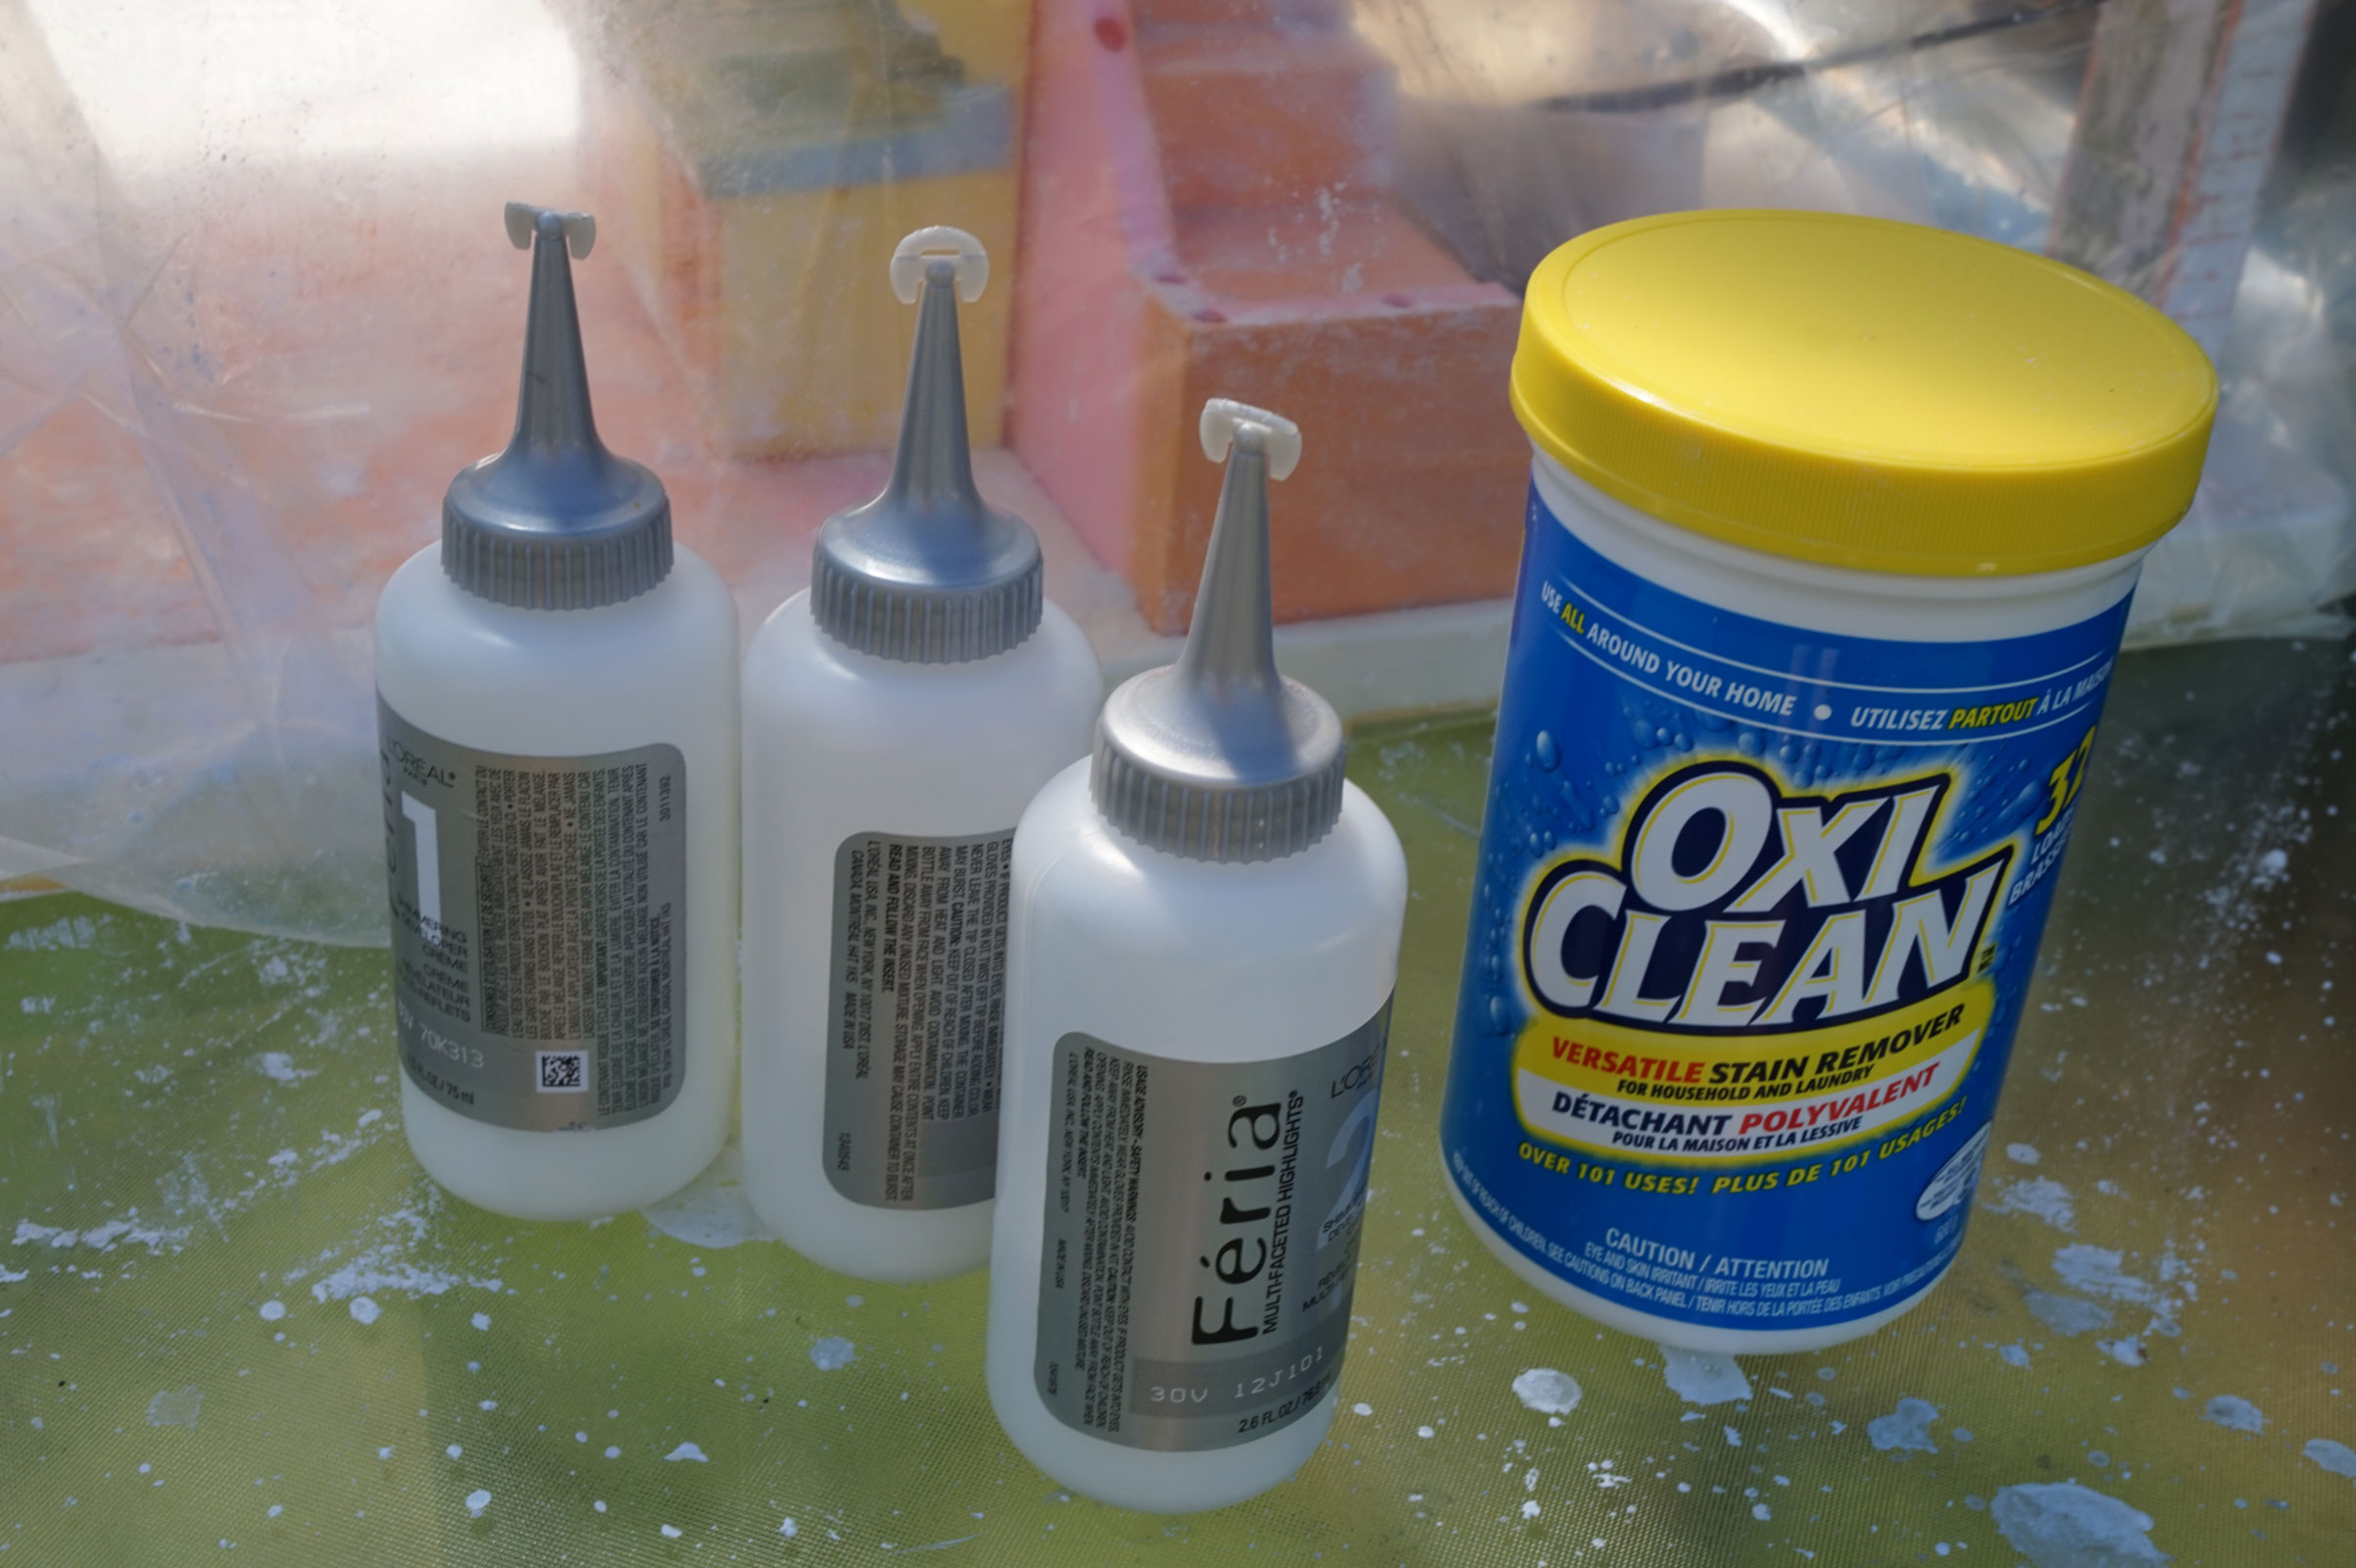
You can use hair bleach, and lighteners, or Oxi Clean to bleach out the yellow on older toys.
How to Bleach Whiten Yellow Plastic Toys
If the bleaching solution is too thick in certain areas, those spots will whiten faster. It’s essential to apply an even coat. One of my featured projects involved restoring a Playskool Victorian Dollhouse.
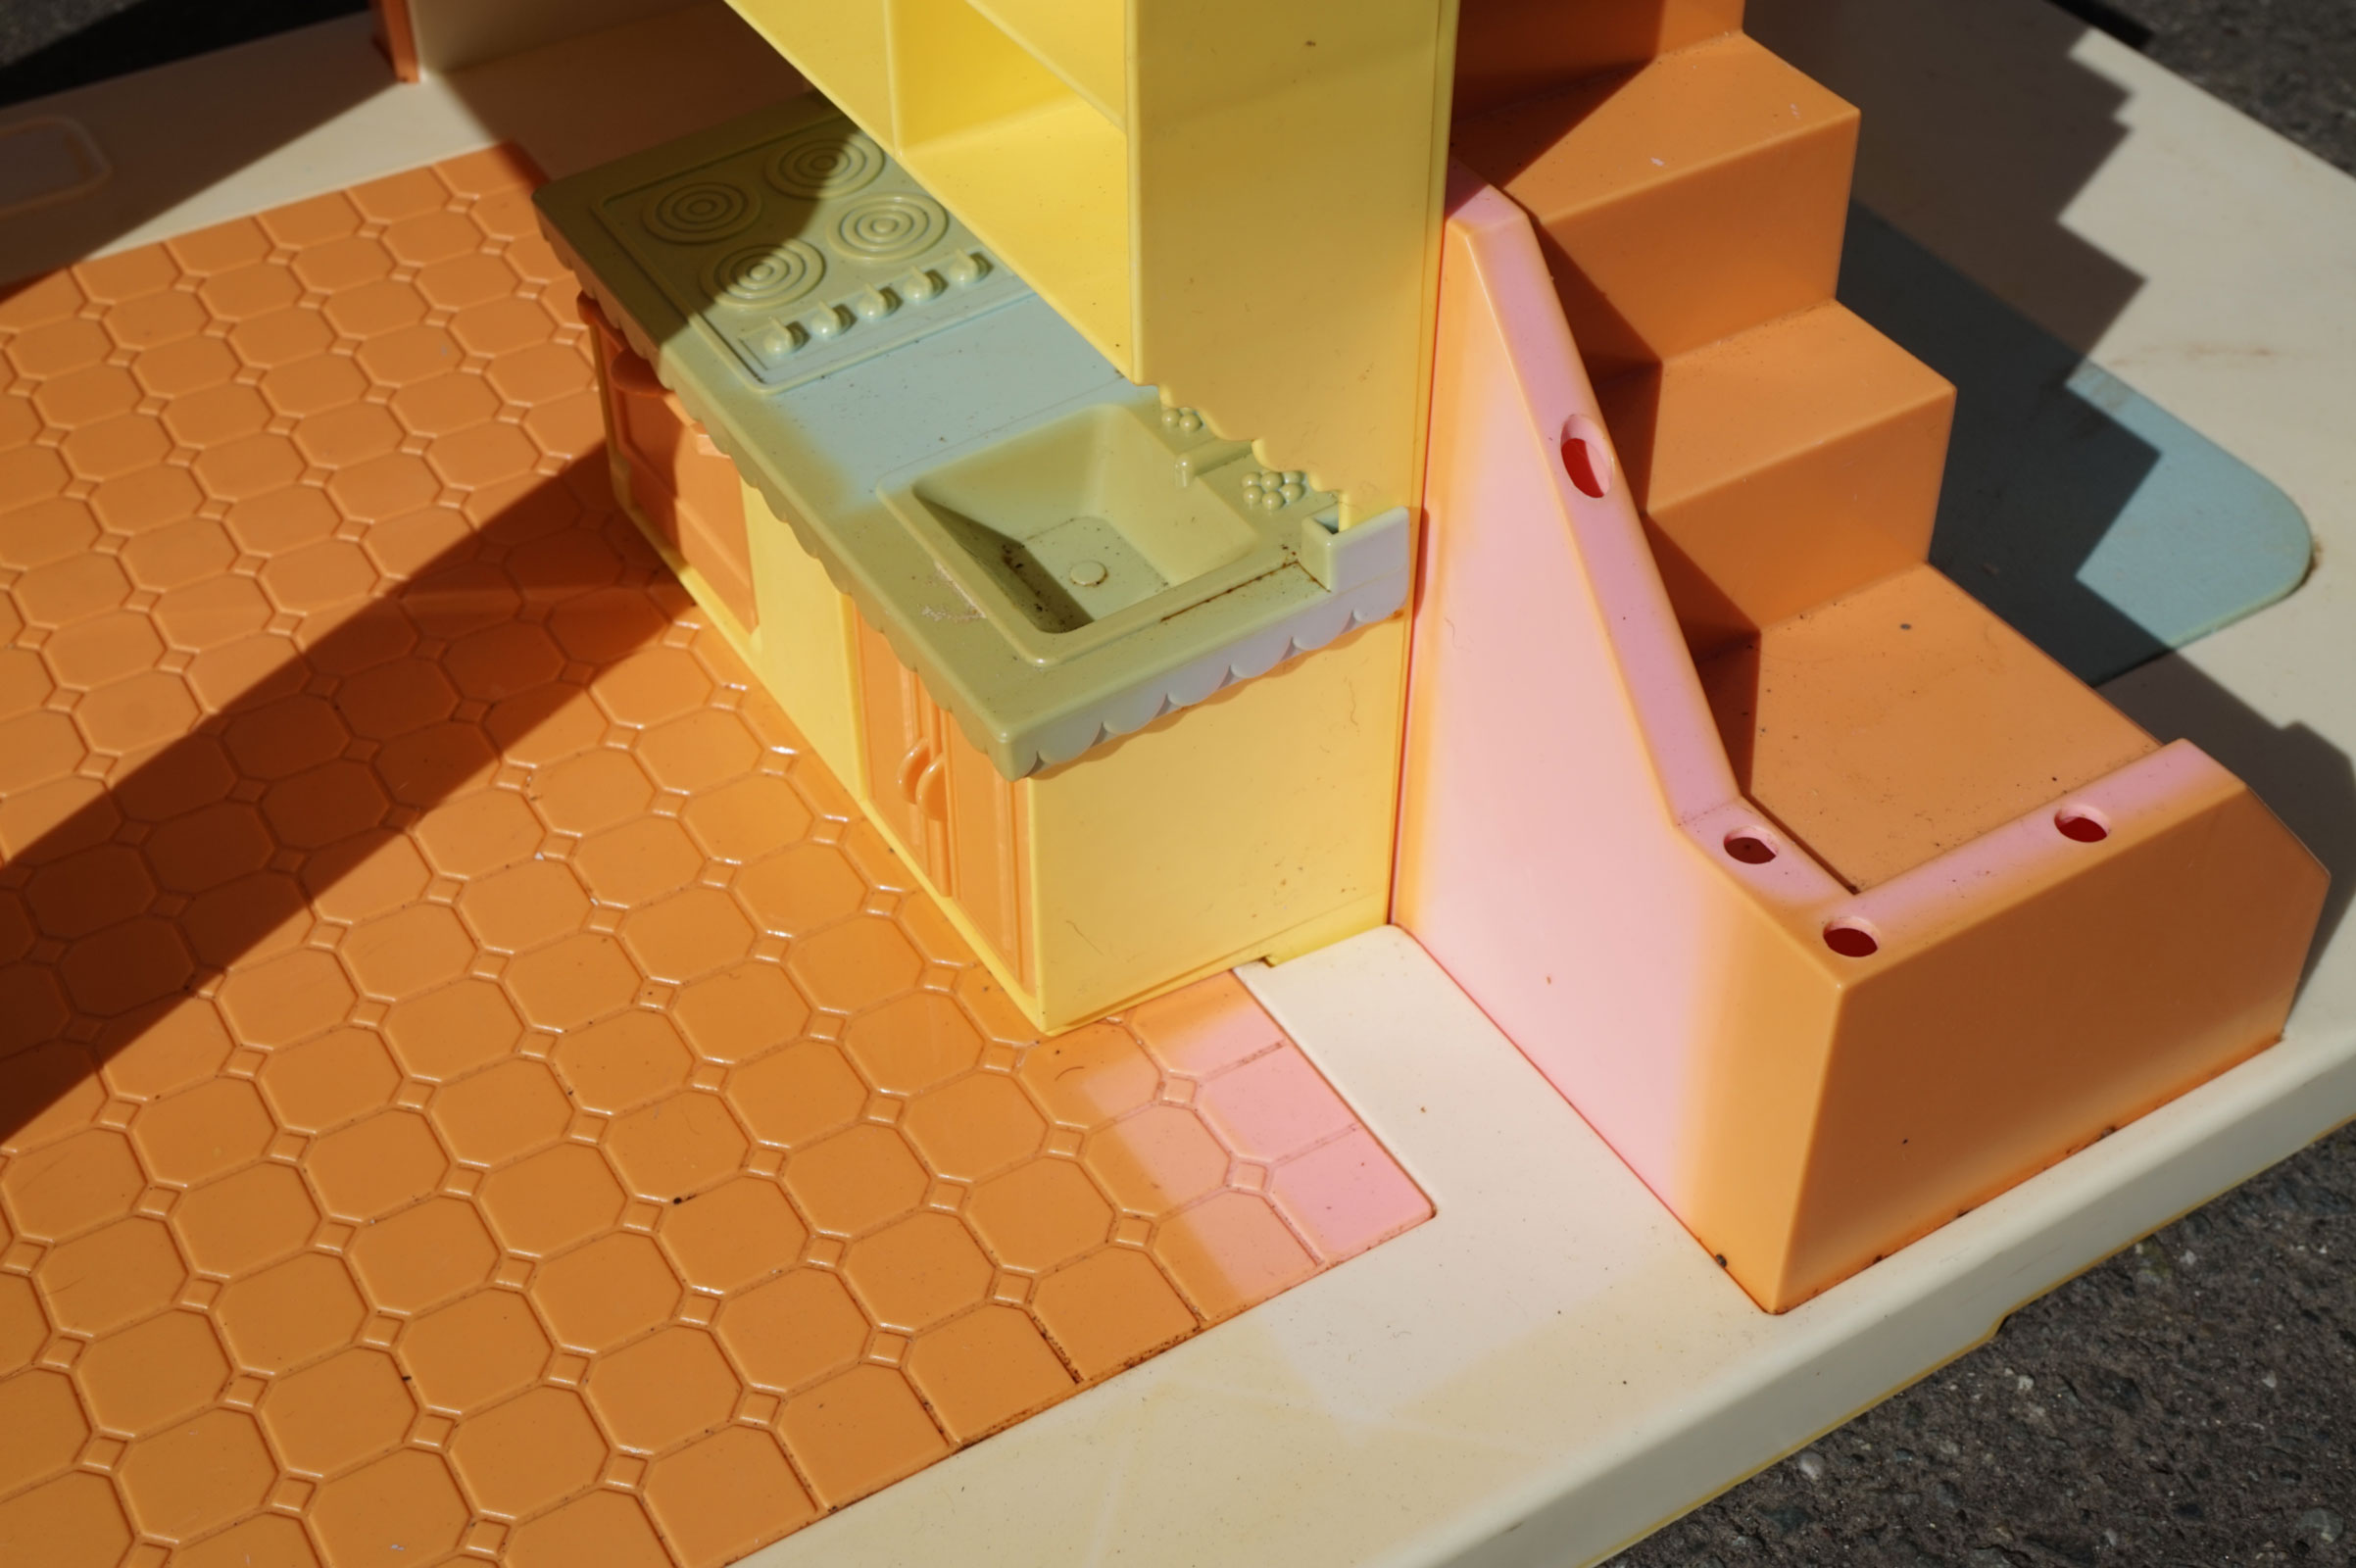
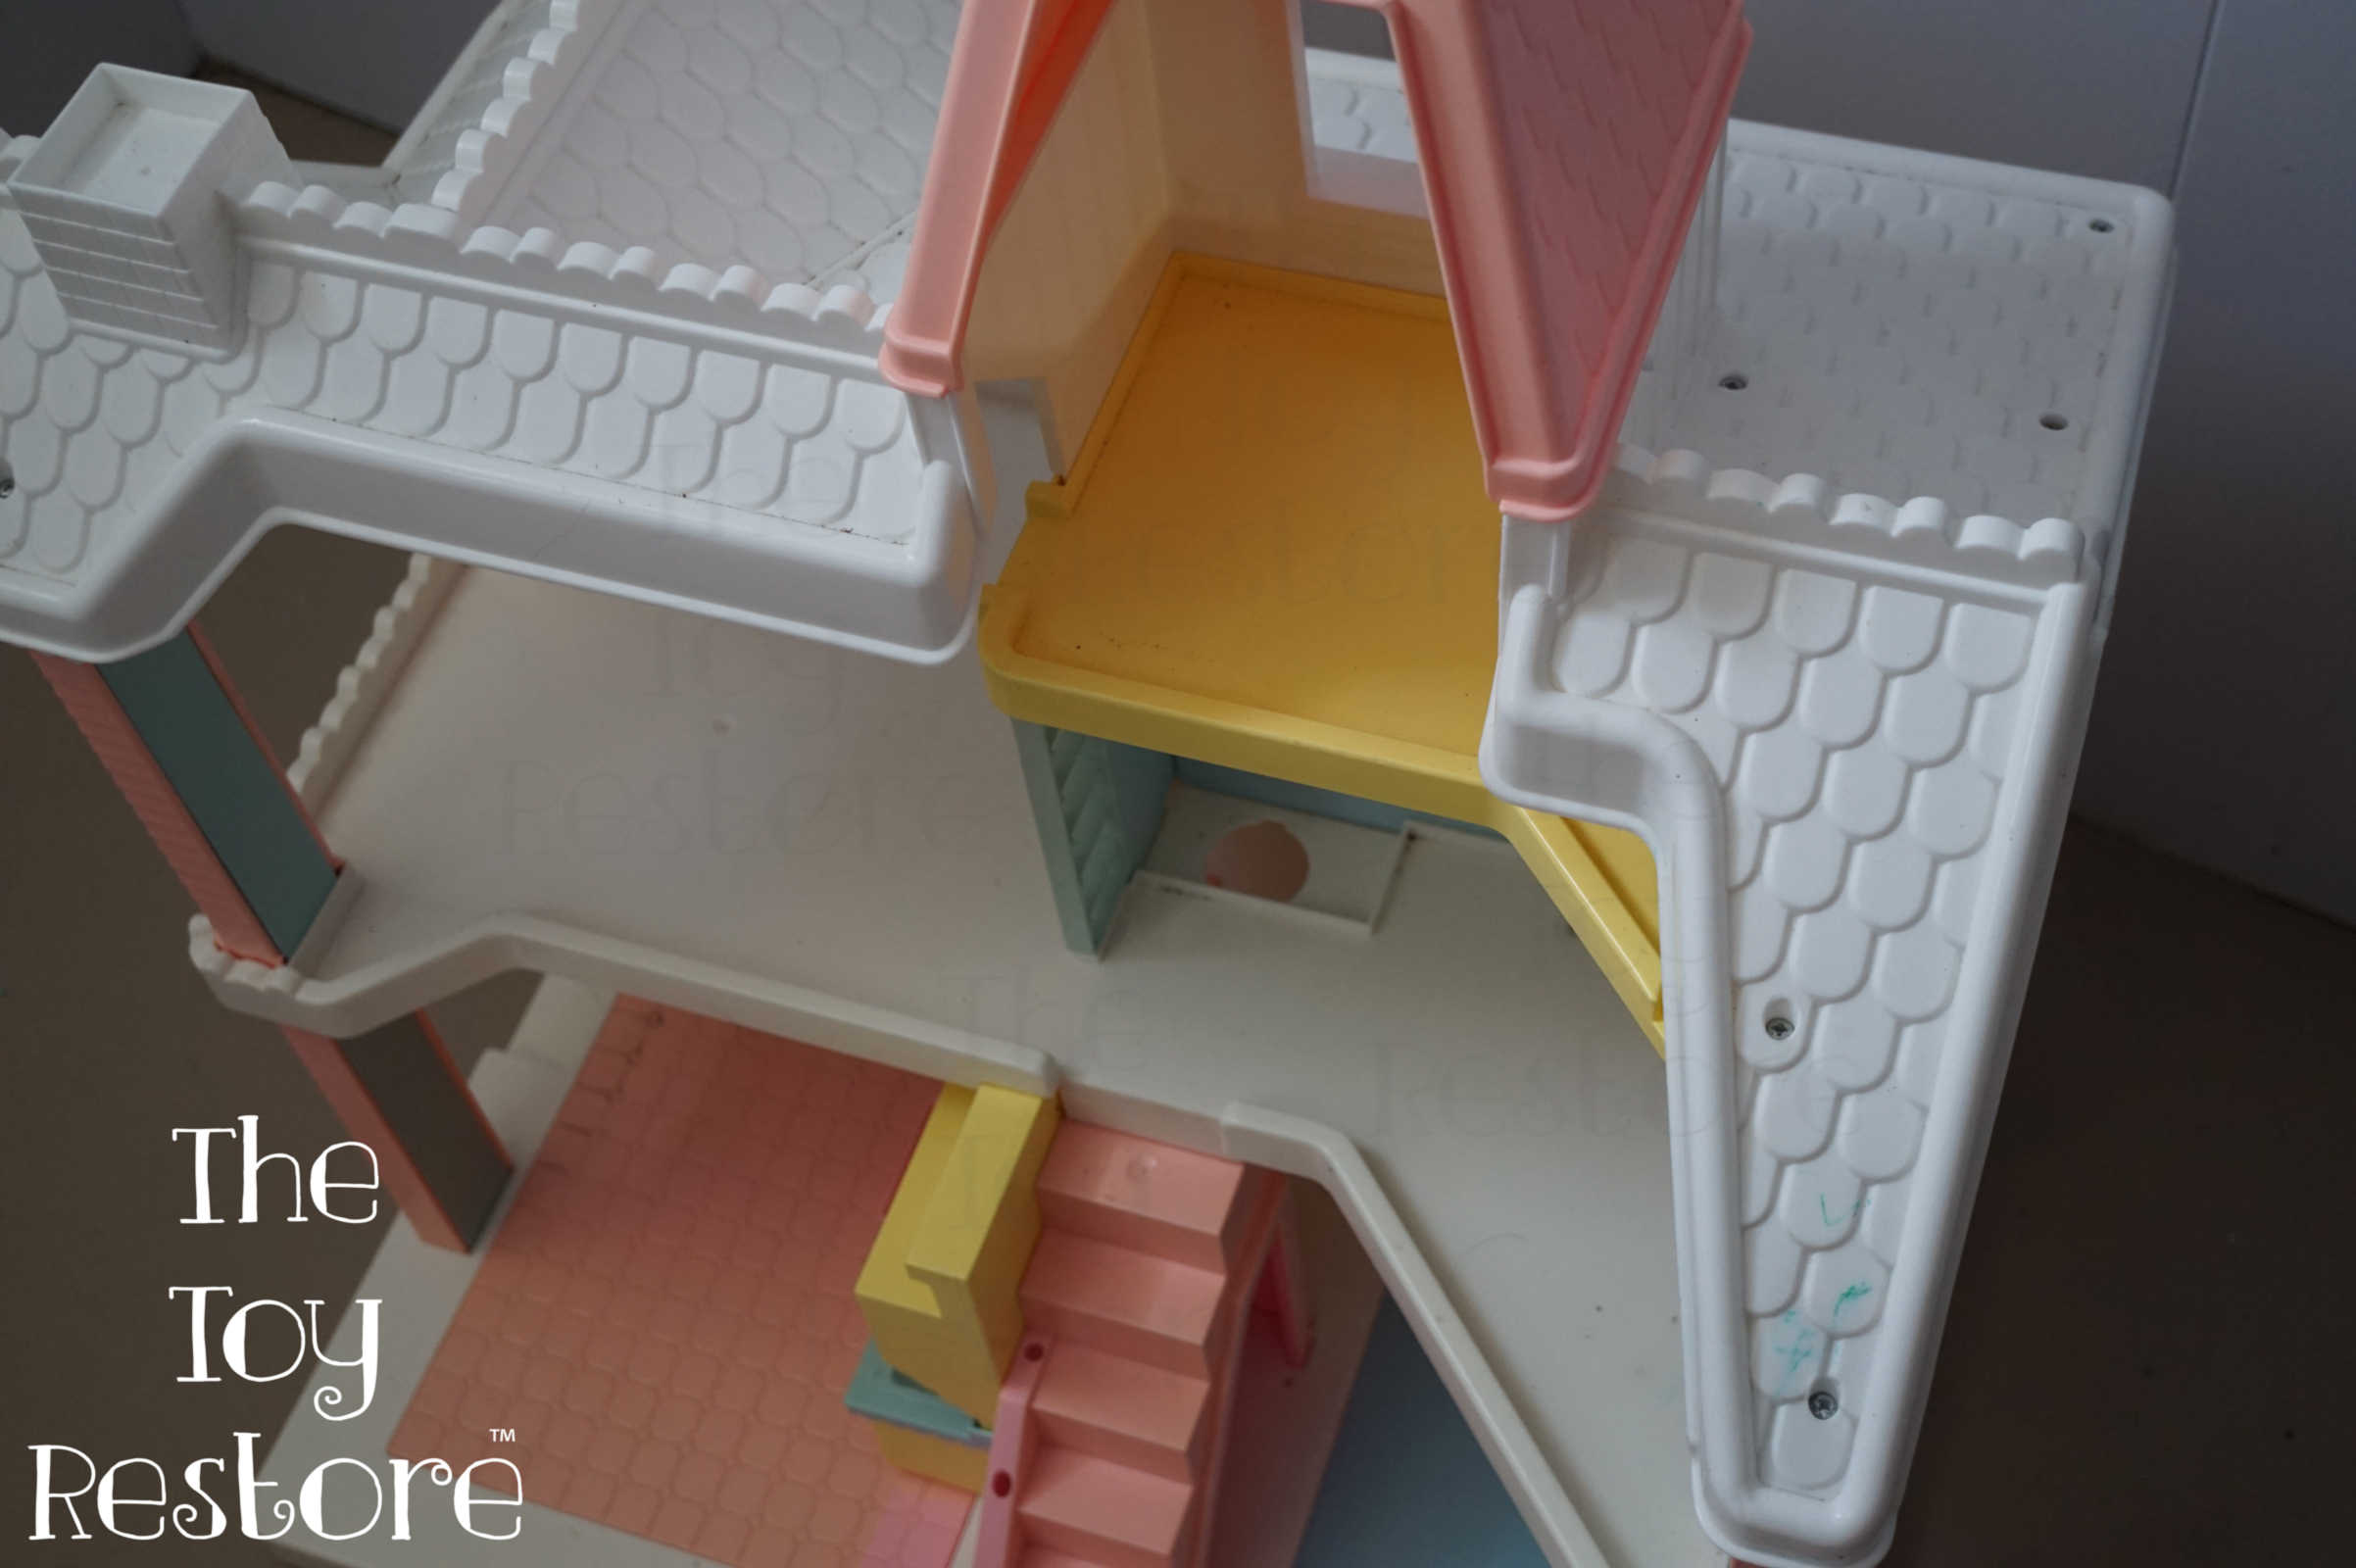
The Playskool Victorian Dollhouse, before bleaching. The yellowing occurred on all the exposed areas.
The Playskool Victorian Dollhouse, before bleaching. The yellowing occurred on all the exposed areas.
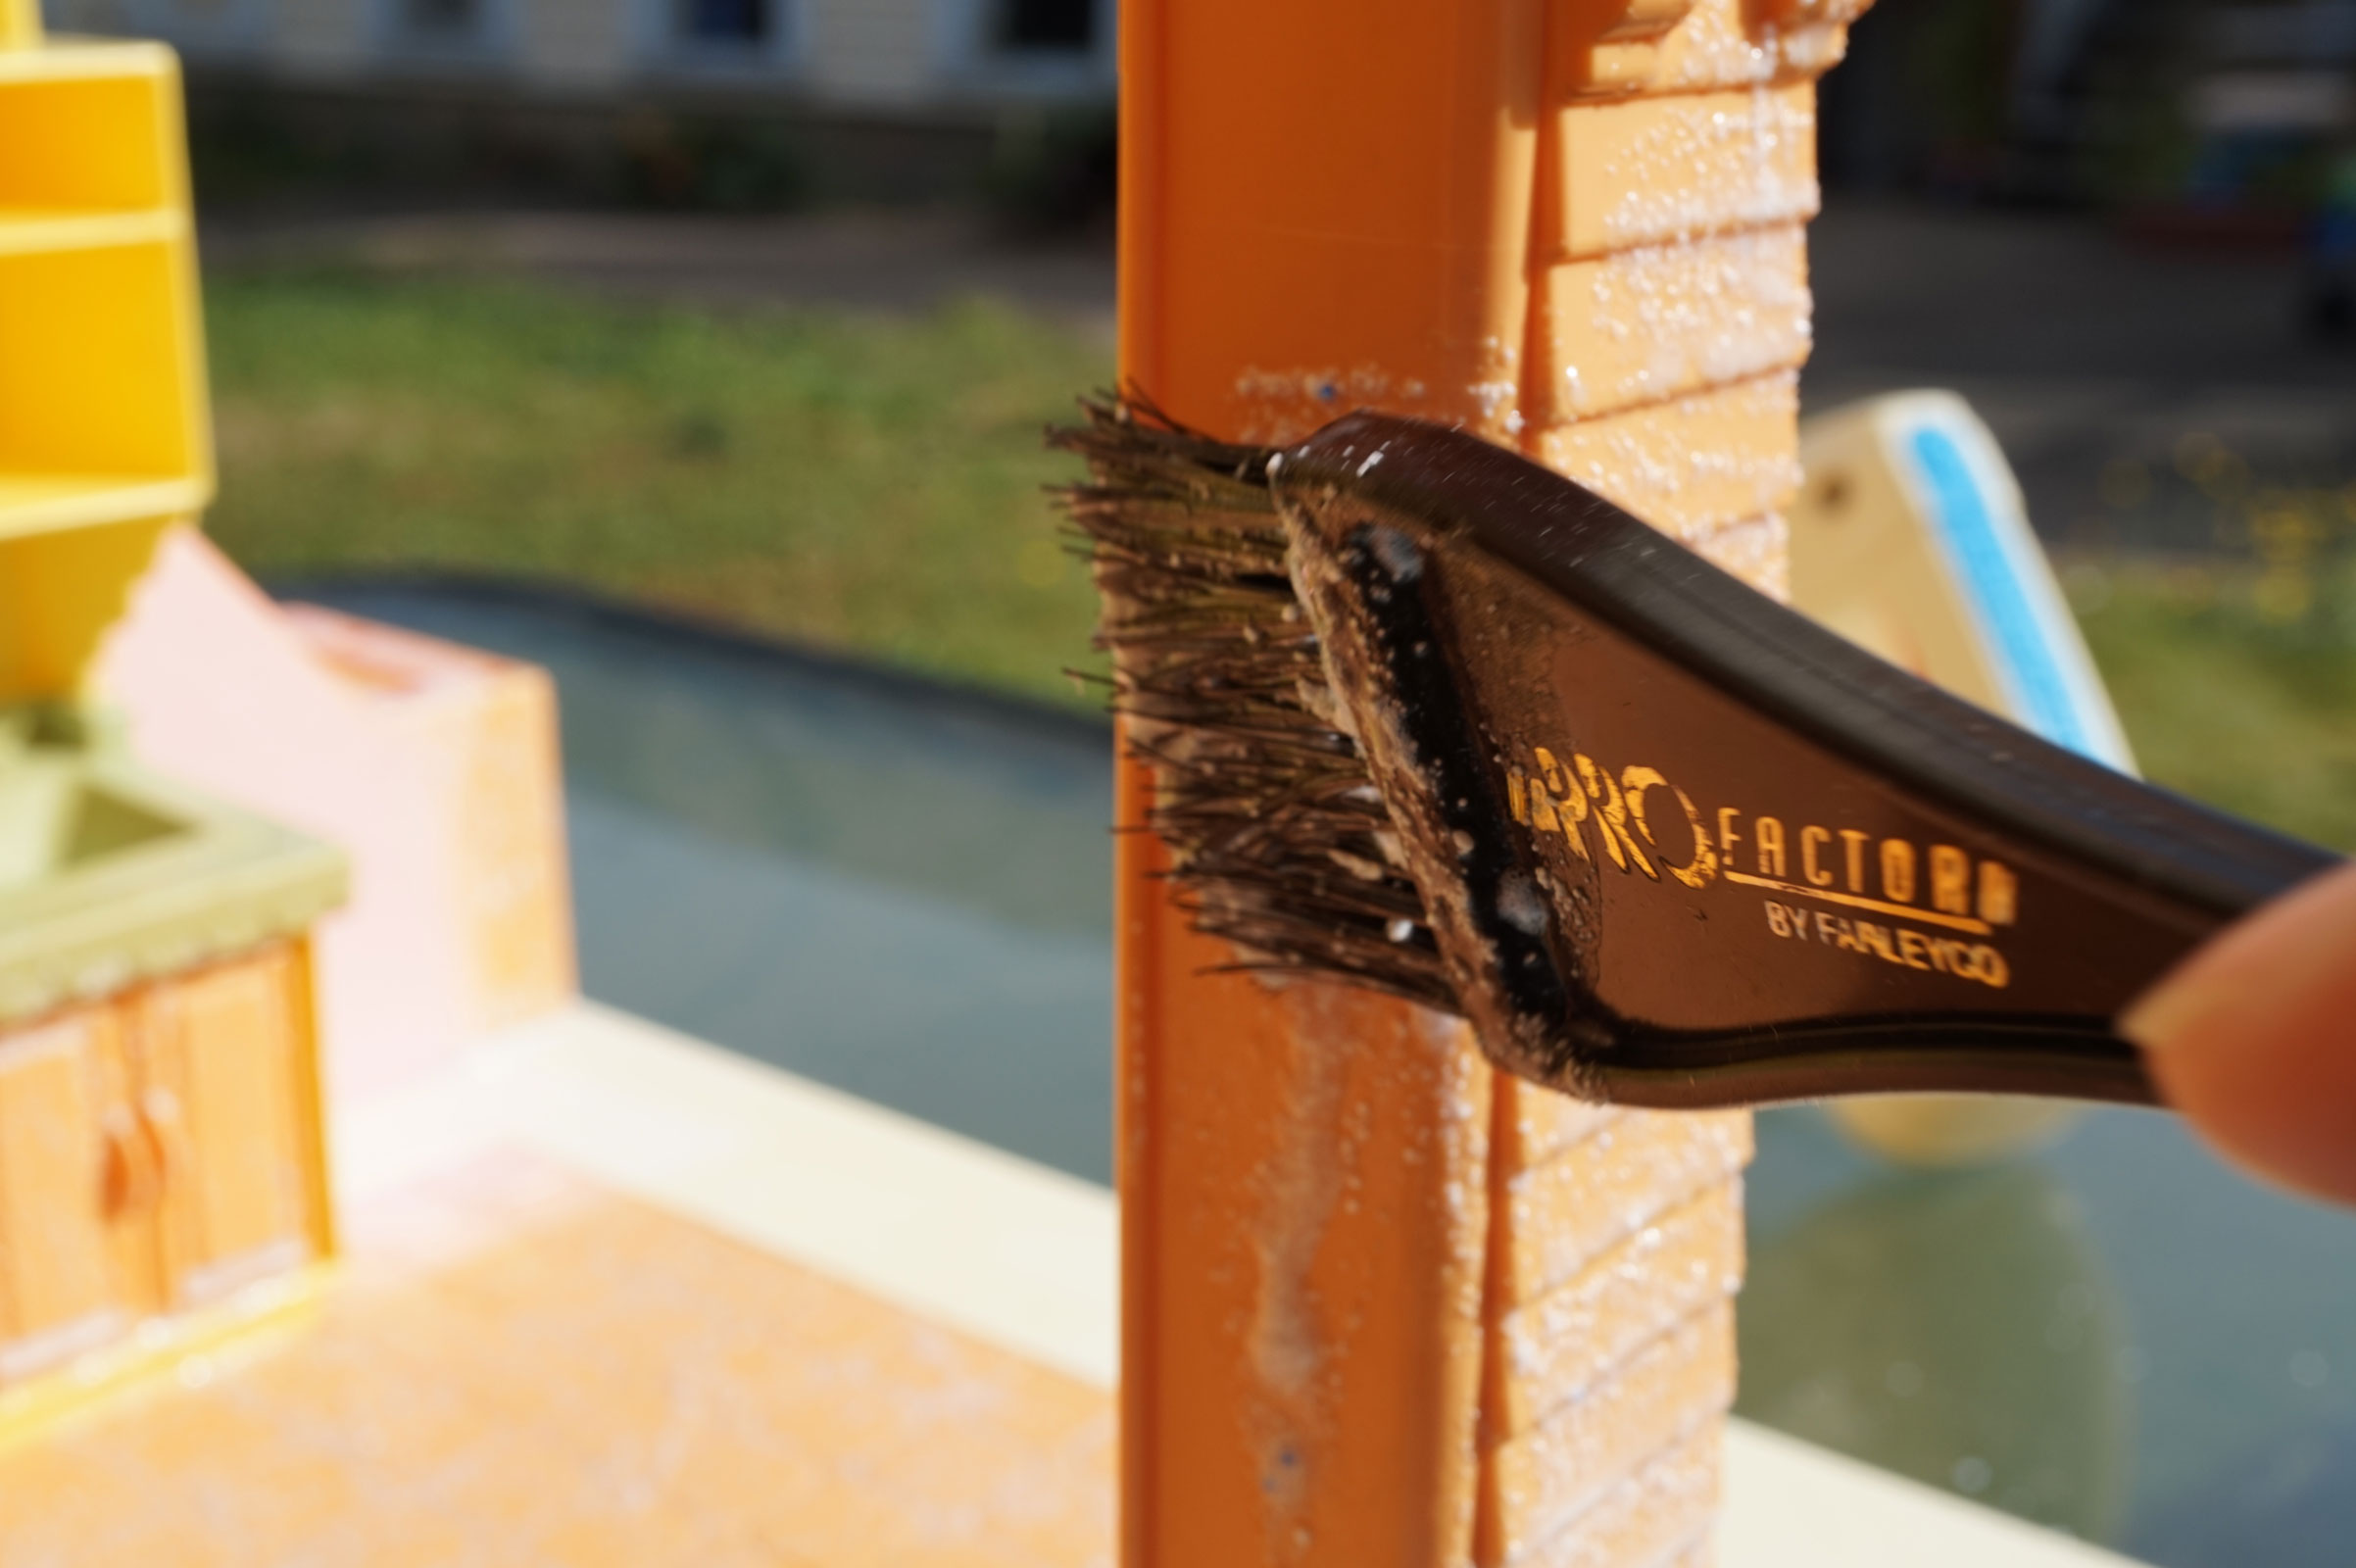
I used a hair-color brush to apply the bleach as evenly as possible, avoiding areas that weren’t yellowed.
Brushing on the bleach to remove the yellowing on the dollhouse
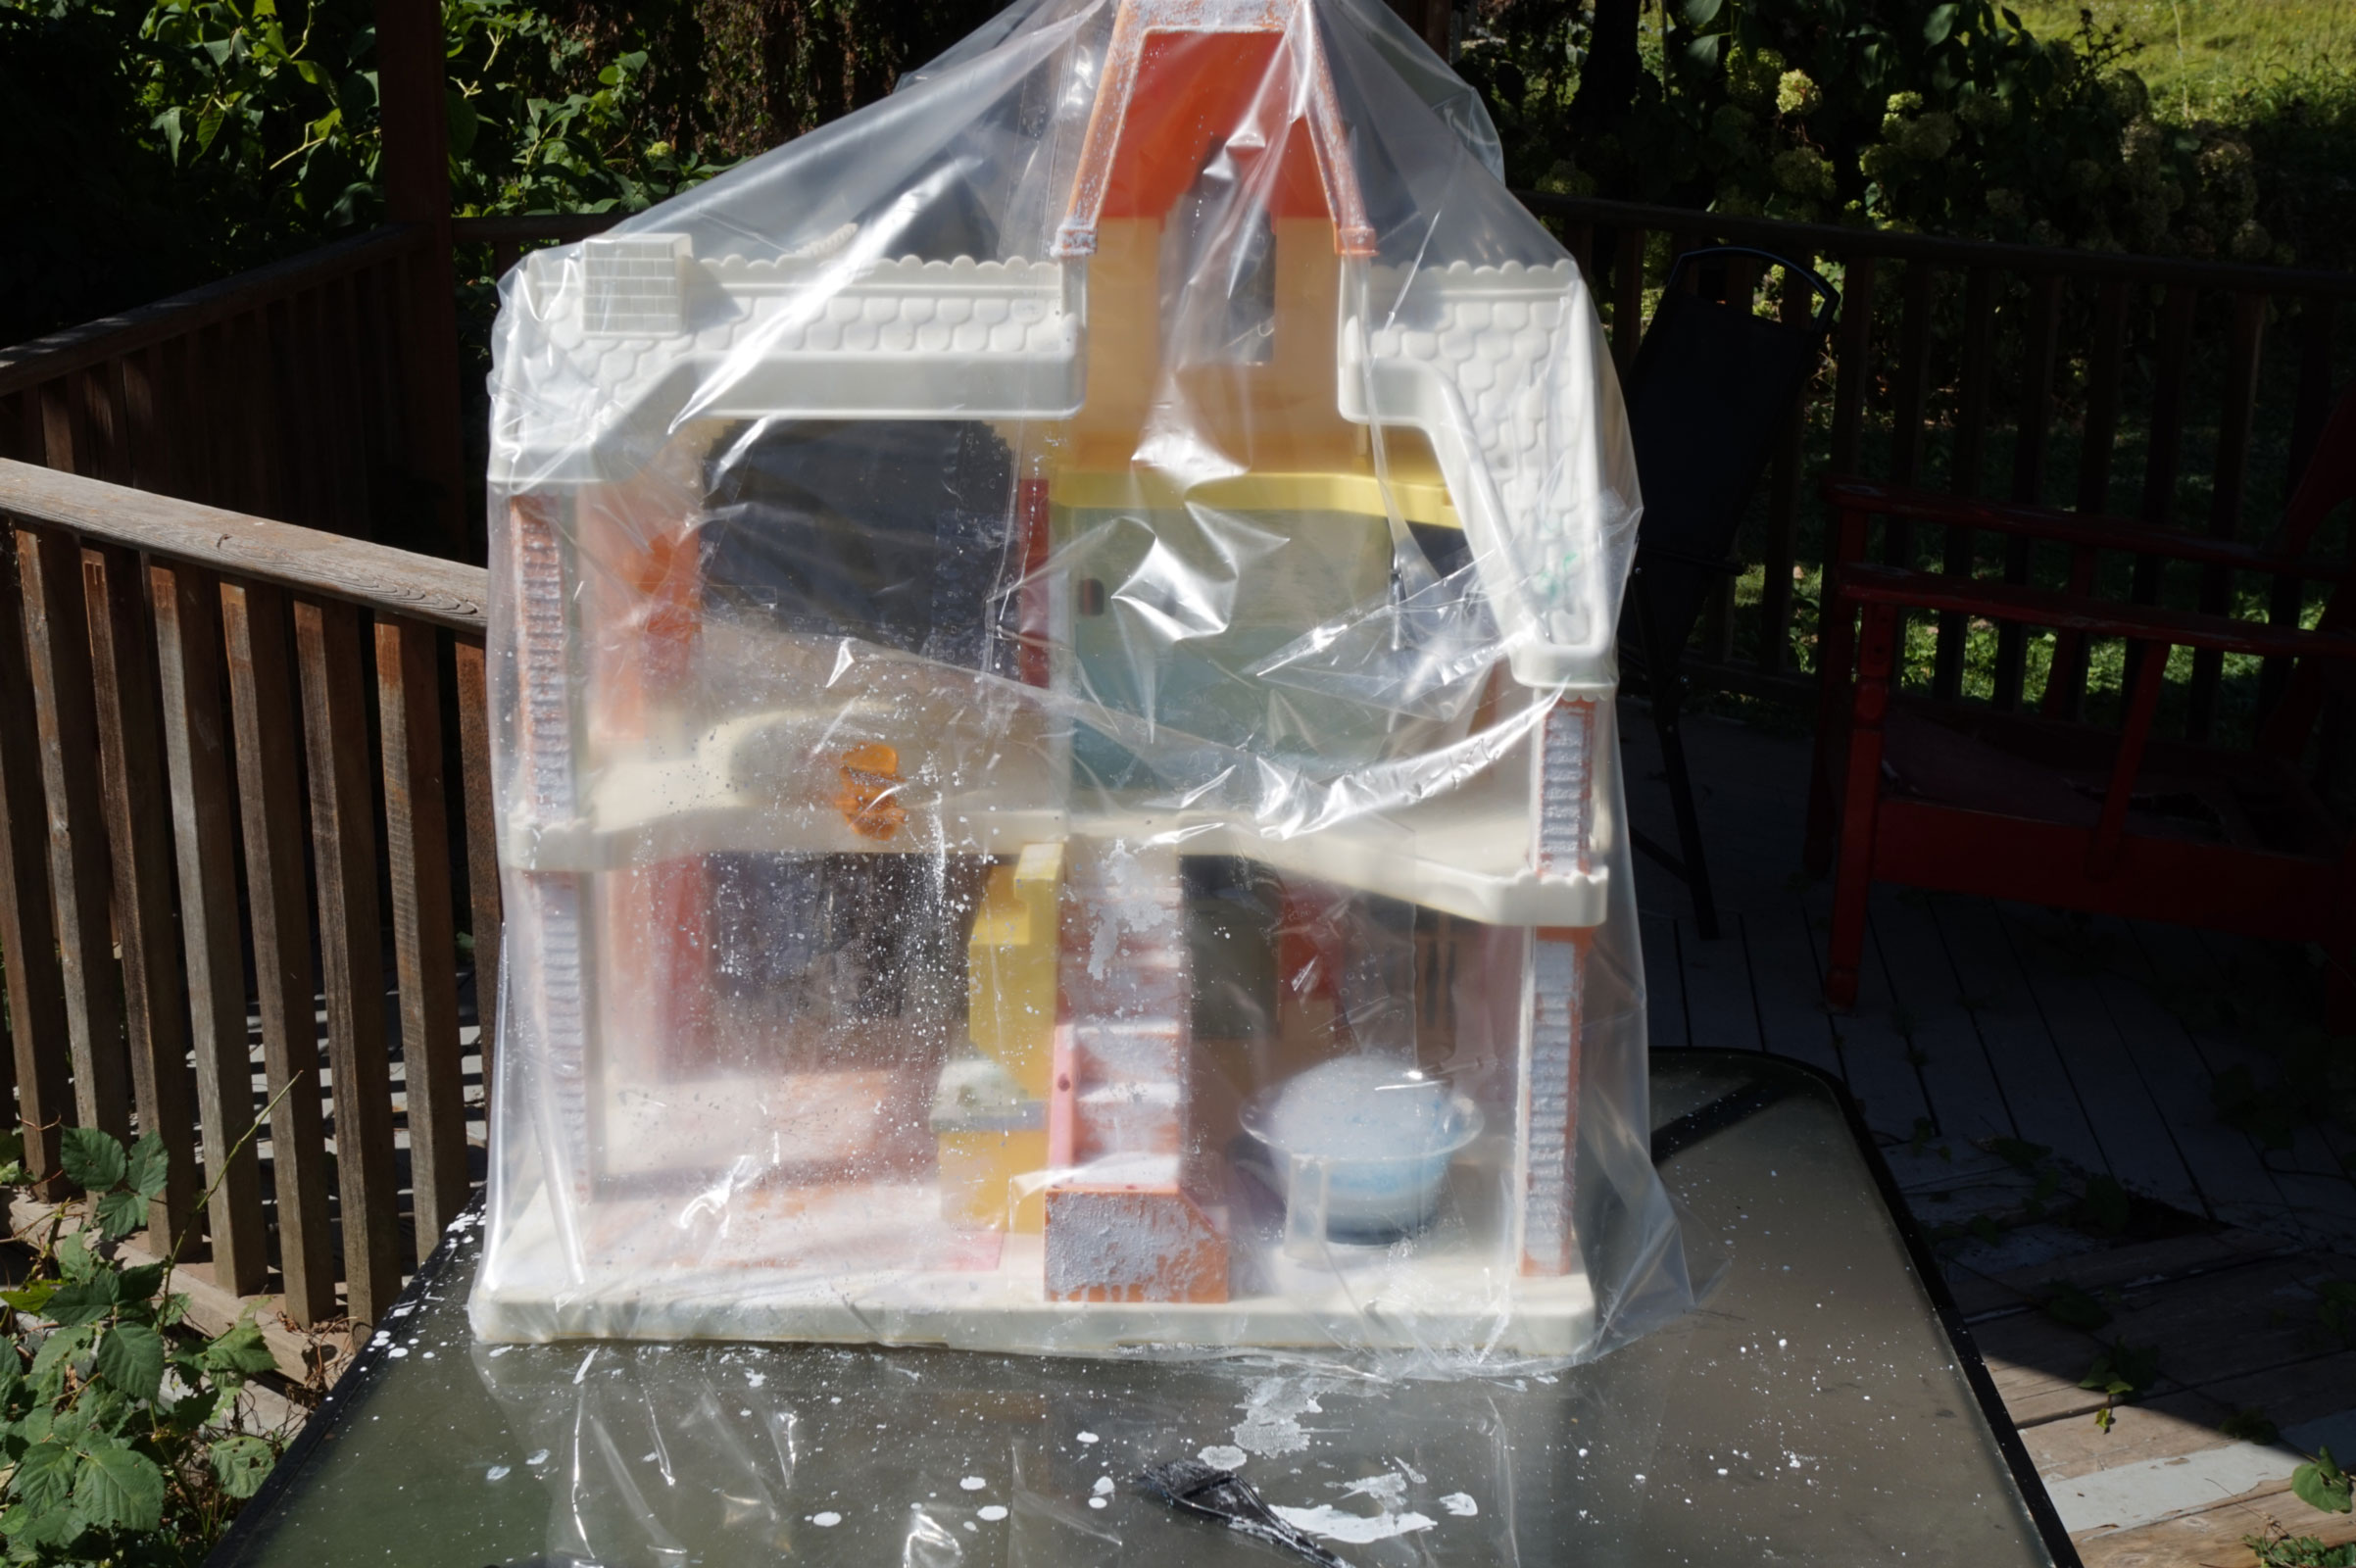
Next, I placed the dollhouse inside a clear plastic recycling bag and monitored it closely throughout the day, ensuring it stayed wet and was exposed to direct sunlight.
Cover your project with clear plastic, to keep the moisture in, and allow the sunlight to lift the yellowing
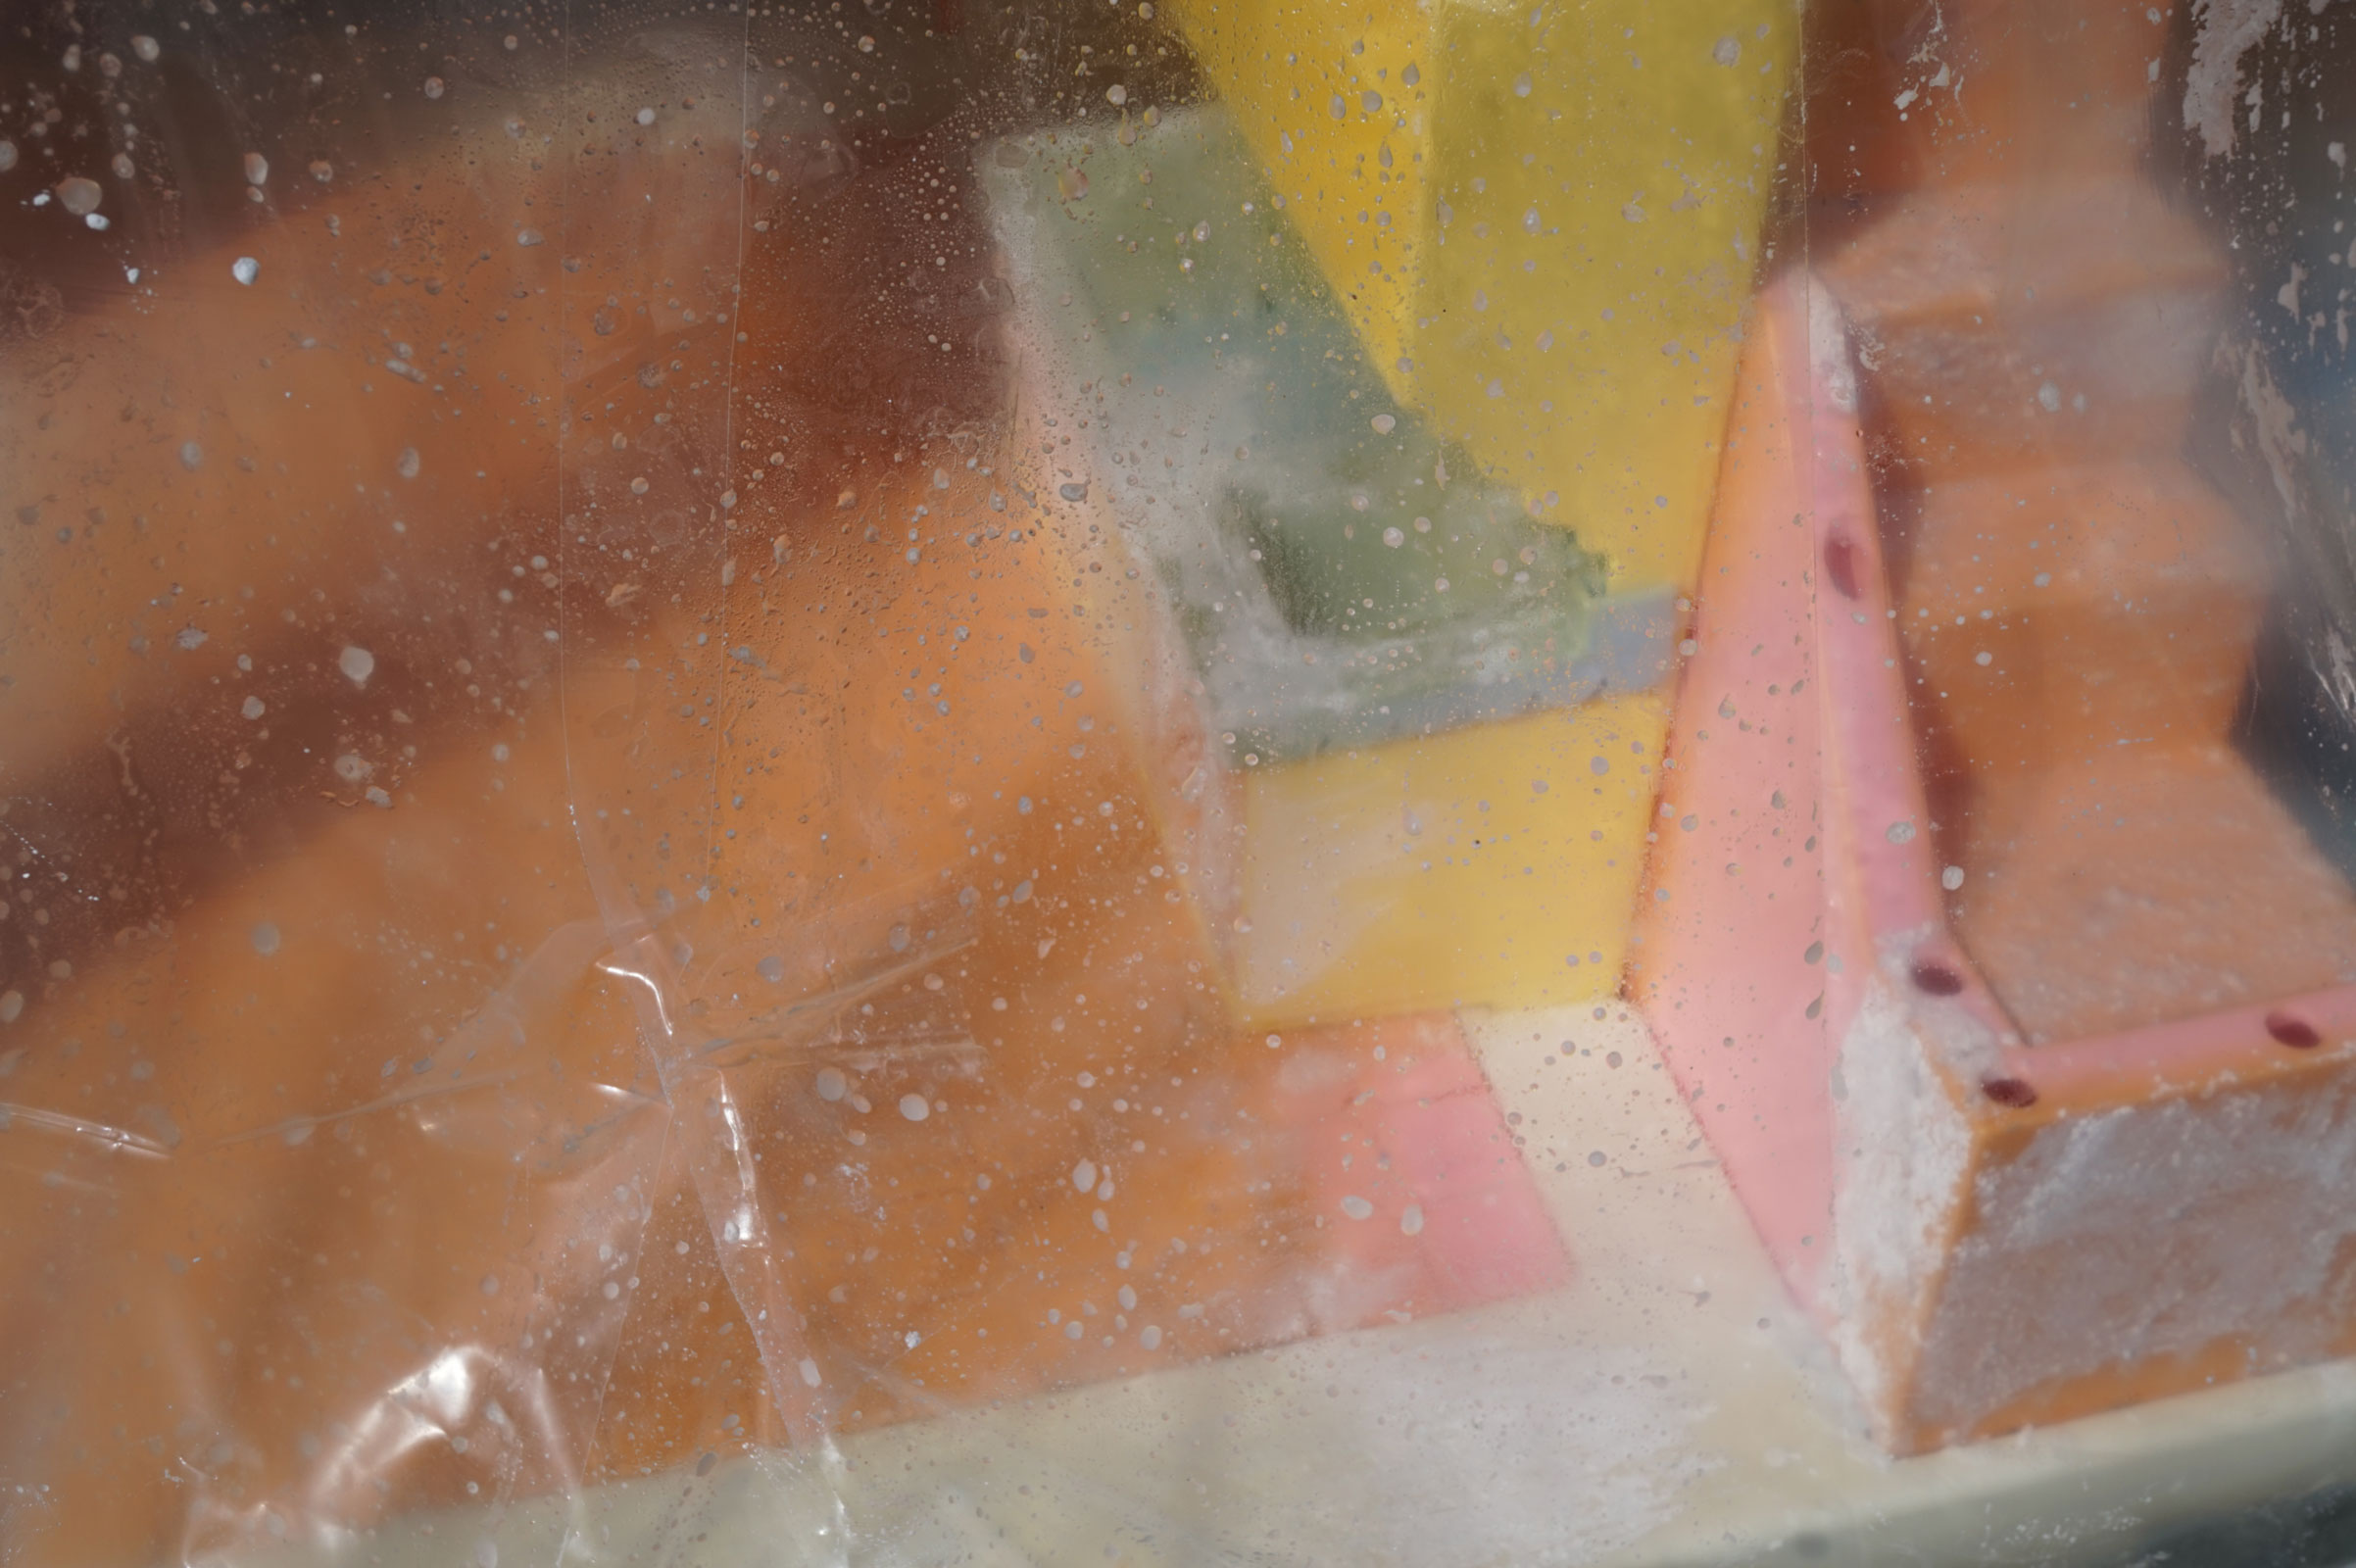
However, I noticed the yellowing didn’t lift evenly. It would have been better to disassemble the dollhouse and bleach each piece separately, but I didn’t have 60 hours to dedicate to that. I do have a greenhouse, so I cleaned off the bleach and let the toy dry. There were still blotchy areas of discoloration, but at that point, I chose to slow the process down. I left the dollhouse in the greenhouse for about a month, rotating it as needed to avoid over-bleaching. Eventually, the color evened out, though it wasn’t perfect.
Victorian Playskool Dollhouse covered with plastic to bleach in the sun
Playskool Victorian Dollhouse
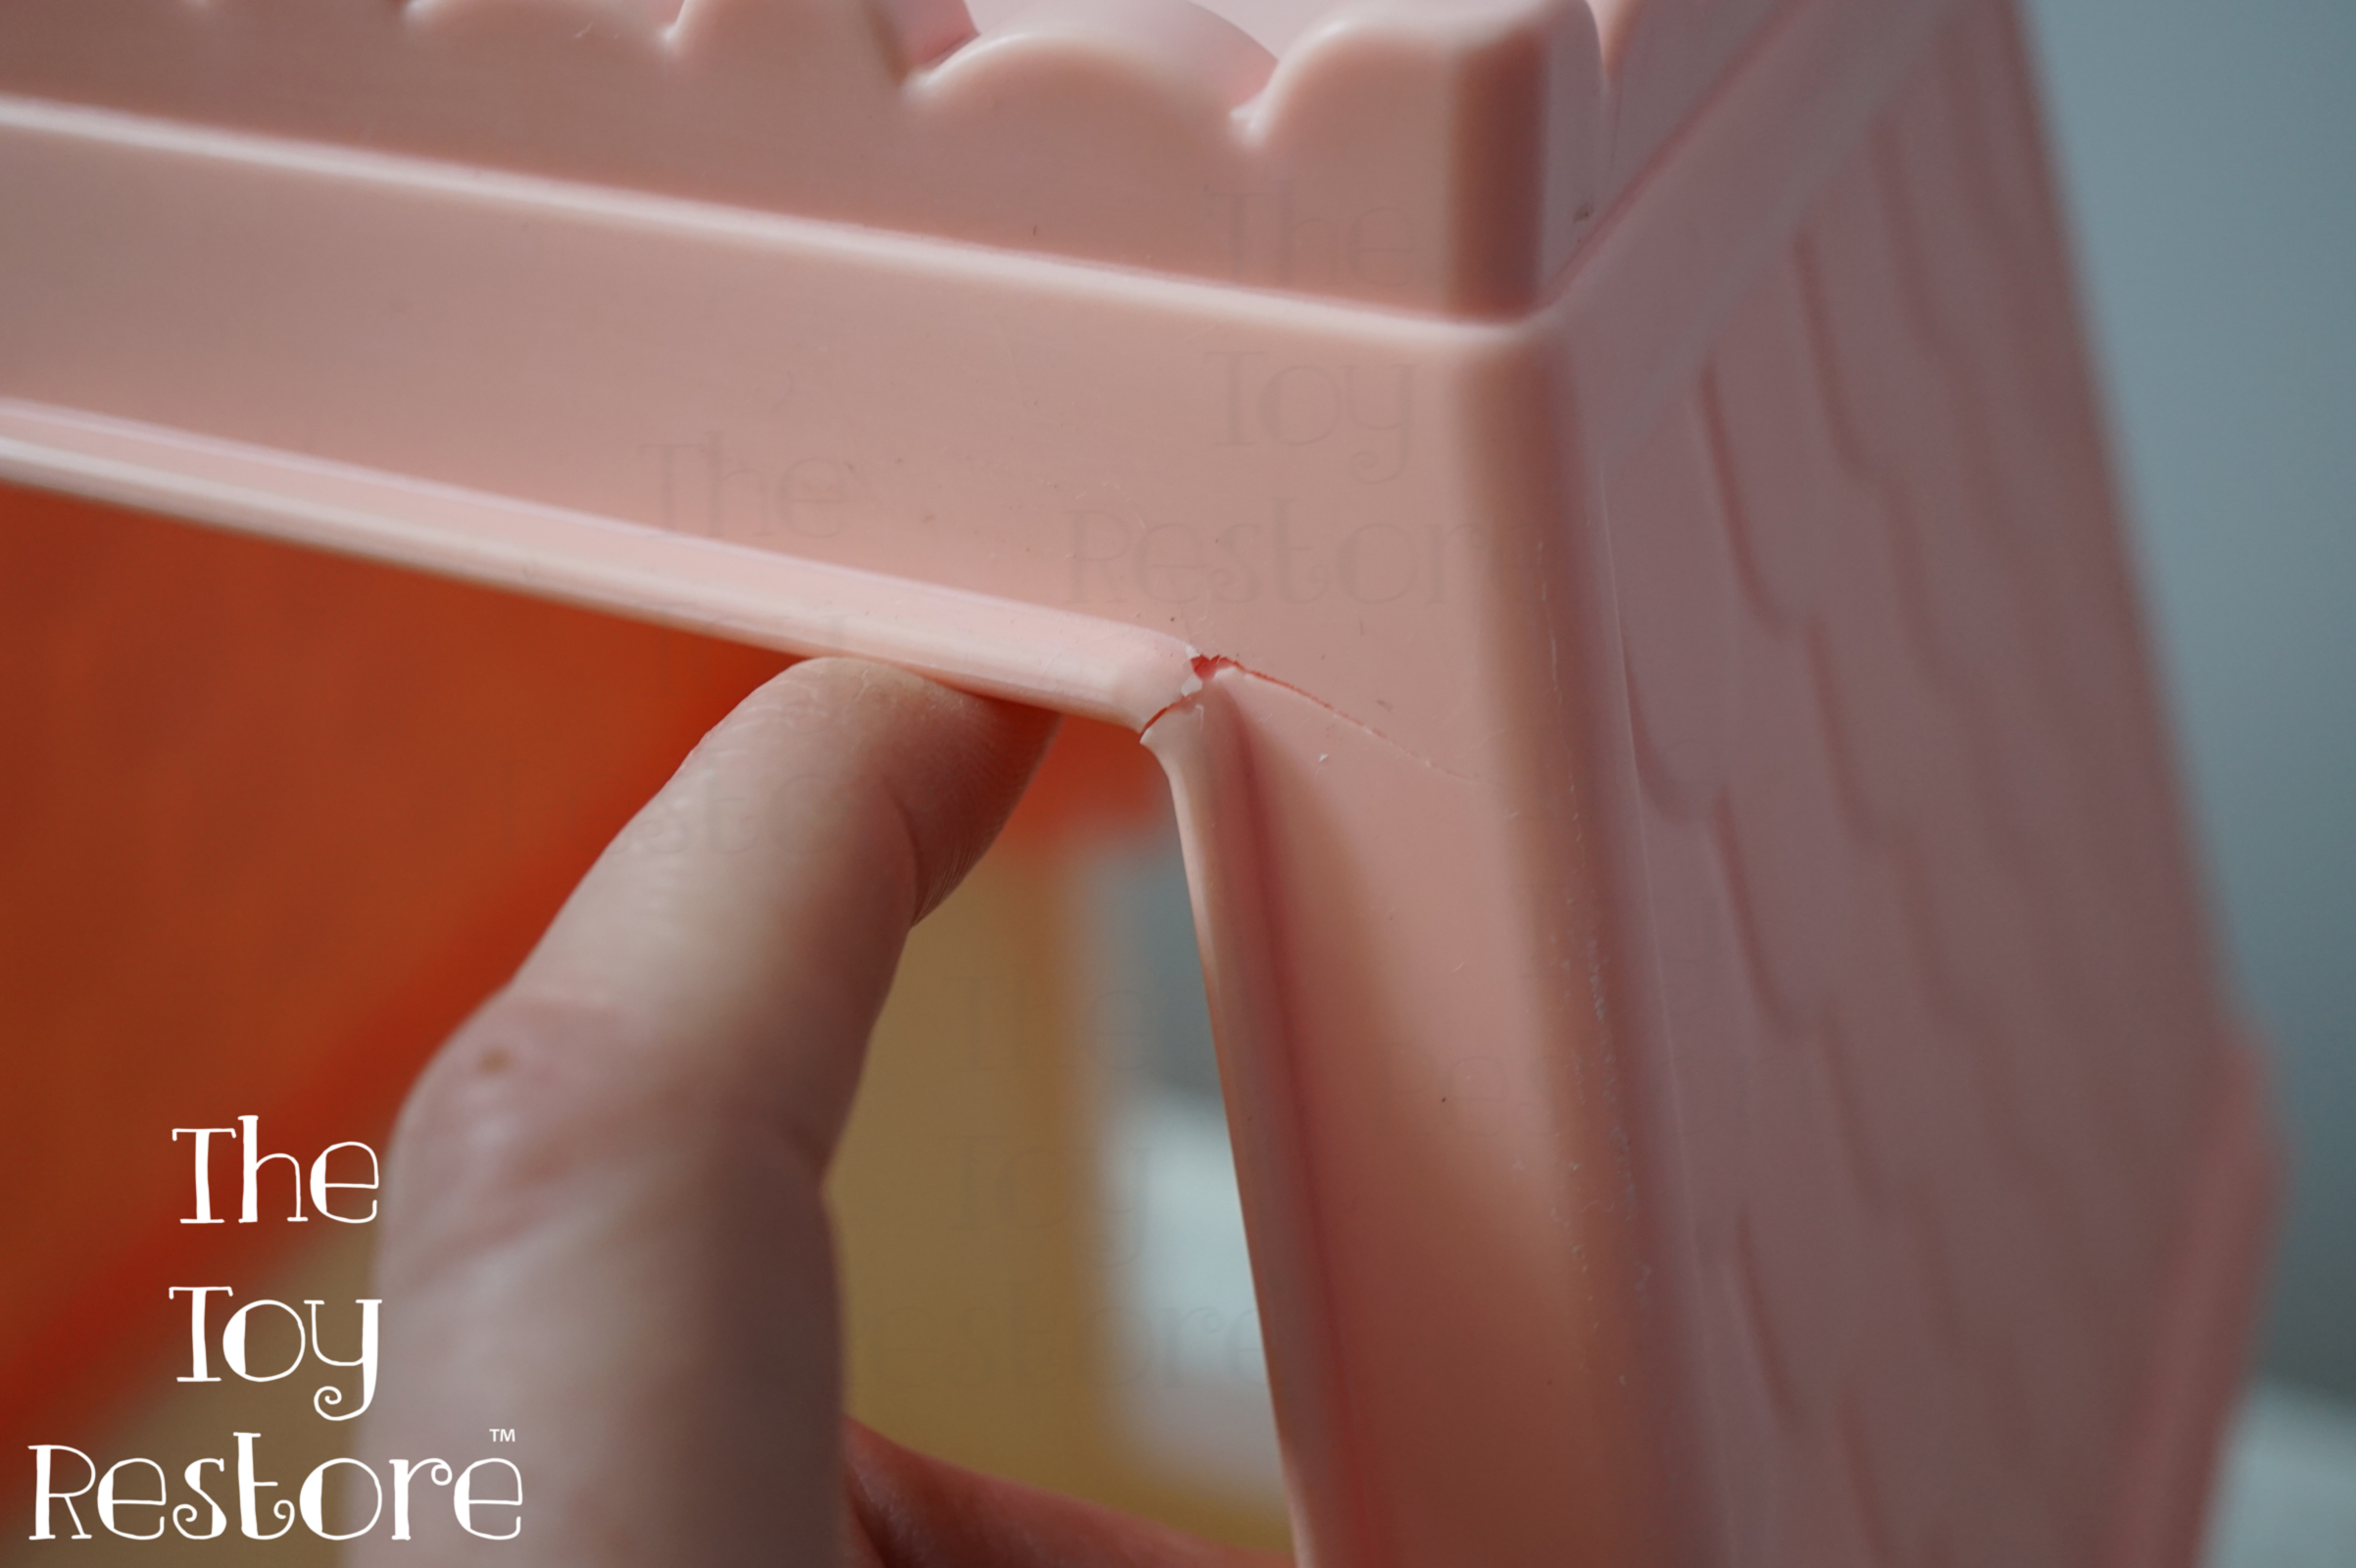
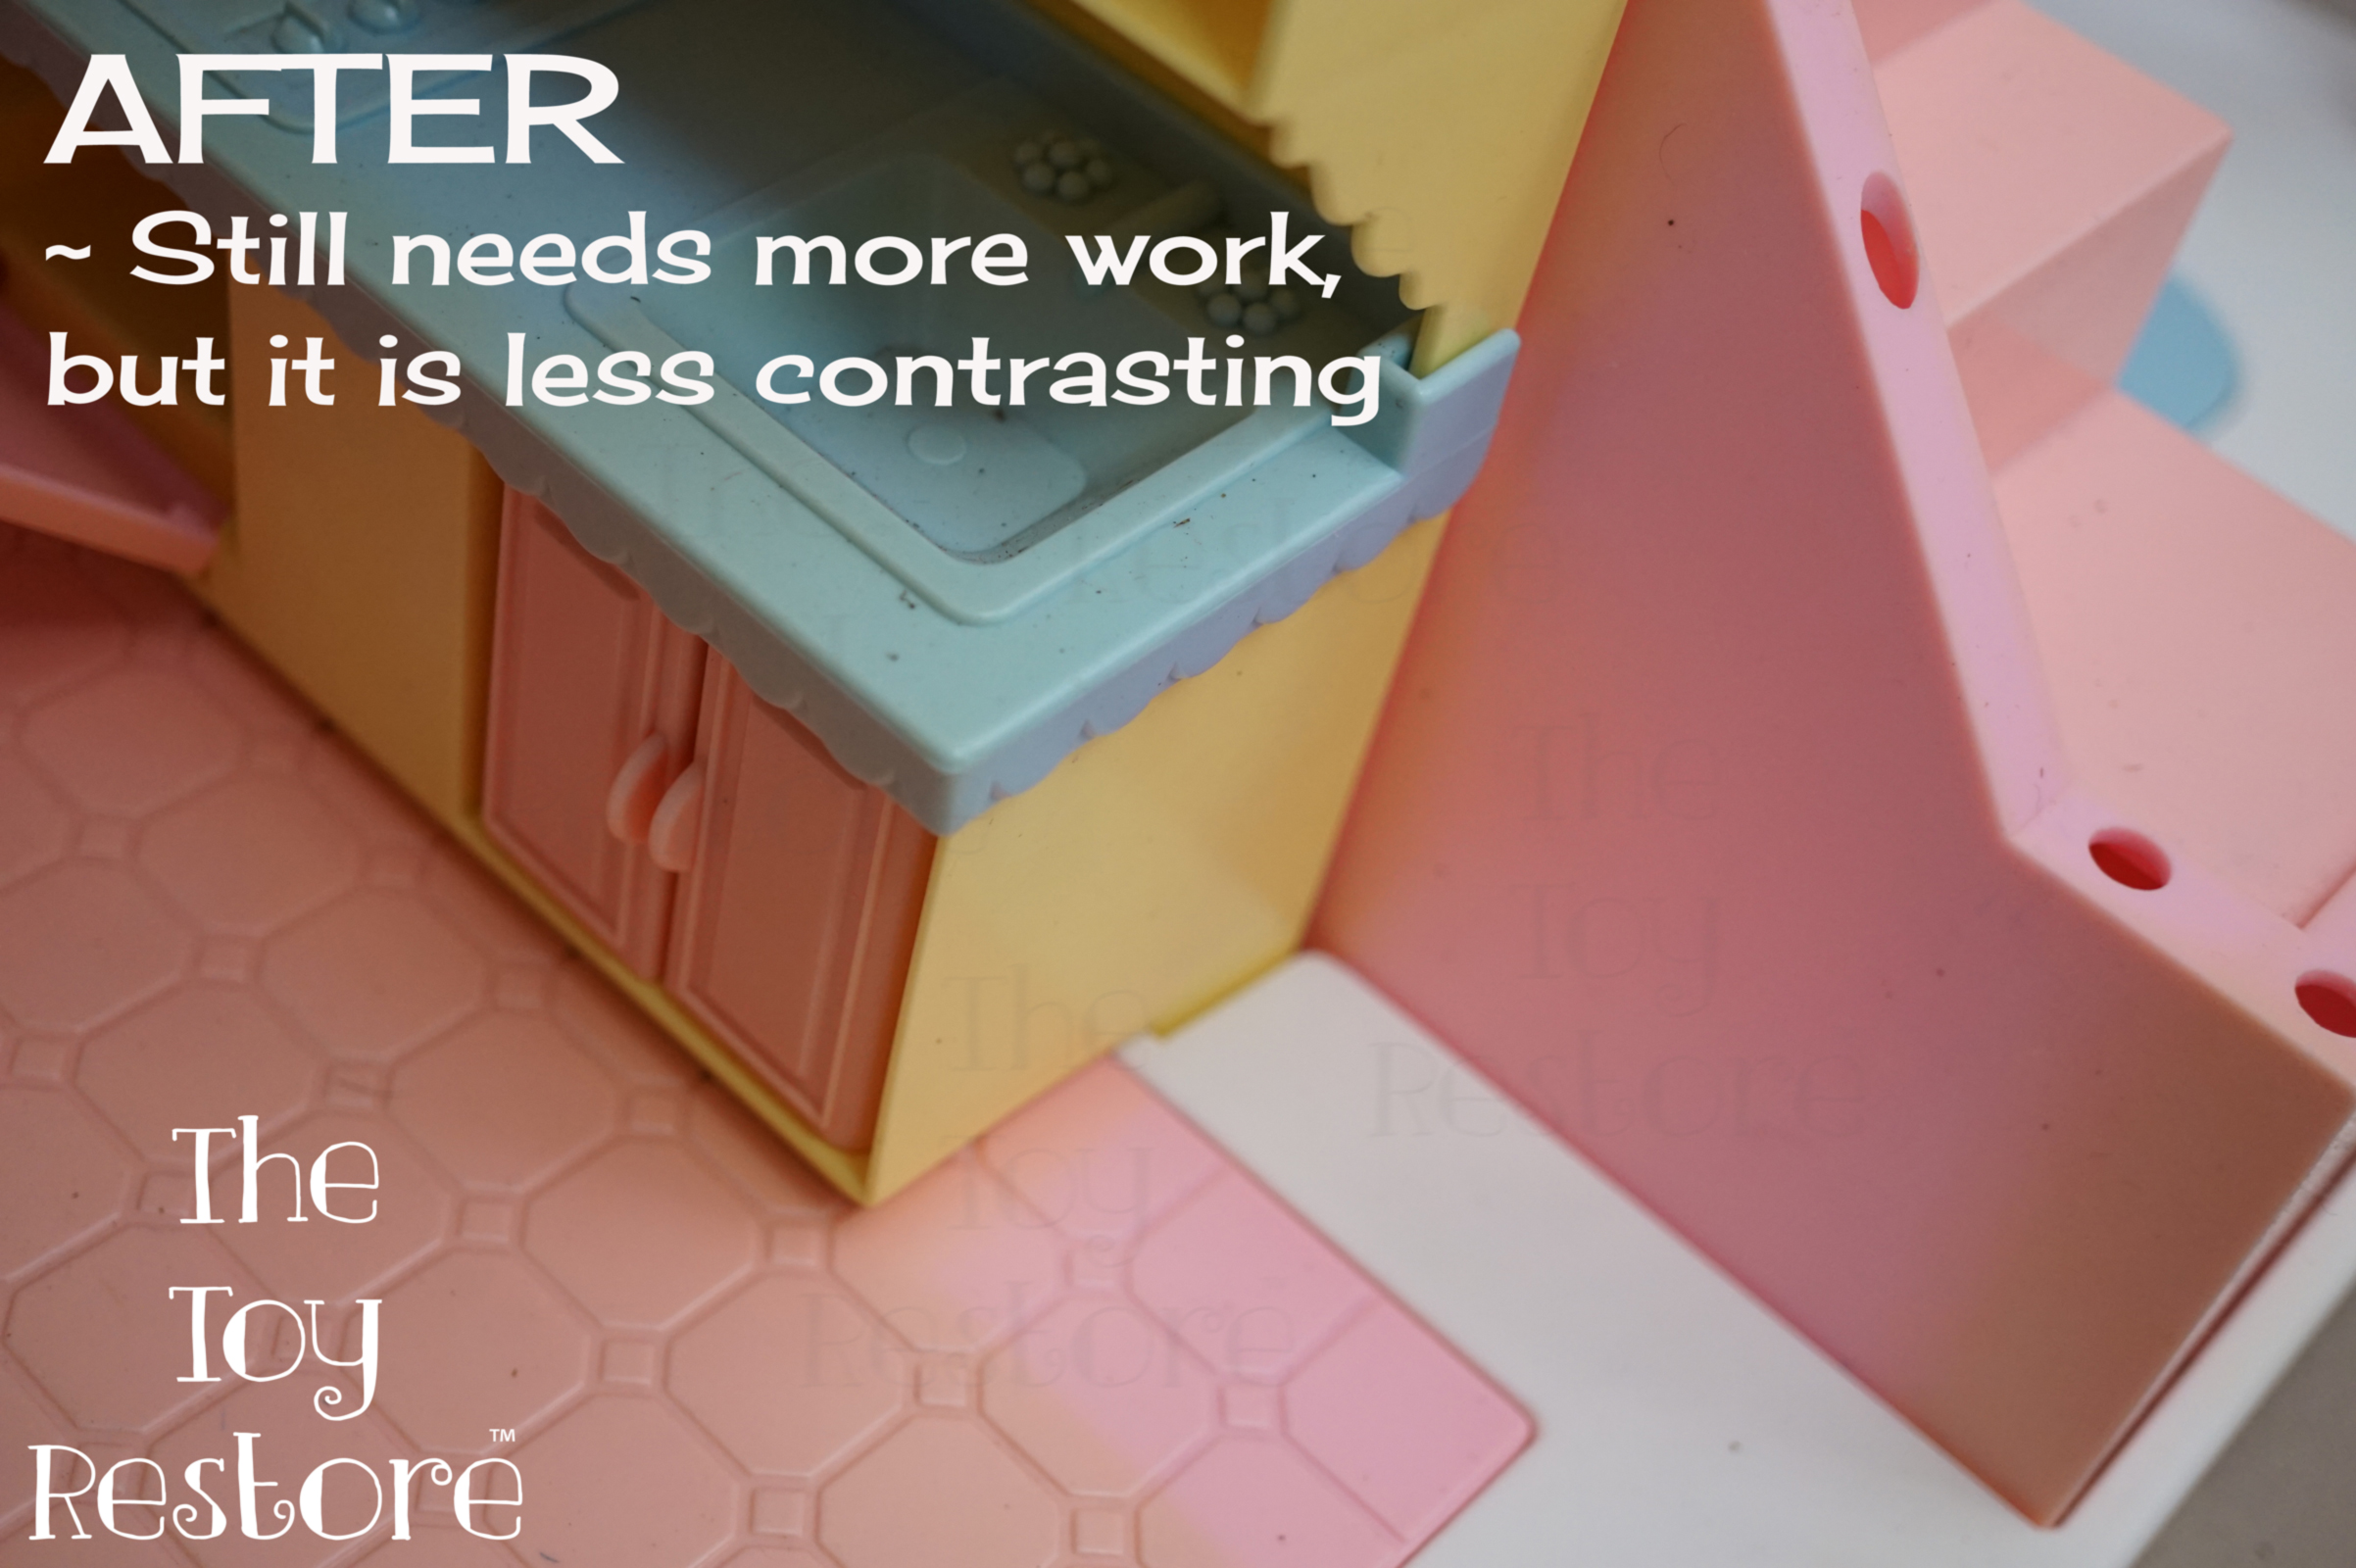
Eventually, the color, including the blotches evened out as best as it could. There is still a lot more work needed on this dollhouse, but I am too afraid to continue with bleaching it. The plastic has already become brittle.
Playskool Victorian Dollhouse, getting brittle from the bleaching process
While the dollhouse still needs work, I’m hesitant to continue because the plastic has already become brittle.
Finished Playskool Victorian Dollhouse. Not perfect, but much better.
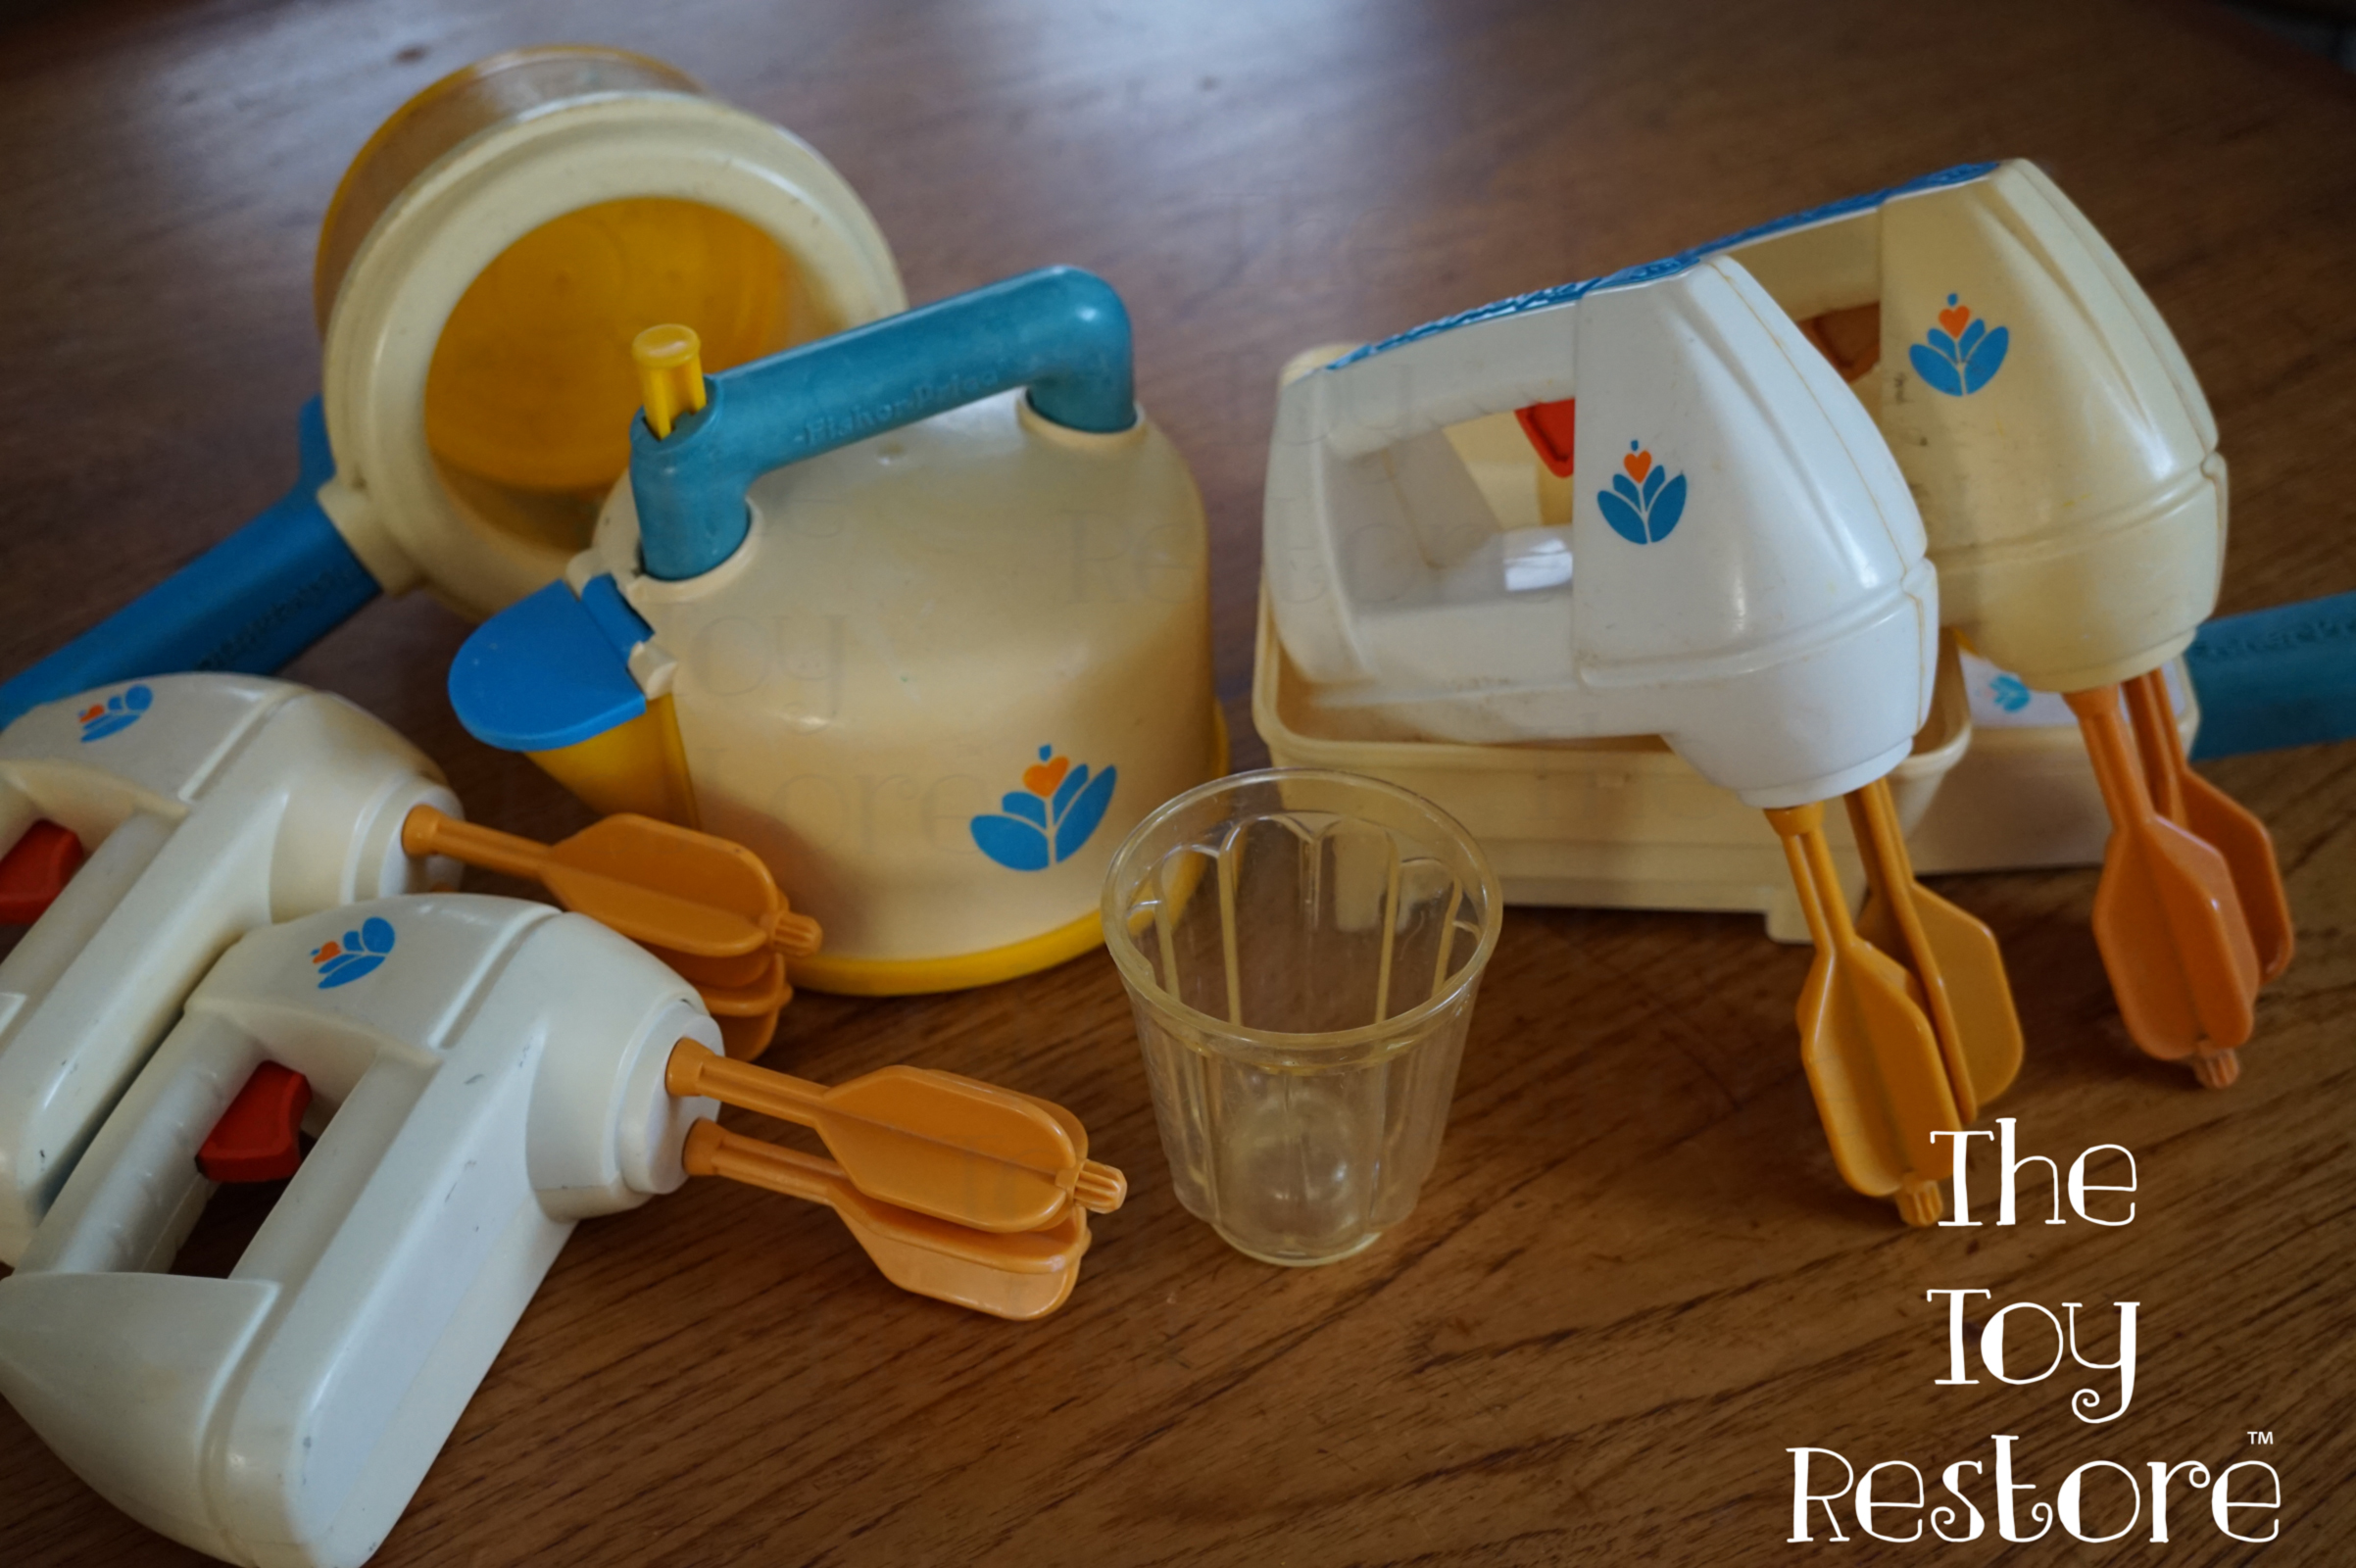
How to Whiten Yellowed Plastic Toys: Fisher Price Examples
Bleaching out Fisher Price Fun With Food
I’ve also used this whitening process on various Fisher Price Fun with Food toys. Sunlight alone does a decent job, but adding bleach and hydrogen peroxide speeds up the process. I make sure to apply the solution only to the white areas and monitor it closely to avoid blotchiness.
Fisher Price Fun With Food Yellowed Toys
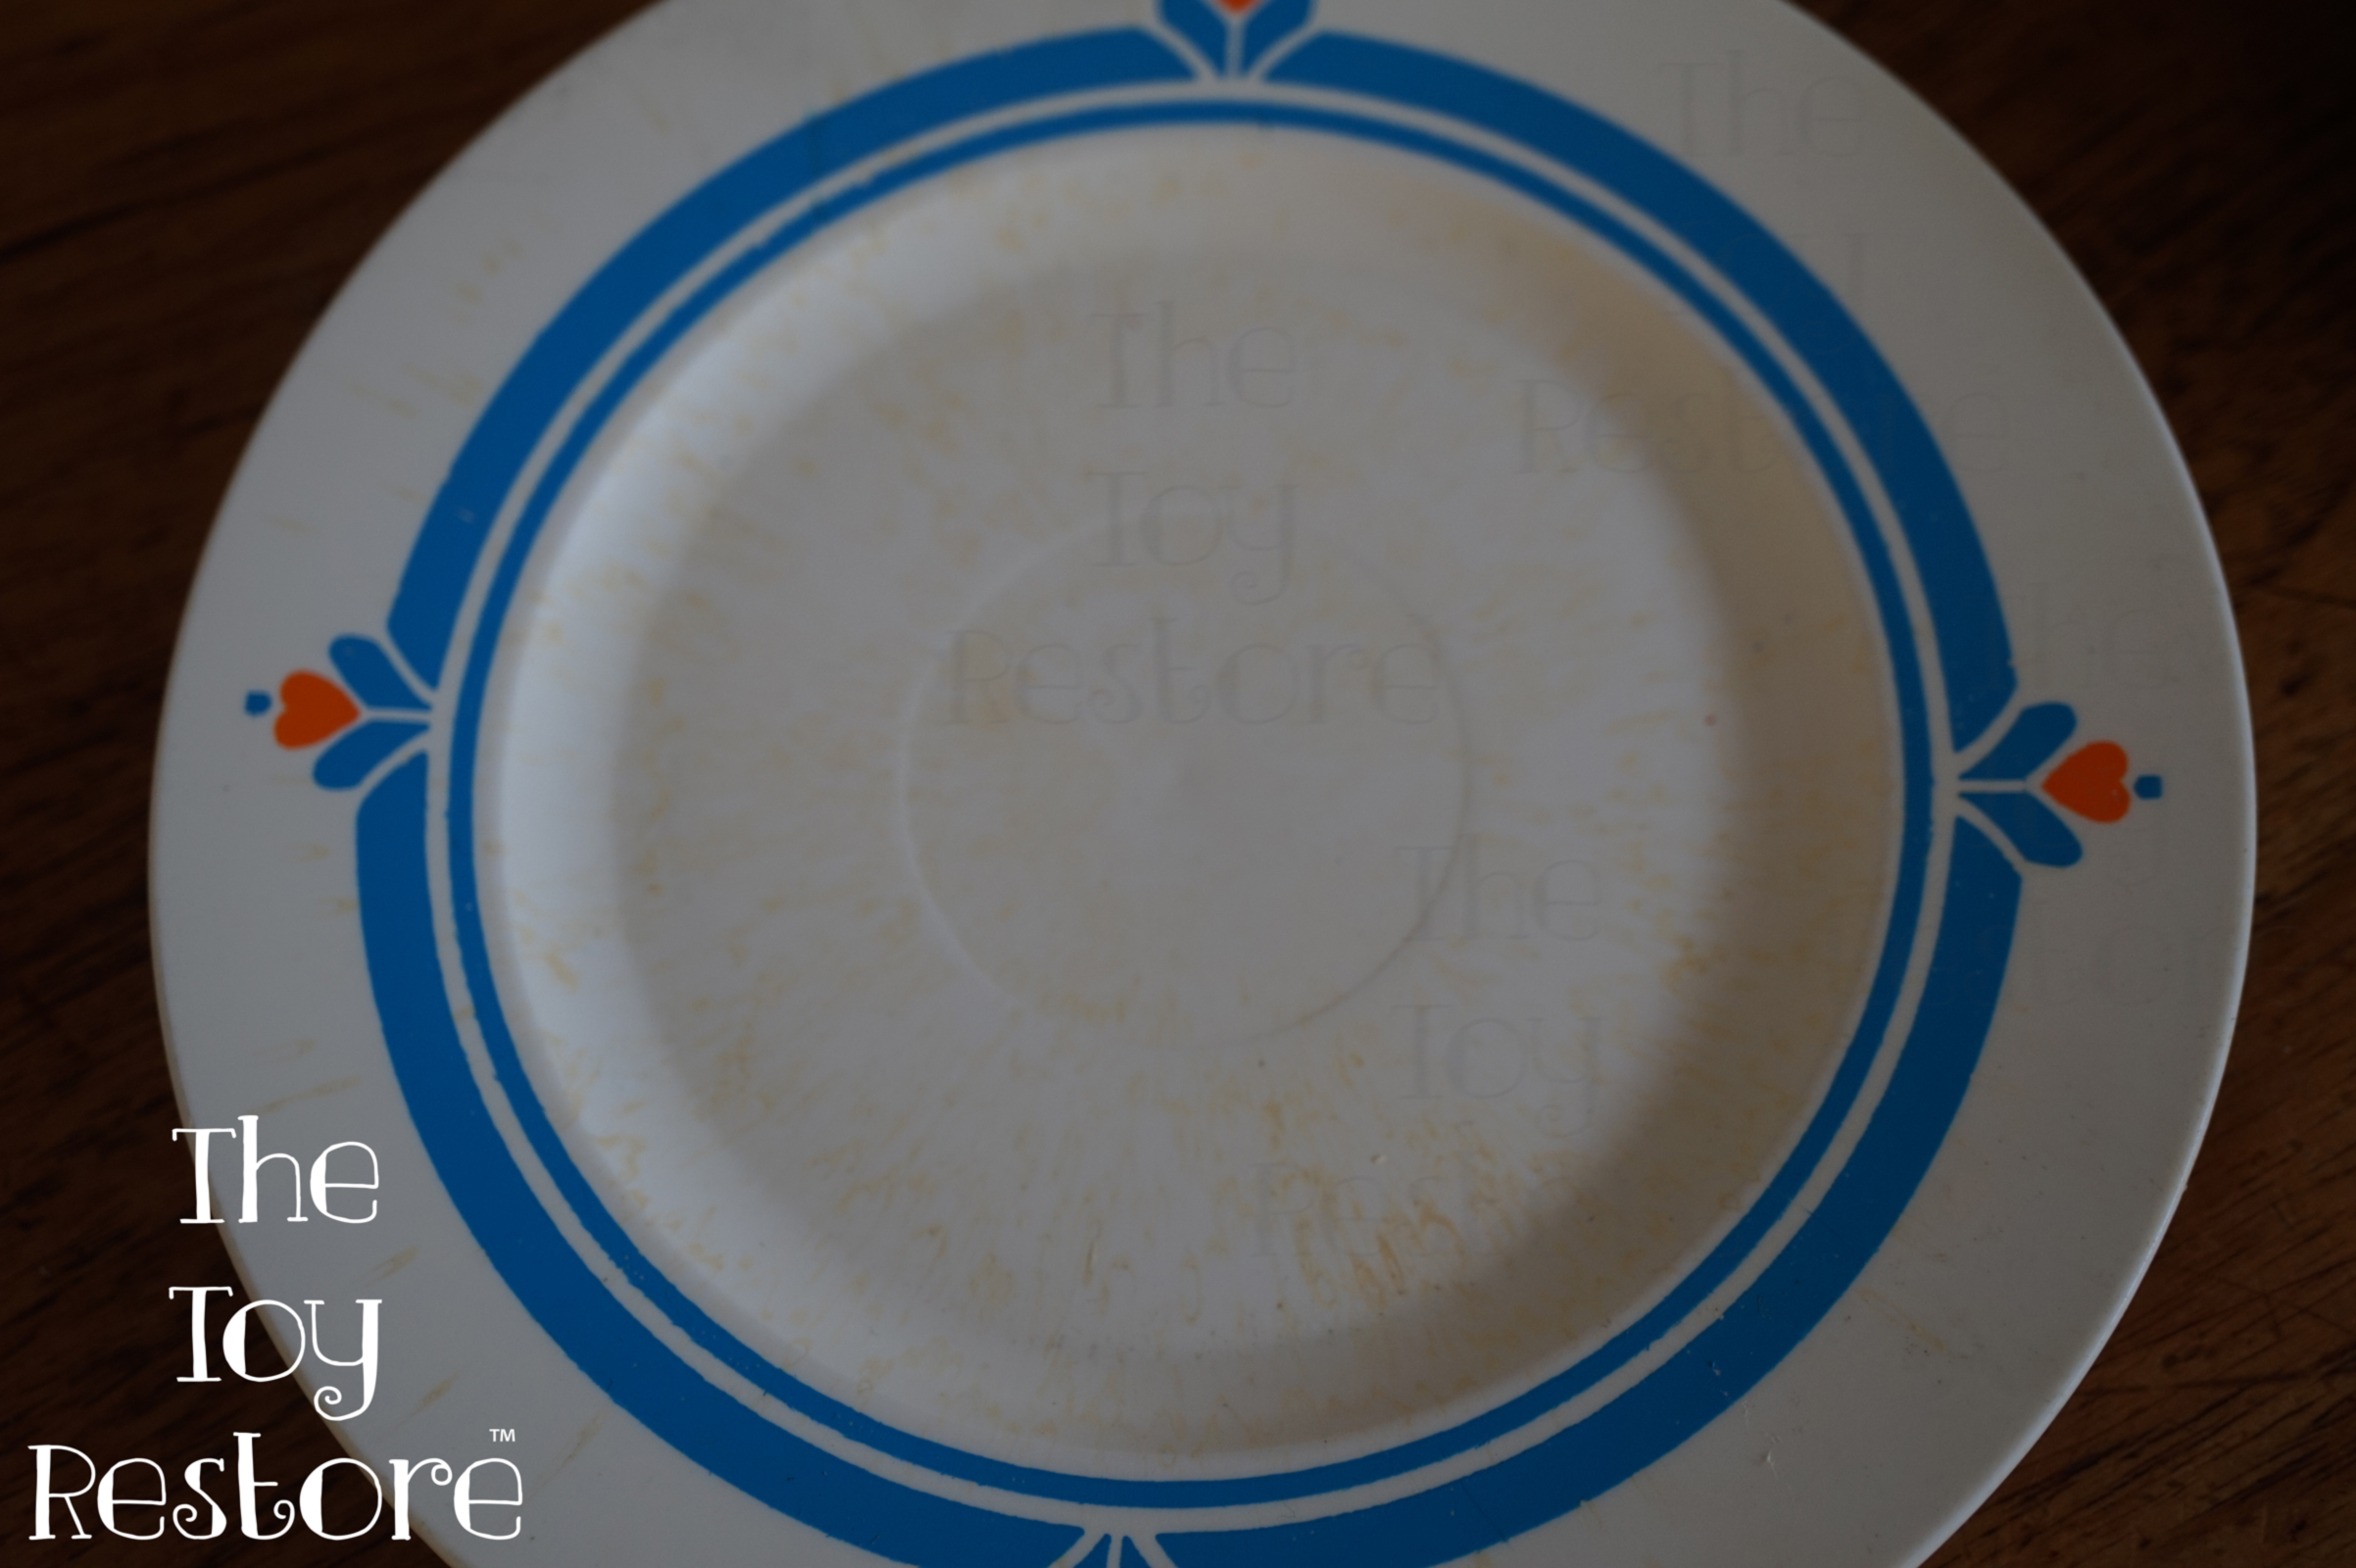
One such instance involved a Fisher Price Fun with Food dish that became blotchy because I didn’t apply an even coat of bleach.
Fisher Price Fun with Food dish, got blotchy from not having an even coat.
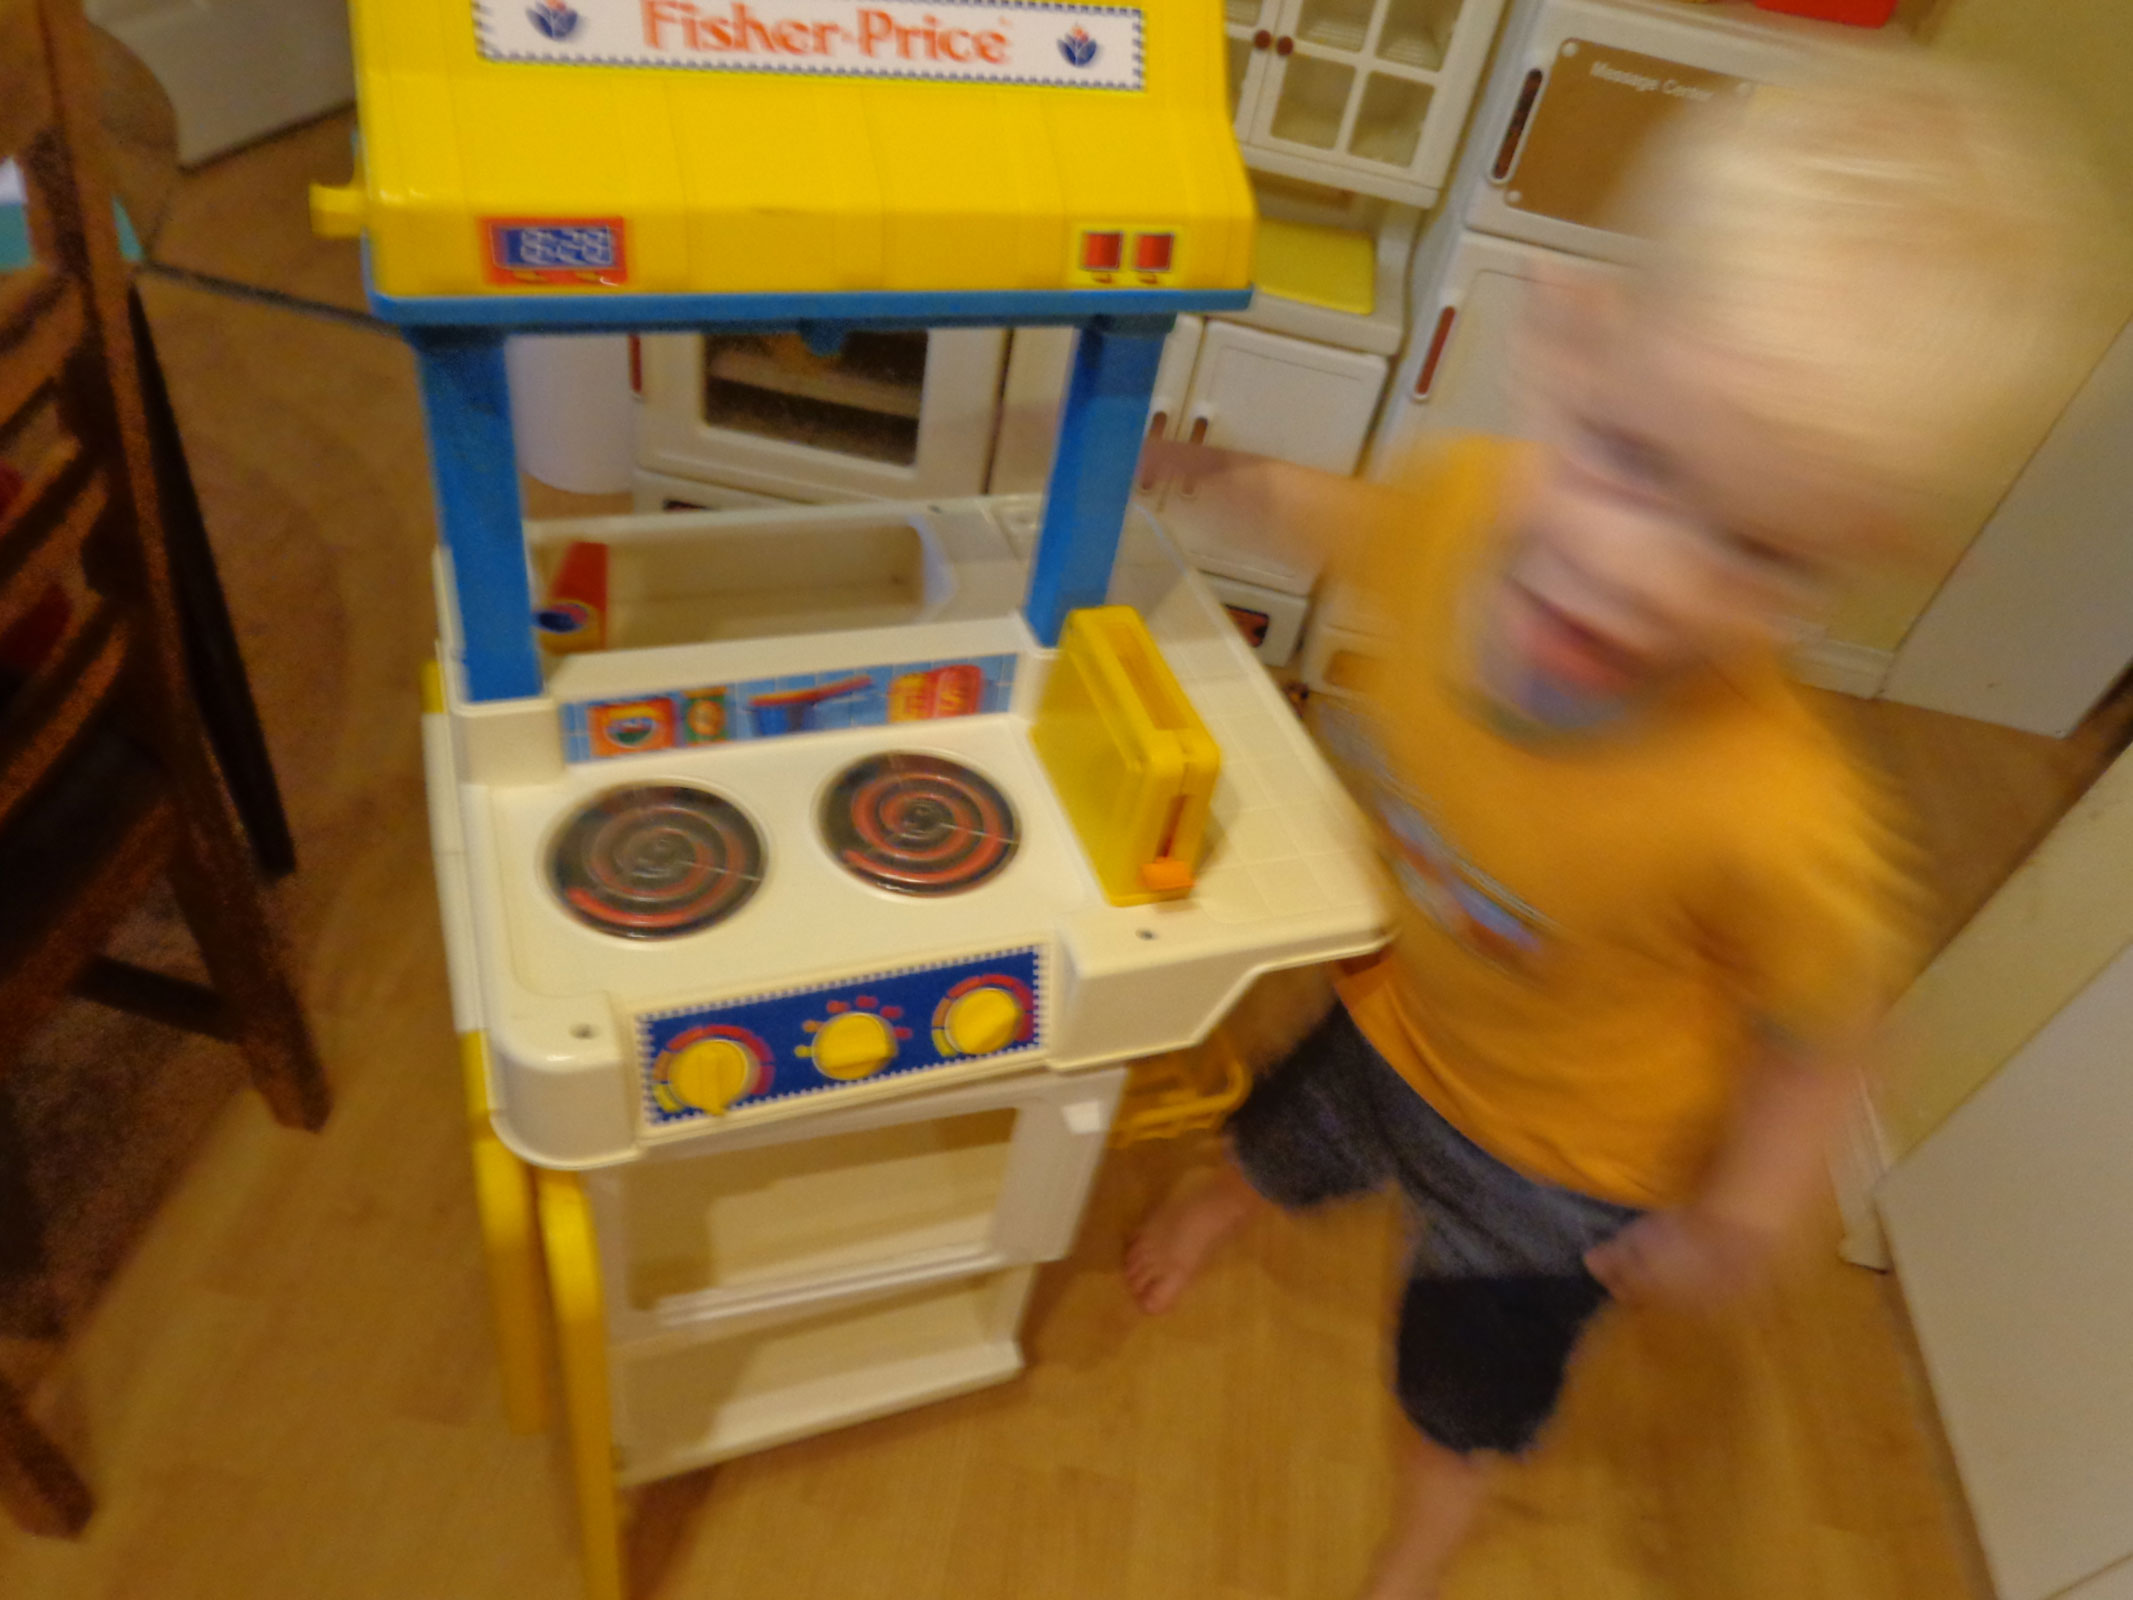
My kids Vintage Fisher Price Magic Burner Kitchen, that they loved.
Sunlight Also Removes Marker Stains
I’ve found that sunlight is great for removing marker and pen stains from plastic furniture items for kids, which I often find at thrift stores. A simple exposure to sunlight is usually enough to remove these stains, depending on the season.
Does the Time of Year Matter for Sunlight Whitening?
In Canada, we experience stronger sunlight and longer daylight hours during the summer months (July and August). This heat speeds up the chemical reaction, making it the ideal time for whitening toys.
Can You Overdo It? Yes, Color Can Fade.
Yes, over-bleaching is a real concern. Colors like pink and purple fade quickly, while red will turn into a dull pink. I learned this the hard way when I left a Vintage Little Tikes Beauty Salon outside in the shade for about six months. It turned white, even though it had been kept in a shaded spot.
Sun Bleached Vintage Little Tikes Beauty Salon
Yes, Plastic Can Become Brittle!
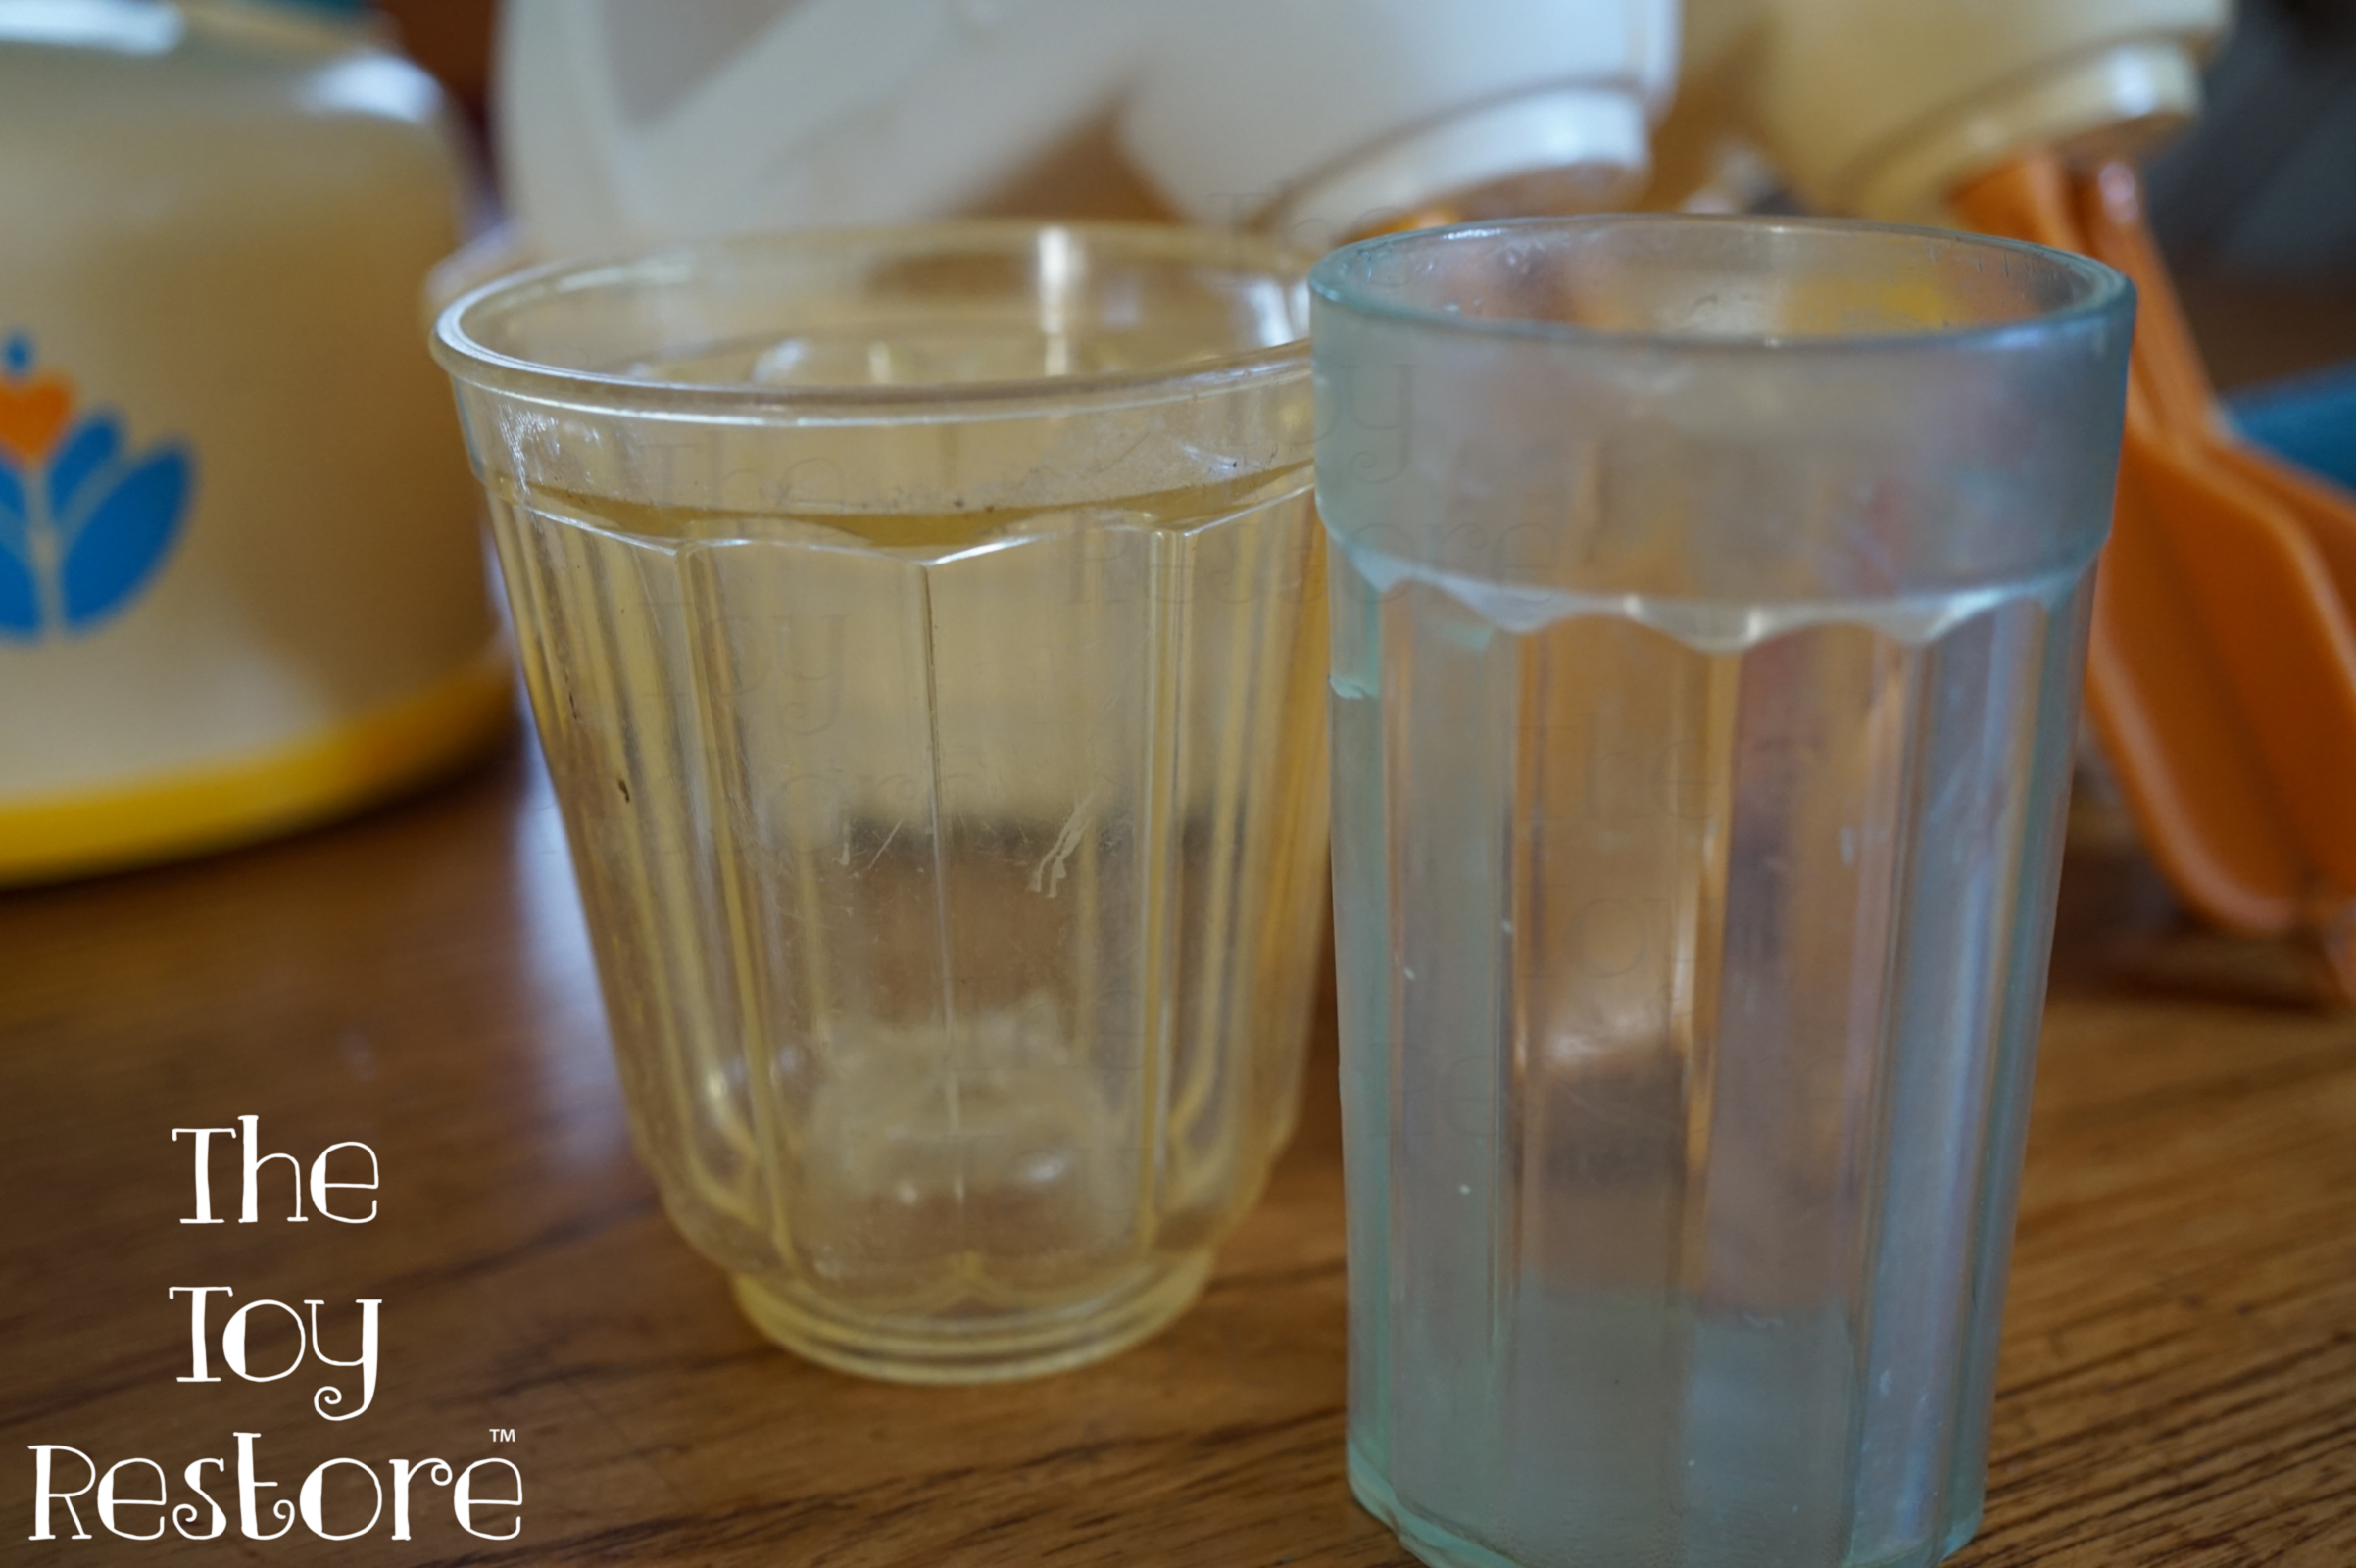
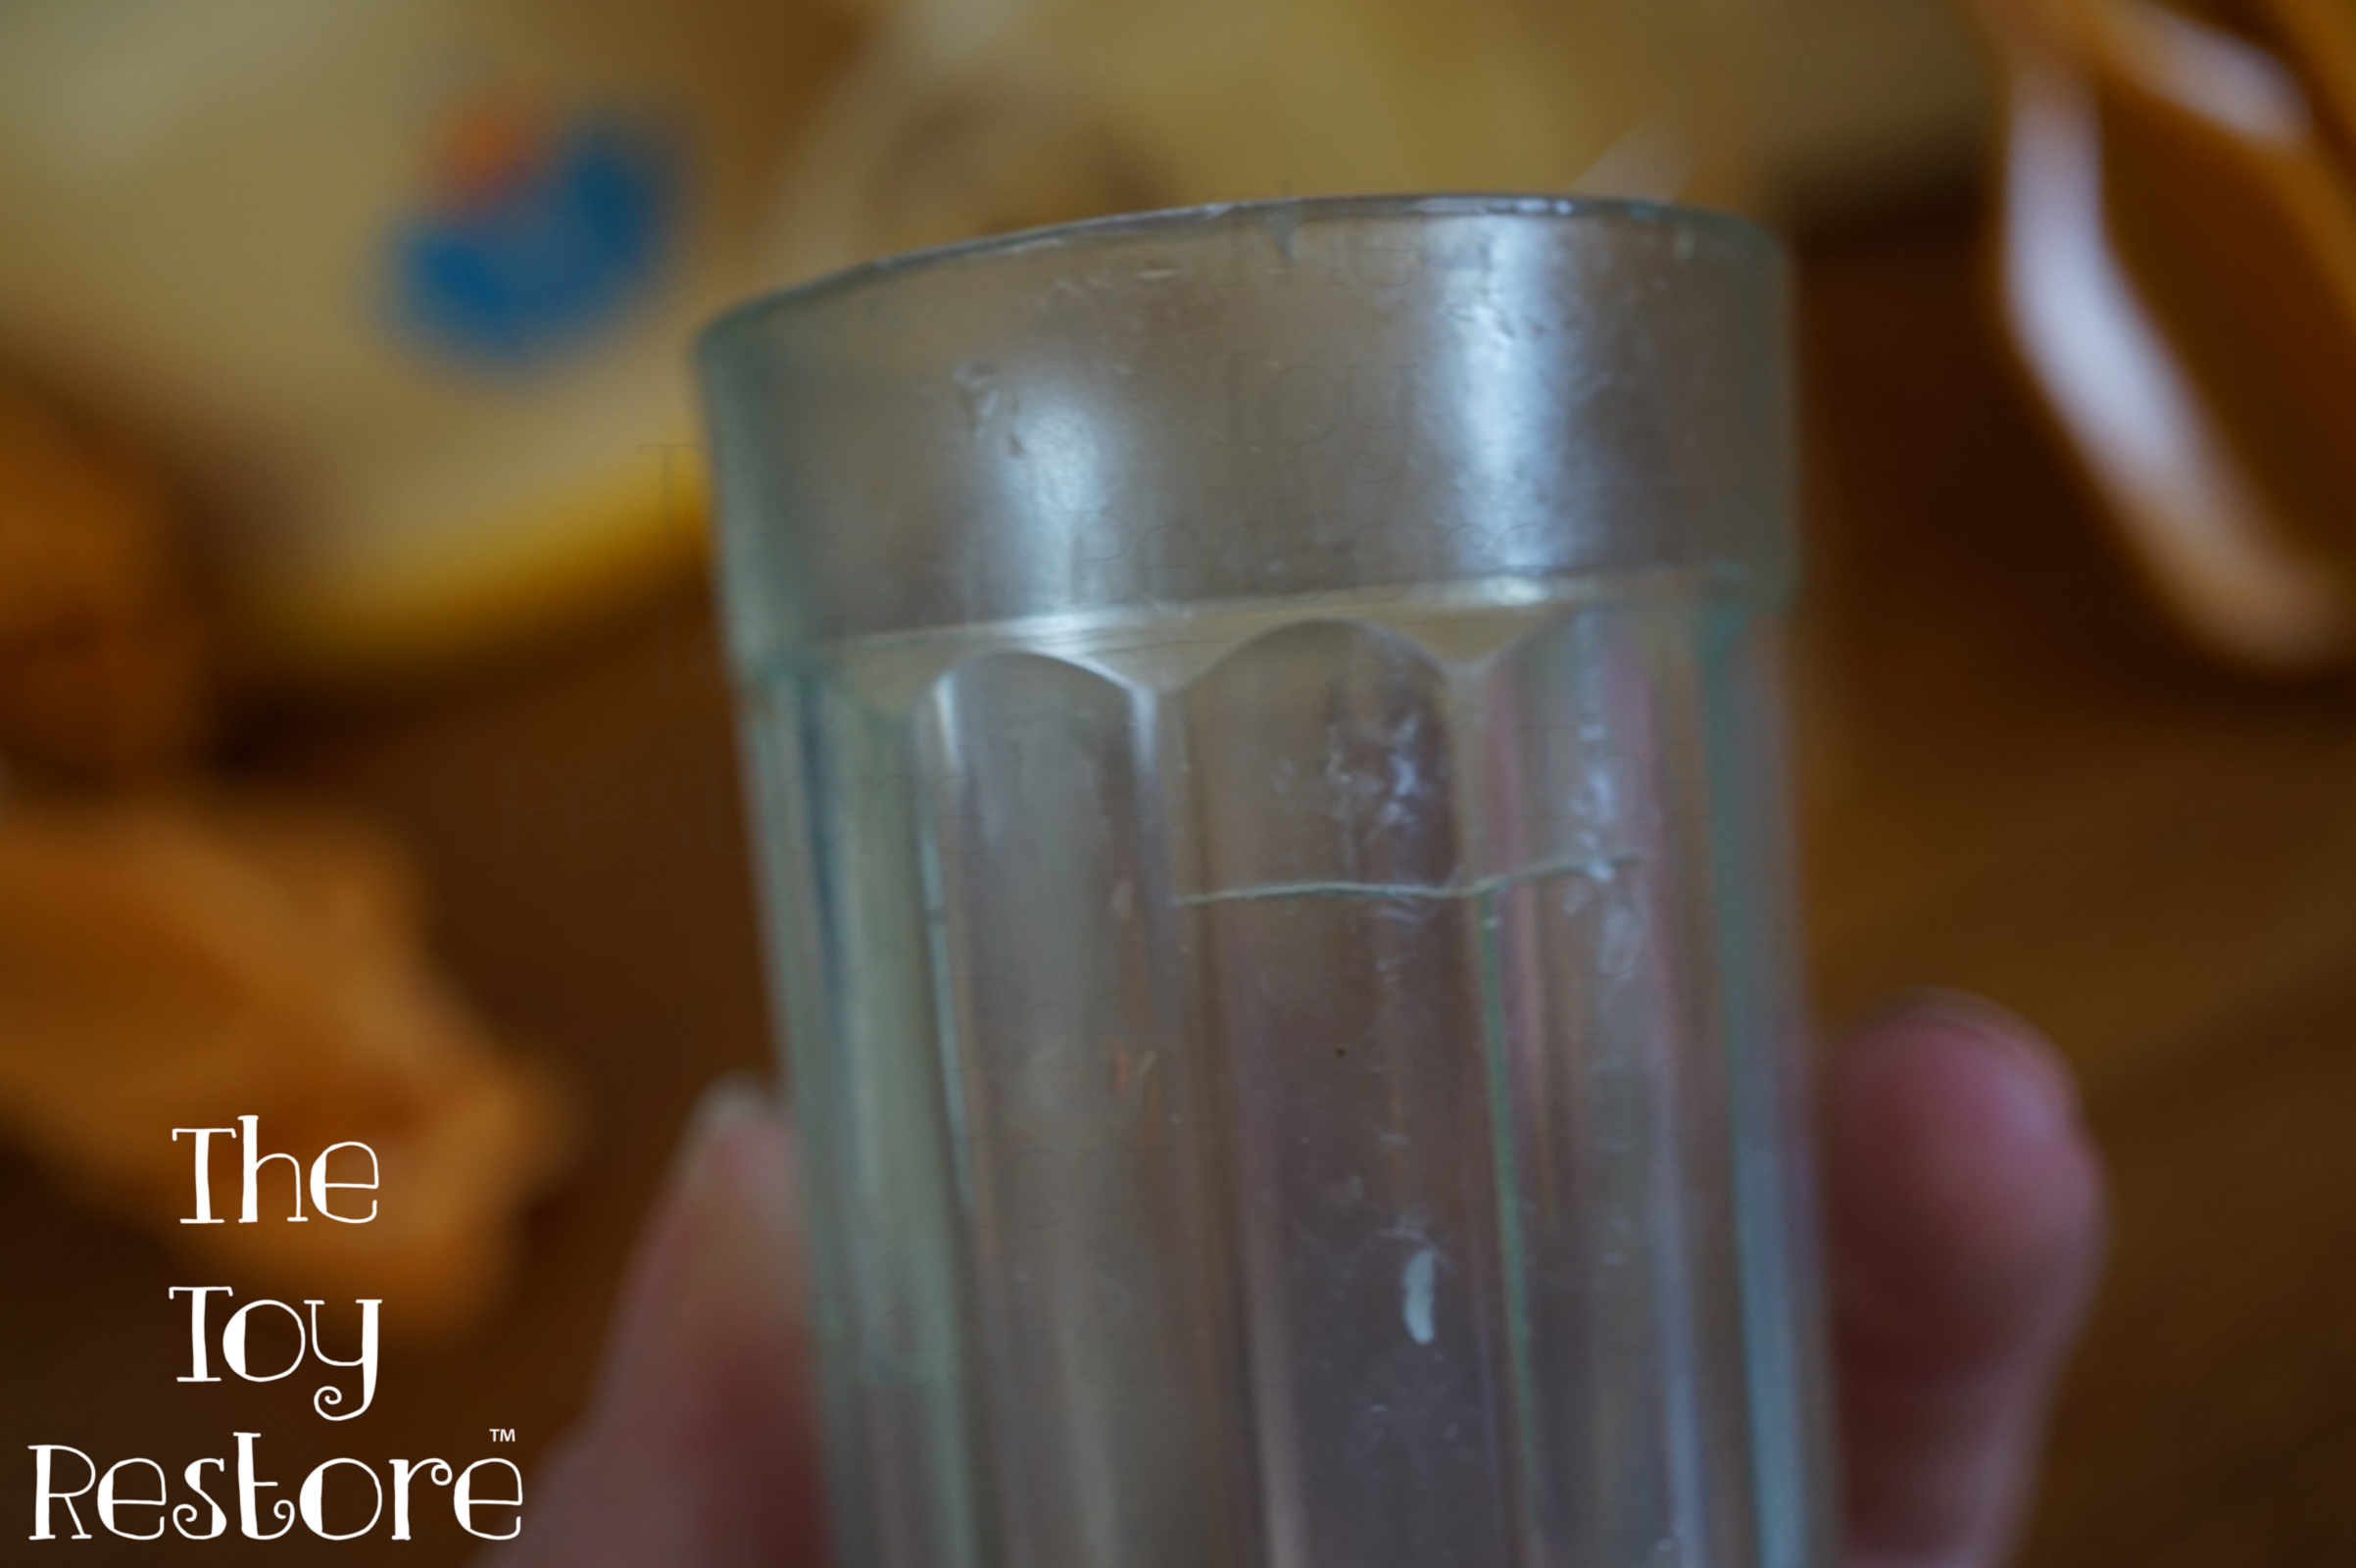
I once tried to whiten some clear Fisher Price Fun with Food glasses, but I got distracted and forgot about them. When I returned, they had become brittle and crumbled along the edges. This is a prime example of over-bleaching.
The reason for this is that when you bleach plastic, you’re removing the bromine from the surface. Without the bromine, the plastic becomes much less flexible and more prone to cracking.
Fisher Price Fun With Food clear glasses can become brittle is bleached too long
Similarly, vintage Little Tikes play kitchen knobs can become brittle if left outside for too long. So, if you have to remove parts from vintage toys, be extra cautious.
What Happens to Colored Plastic When You Overdo It?
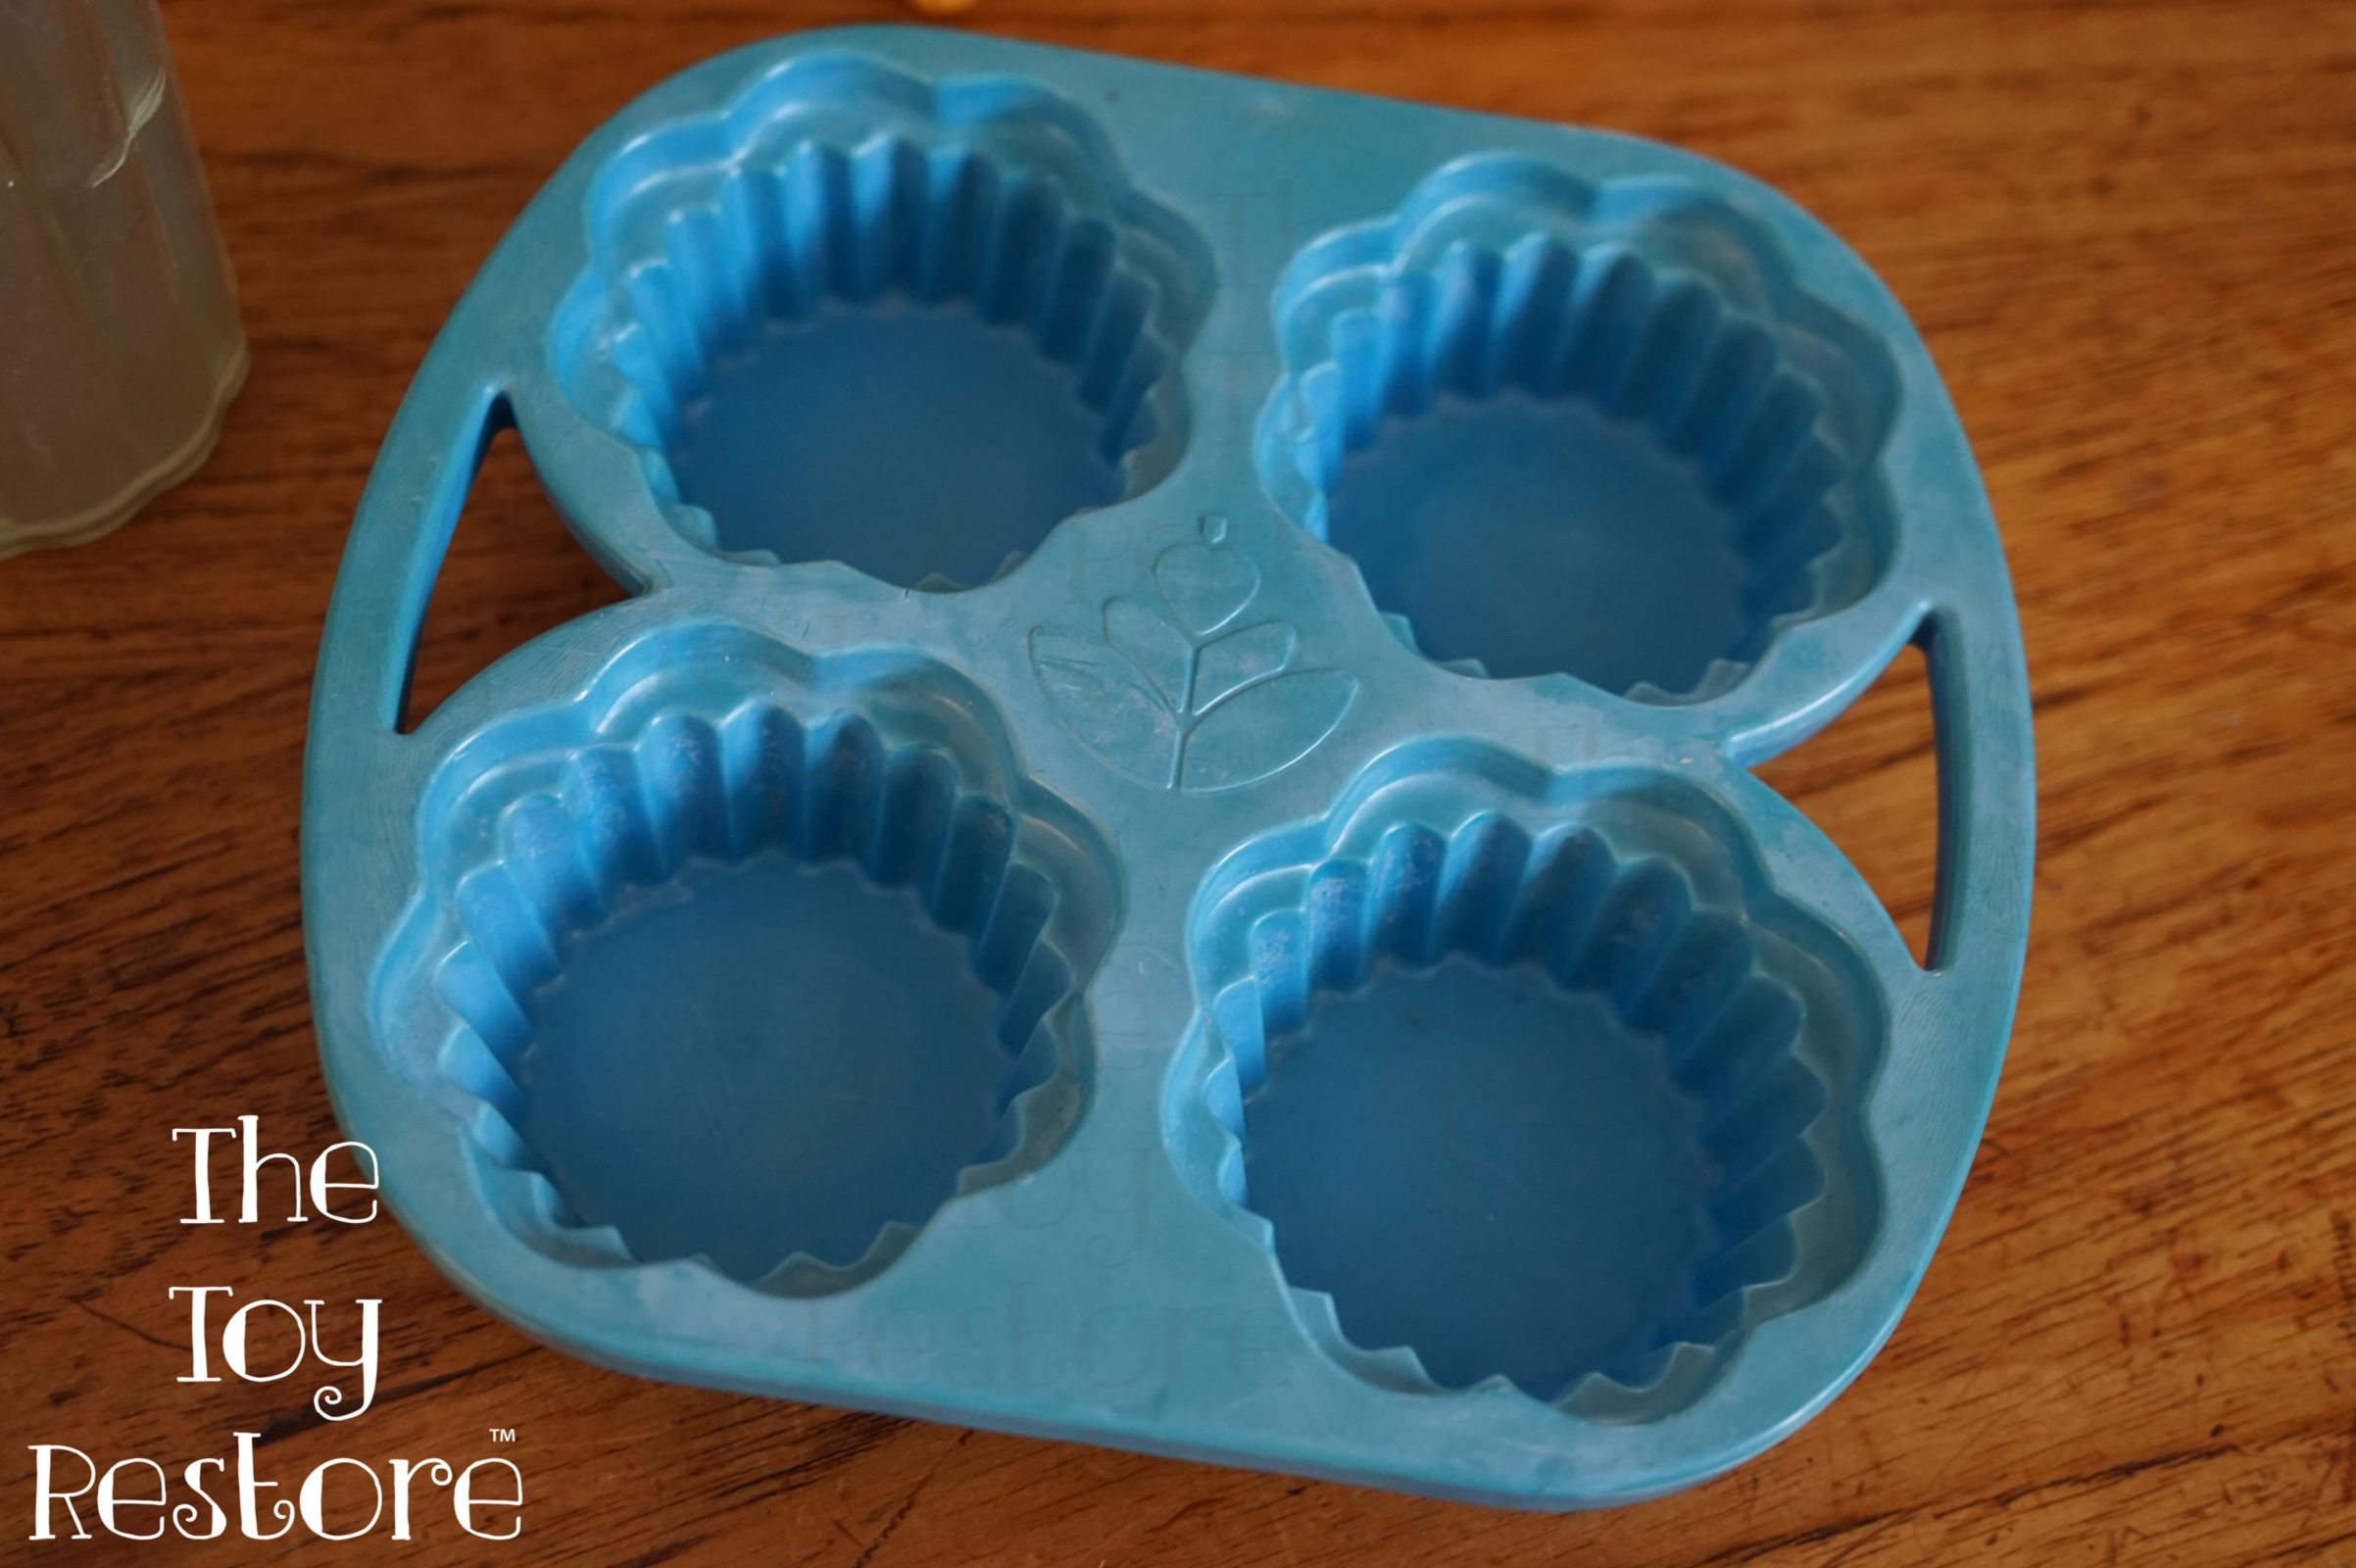
Colored plastic can fade to white if over-bleached. In cases where the bleach isn’t applied evenly, it can turn blotchy. I made this mistake with a Fisher Price Fun with Food cupcake tray, which ended up turning white and blotchy because I left it in the solution too long.
Fisher Price Fun With Food CupCake pan, was bleached too long. It got white and blotchy
Learning from Mistakes
While I’ve shown mostly mistakes in this post, I’ve had plenty of successful projects too. Sometimes learning from mistakes is the best way to improve. I hope my experiences help others avoid similar pitfalls.
I’m not a chemist, so if you notice any errors in my explanation, feel free to reach out and let me know!
Conclusion: Keep Experimenting and Be Careful
Restoring yellowed plastic toys can be a fun and rewarding process, but it’s important to proceed cautiously and carefully monitor your progress. The key takeaway is to avoid overdoing it and to always test a small area first. With time, patience, and the right techniques, you can bring those vintage toys back to life.
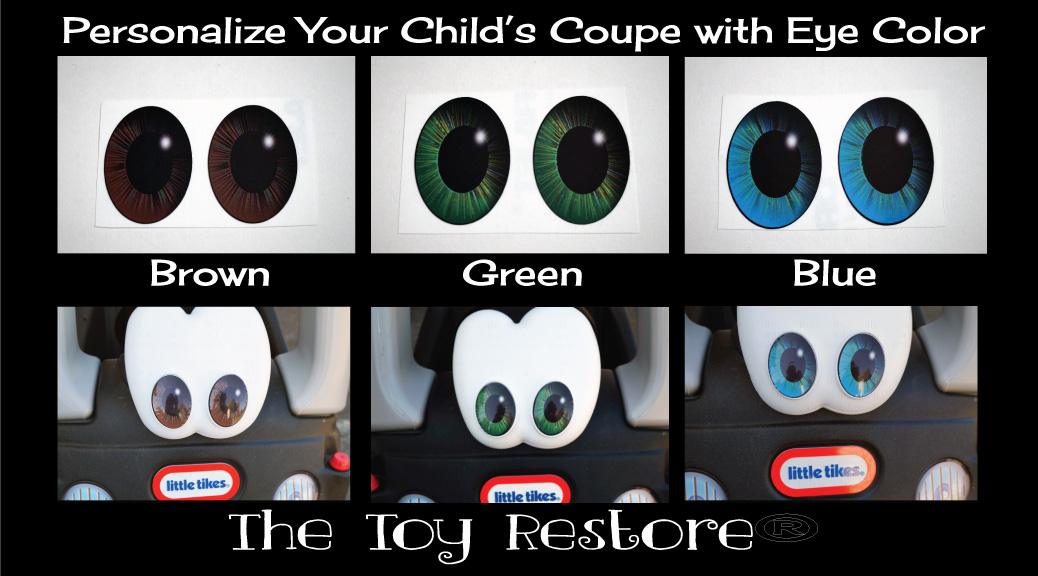
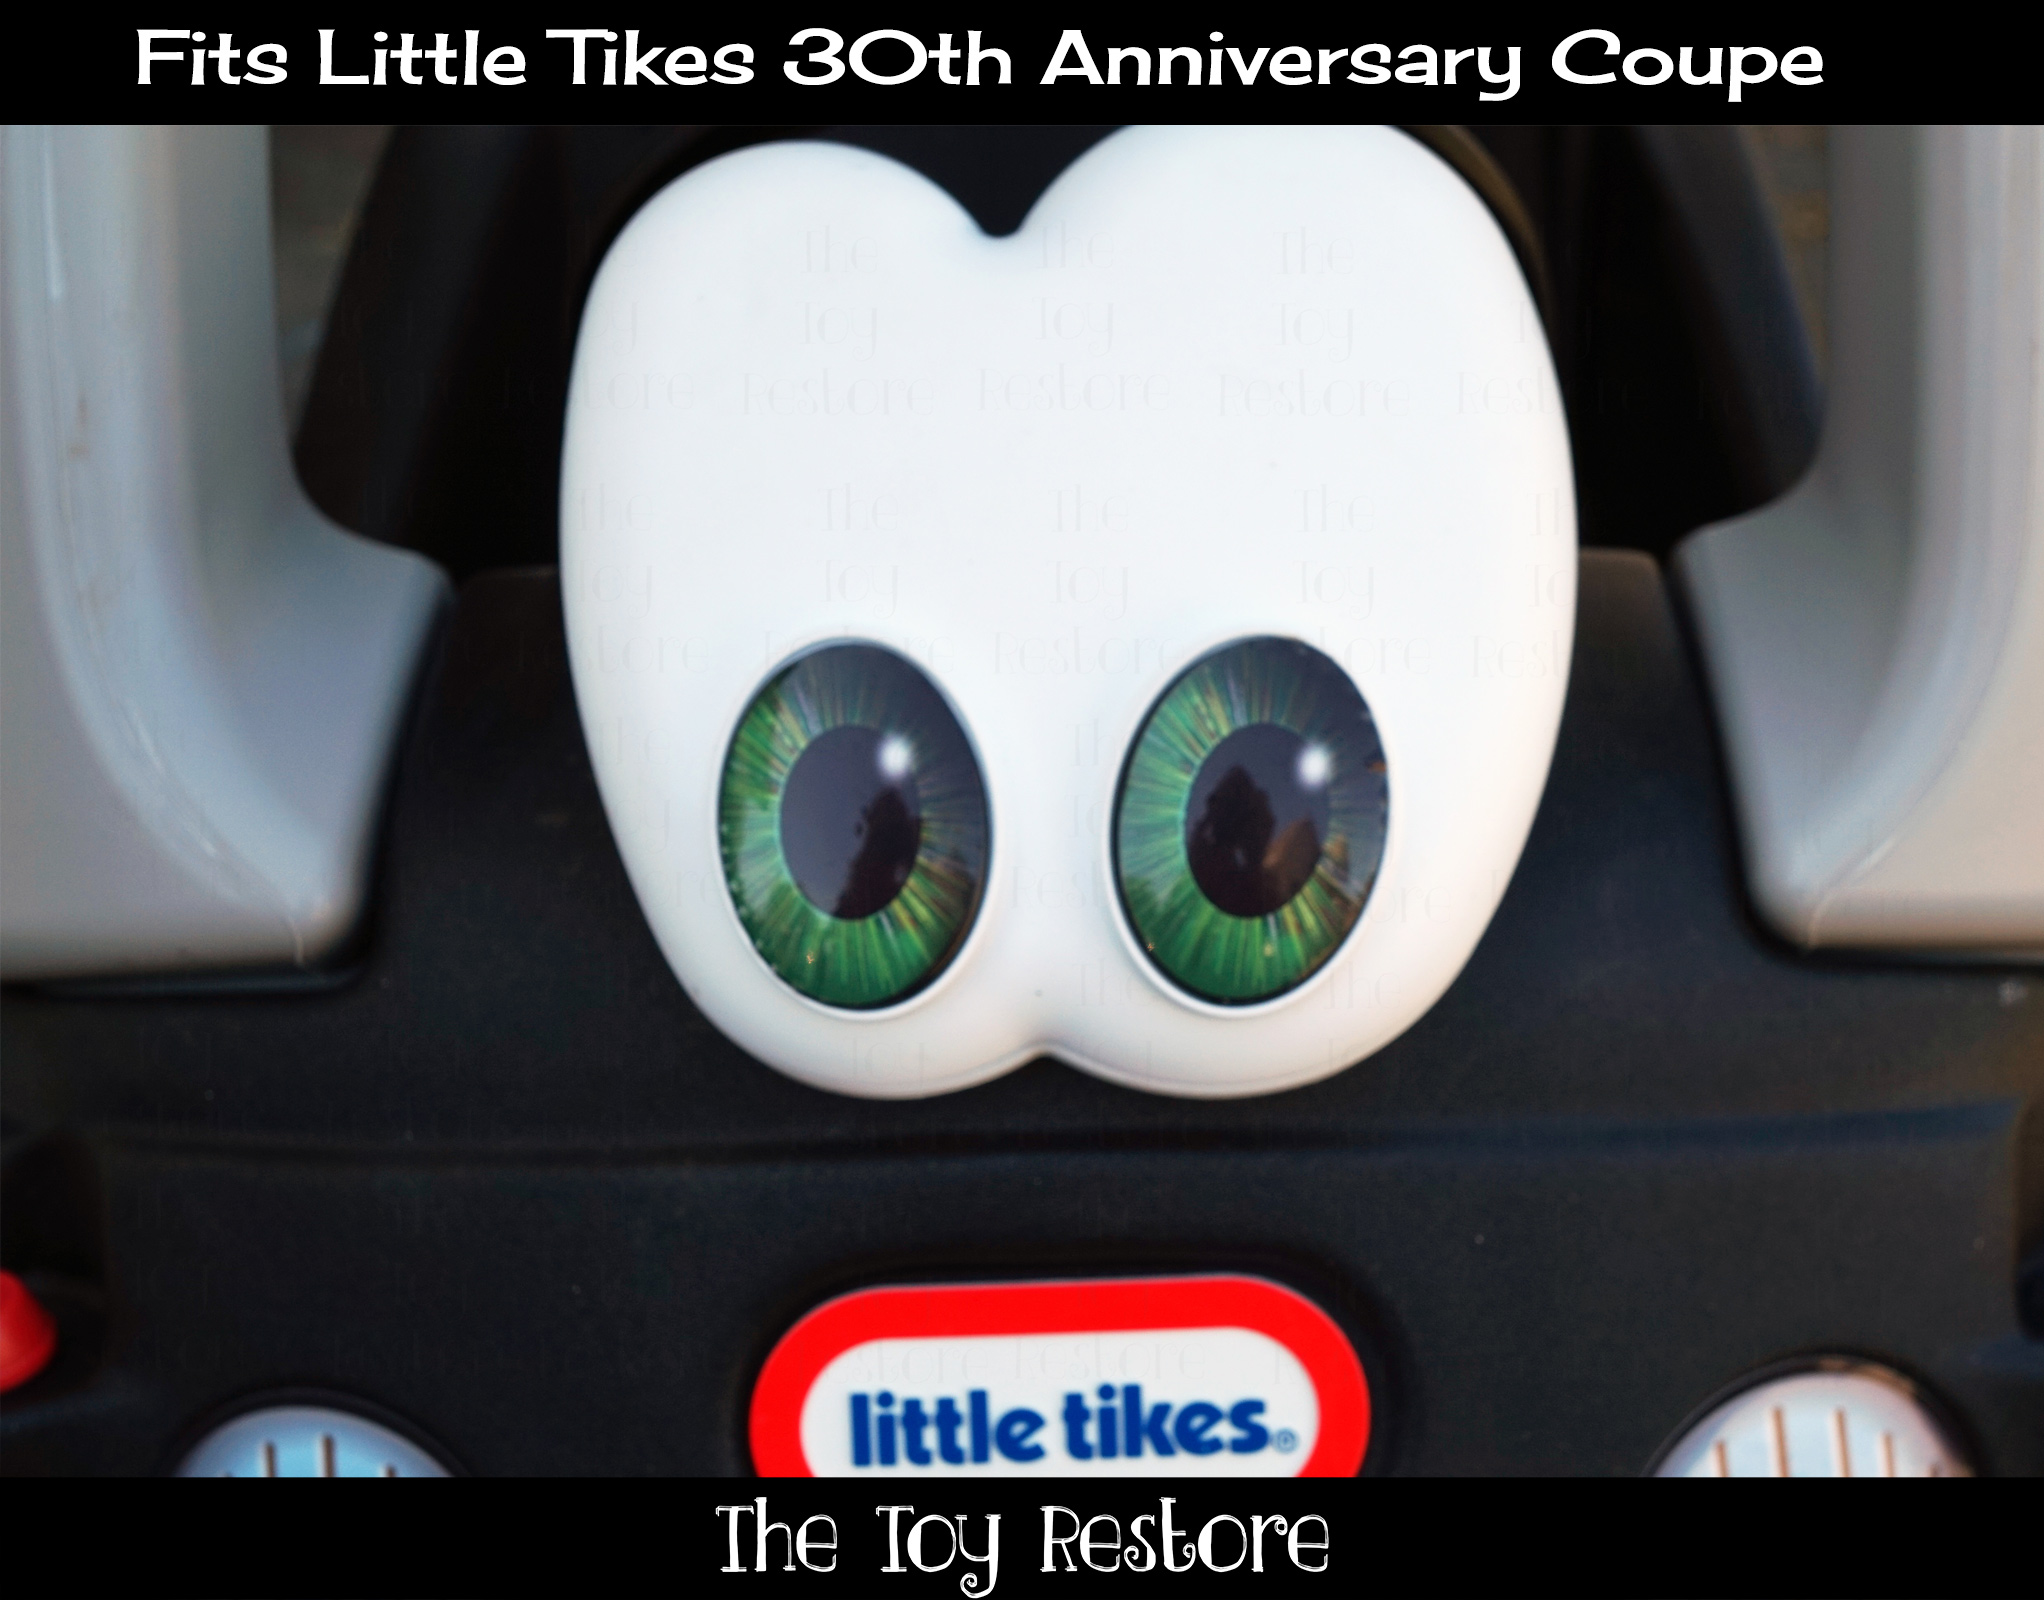
Customize Childs Little Tikes 30th Anniversary Coupe with Eye Color
Customize Childs Little Tikes 30th Anniversary Coupe with Eye Color
I came up with three designs, all of which can be changed in many ways. It is a fun way to personalize your child’s cozy coupe. All decals are 100% waterproof, UV proof for 4-5 years, and are machine cut for accuracy. I also stand behind all my decals. If you have any problems with them, within a year or two of purchase, I will gladly ensure you are happy with your purchase. I want to keep these awesome toys out of our landfills, so I want my decals to last.
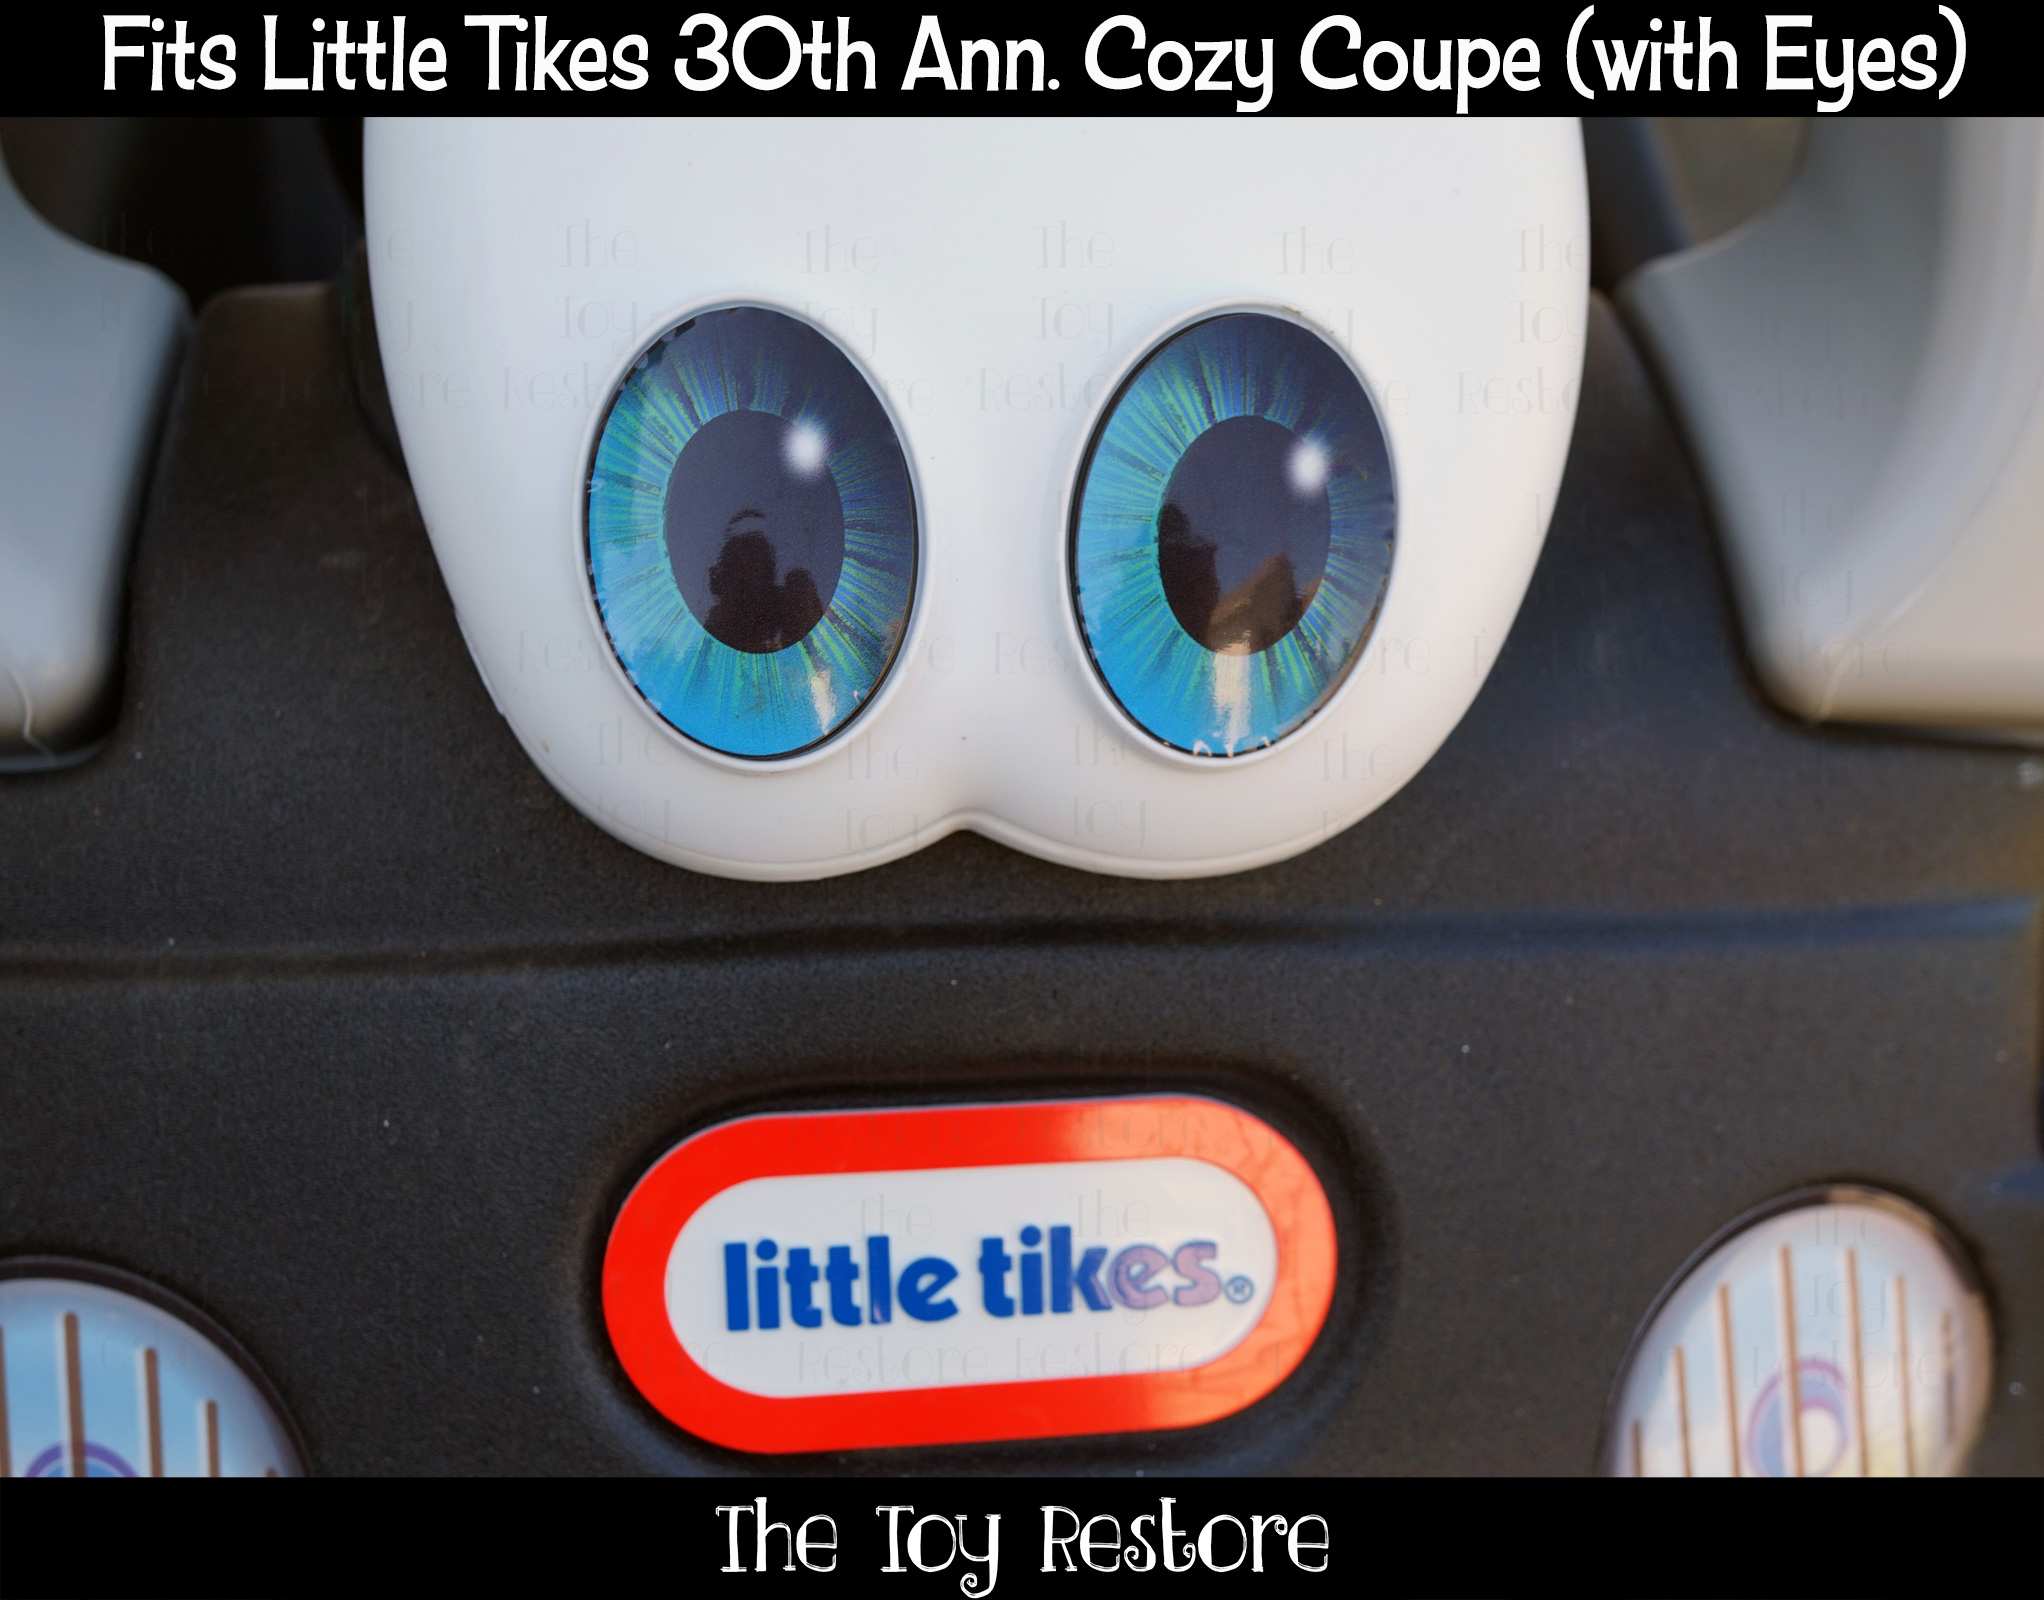
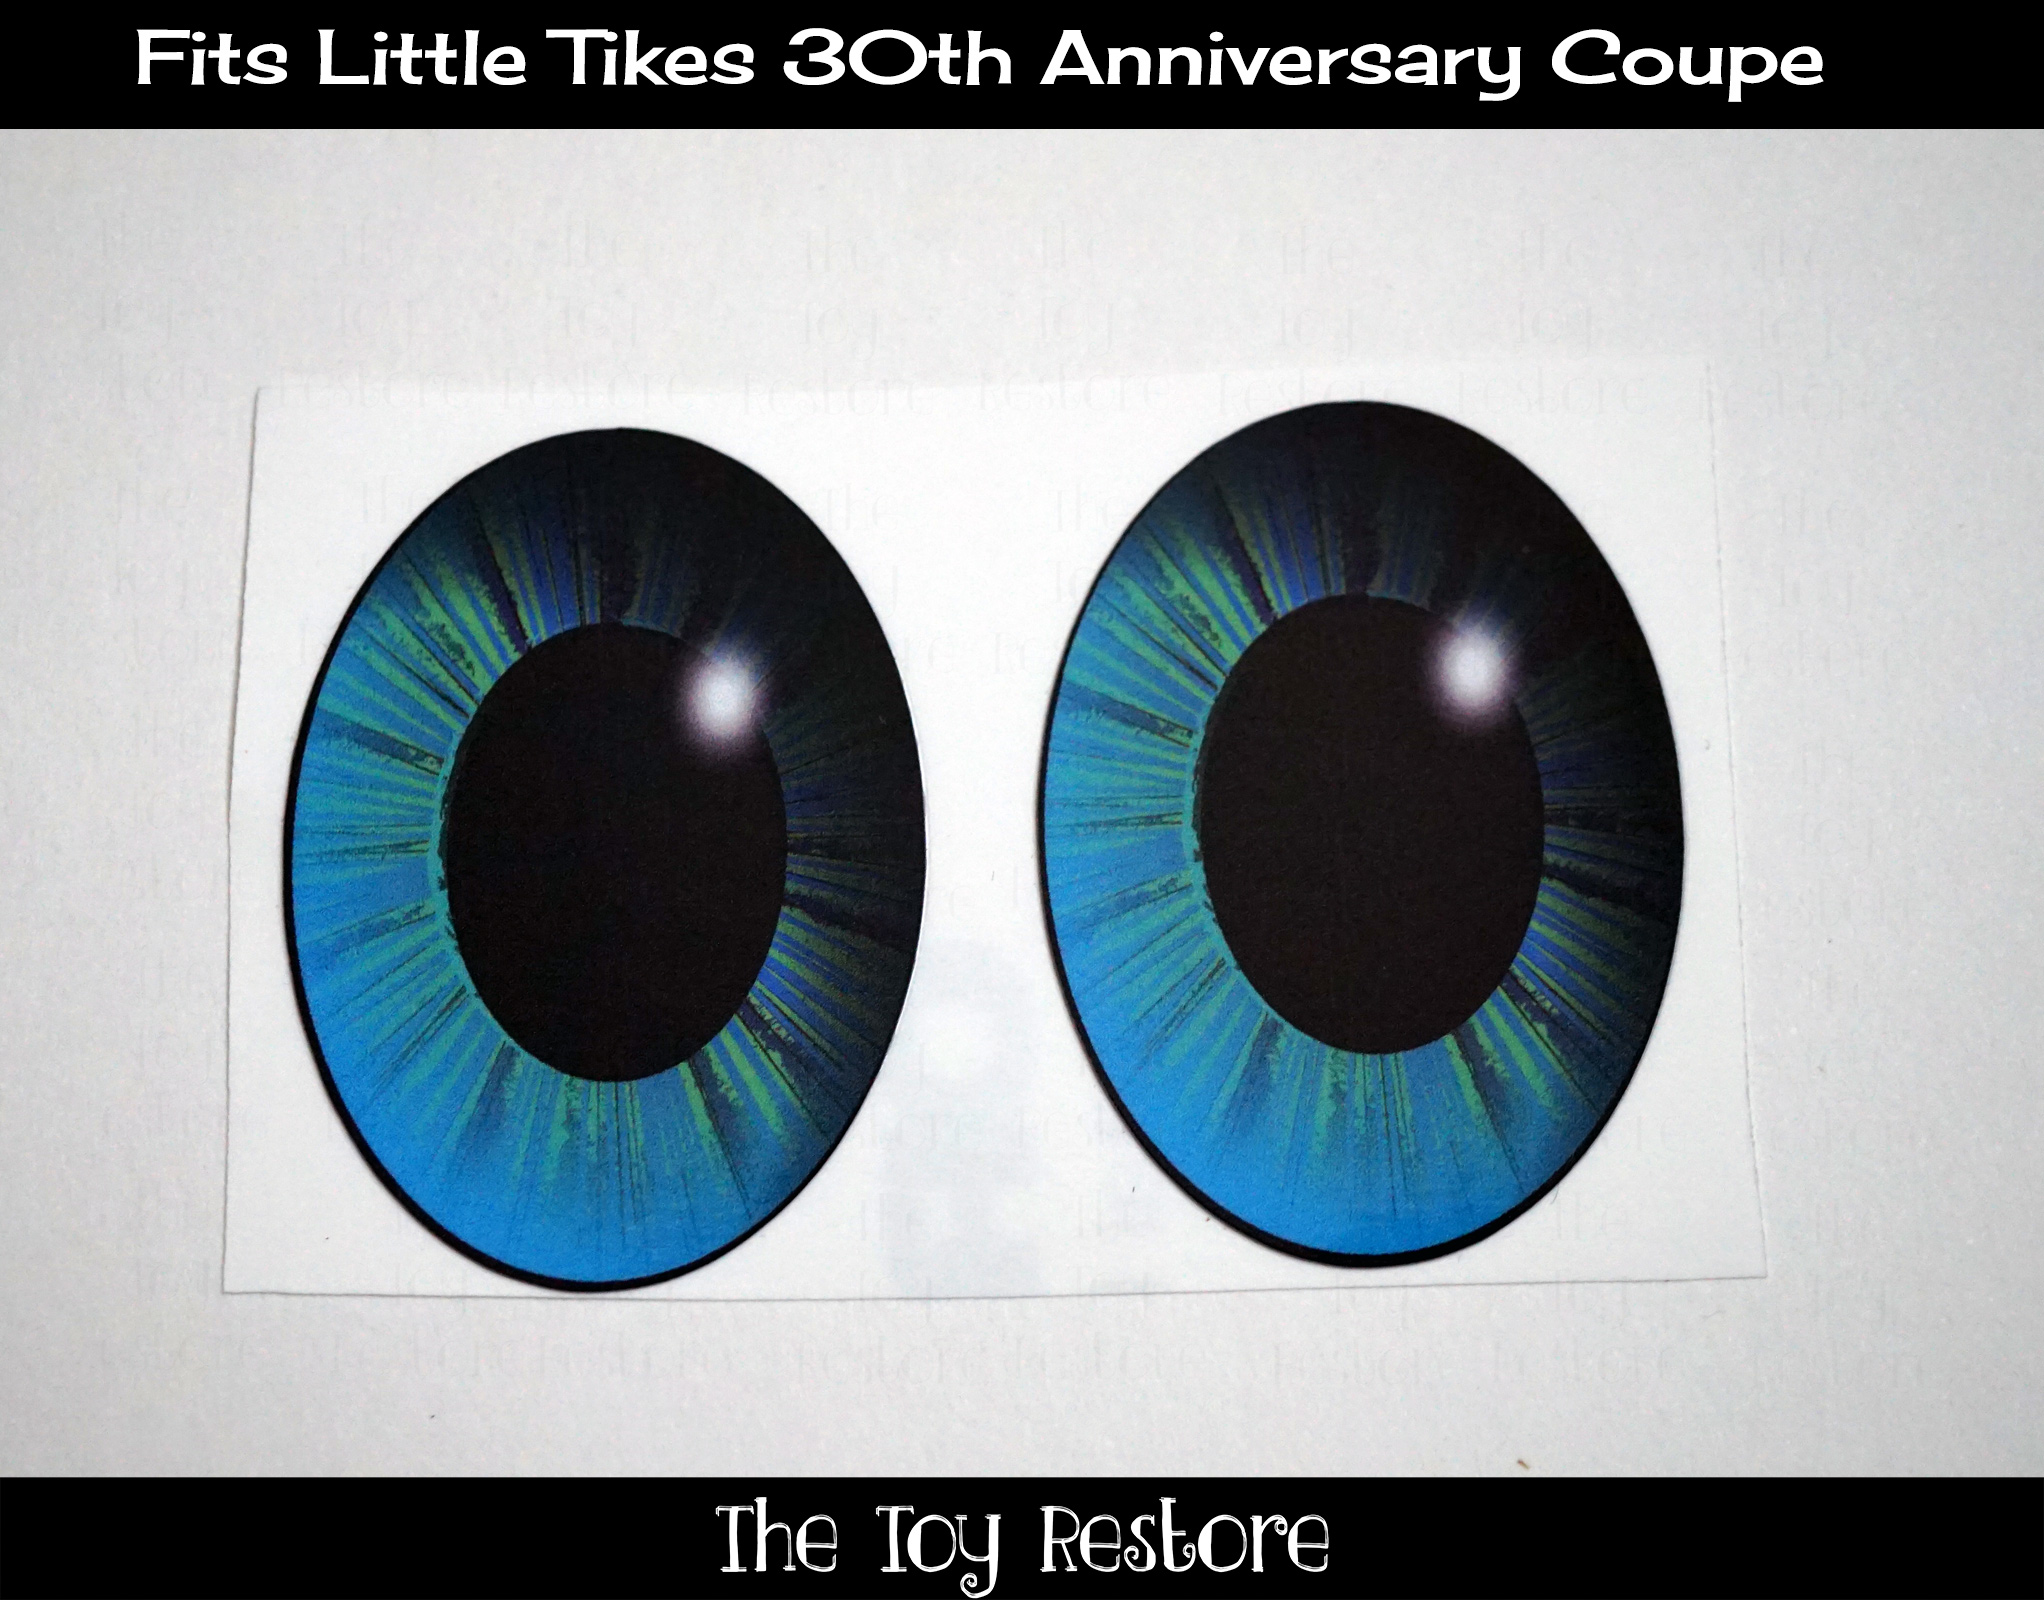
Customize Childs Little Tikes 30th Anniversary Coupe with Eye Color : Blue Eyes
Customize Childs Little Tikes 30th Anniversary Coupe with Eye Color Color
Here is my design for the blue eyes decal to be placed right over top of the pupil, on the molded plastic screw in eyes, which came factory with this model.
Customize Childs Little Tikes 30th Anniversary Coupe with Eye Colorblue
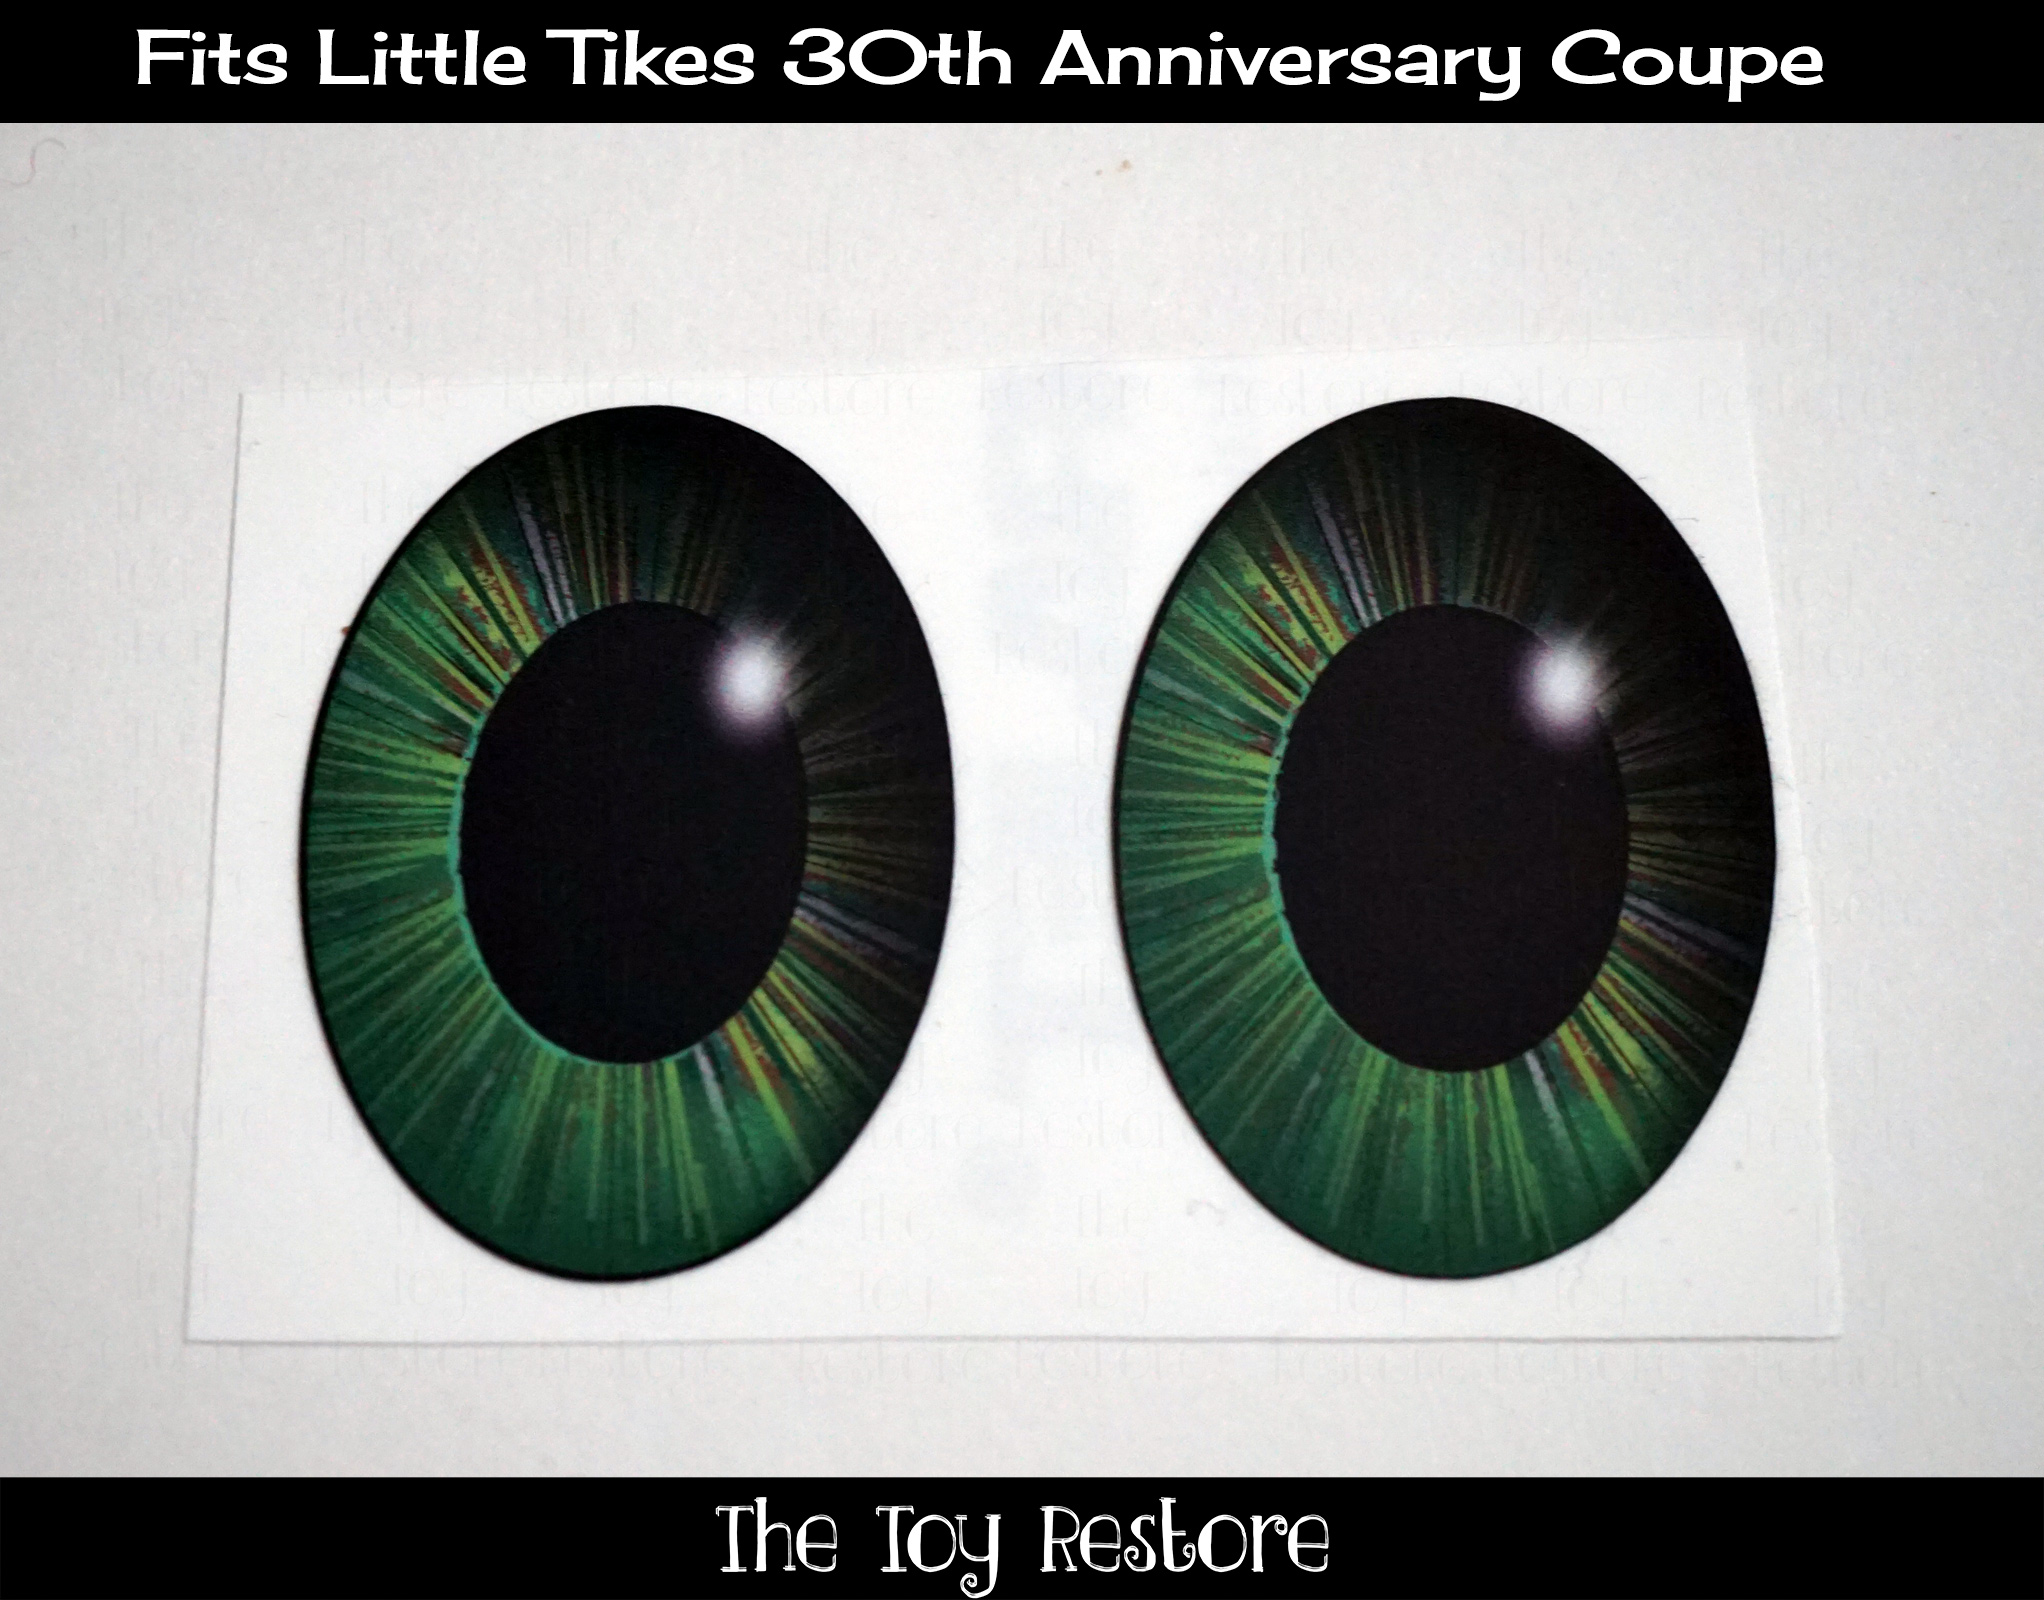
Customize Your Childs Little Tikes 30th Anniversary Coupe with Green Eyes
Customize Childs Little Tikes 30th Anniversary Coupe with Eye Color green
Here is my design for the Green eyes decal to be placed right over top of the pupil, on the molded plastic screw in eyes, which came factory with this model.
Customize Childs Little Tikes 30th Anniversary Coupe with Eye Color green
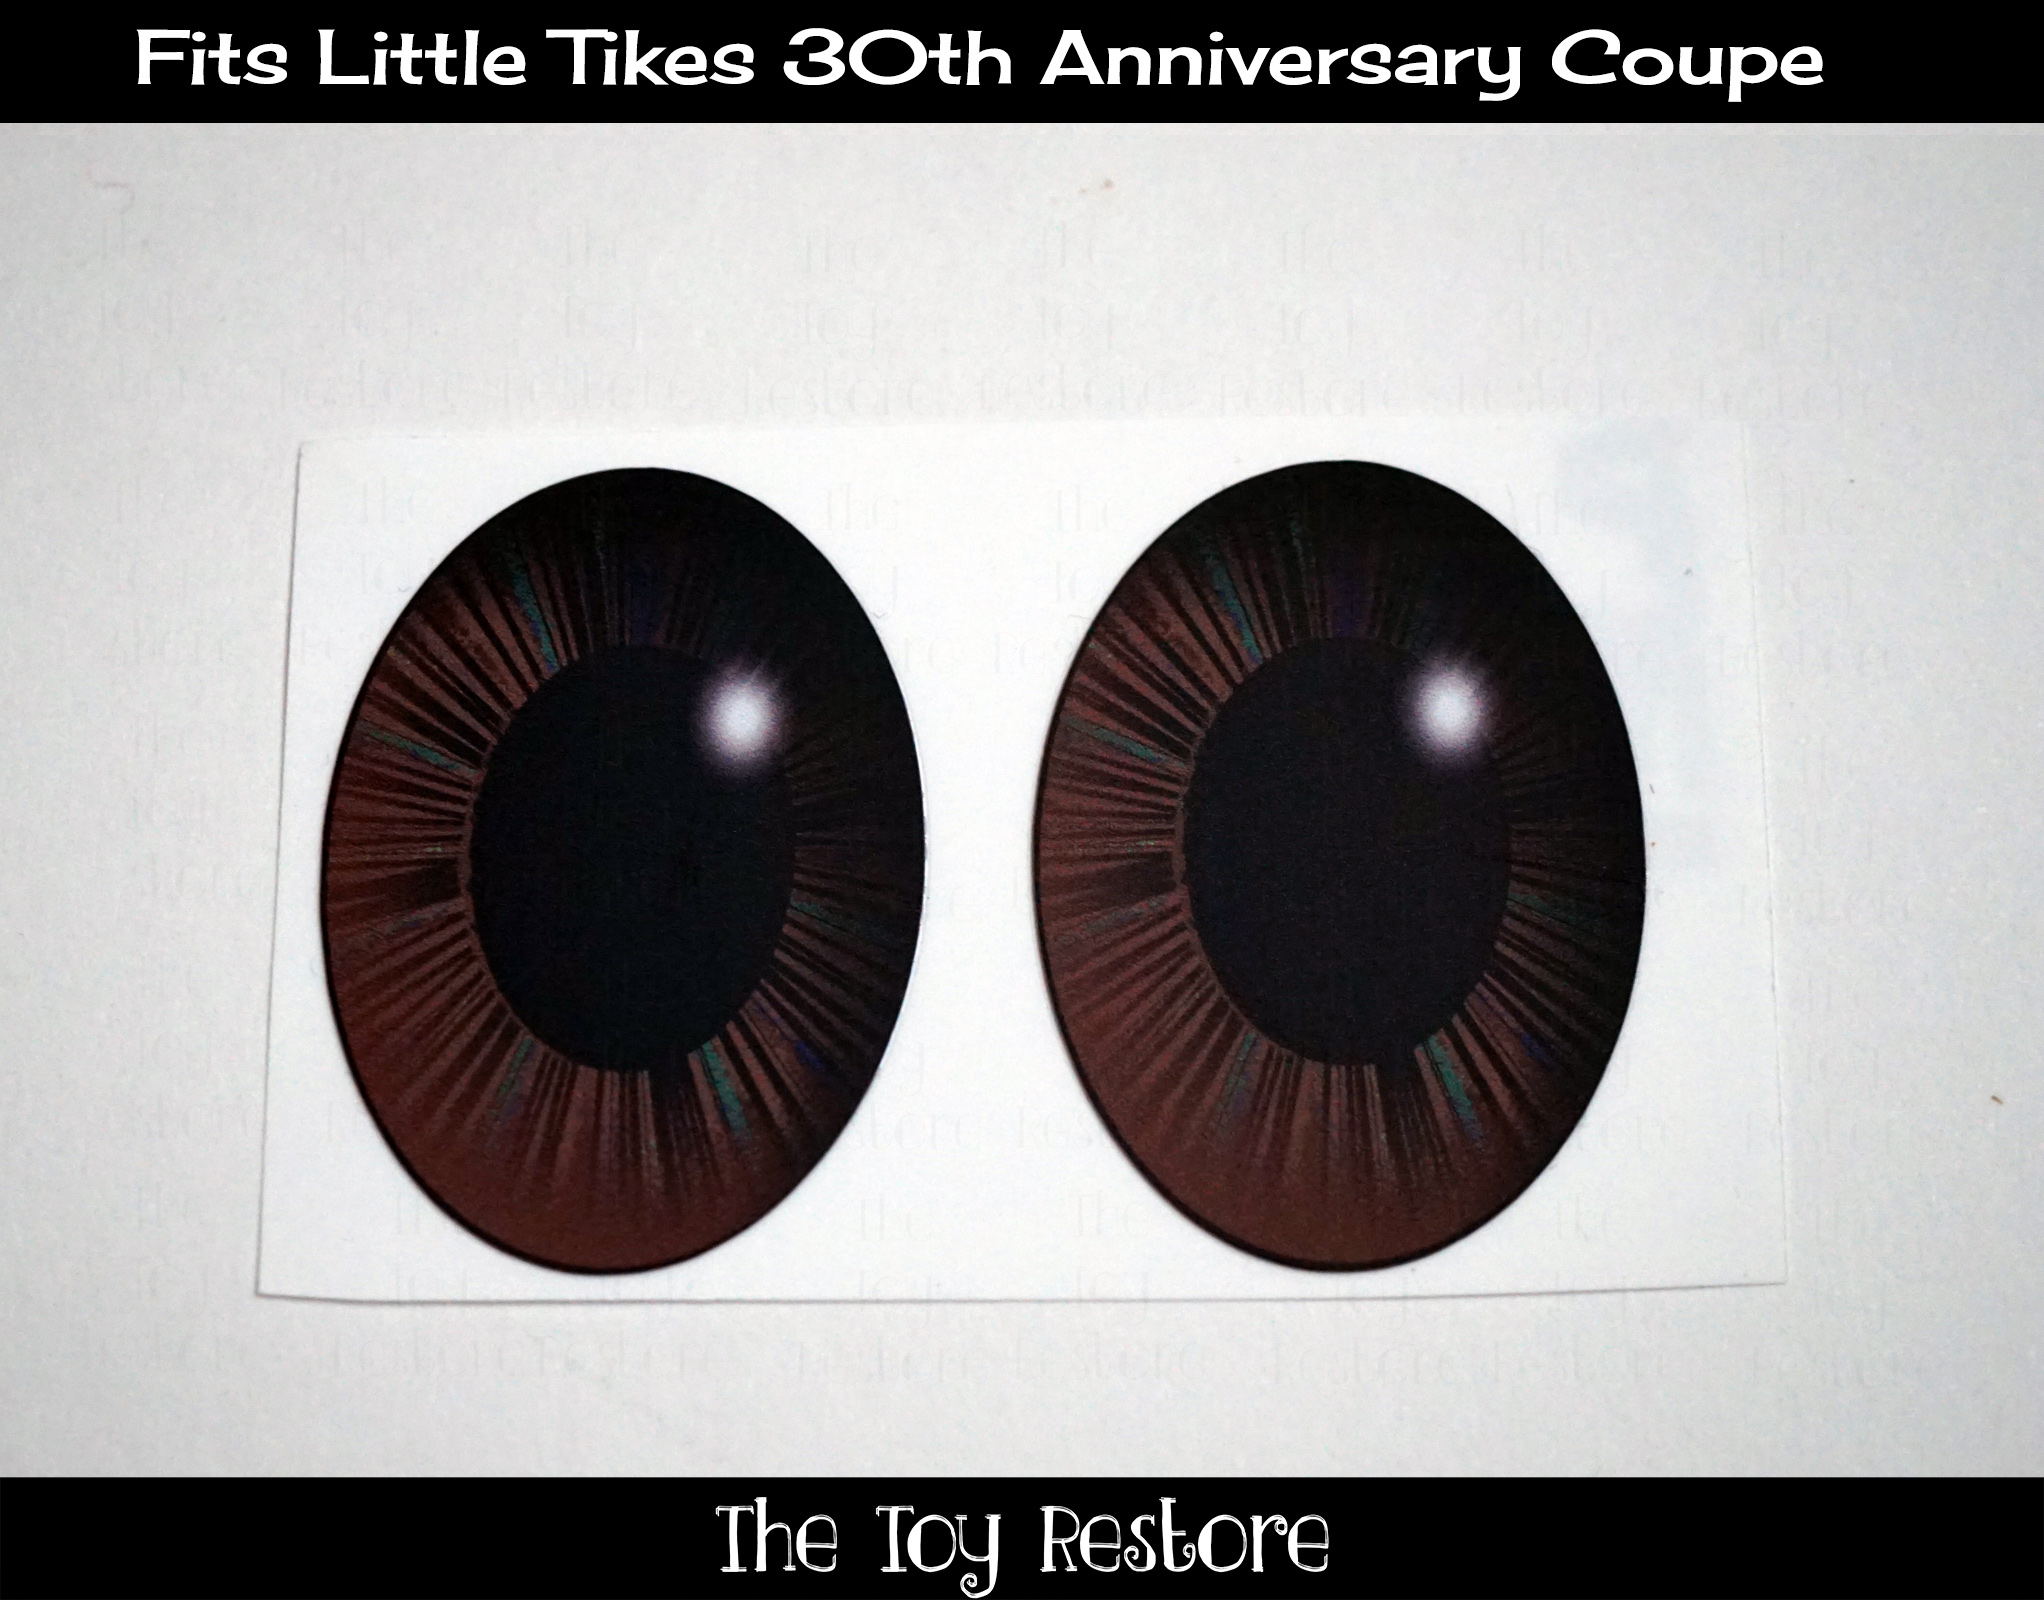
Customize Your Childs Little Tikes 30th Anniversary Coupe with Brown Eyes
Customize Childs Little Tikes 30th Anniversary Coupe with Eye Color brown
Here is my design for the brown eyes decal to be placed right over top of the pupil, on the molded plastic screw in eyes, which came factory with this model.
Customize Childs Little Tikes 30th Anniversary Coupe with Eye Color brown
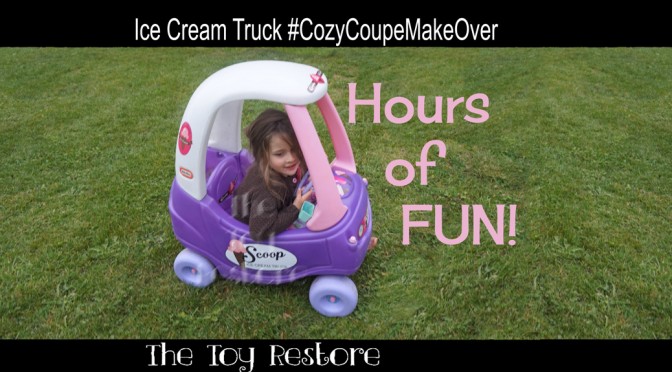
Upcycling: Ice Cream Truck Cozy Coupe Makeover. What kids doesn’t love icecream, and what kids doesn’t love the idea of driving thier own car! Put those two ideas together and you have the Icecream Cozy Coupe Truck. For this Cozy Coupe Redo I used a Princess model of the Cozy Coupe II, so I didn’t have to paint it.
Upcycling: Ice Cream Truck Cozy Coupe Makeover: Find a Second Hand Coupe
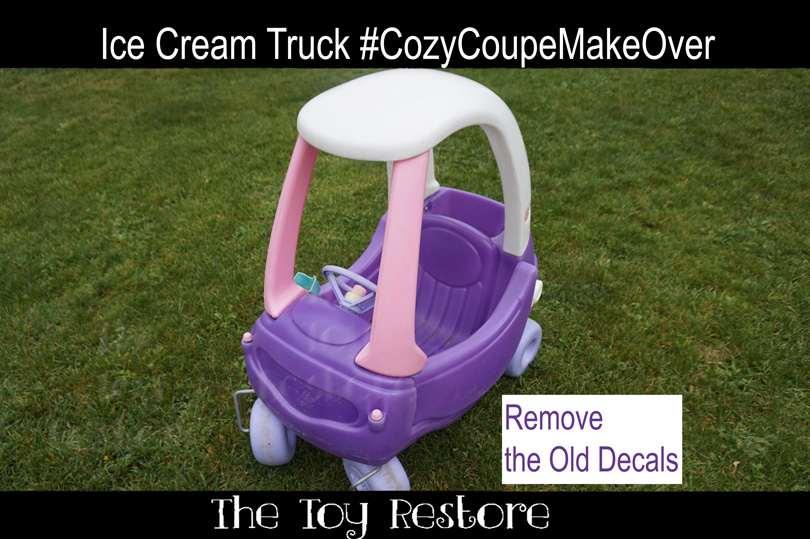
An Icecream Truck Cozy Coupe Makeover: Remove the Old Decal, and Throughly Wash it.
An Icecream Truck Cozy Coupe Makeover: Remove the Old Decal, and Throughly Wash it.
Removing the old decals is a bit of work, but well worth the effort. I have a more detailed instructions on removing decals here. Once the old ones are going you can do so much to change the car. You can repaint it, or add new decals. I sell new decals for most of the Little Tikes foot to floor cars on Ebay, and Etsy. For this particular Cozy Coupe Makeover, I used my set here. But I have lots of other styles that would look nice on this cozy coupe without having to repaint it.
Upcycling: Ice Cream Truck Cozy Coupe Makeover : Apply the New Decals
Upcycling: Ice Cream Truck Cozy Coupe Makeover : Apply the New Decals
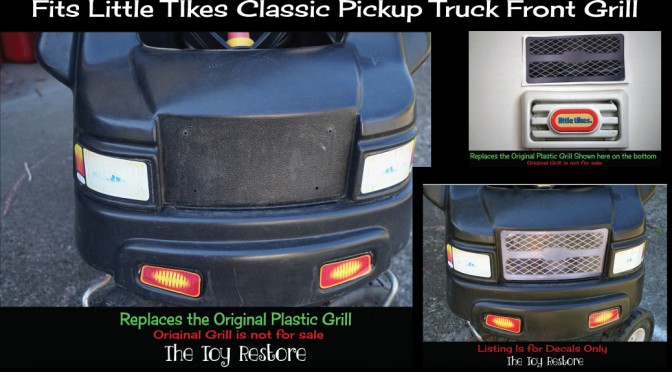
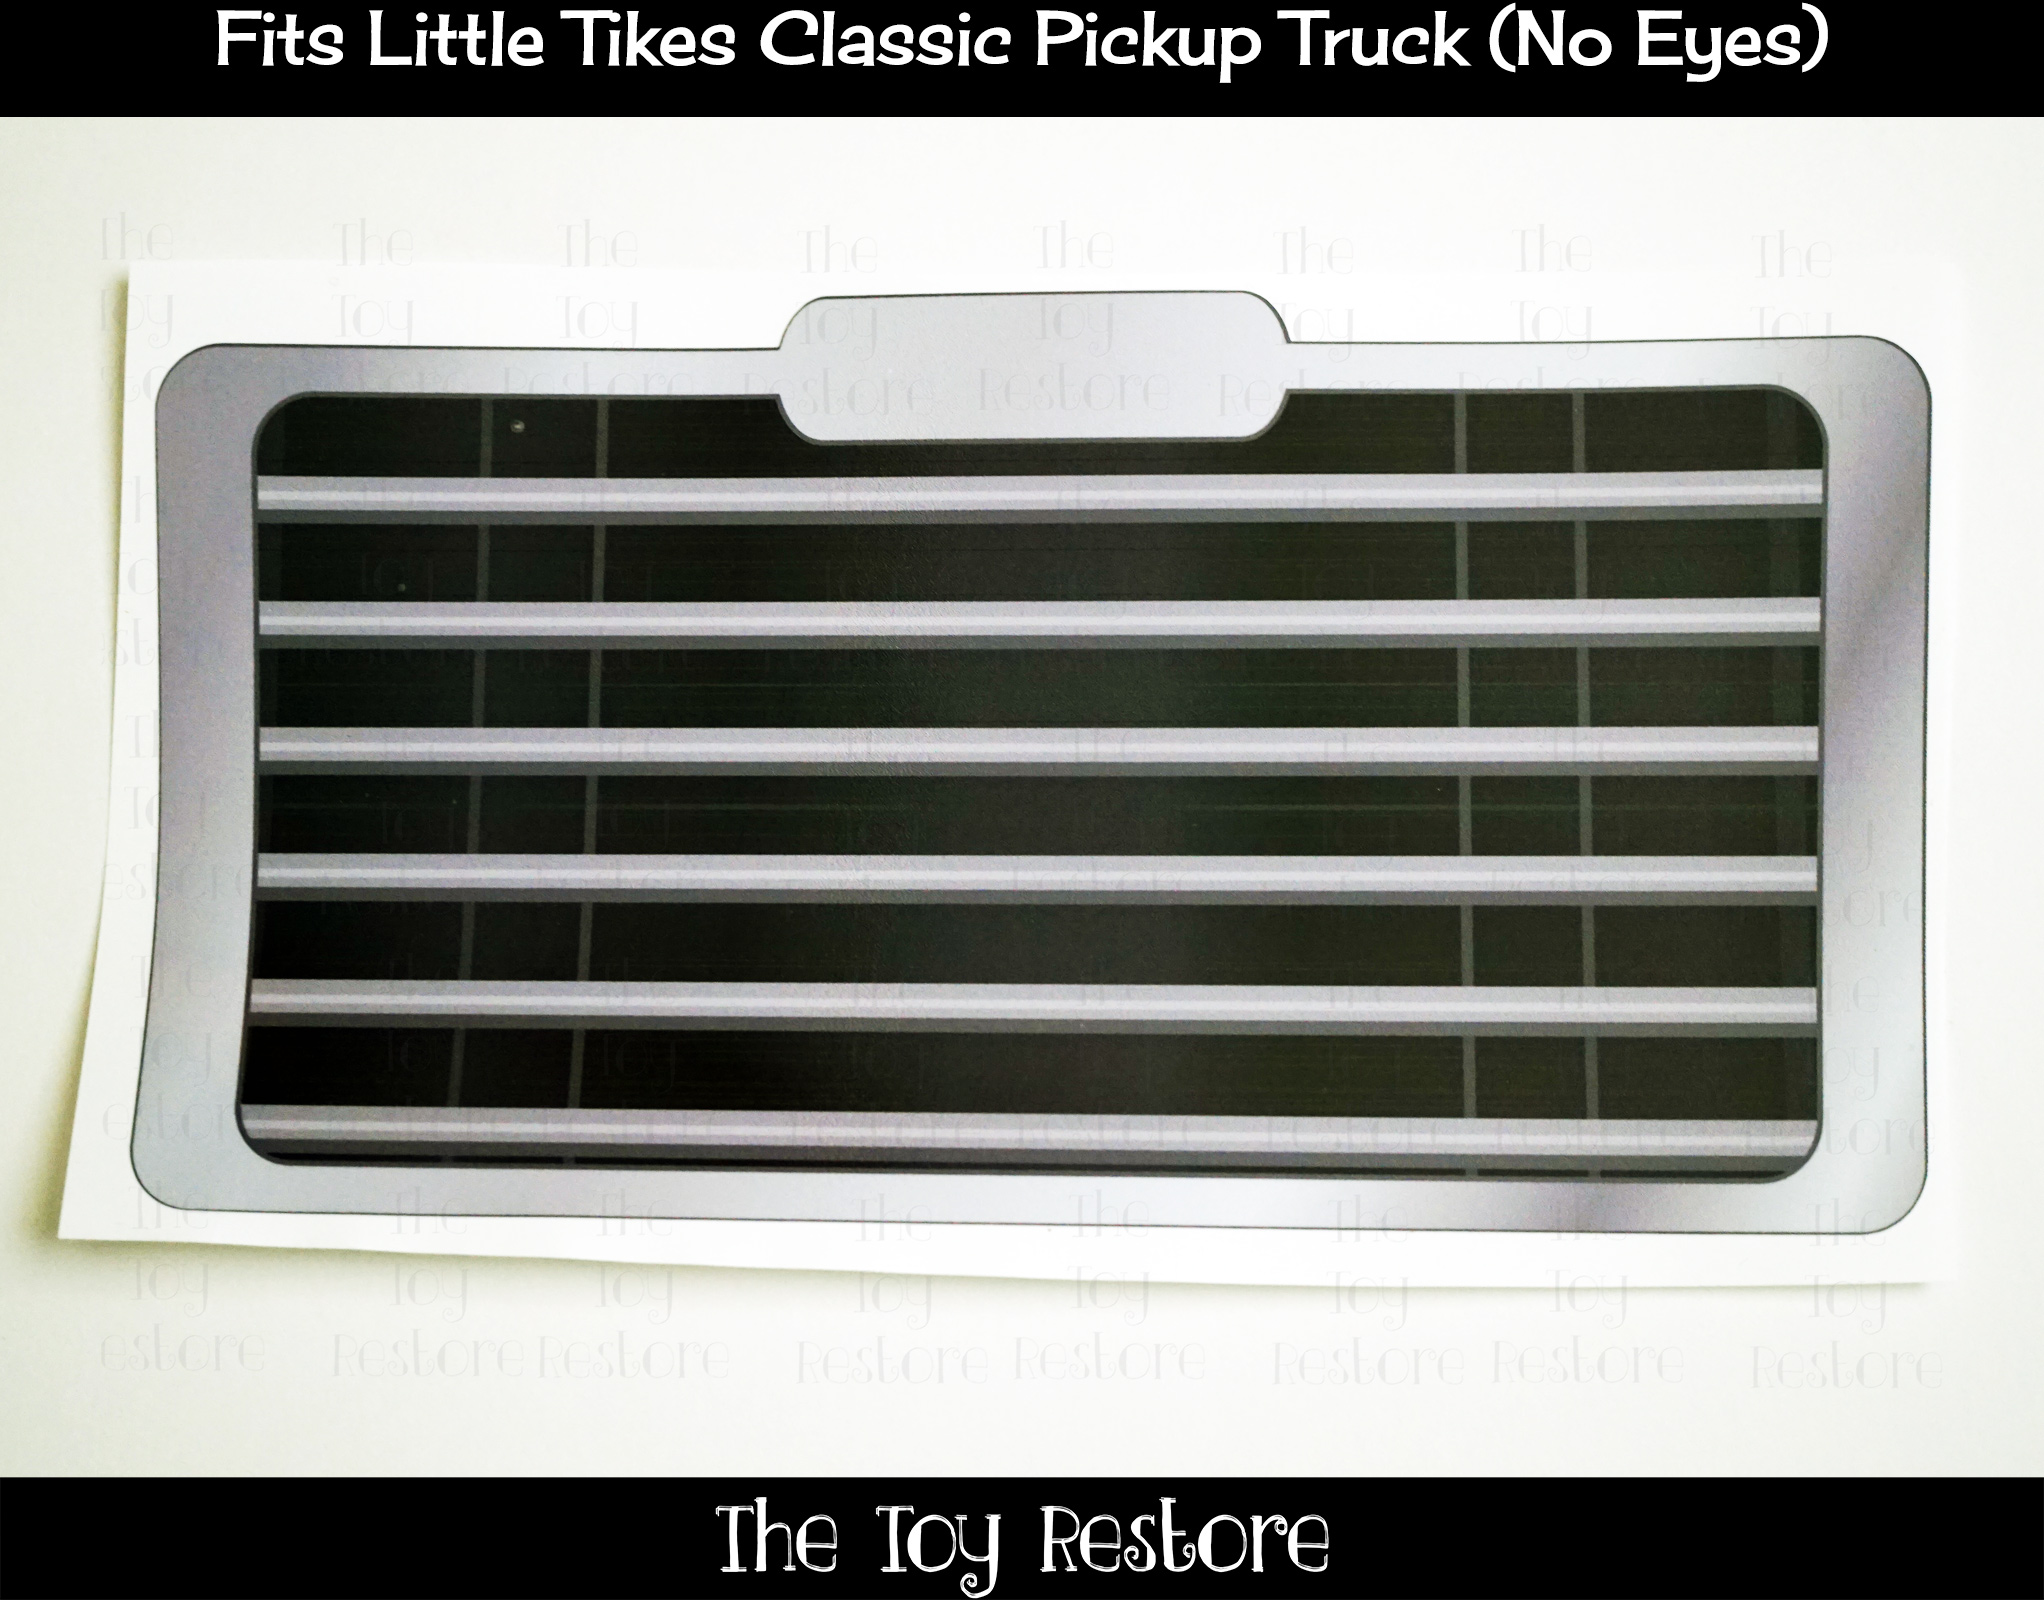
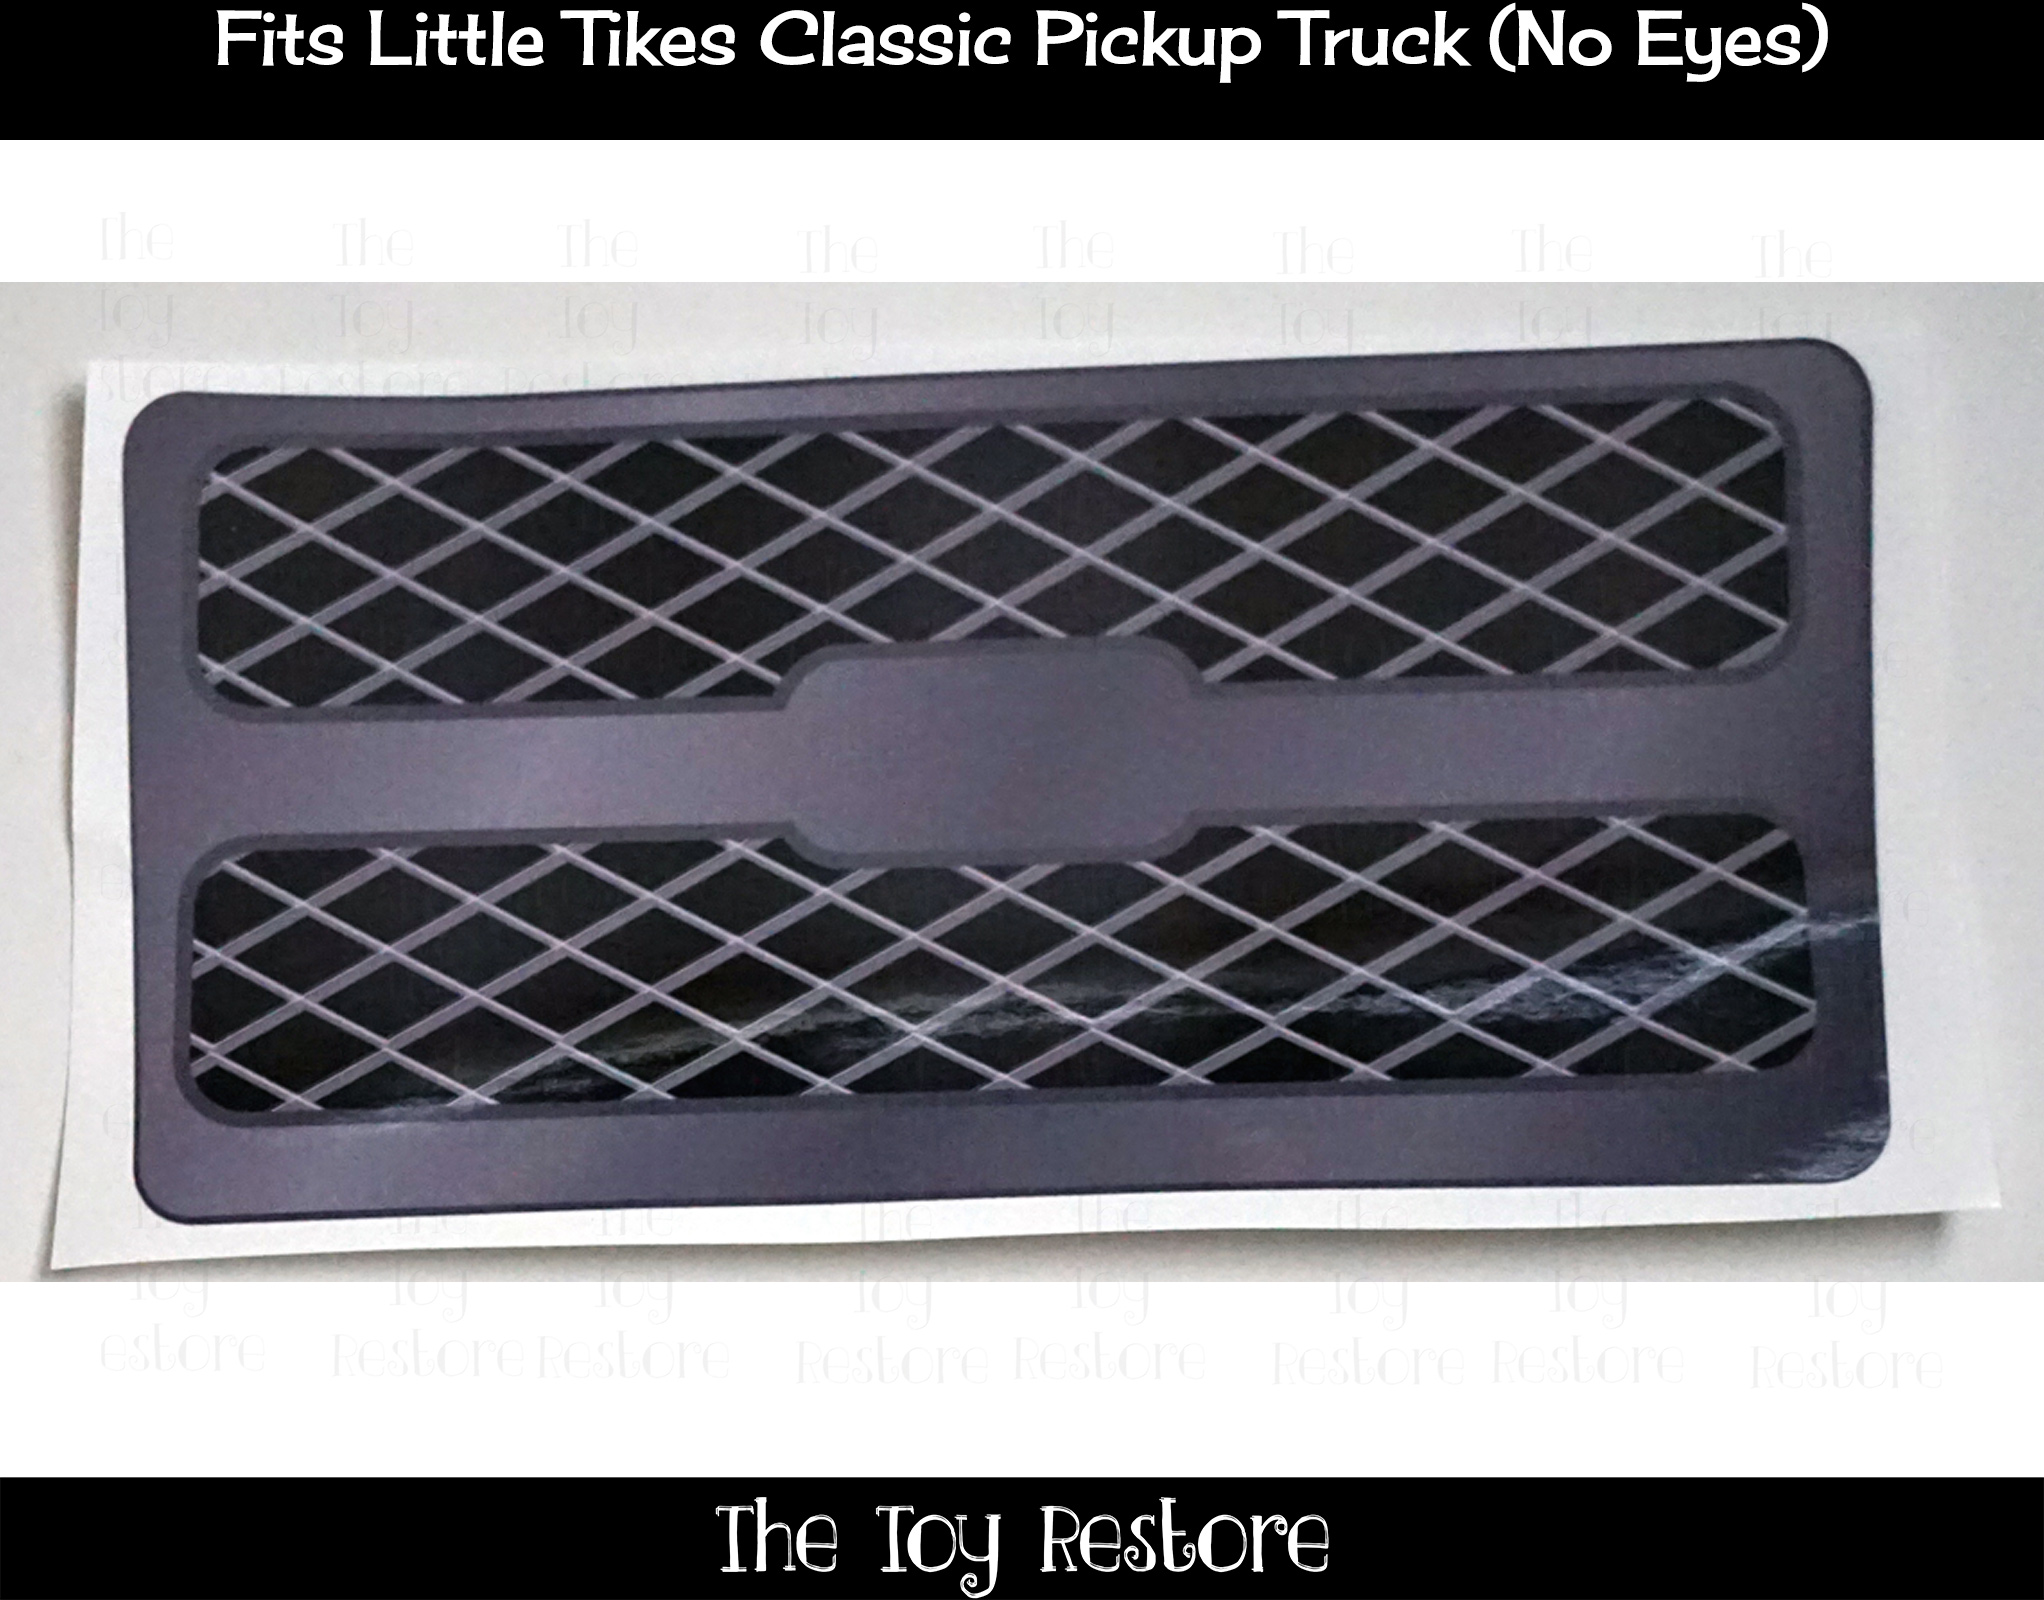
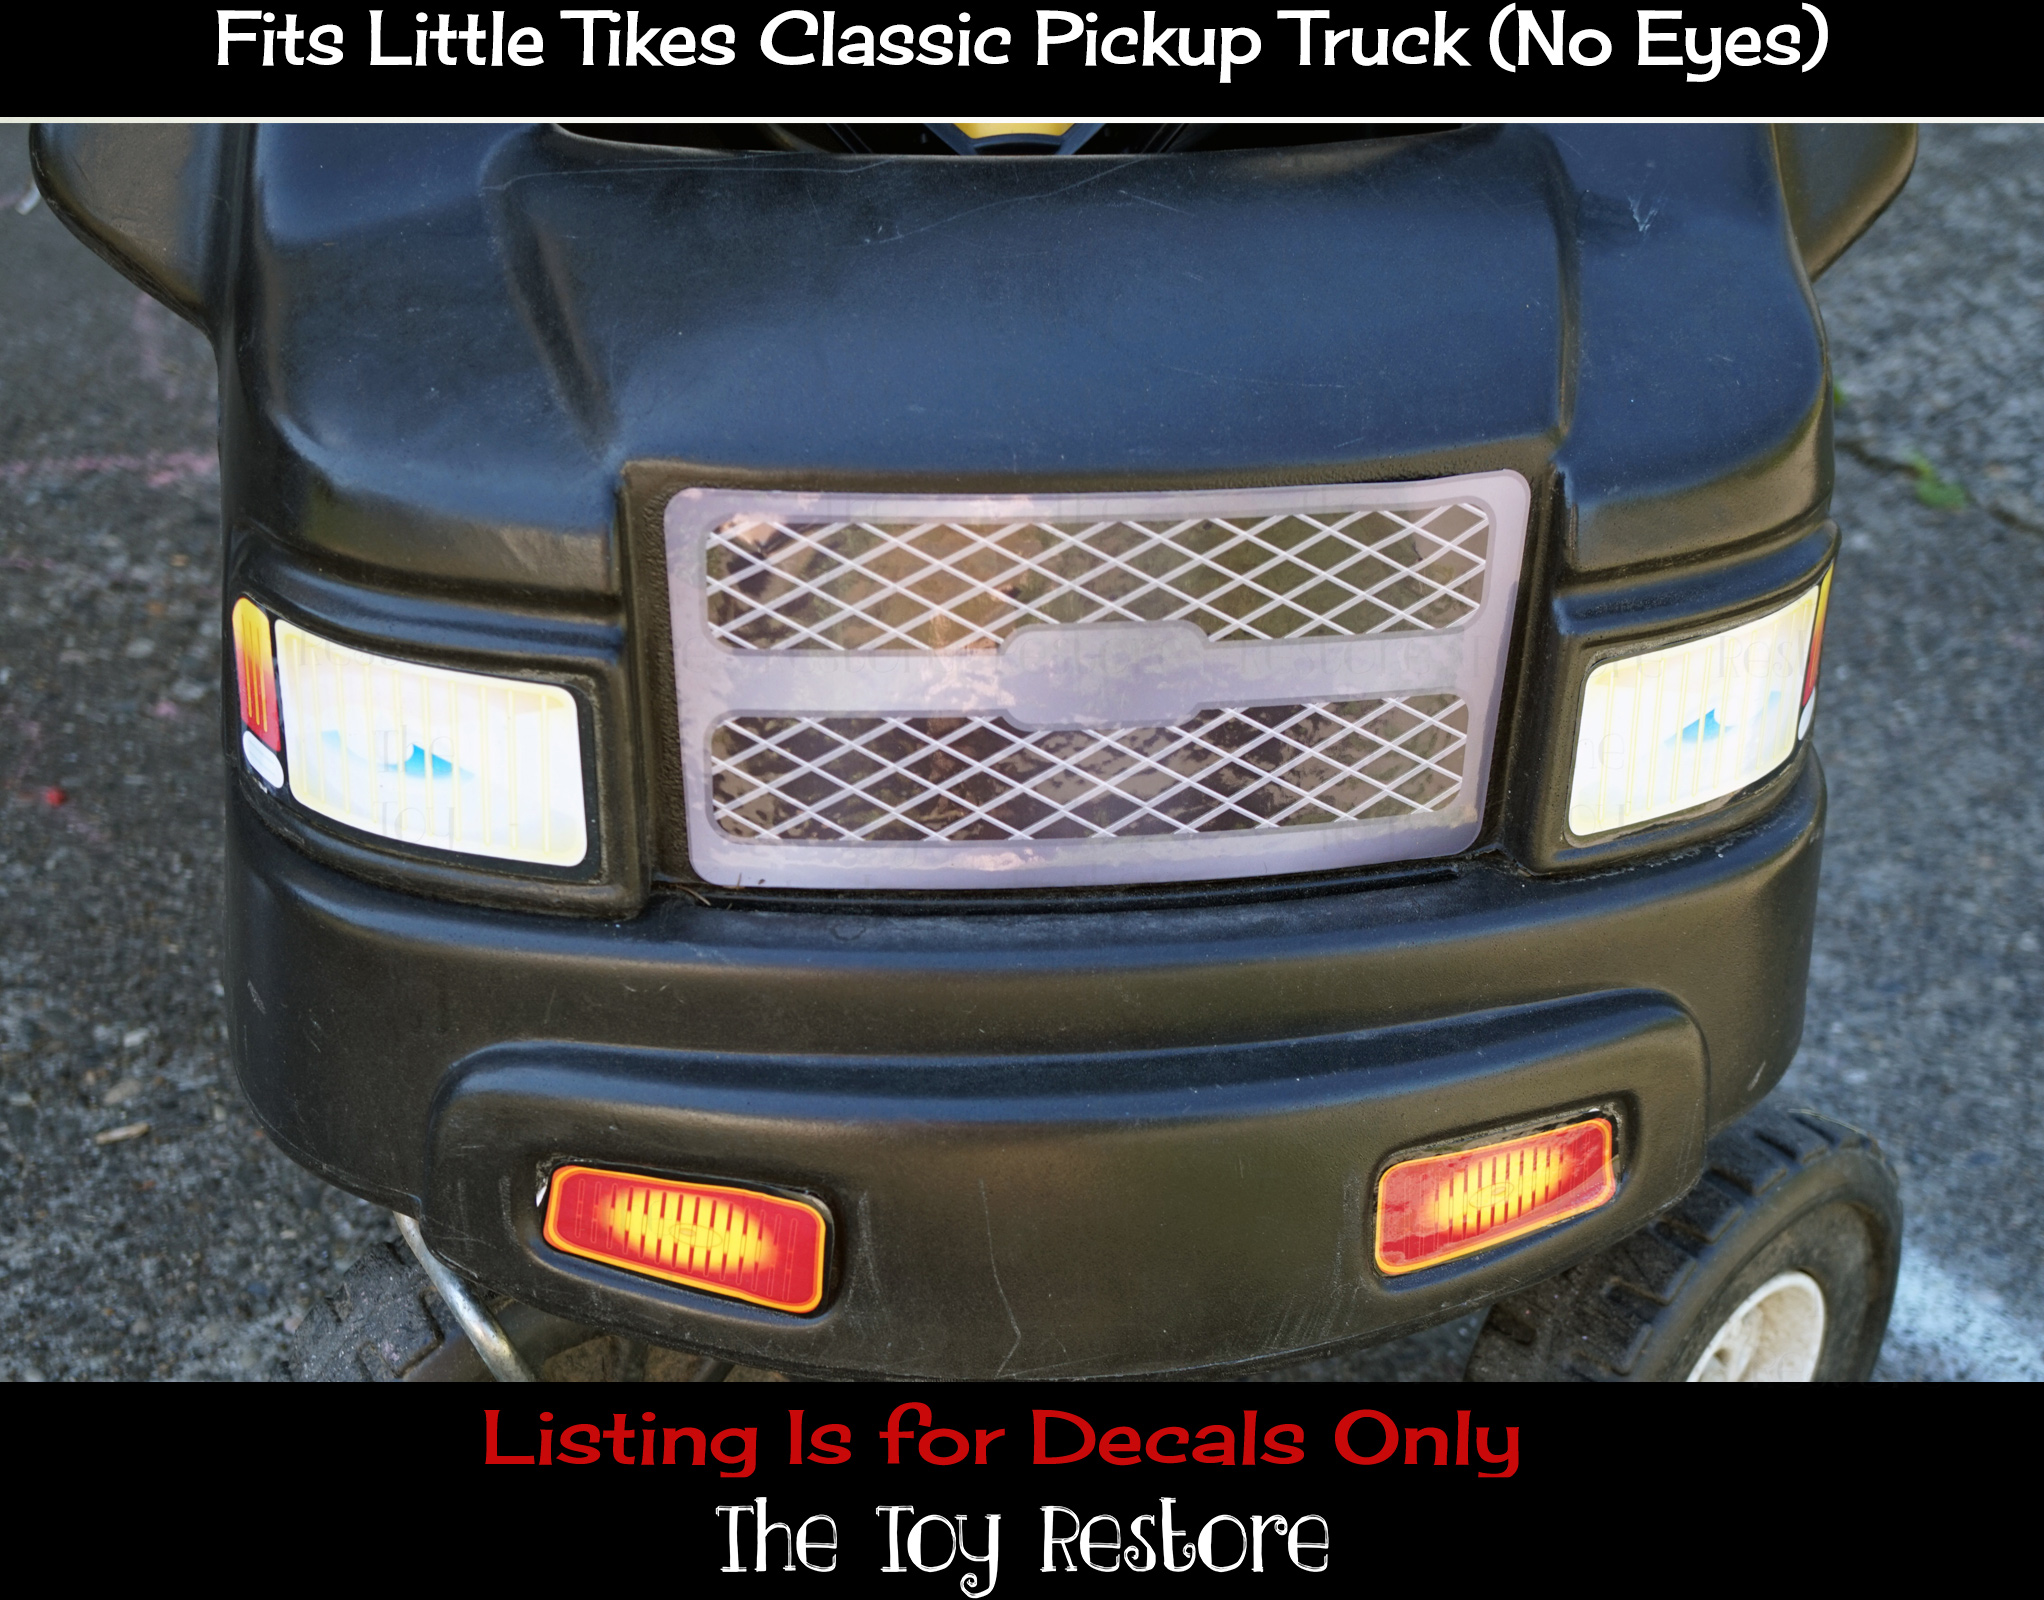
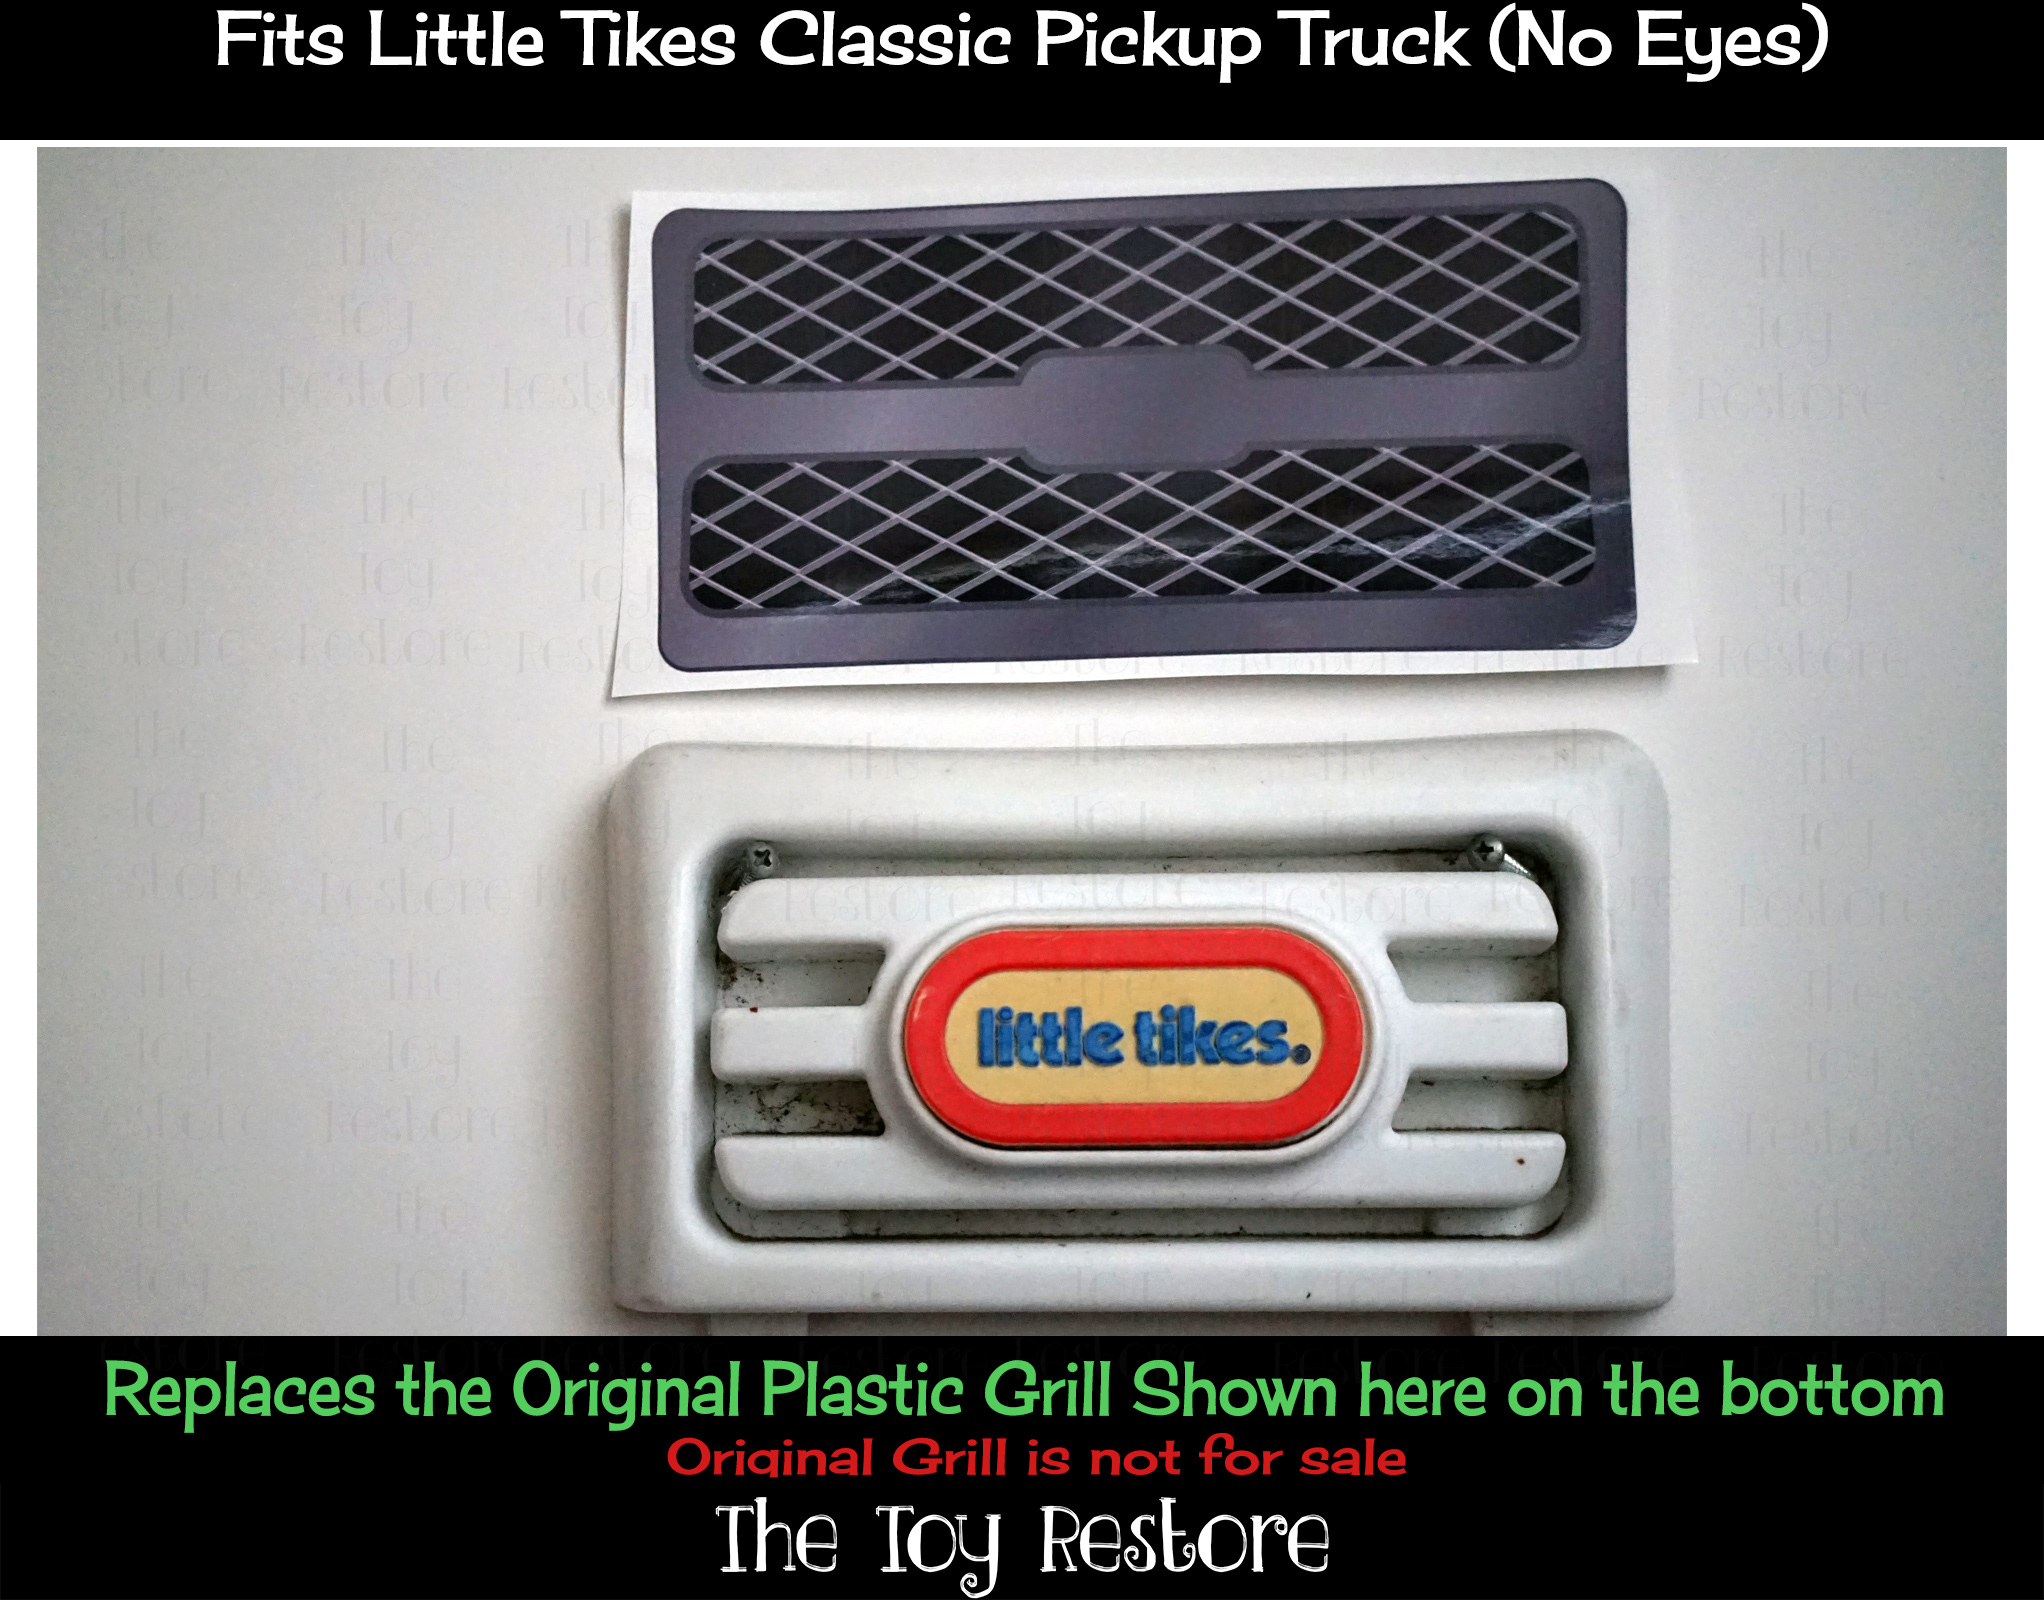
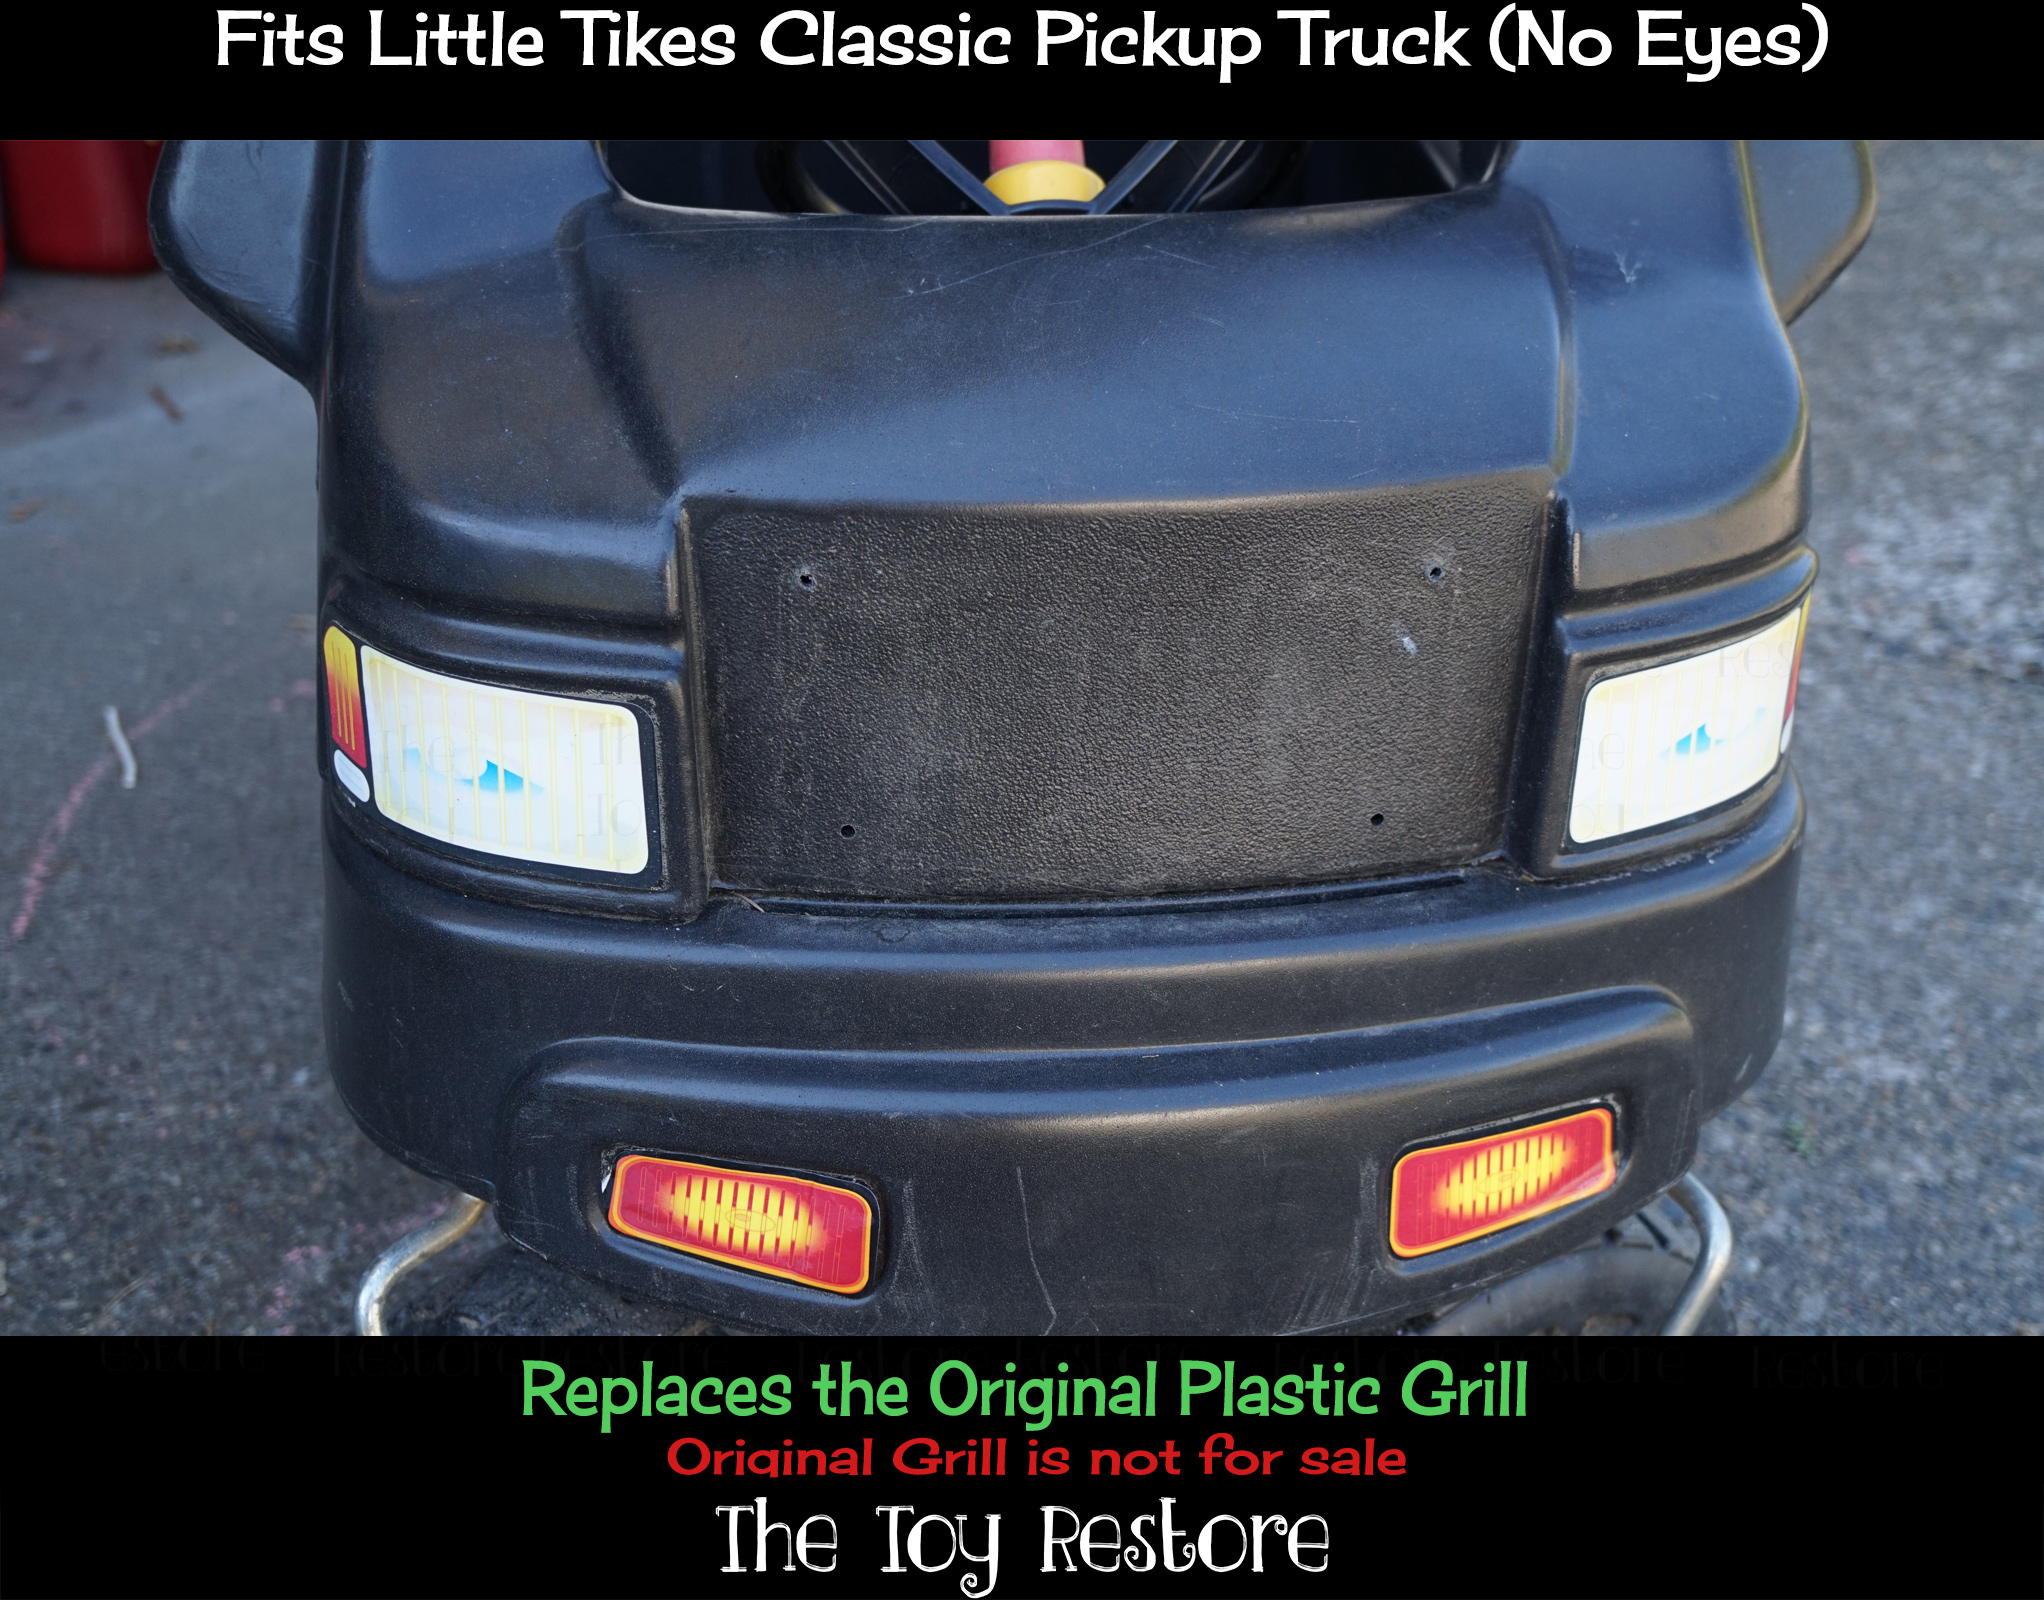
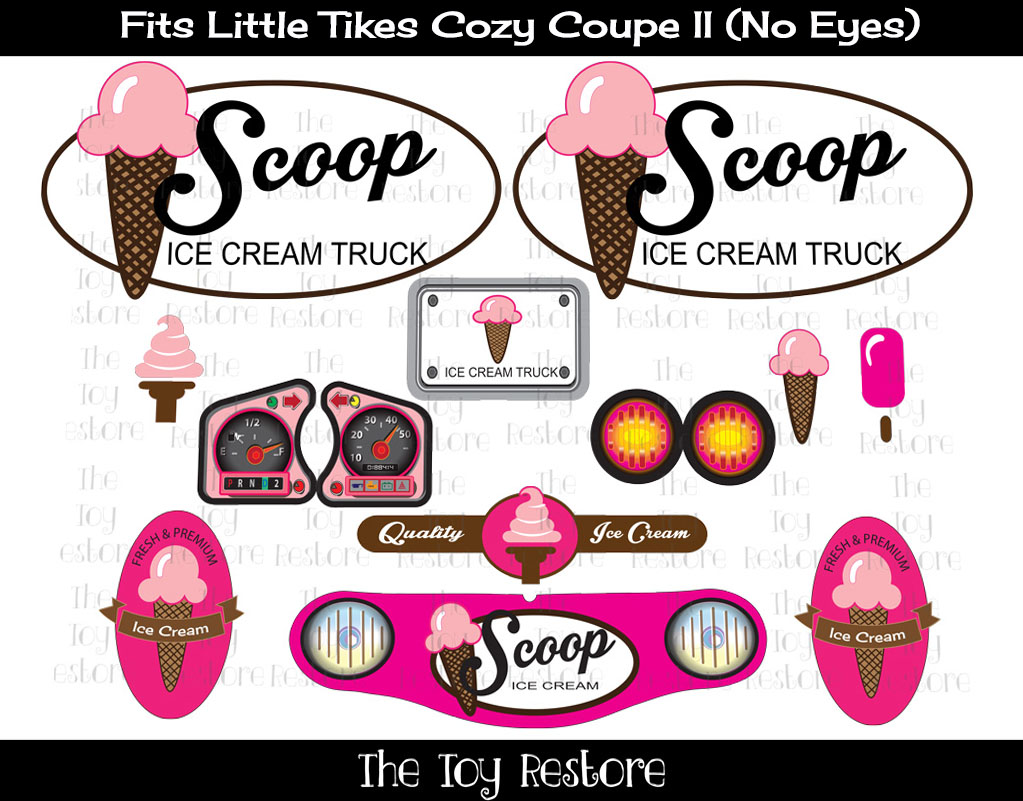
My kits contain everything that you need to make your coupe look like an ice cream truck. The front grill, the license plate, the dash, mirror, tail lights, door logos, front logo, and 2 logos for the back pillars, and some extra ice cream decals.
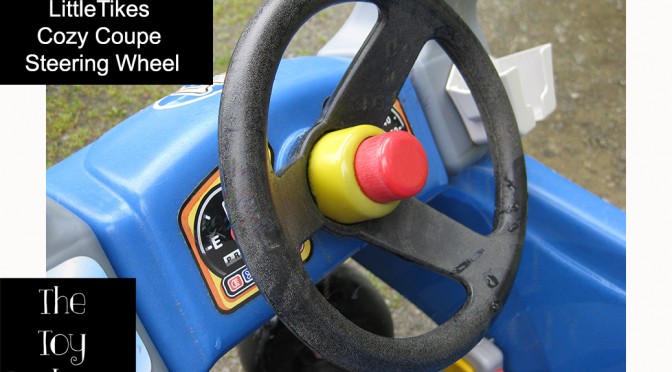
Little Tikes Cozy Coupe Steering Wheel Replacement
How to Fix Little Tikes Cozy Coupe Steering Wheel
Here is a quick overview of how to replace a steering wheel on the Little Tikes Cozy Coupes. For the purposes of this post, I am using a 1990s Little Tikes Cozy Coupe. I will add measurements in the future to be sure that this can be used for other car replacments.
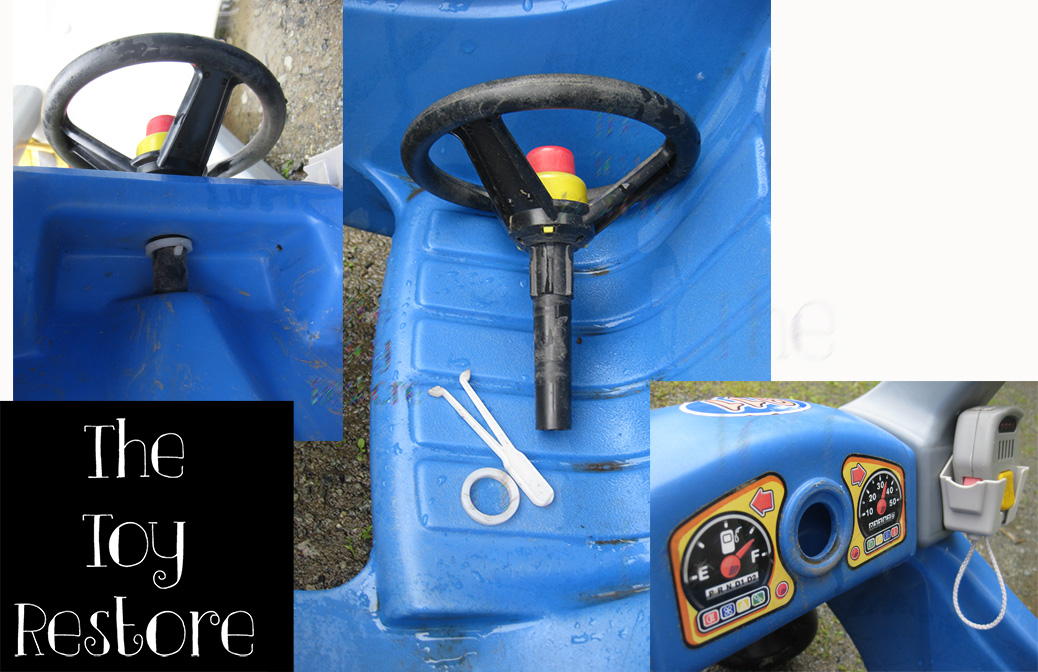
Little Tikes Cozy Coupe Steering Wheel Replacement 2
The basic set-up is simple. There is the steering wheel, a washer, and a steering wheel clip. All your car needs is the right size of hole, both in diameter, and in depth. I am pretty sure you could modify the replacement parts to fit different dimensions though. That will have to wait for another post. 🙂
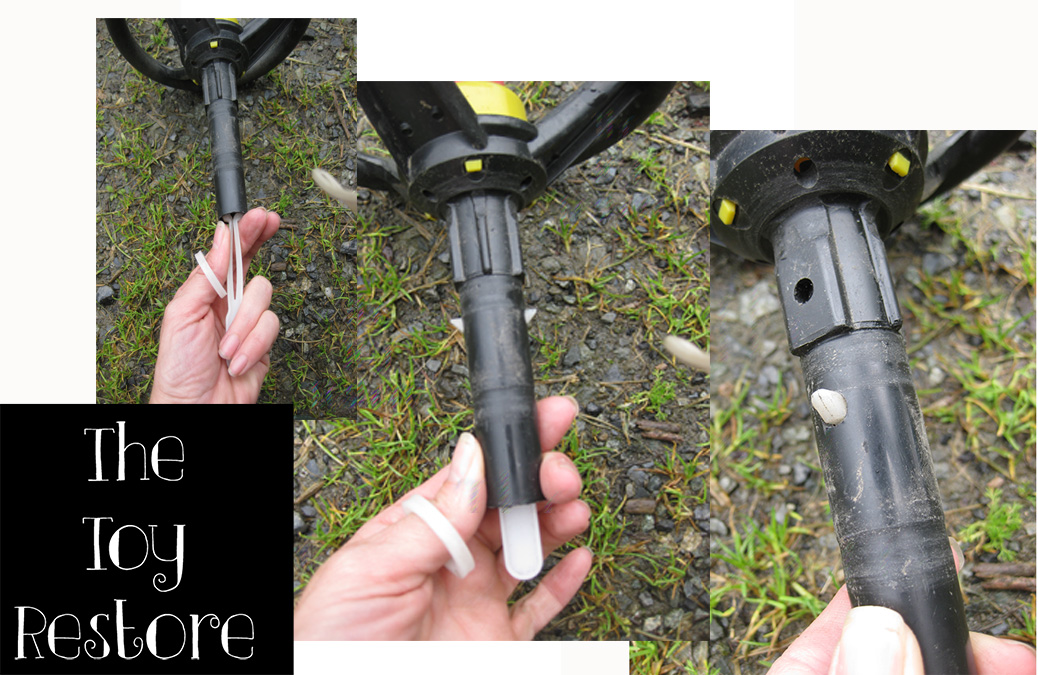
Little Tikes Cozy Coupe Steering Wheel Replacement 4
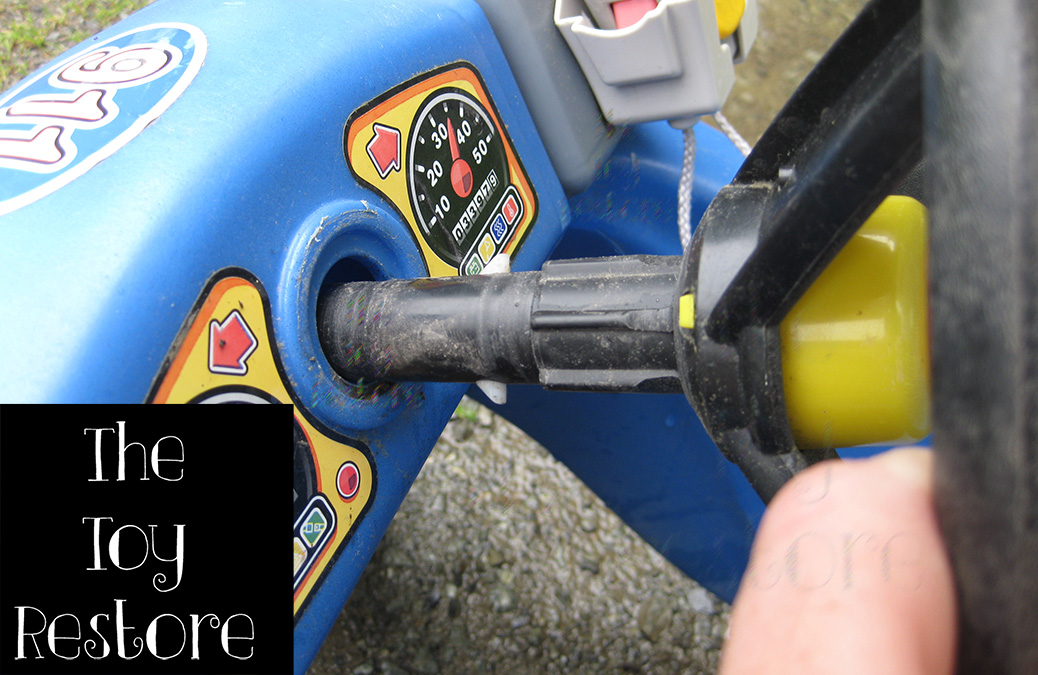
So the steering wheel clip slides into the bottom of the steering wheel, with the “Y” end up. Push it up until the clip ends pop out of the holes in the tube.
Little Tikes Cozy Coupe Steering Wheel Replacement Title
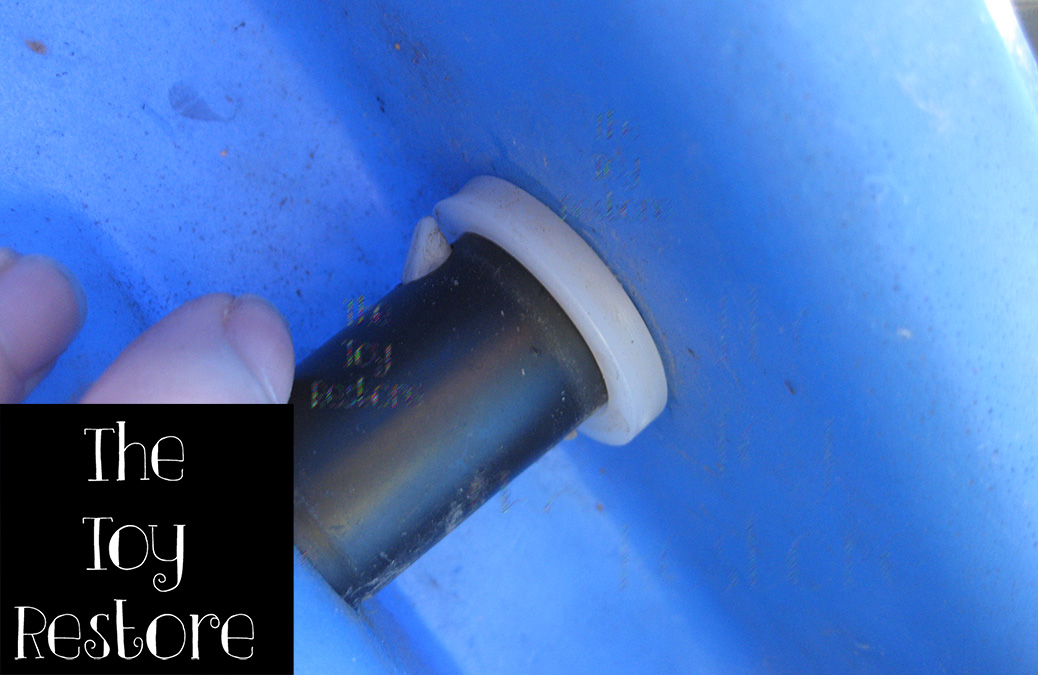
Put the steering wheel into the hole, and underneath, before it goes through the other side, hold the washer on the underside of the hole, and thread the washer and the otherside of the hole onto the bottom tube of the steering wheel. The washer will slide upwards and over the two nobs that are expsoed from the steering wheel clip inside the steering wheel. If you need to take it off again, push in the two exposed clips and let the washer slide back down the tube again.
Little Tikes Steering wheel underneath
I will get the dimensions and add to this post as soon as I can.