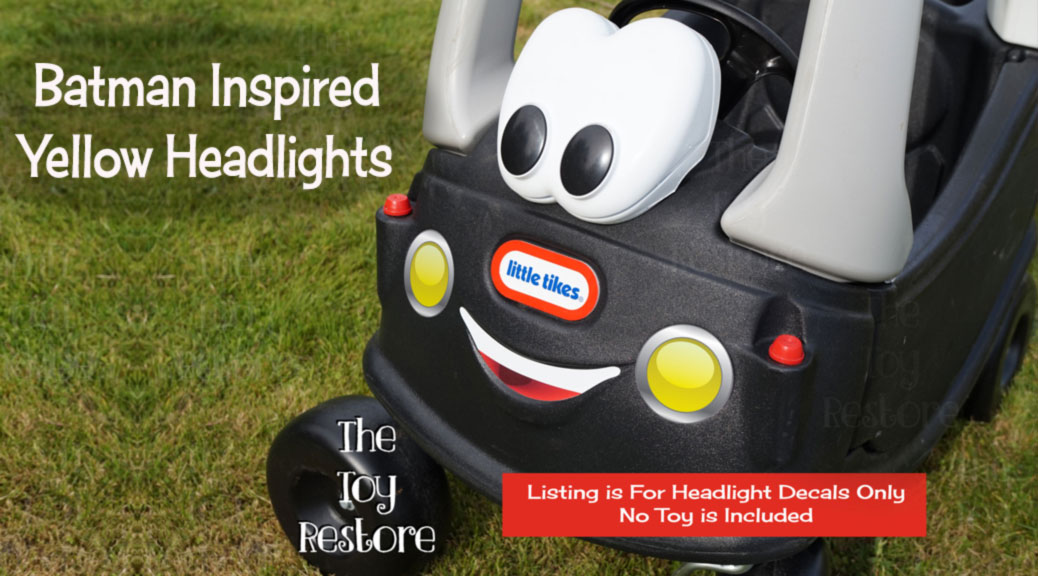
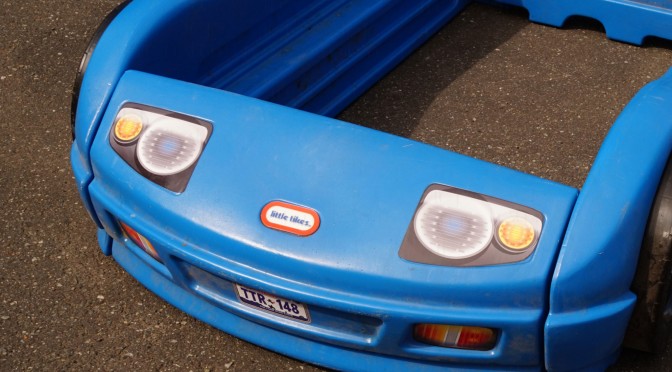
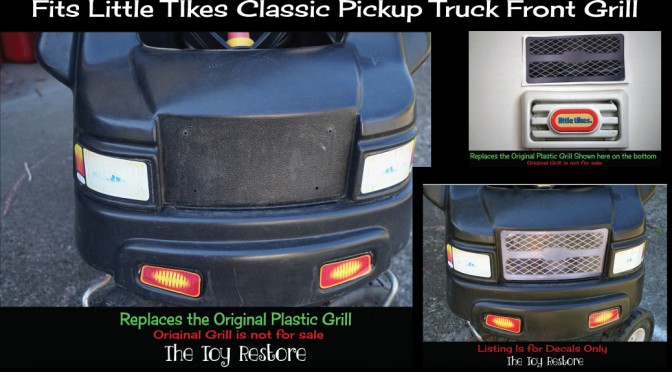
How to Fix the Headlights on your Little Tikes 30th Anniversary Cozy Coupe
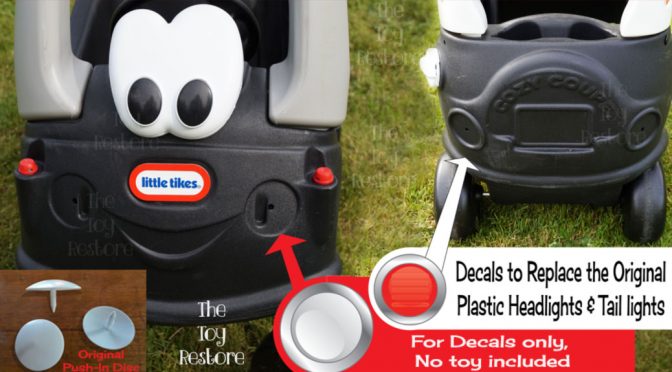
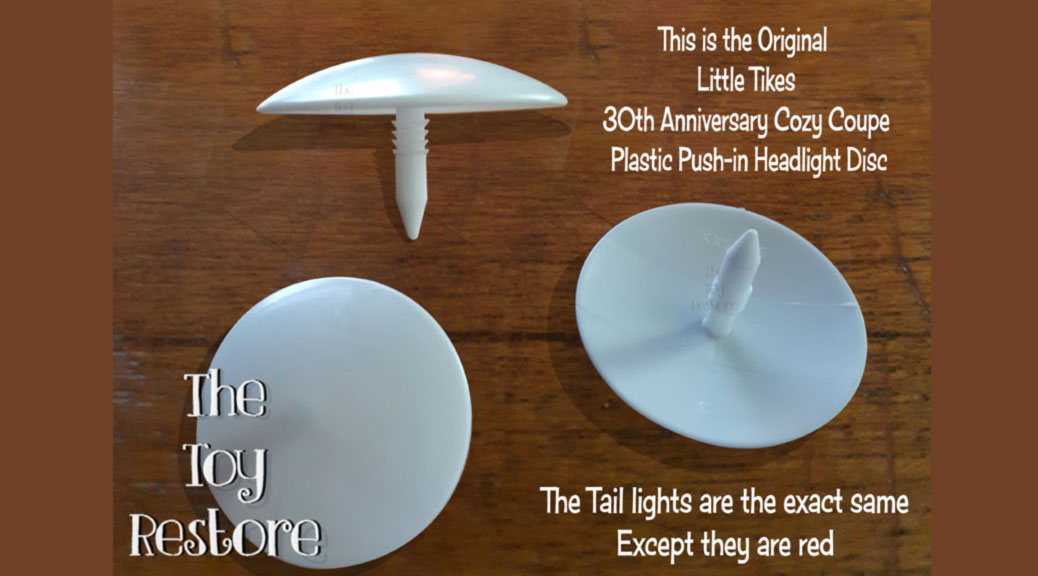
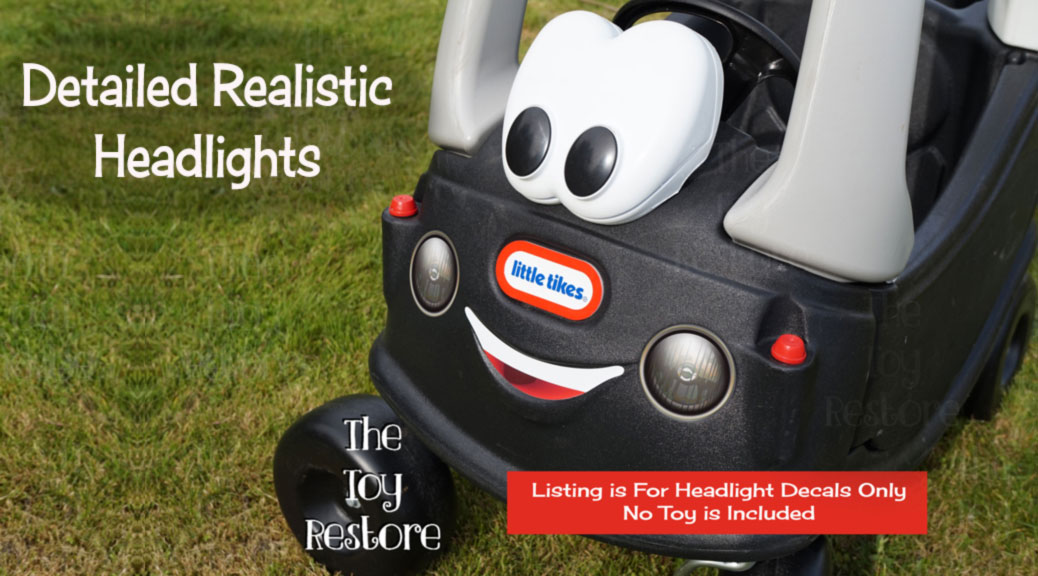
How to Fix the Headlights on your Little Tikes 30th Anniversary Cozy Coupe. This model originally came with plastic push in discs for the headlights and tail lights. They can get pulled off, or broken, so I designed a couple of choices for decal replacements.
It is important to note, that you must place these directly on the body of the coupe. So you must remove the plastic push-in discs first. You can use a flat head screwdriver to pry them off.
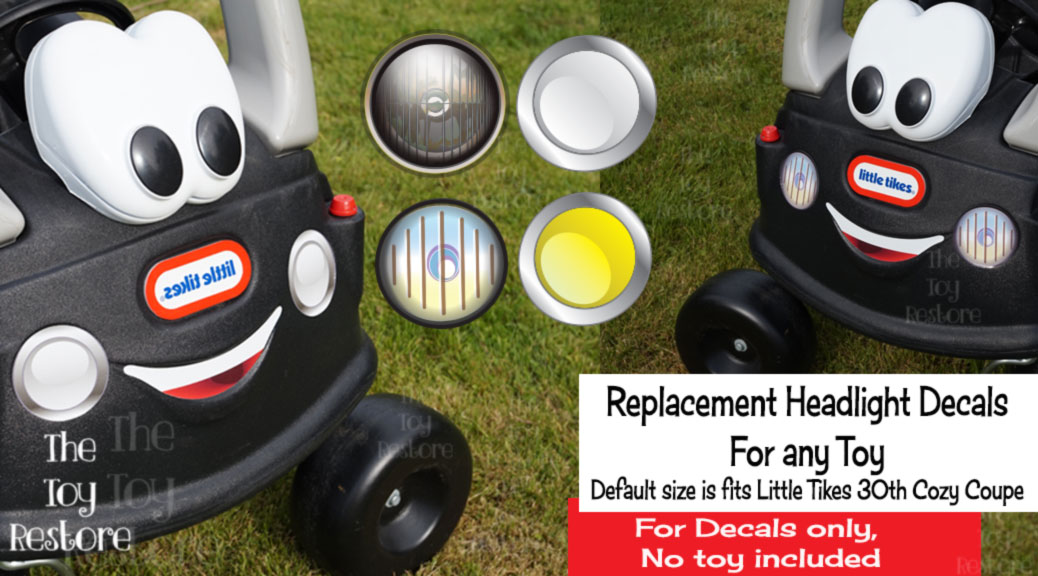
I can also change the colors as well, so if you have a custom coupe you have in mind, just send me an email. These can even help you to customize your coupe to suit a particular look you are wanting. It still may be possible to contact Little Tikes for replacement plastic parts, but at the time of writing this, it was not possible. To check, call the 1-800 number on your toy.
These can be easily resized to suit any car, I have this listing for most diameters, but I can custom size it for any project. Just send me an email.
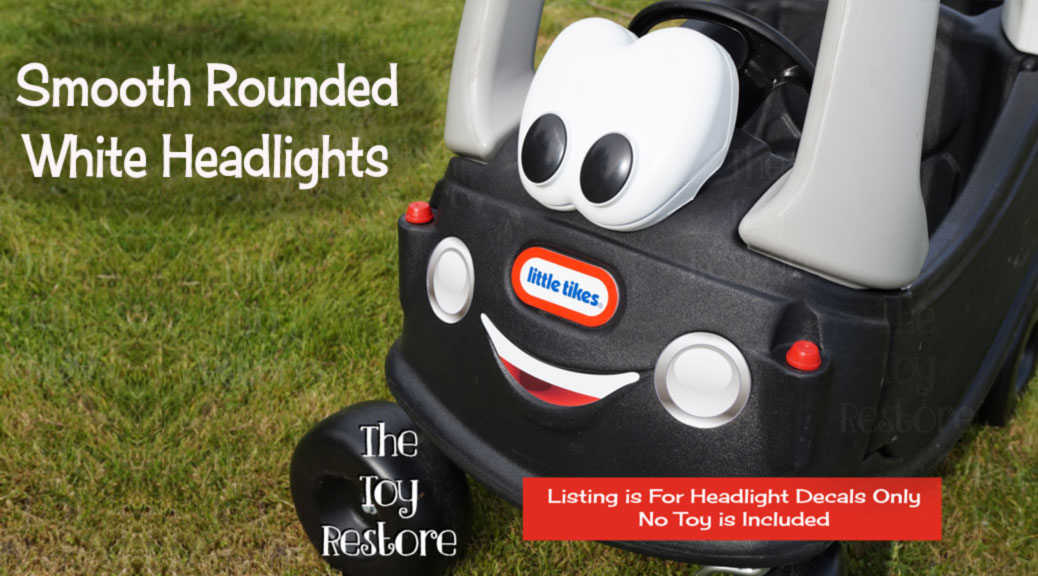
How to Fix the Headlights on your Little Tikes 30th Anniversary Cozy Coupe. Headlights and Tail lights decals regular set.
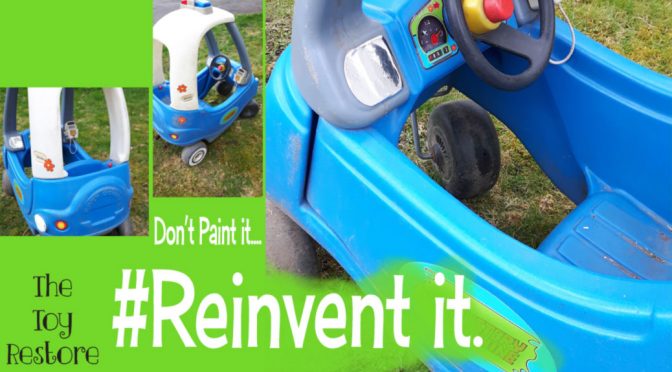
Reinventit Reinvent It to keep it out of the landfill
Reinventit Reinvent It to keep it out of the landfill. I don’t bother painting my kids toys anymore… Honestly, I am too busy for that. But I interchange the parts, or I just use the colors that are with it…..
I like to design things around what is given to me. So my son LOVES Scooby, and we have an older blue Little Tikes Cozy Coupe II Patrol Car, and I just made him some stickers. No paint involved. He’s happy, and I can use it for a Police car again in the future.
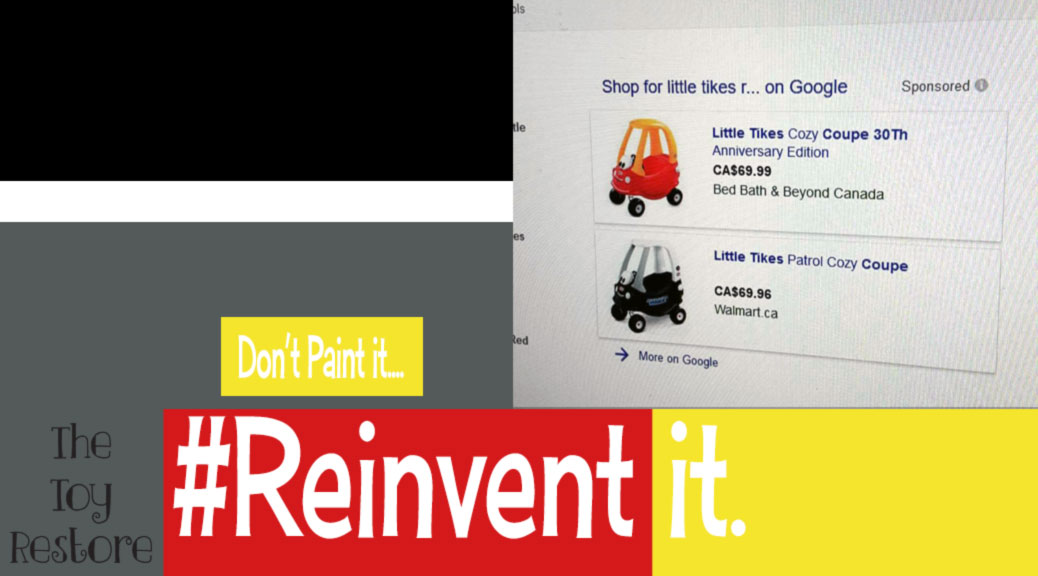
Even some of the more popular mods, you could just buy two cars, and swap out the parts to get different color schemes.
For example the Little Tikes 30th Anniversary police car, with the red 30th Anniversary Cozy Coupe. Then you would have two yellow columns, yellow roof, grey columns, and a white roof, and a red body, and a black body. So you would have yellow and black for one car, and red, grey and white for the other…. Minnie mouse? Batman? Princess? VW? The possibilites are endless… And they would be brand new. You could resell them, without wasting anything. Or mixing these parts with older coupes, and making them new again… #outofthelandfill.
#reinvent I like that… I want my customers to be able to sell their toys again after their kids are done with them. I want families, to pass these toys on to the next generation. I am tired of wasting, I am tired off seeing things thrown away, because we had too much.
I will try to add posts, where I change around my kids toys, without painting. I got a lot of them…..
Plastic toys, especially vintage ones, often develop a yellowish tint over time. This yellowing occurs due to the migration of bromine from the plastic to the surface. Bromine helps keep plastic flexible, but as it migrates, the toy begins to turn yellow.
Key Reasons for Yellowing:
Heat Exposure: Heat accelerates the migration of bromine. Toys in sunny windows or close to heaters will yellow faster.
UV Light: UV rays from sunlight break down the chemical bonds in plastic, causing discoloration.
Aging: Over time, even without direct sunlight or heat, plastic naturally undergoes a process of degradation.
How to Whiten Yellow Plastic Toys: My Personal Experience
Restoring yellowed plastic toys can be a rewarding project. After experimenting with hydrogen peroxide, bleach, and sunlight, I’ve developed a method that works well for me. Here’s a step-by-step guide to whitening your toys:
Start Slowly: Test a small, less valuable toy first to understand how your materials react.
Safety First: Always wear gloves, protective eyewear, and ensure good ventilation when handling bleach or hydrogen peroxide.
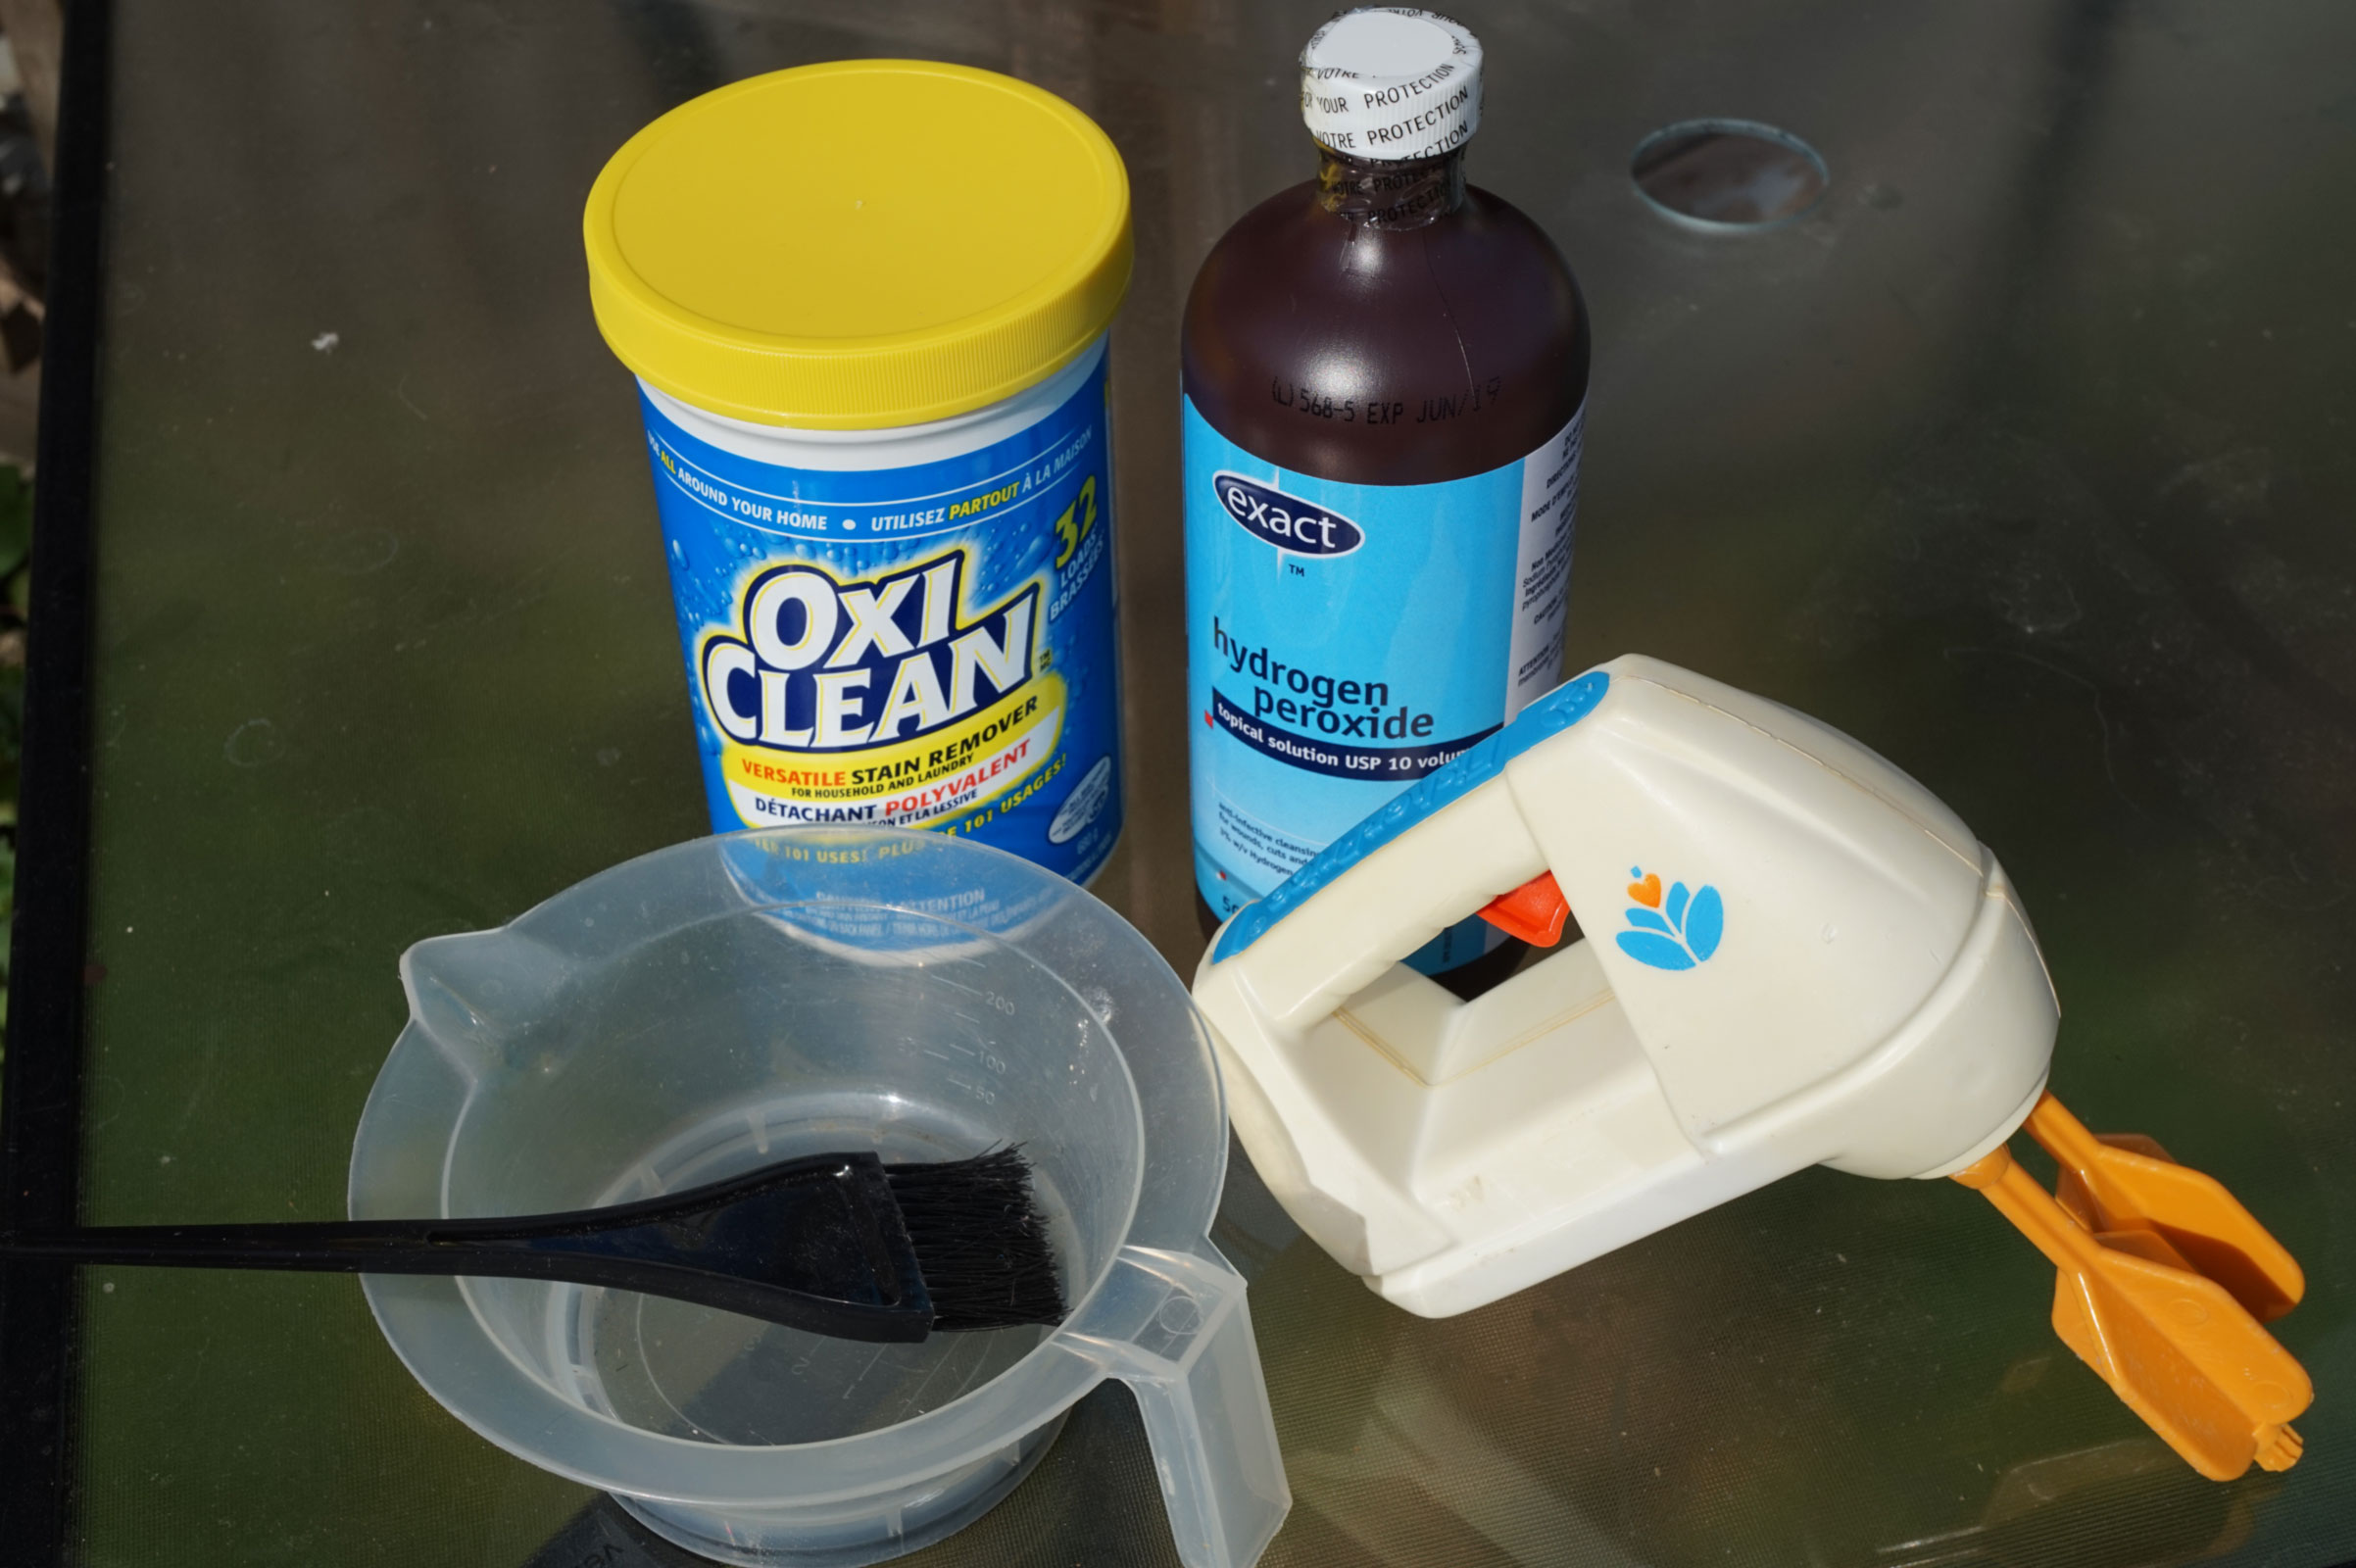
Materials You’ll Need:
Hydrogen peroxide (available at most drugstores)
Bleach
Sunlight (natural light works best)
Plastic container or recycling bag (for the toy)
Paintbrush (to apply bleach evenly)
How to Bleach and Whiten Yellow Plastic Toys
Here’s the technique I use to remove yellowing:
Prepare the Bleach Solution: Mix hydrogen peroxide and bleach in a container. Be sure to wear gloves and eye protection when handling bleach.
Apply the Solution: Using a paintbrush, apply the solution evenly to the yellowed areas. Make sure you coat the plastic evenly to avoid blotches.
Use Sunlight: Place the toy in a clear plastic bag or container that allows sunlight to shine directly on it. This process works best during summer months when sunlight is strongest.
Monitor Progress: Keep an eye on the toy to prevent over-bleaching, which can make plastic brittle. Don’t leave it out for too long.
Rinse and Dry: After the desired whiteness is achieved, rinse the toy thoroughly with water and dry it.
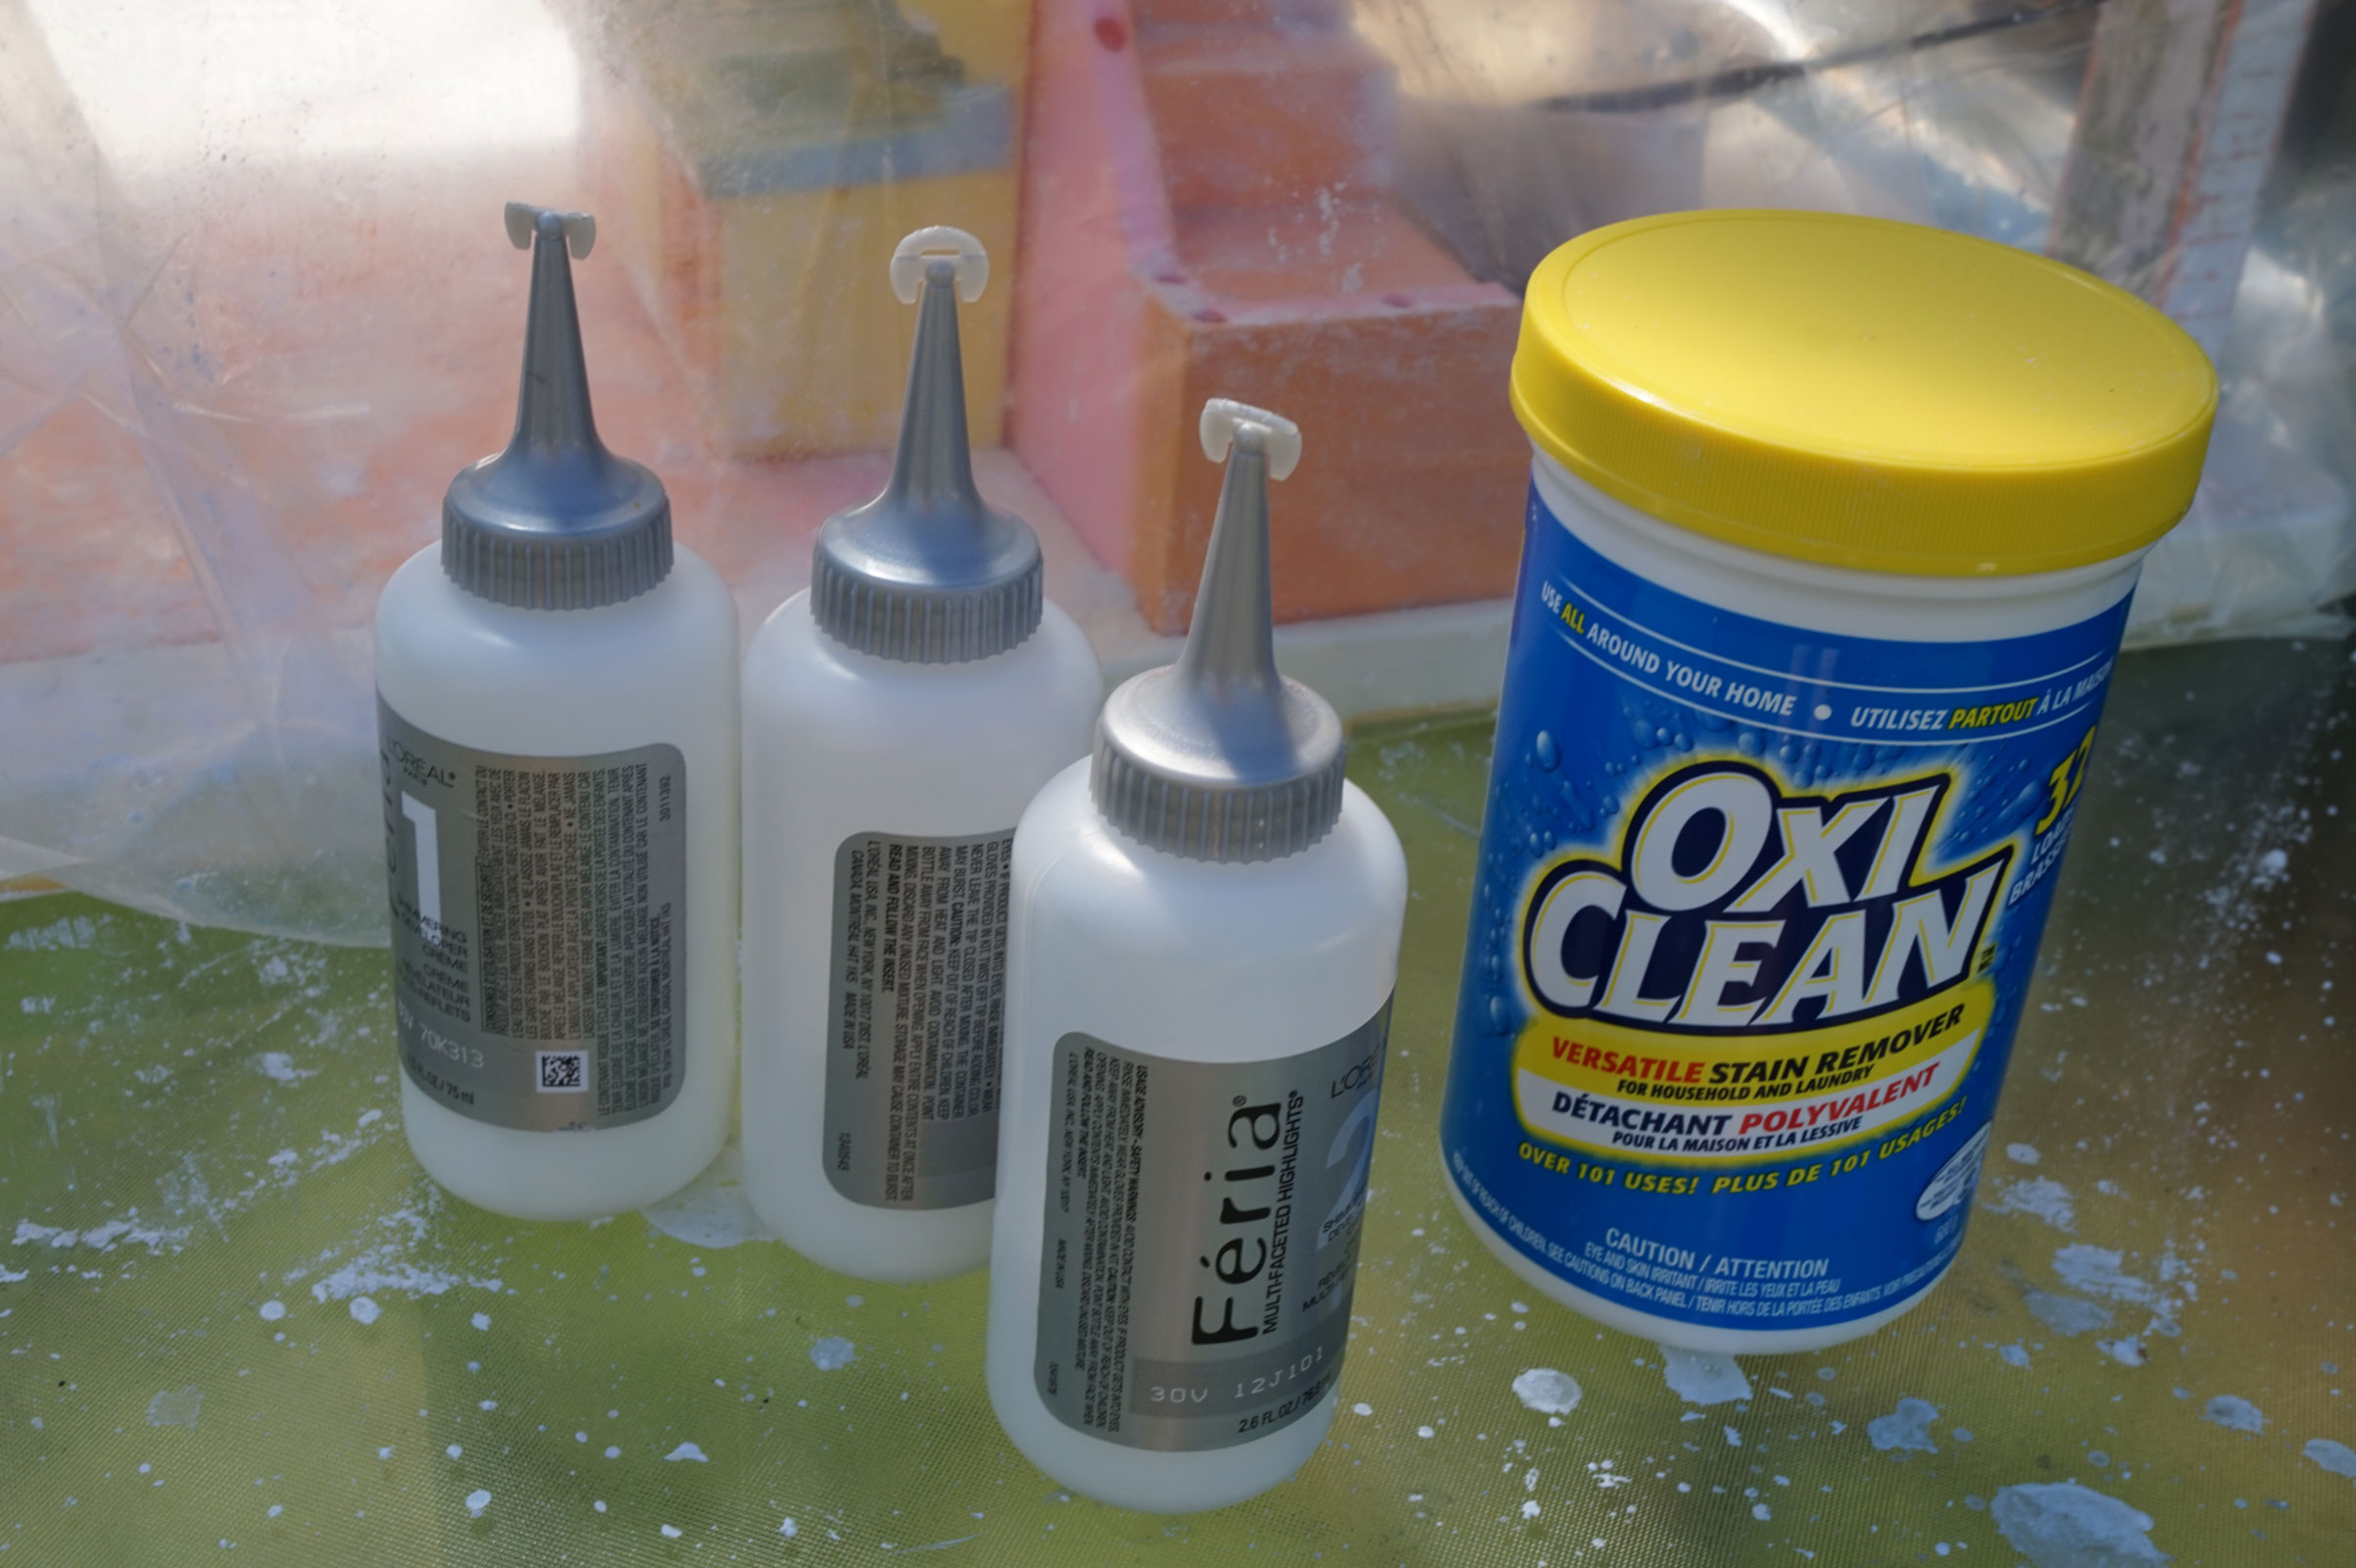
You can use hair bleach, and lighteners, or Oxi Clean to bleach out the yellow on older toys.
How to Bleach Whiten Yellow Plastic Toys
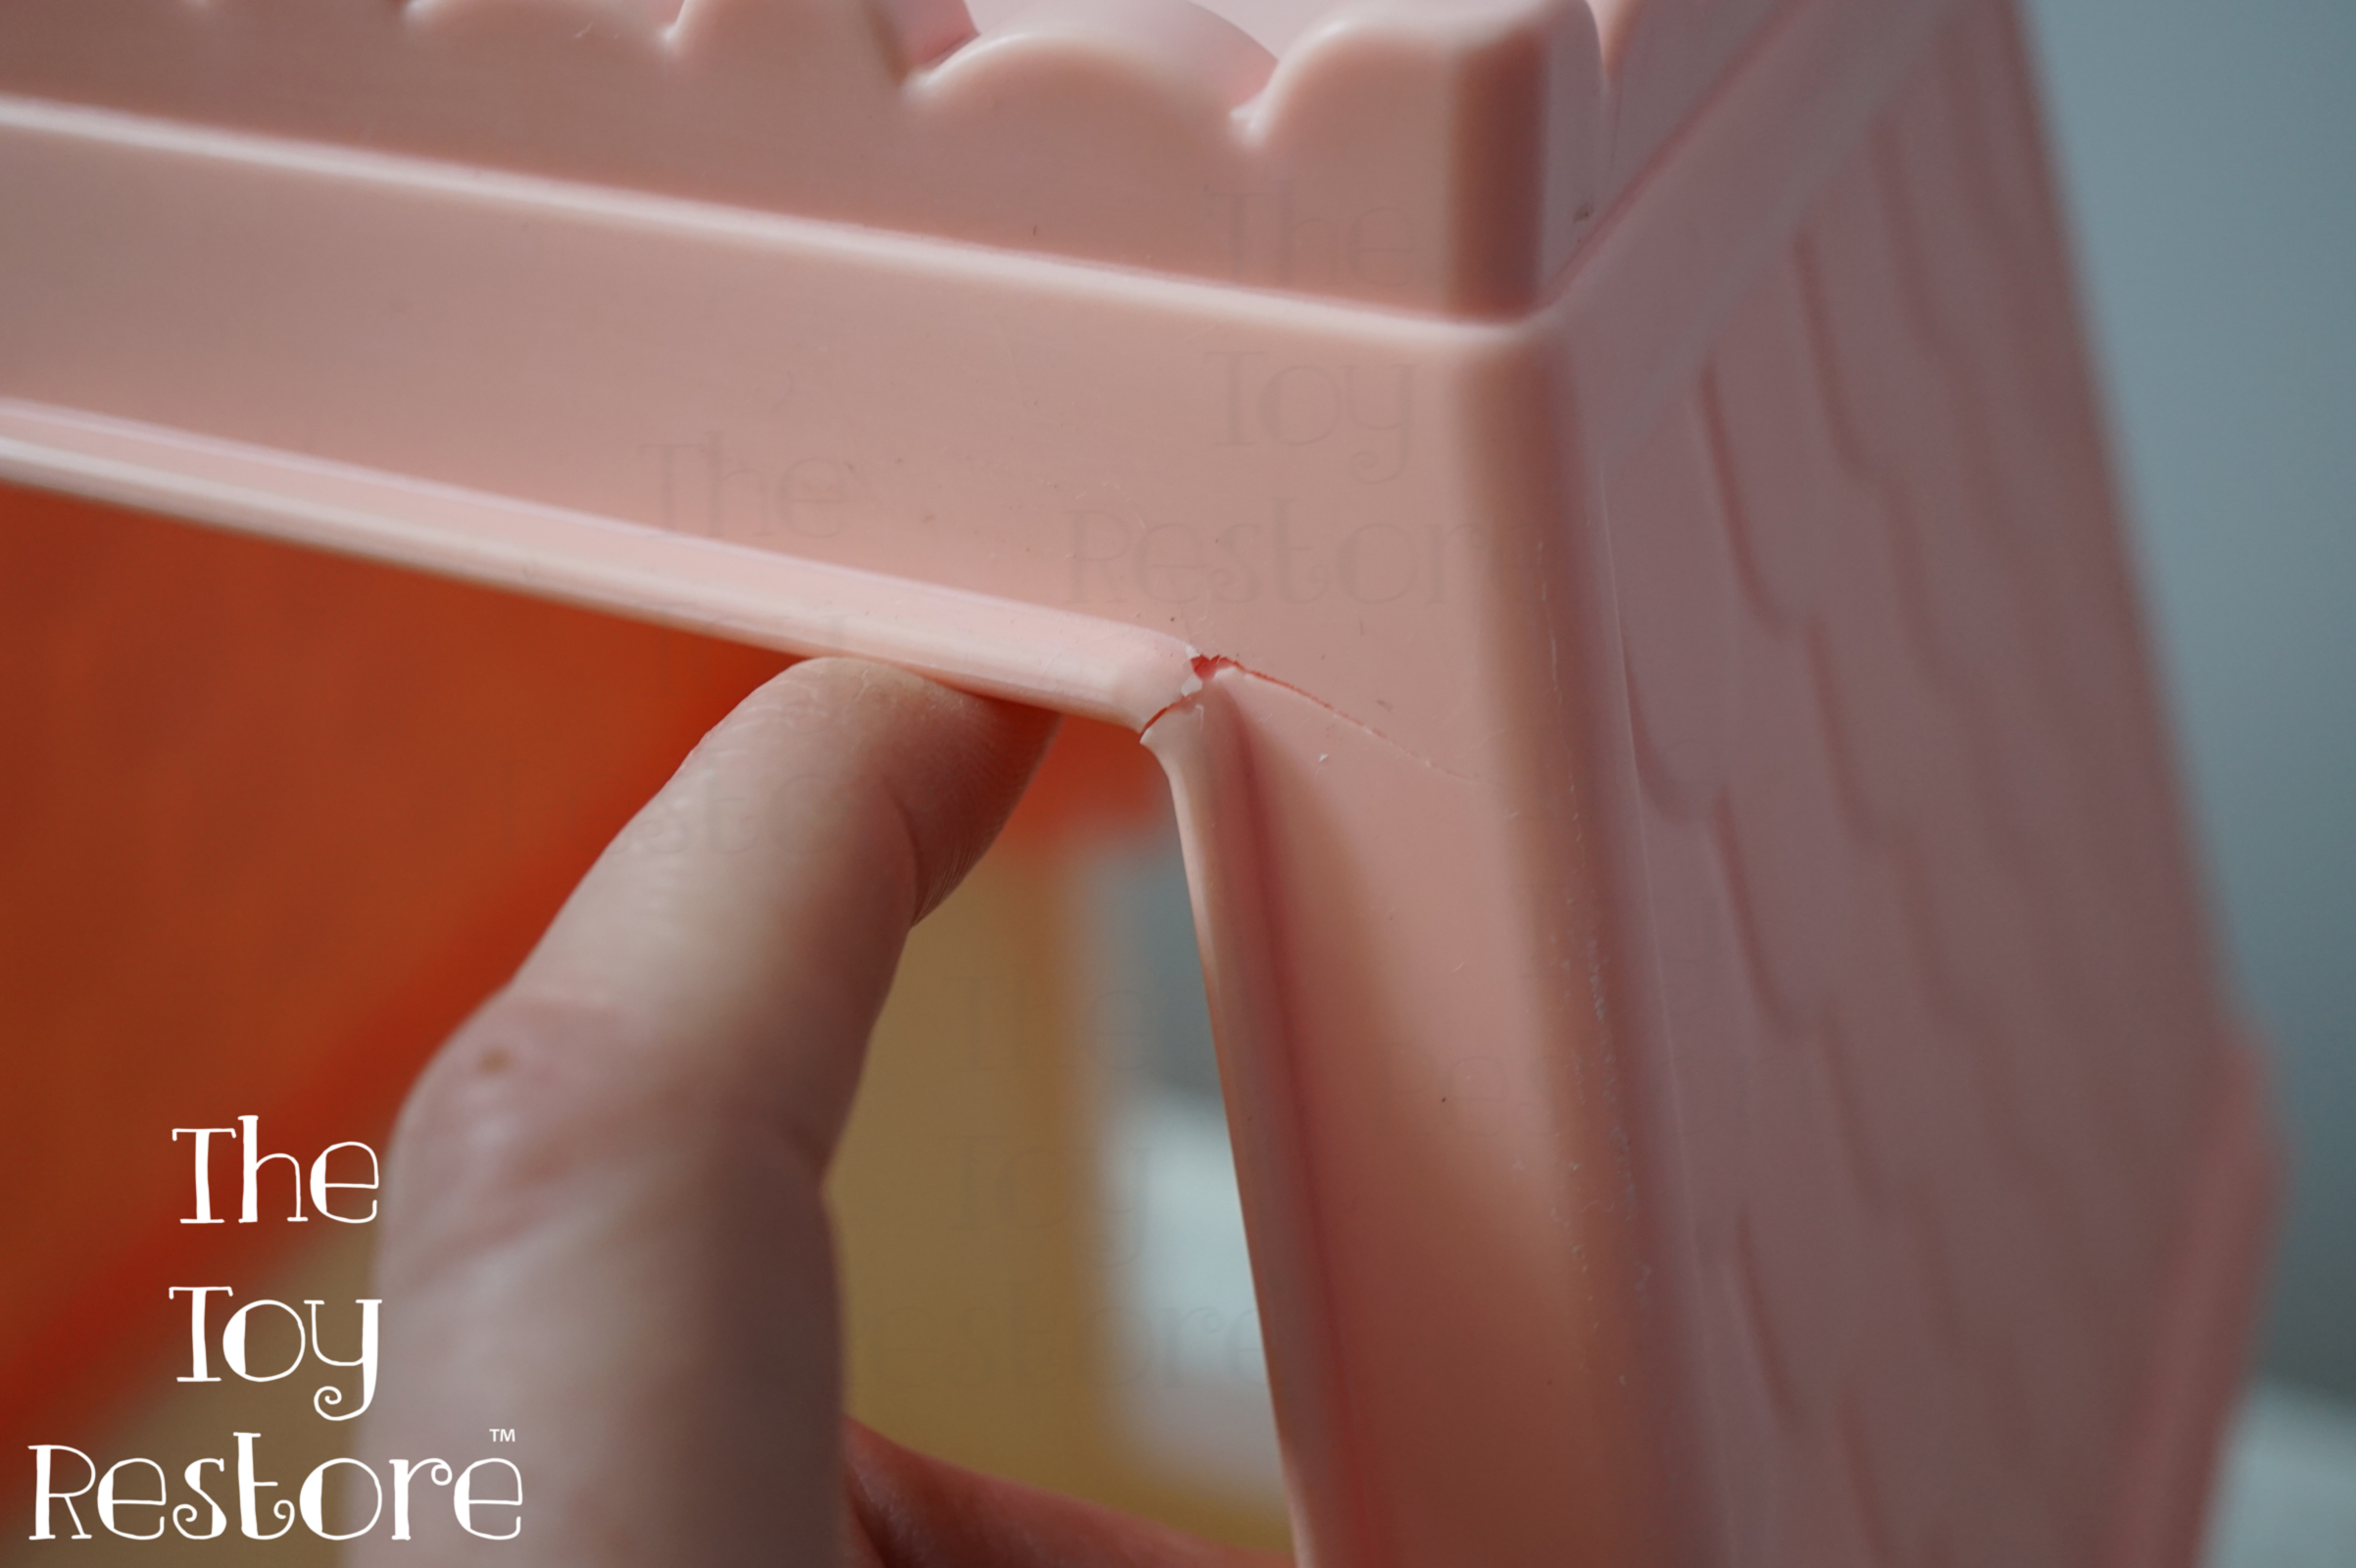
If the bleaching solution is too thick in certain areas, those spots will whiten faster. It’s essential to apply an even coat. One of my featured projects involved restoring a Playskool Victorian Dollhouse.
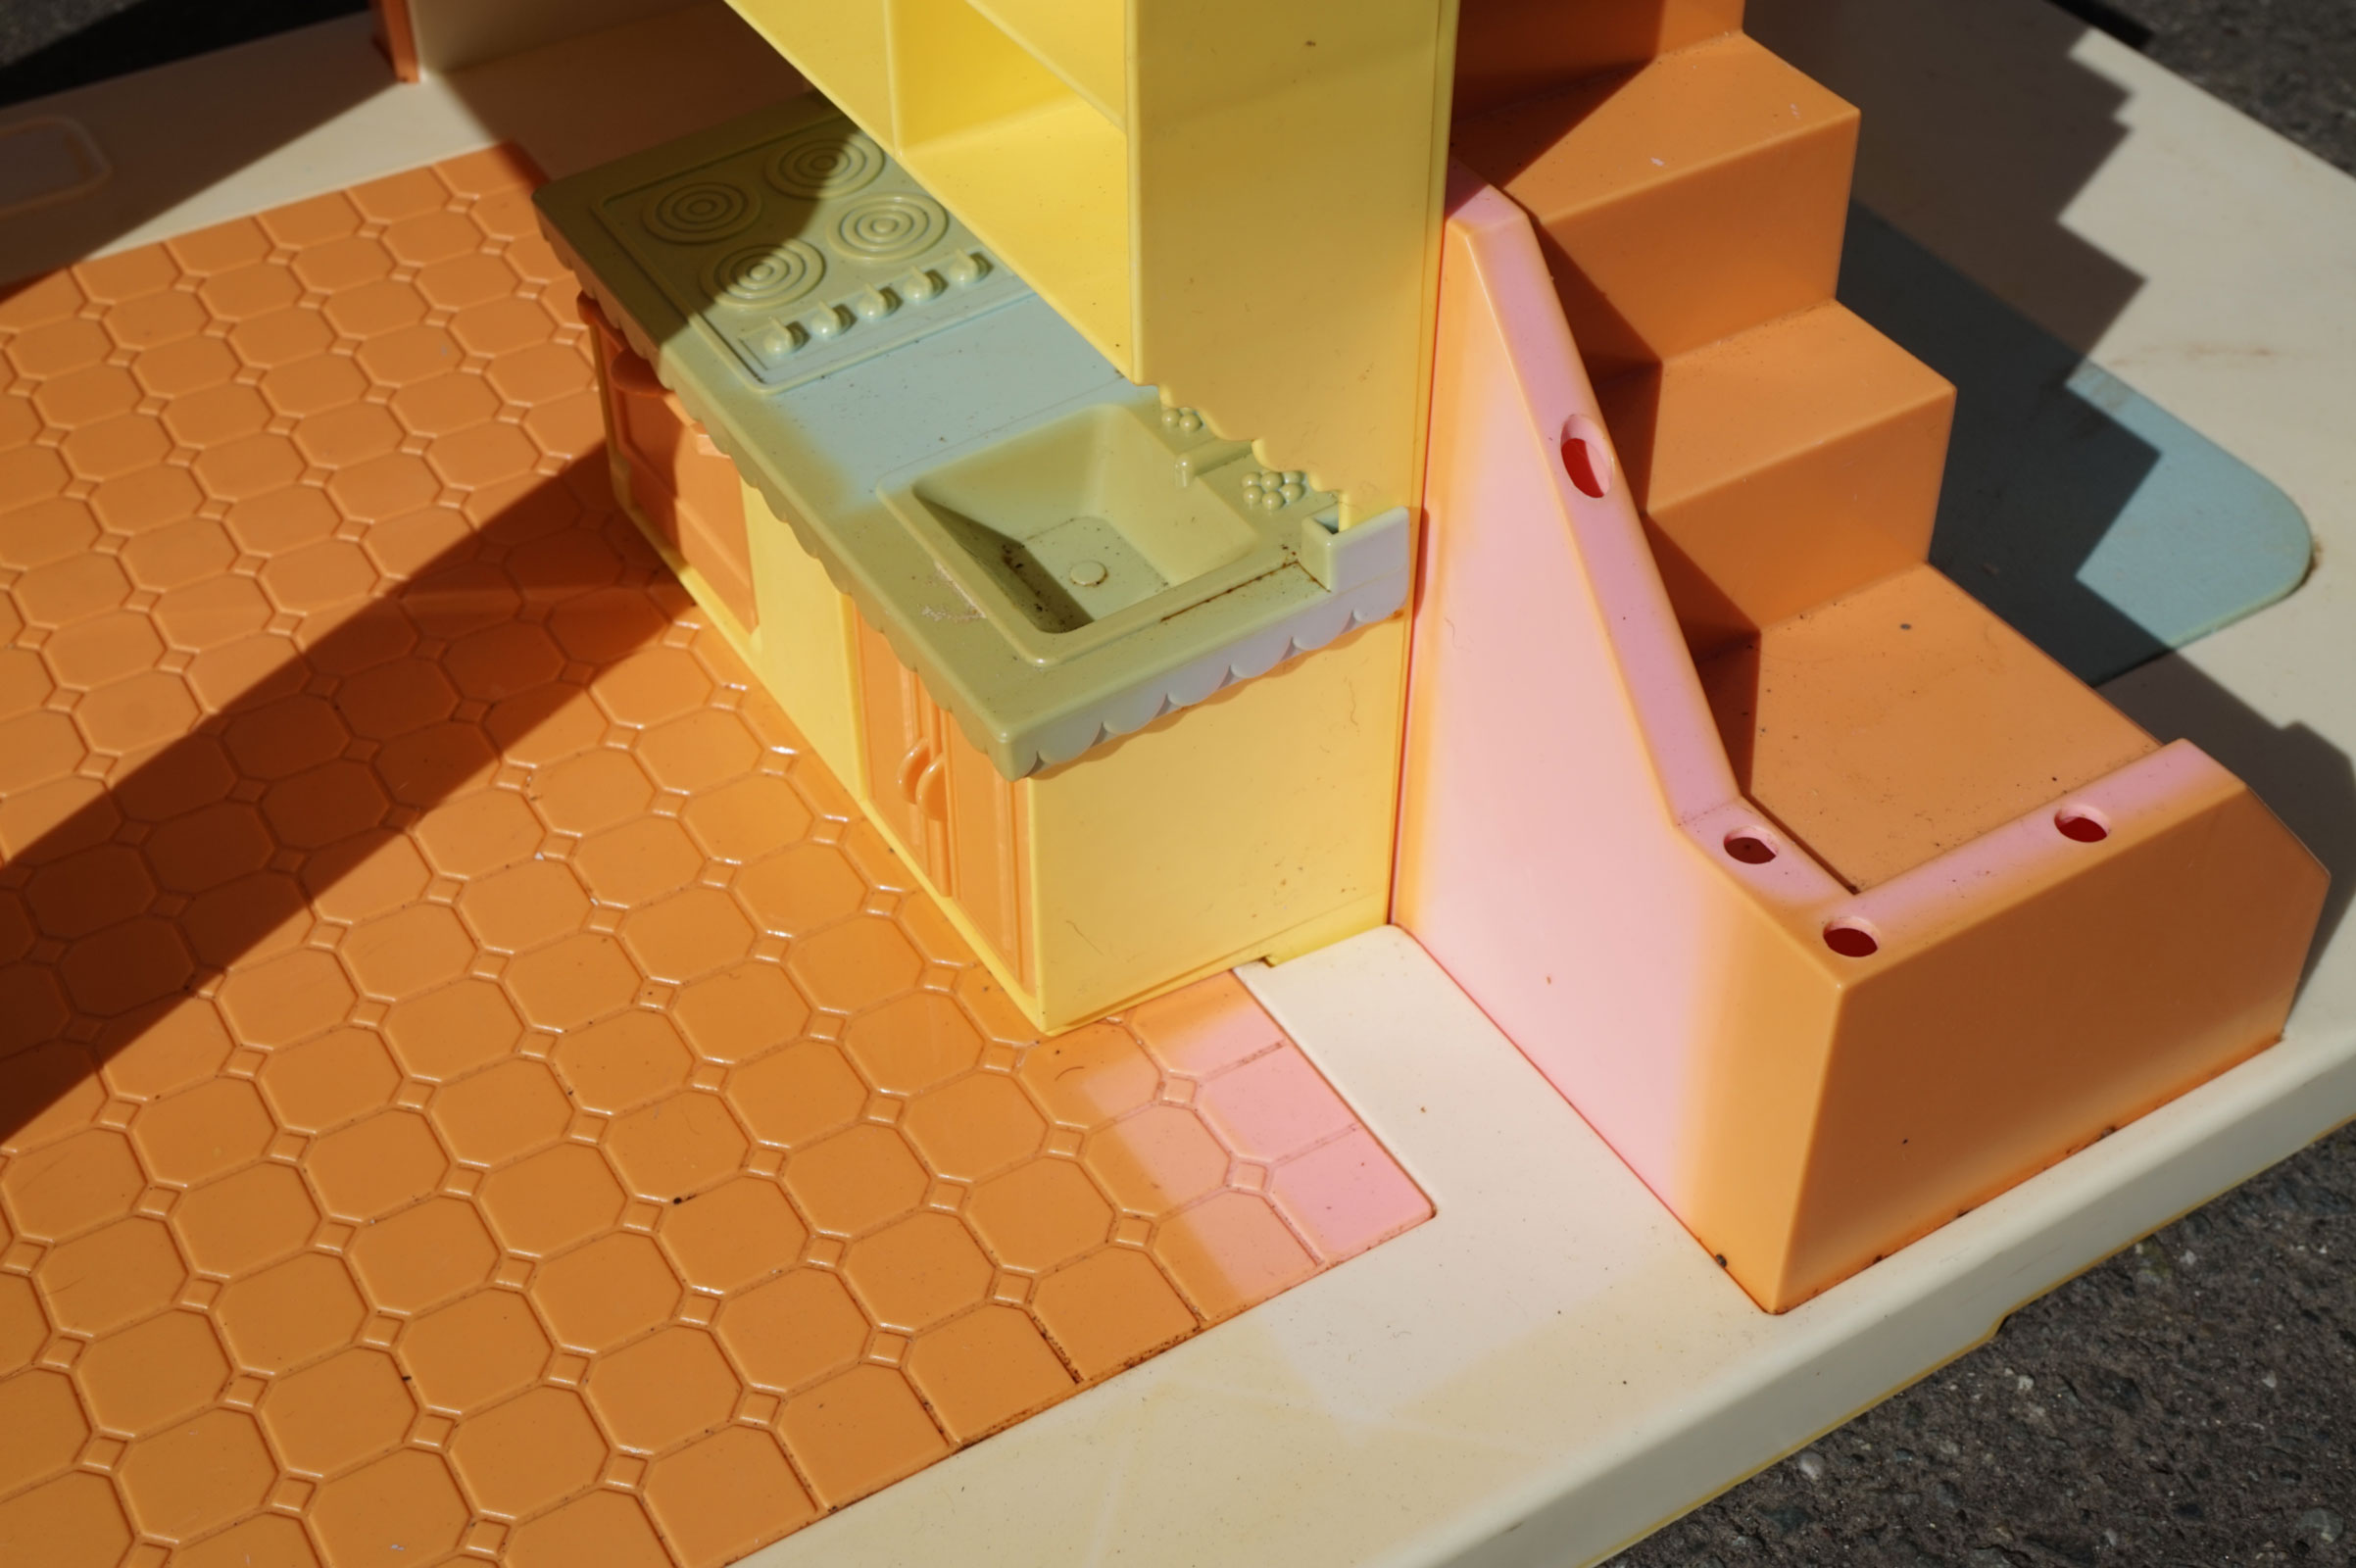
The Playskool Victorian Dollhouse, before bleaching. The yellowing occurred on all the exposed areas.
The Playskool Victorian Dollhouse, before bleaching. The yellowing occurred on all the exposed areas.
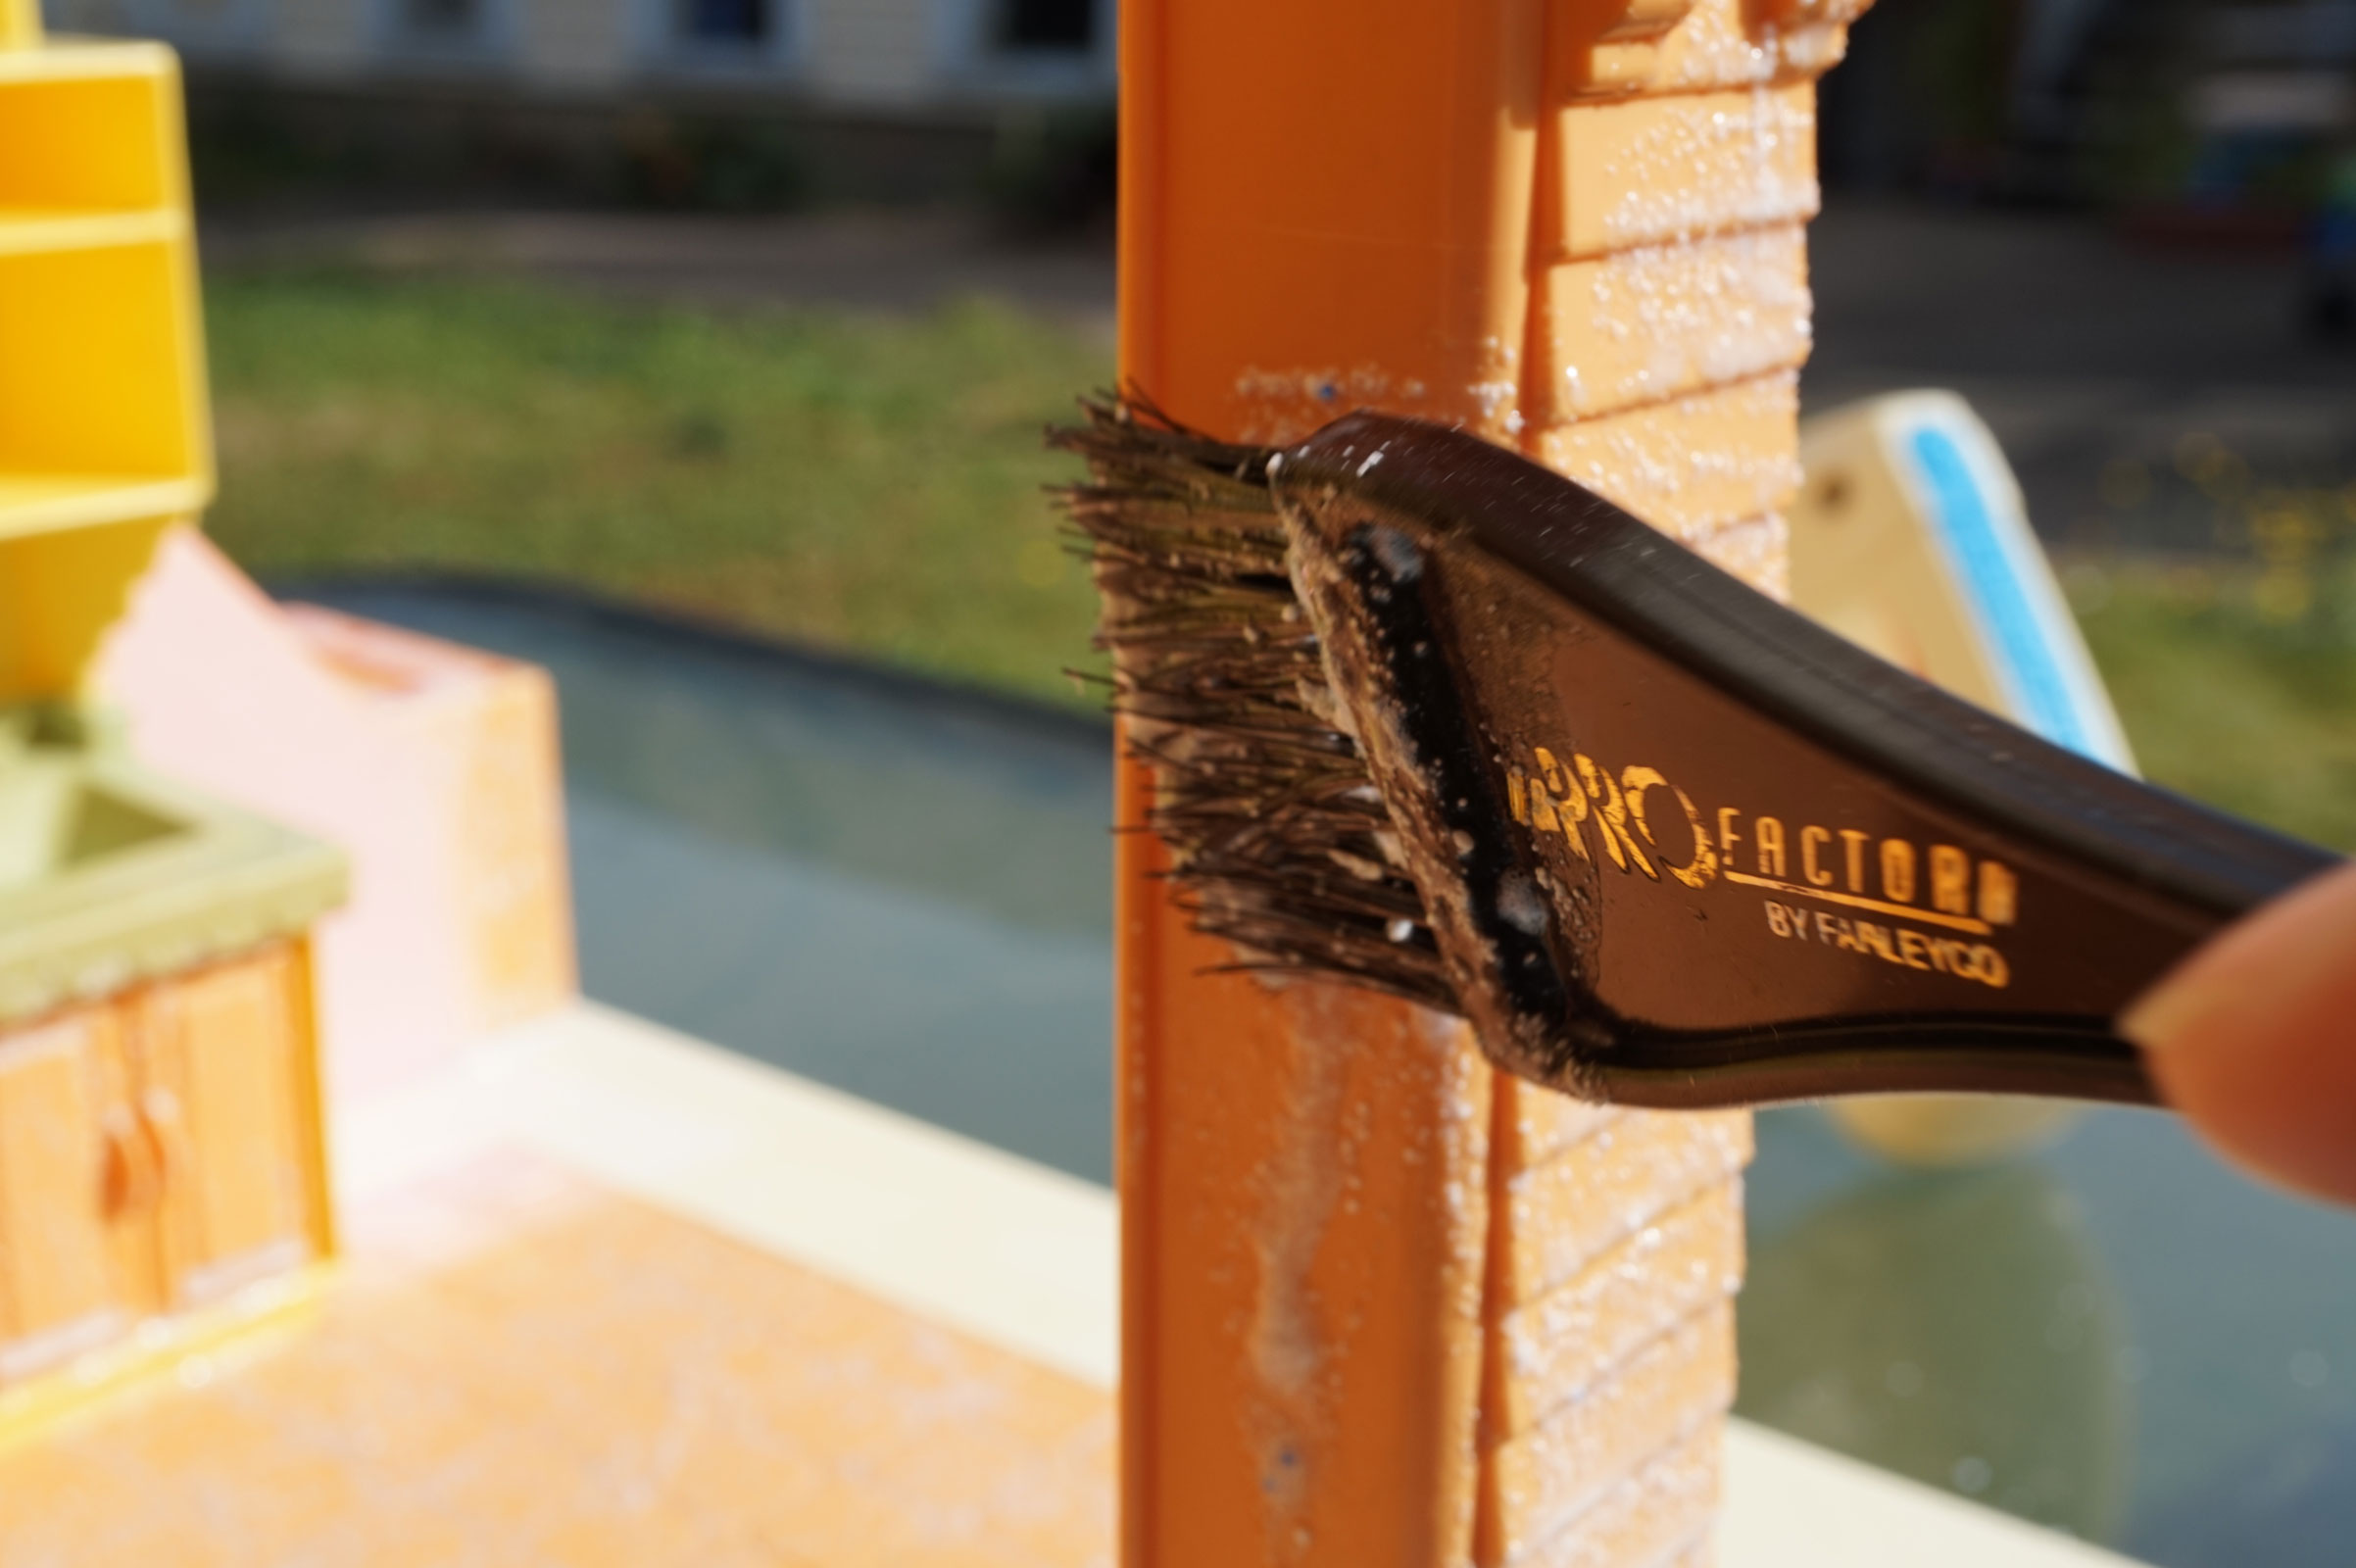
I used a hair-color brush to apply the bleach as evenly as possible, avoiding areas that weren’t yellowed.
Brushing on the bleach to remove the yellowing on the dollhouse
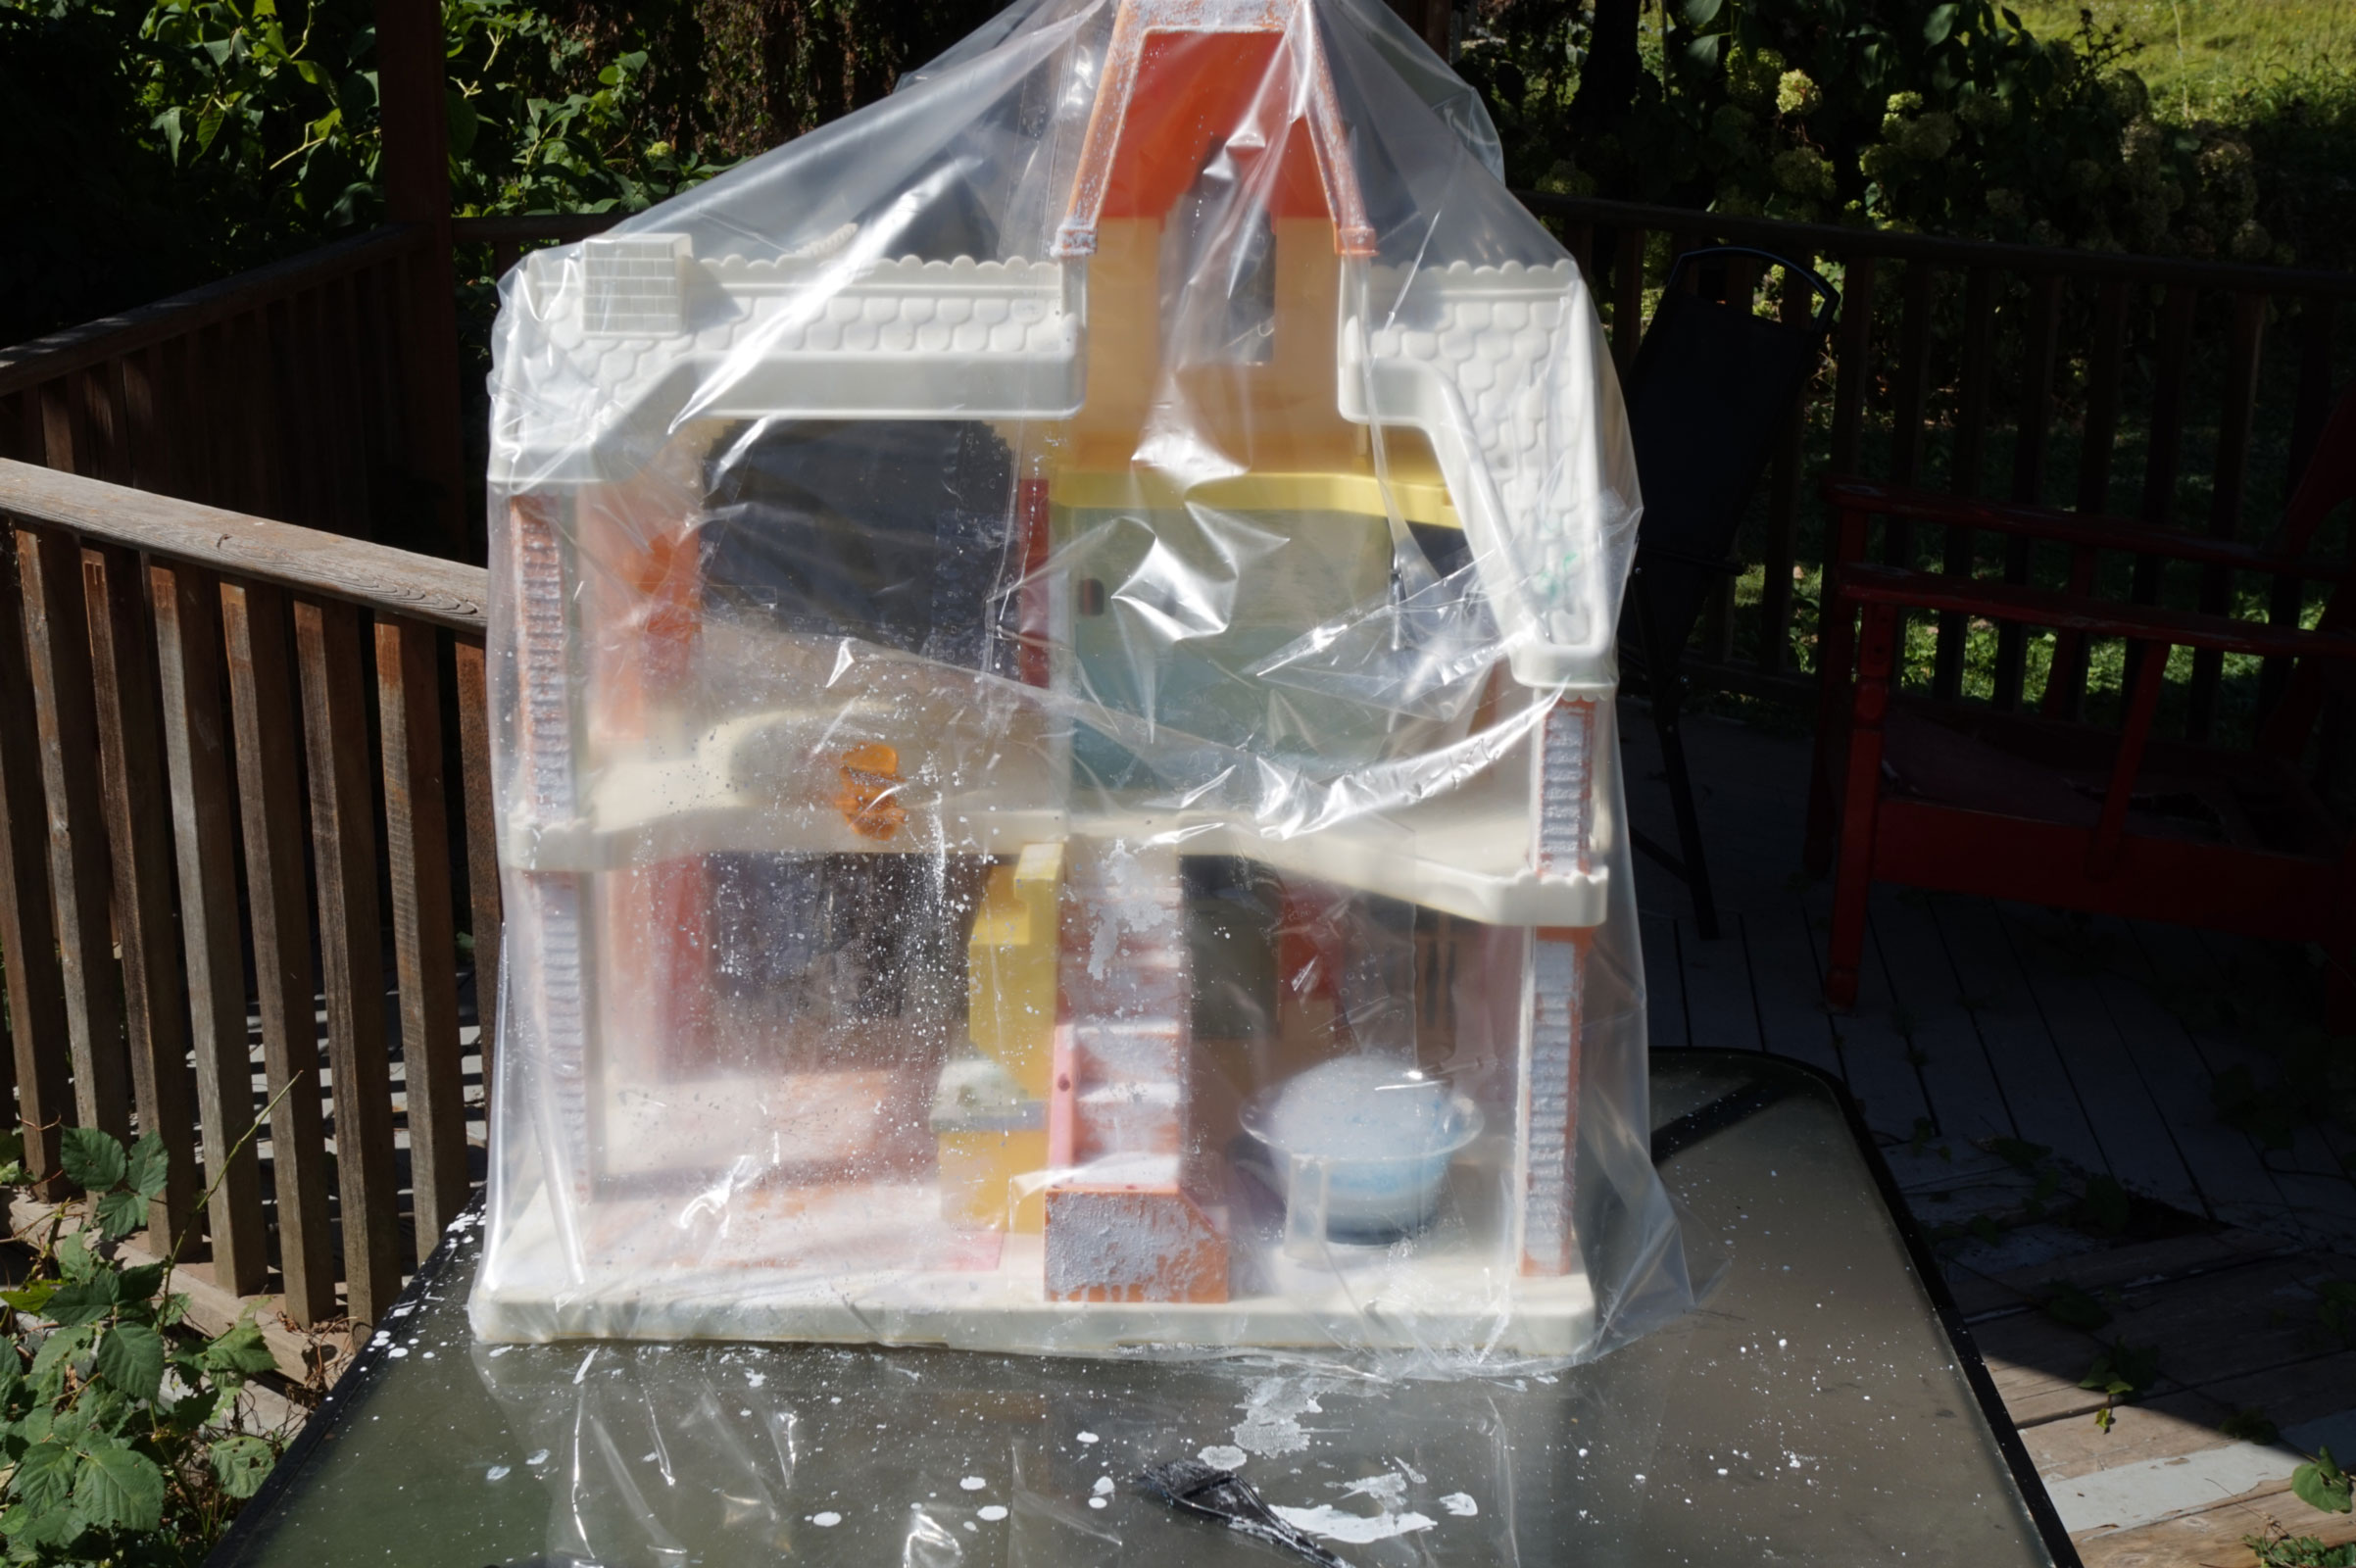
Next, I placed the dollhouse inside a clear plastic recycling bag and monitored it closely throughout the day, ensuring it stayed wet and was exposed to direct sunlight.
Cover your project with clear plastic, to keep the moisture in, and allow the sunlight to lift the yellowing
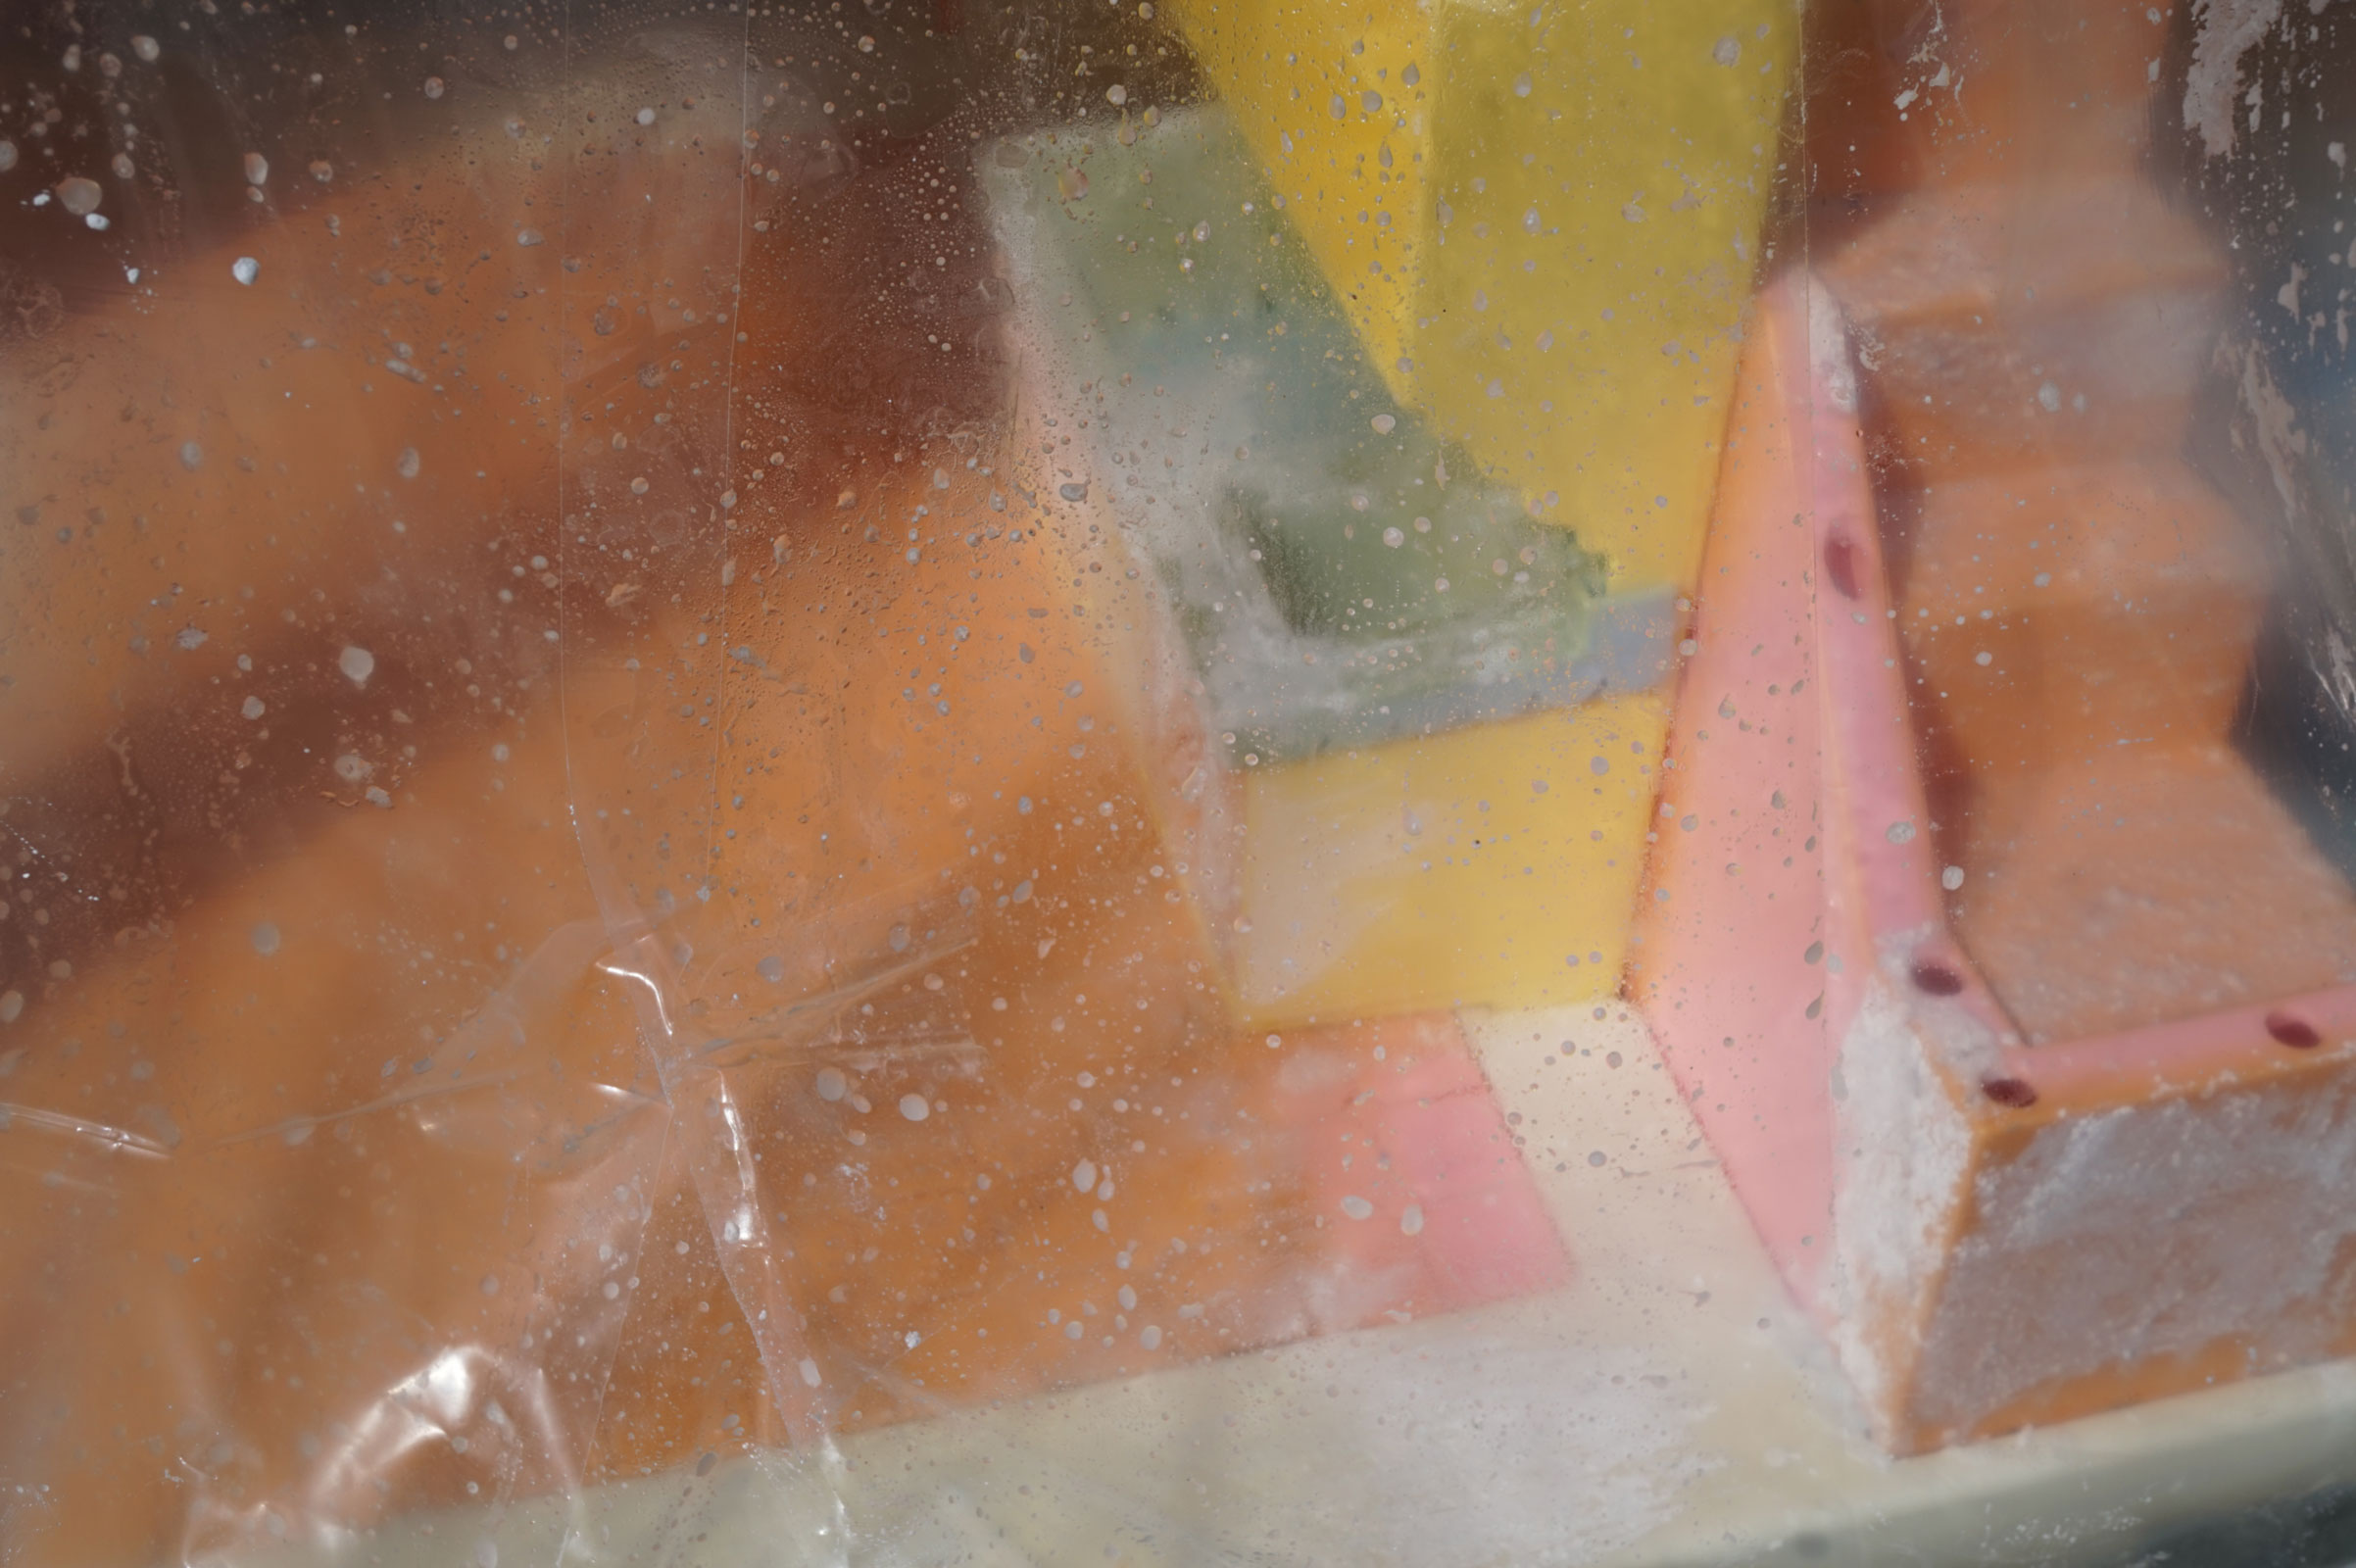
However, I noticed the yellowing didn’t lift evenly. It would have been better to disassemble the dollhouse and bleach each piece separately, but I didn’t have 60 hours to dedicate to that. I do have a greenhouse, so I cleaned off the bleach and let the toy dry. There were still blotchy areas of discoloration, but at that point, I chose to slow the process down. I left the dollhouse in the greenhouse for about a month, rotating it as needed to avoid over-bleaching. Eventually, the color evened out, though it wasn’t perfect.
Victorian Playskool Dollhouse covered with plastic to bleach in the sun
Playskool Victorian Dollhouse
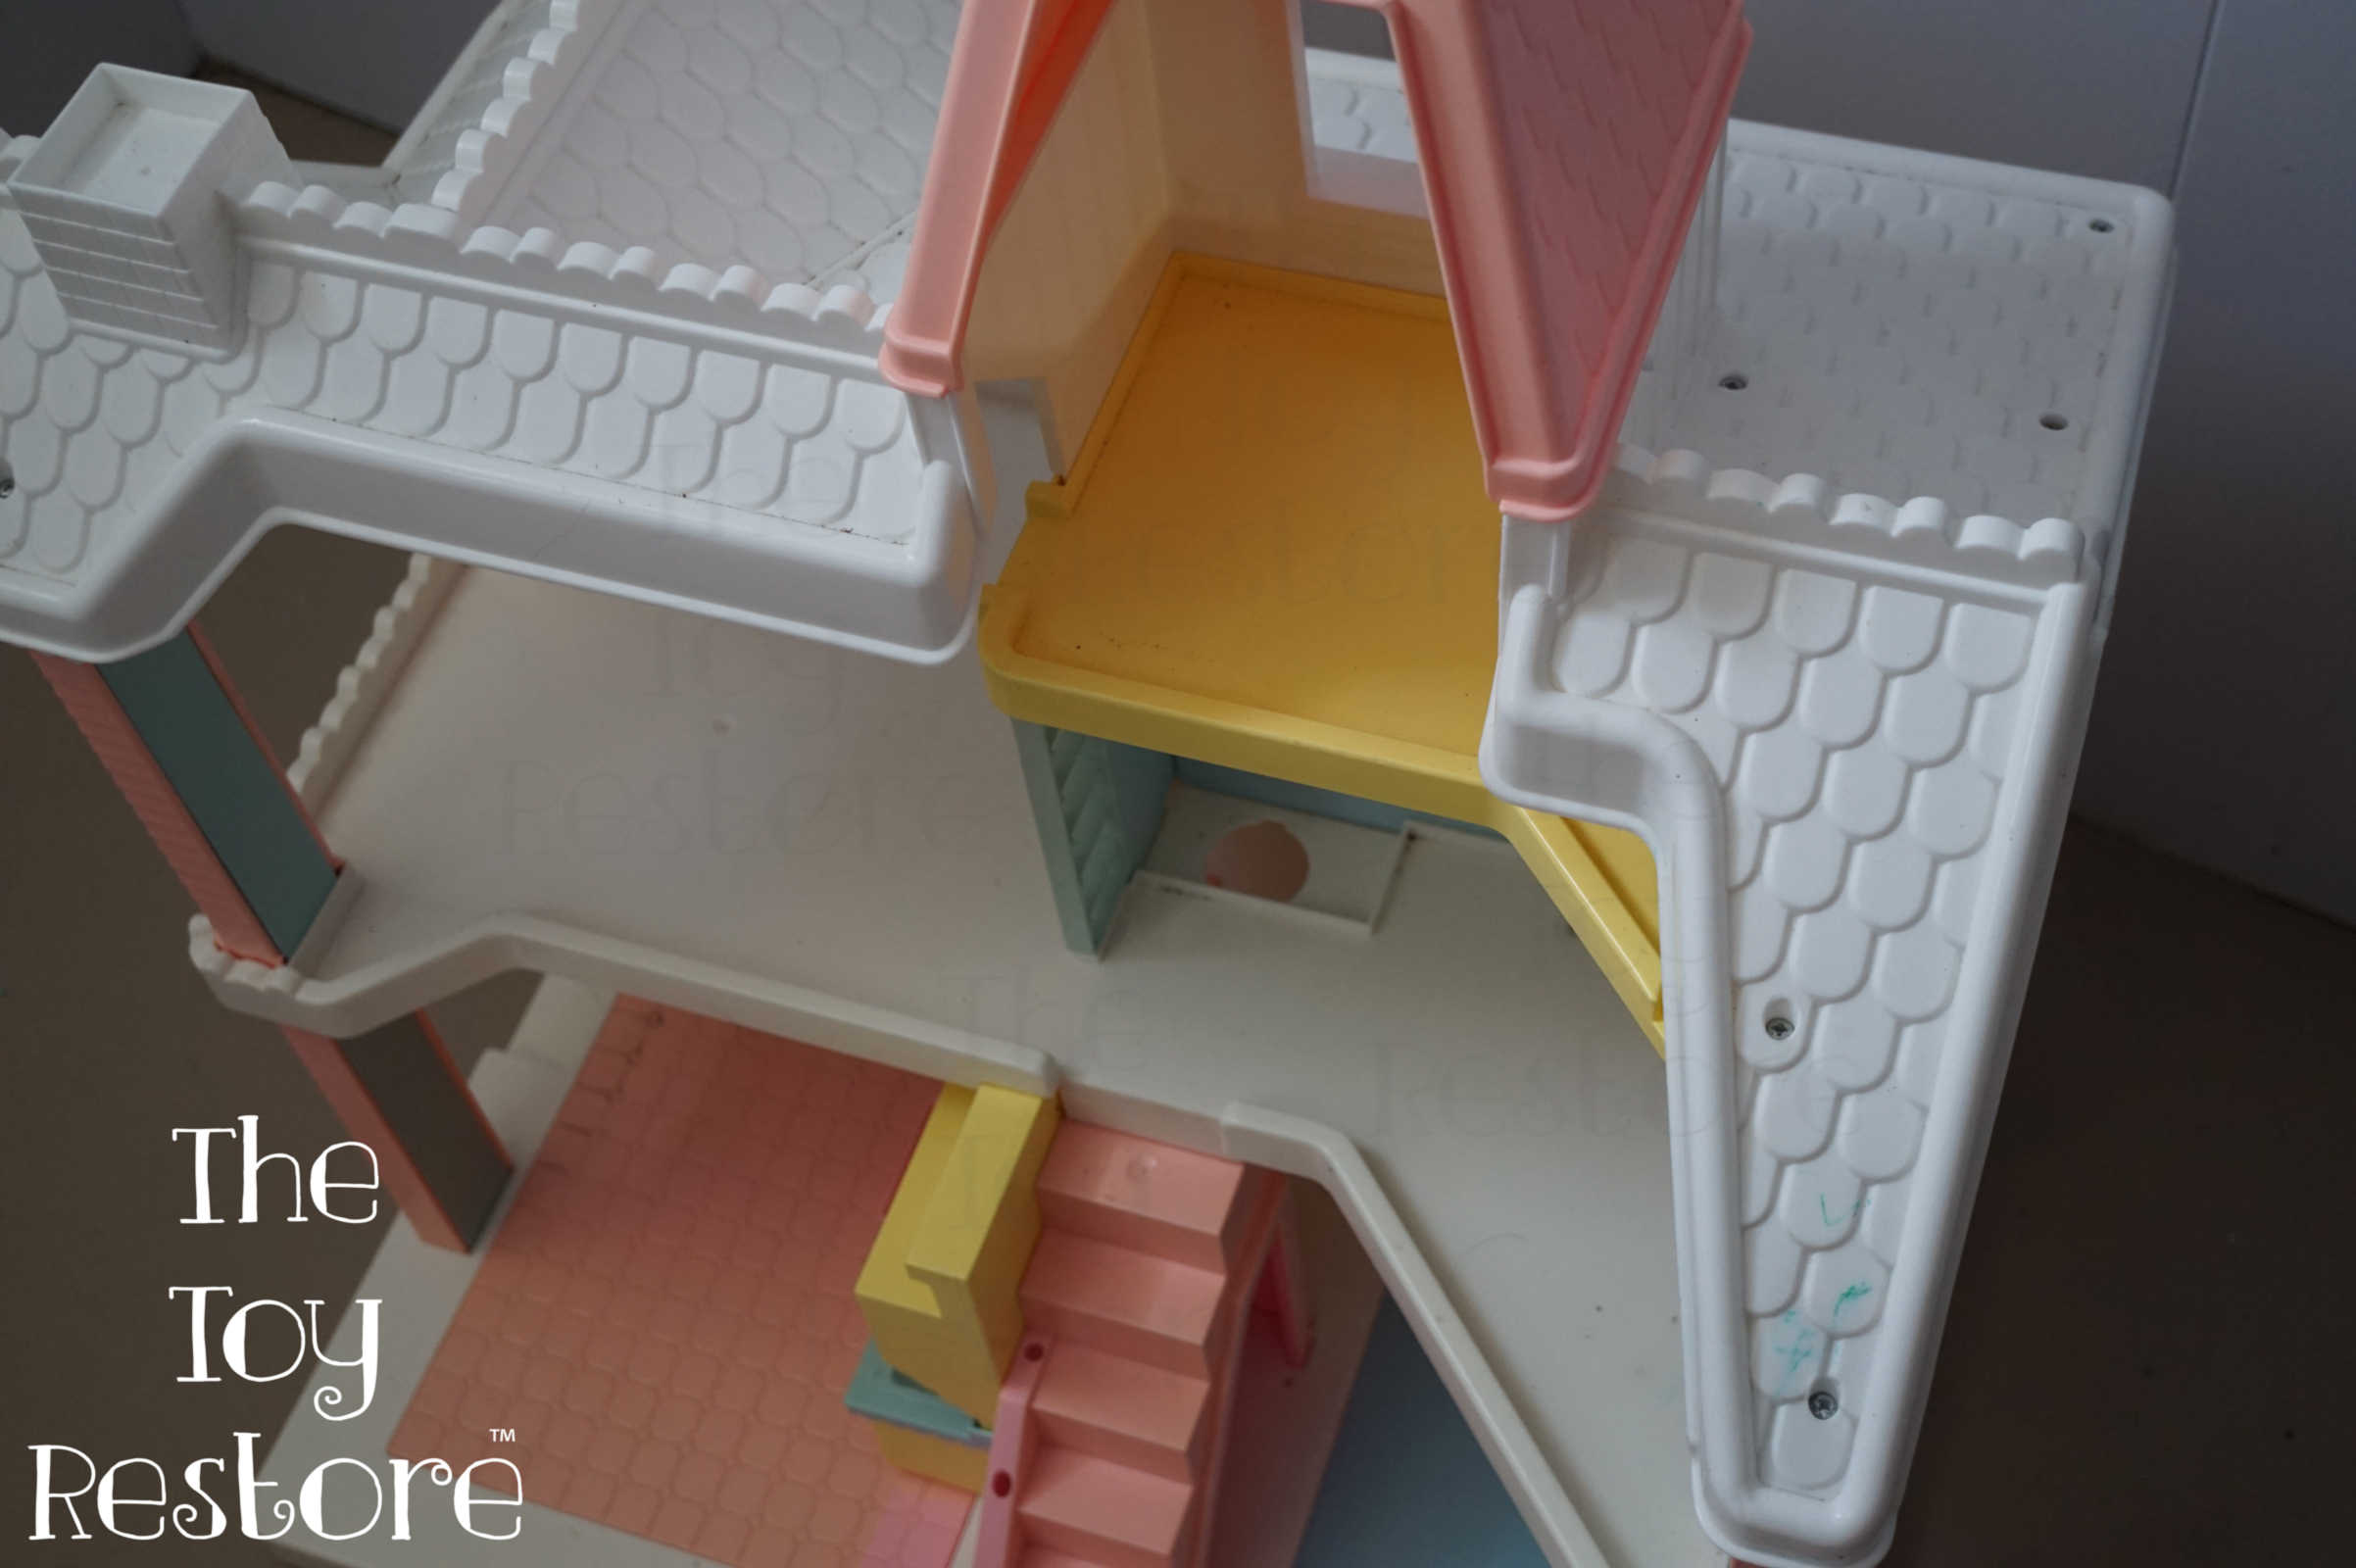
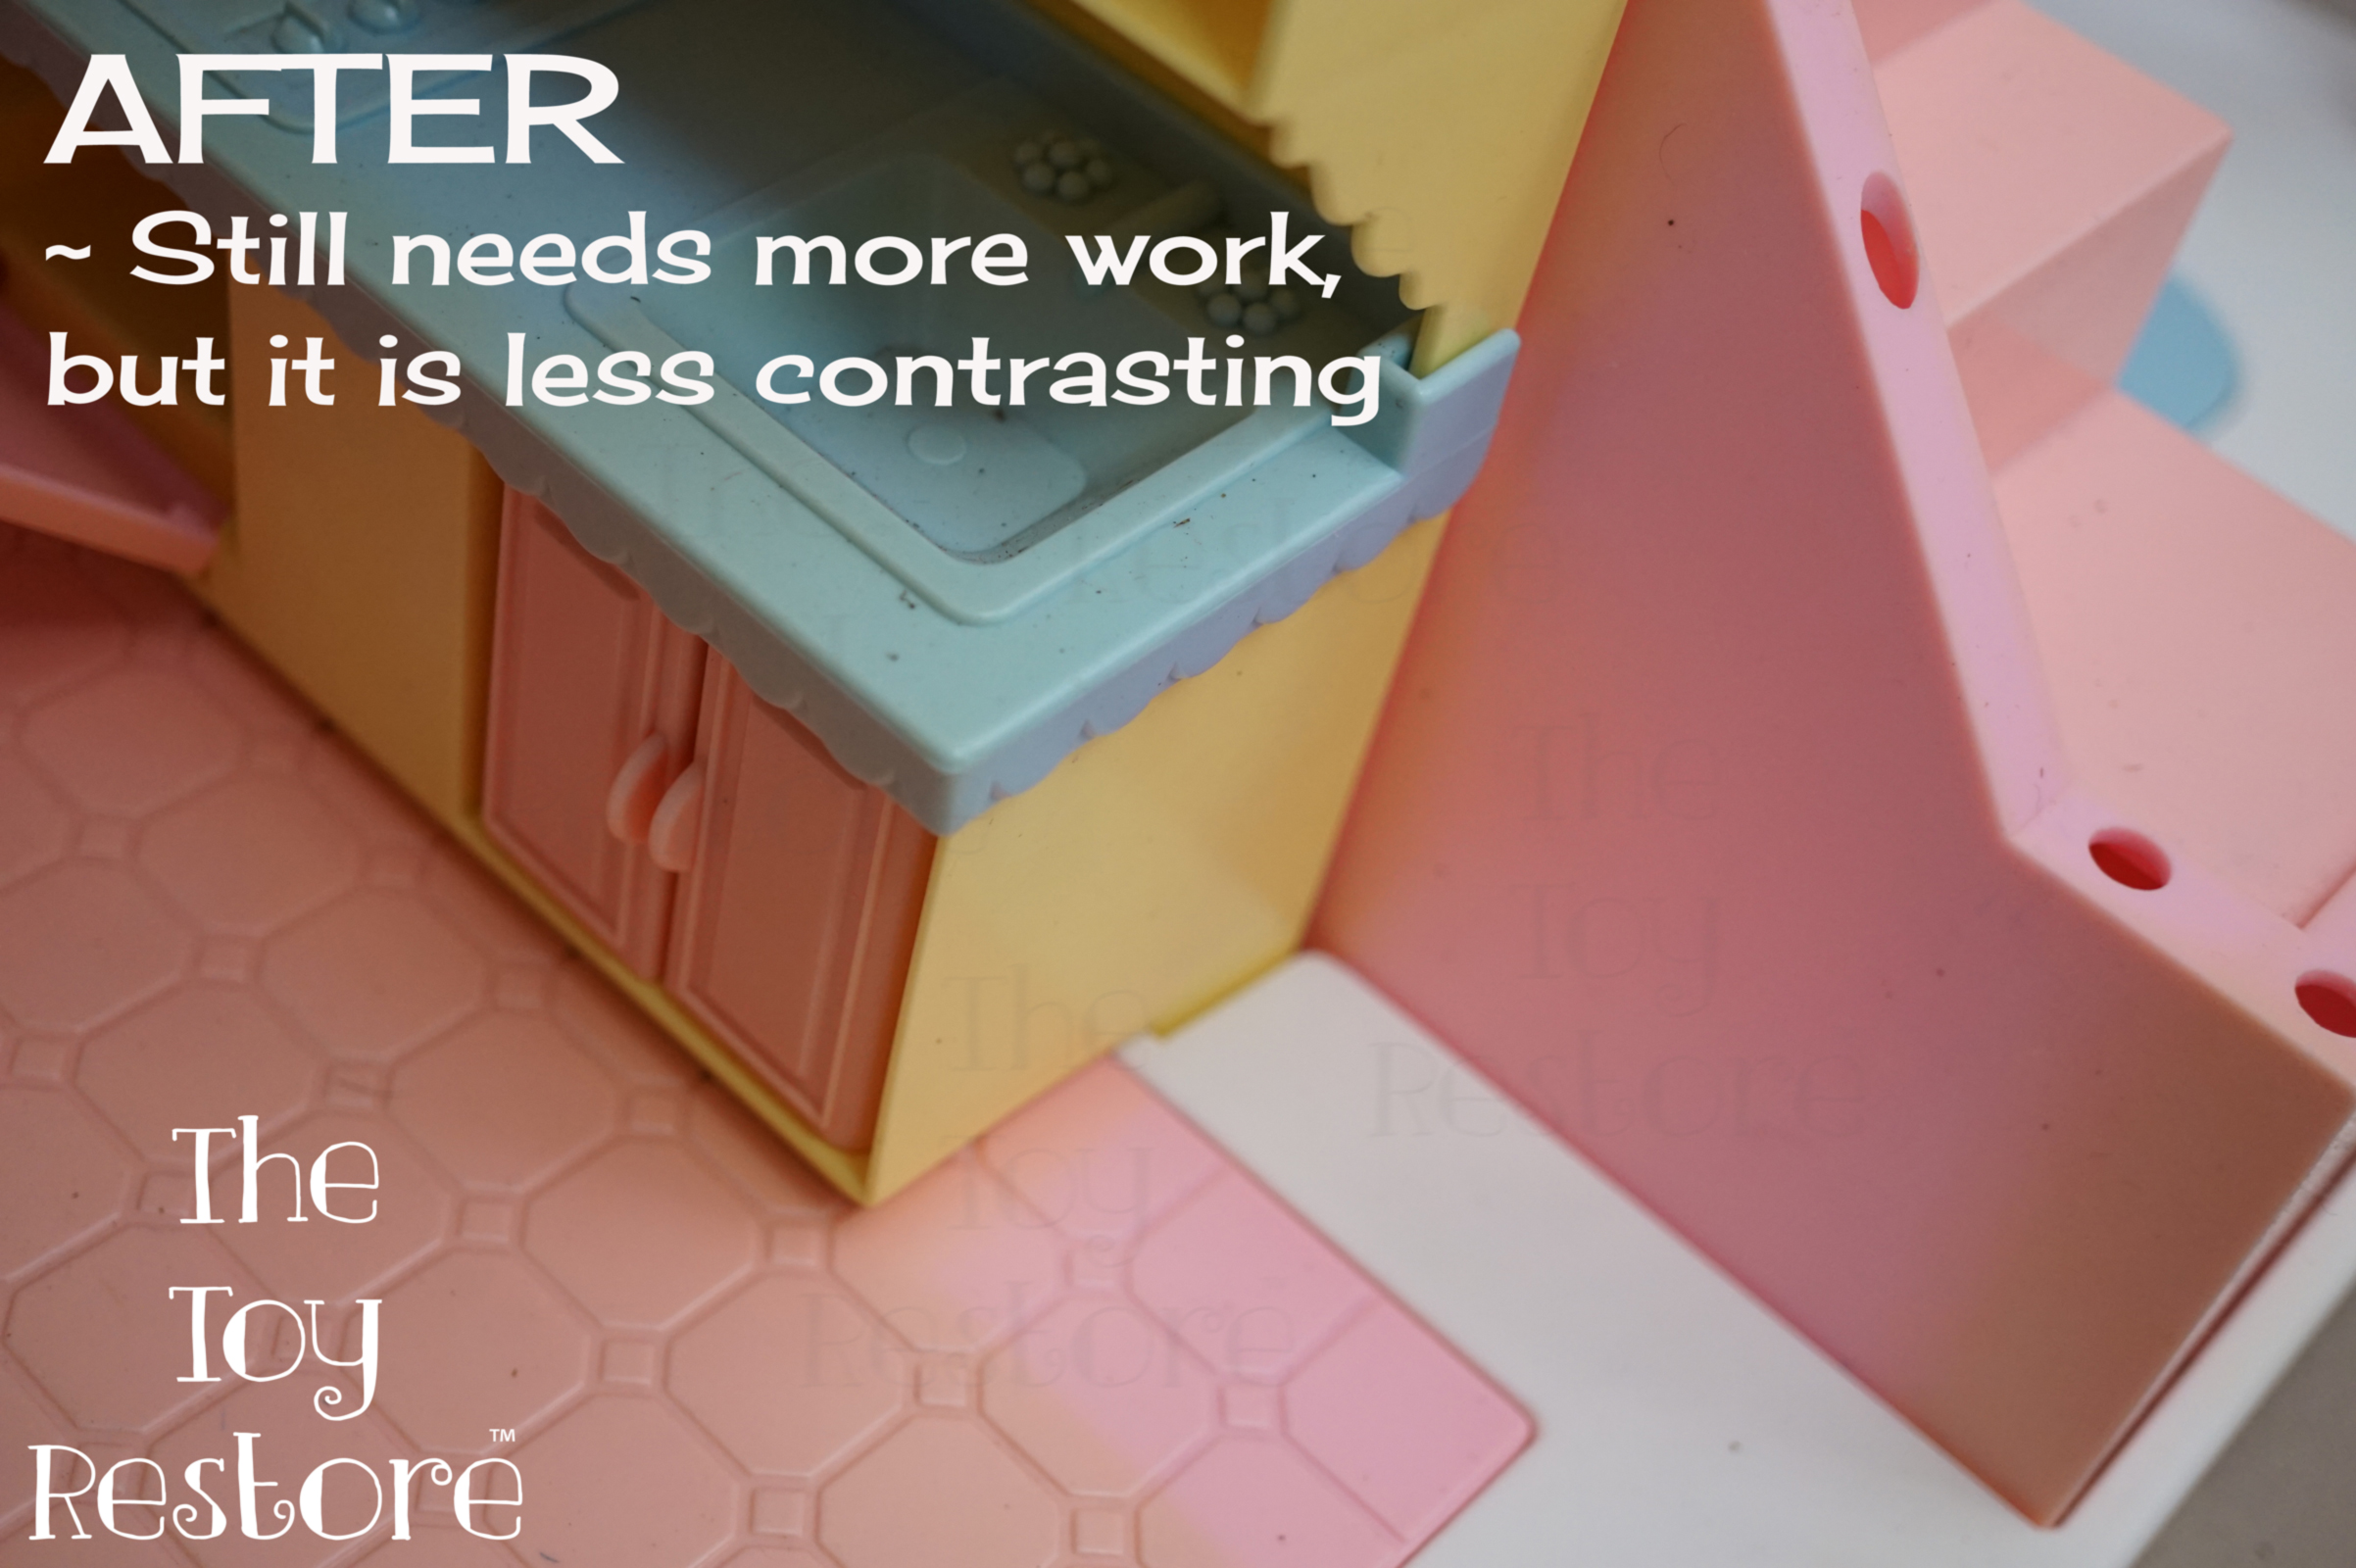
Eventually, the color, including the blotches evened out as best as it could. There is still a lot more work needed on this dollhouse, but I am too afraid to continue with bleaching it. The plastic has already become brittle.
Playskool Victorian Dollhouse, getting brittle from the bleaching process
While the dollhouse still needs work, I’m hesitant to continue because the plastic has already become brittle.
Finished Playskool Victorian Dollhouse. Not perfect, but much better.
How to Whiten Yellowed Plastic Toys: Fisher Price Examples
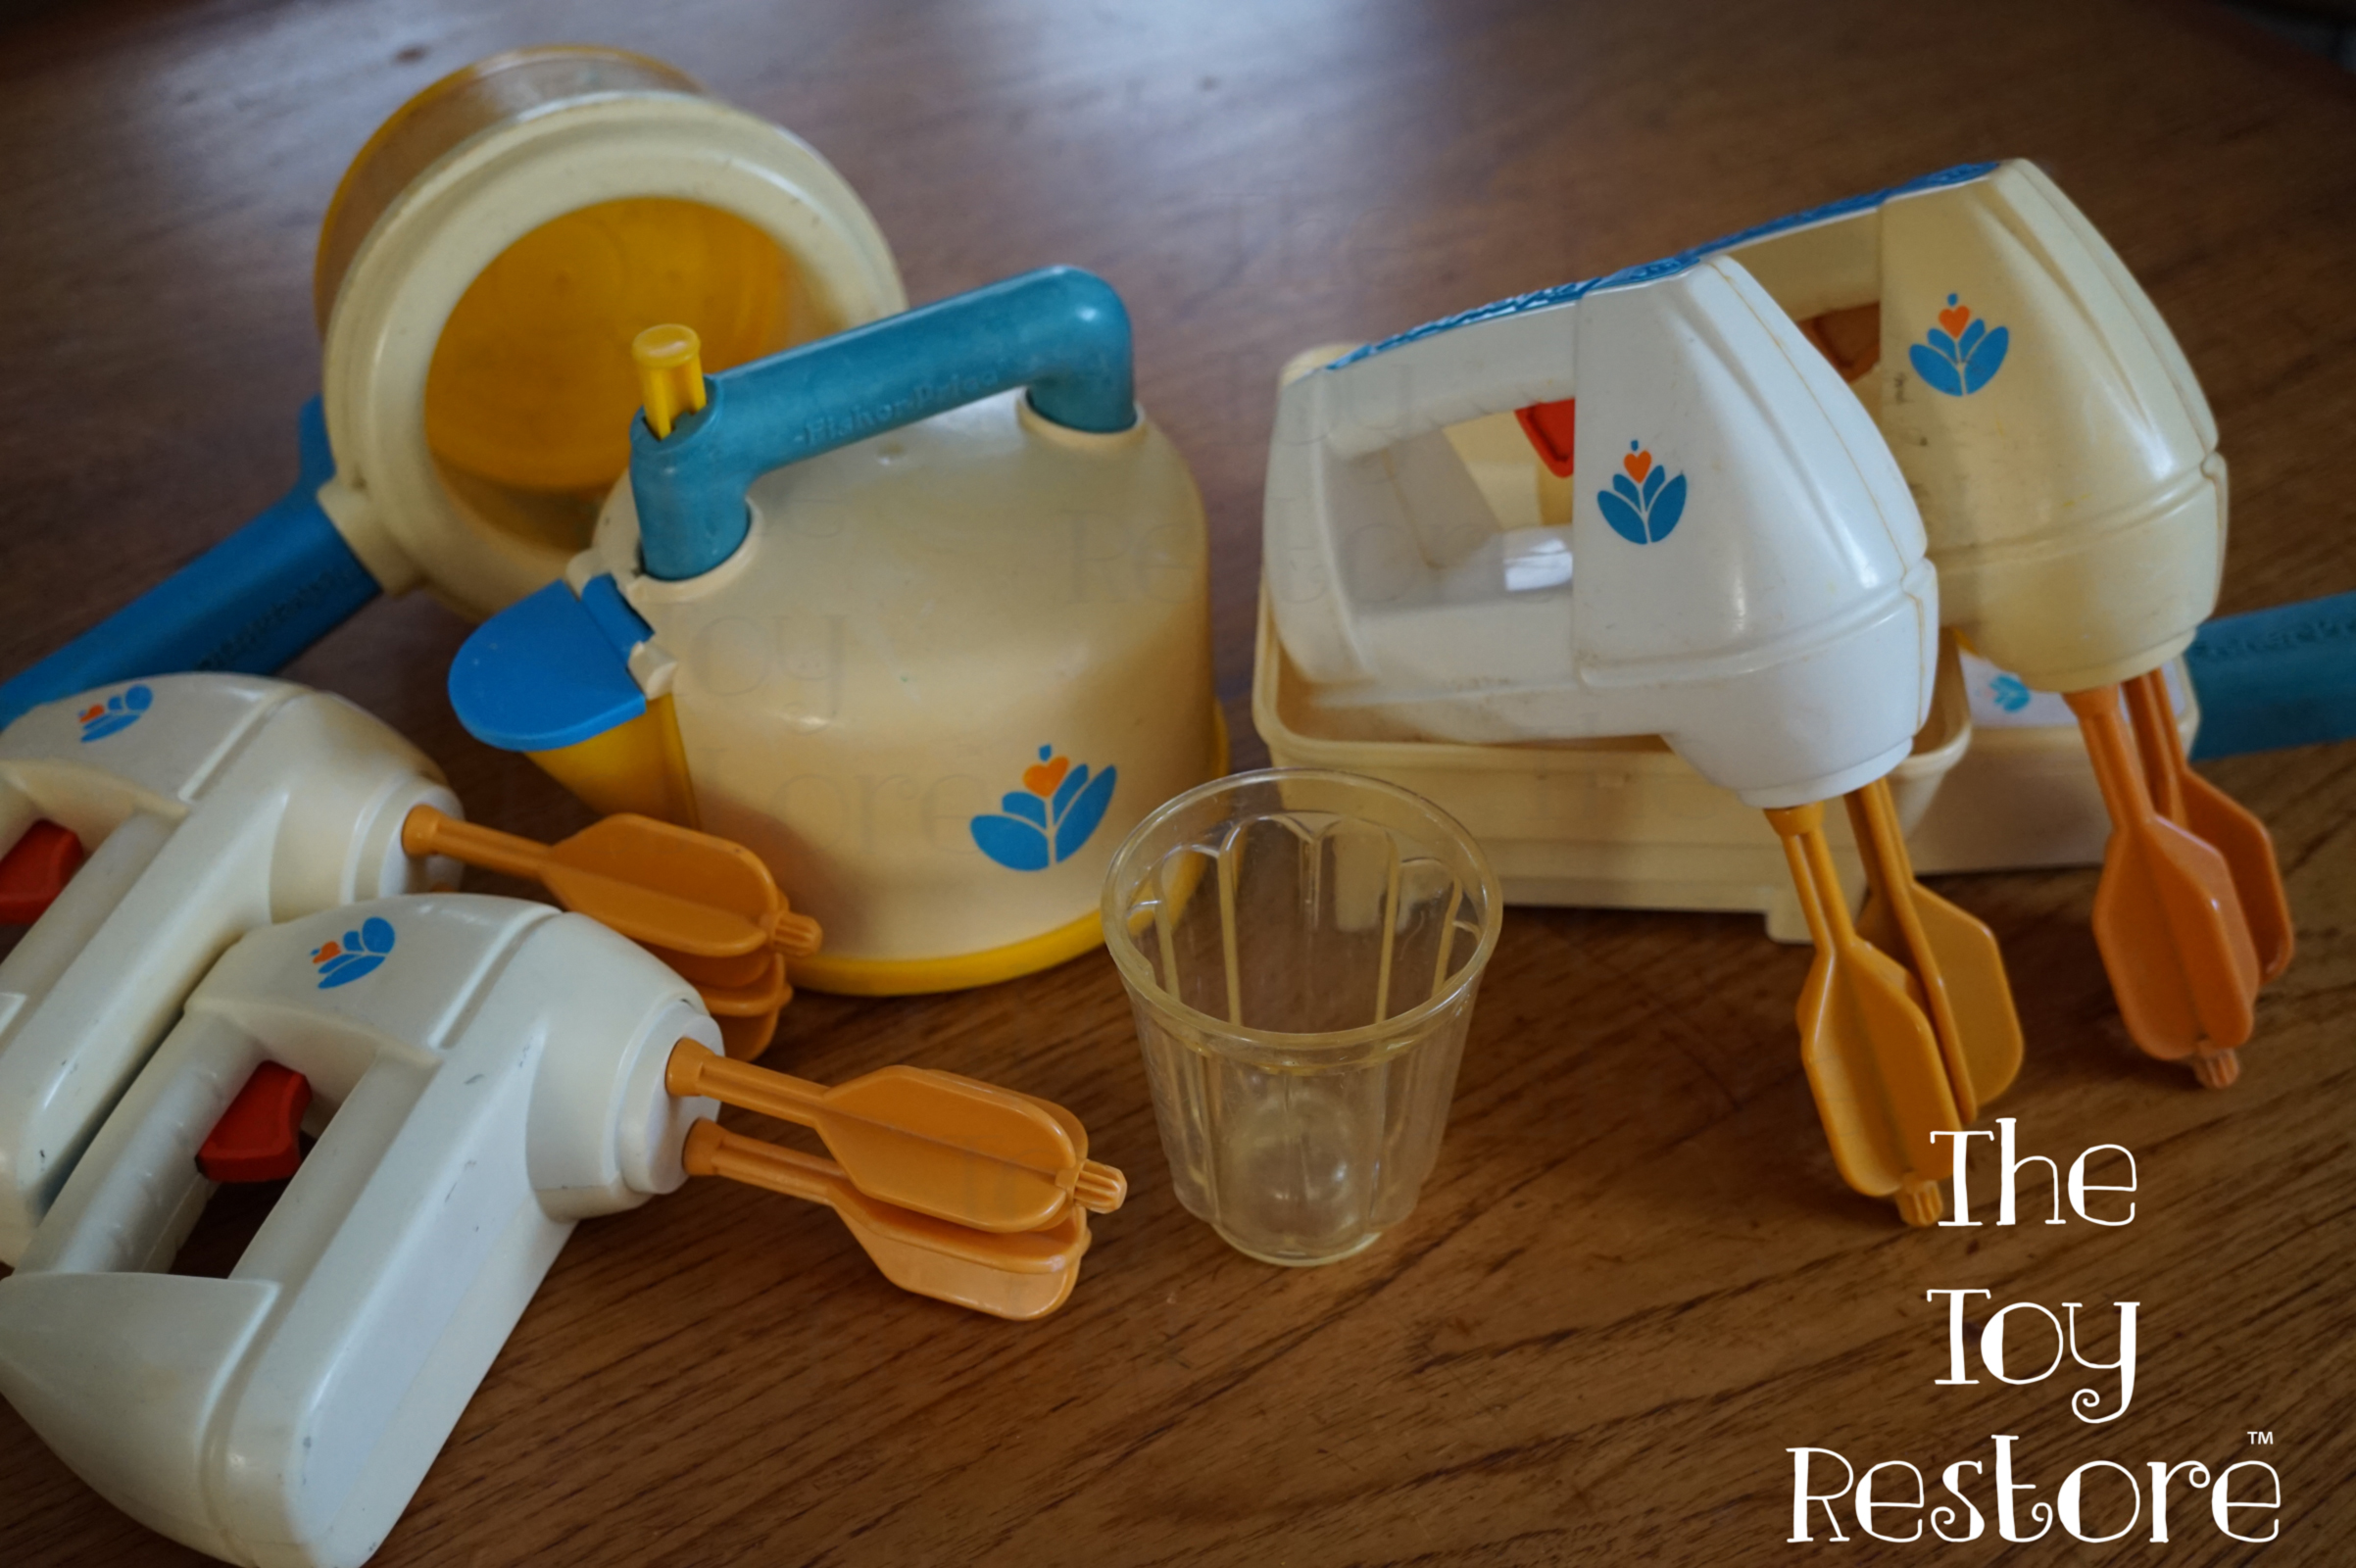
Bleaching out Fisher Price Fun With Food
I’ve also used this whitening process on various Fisher Price Fun with Food toys. Sunlight alone does a decent job, but adding bleach and hydrogen peroxide speeds up the process. I make sure to apply the solution only to the white areas and monitor it closely to avoid blotchiness.
Fisher Price Fun With Food Yellowed Toys
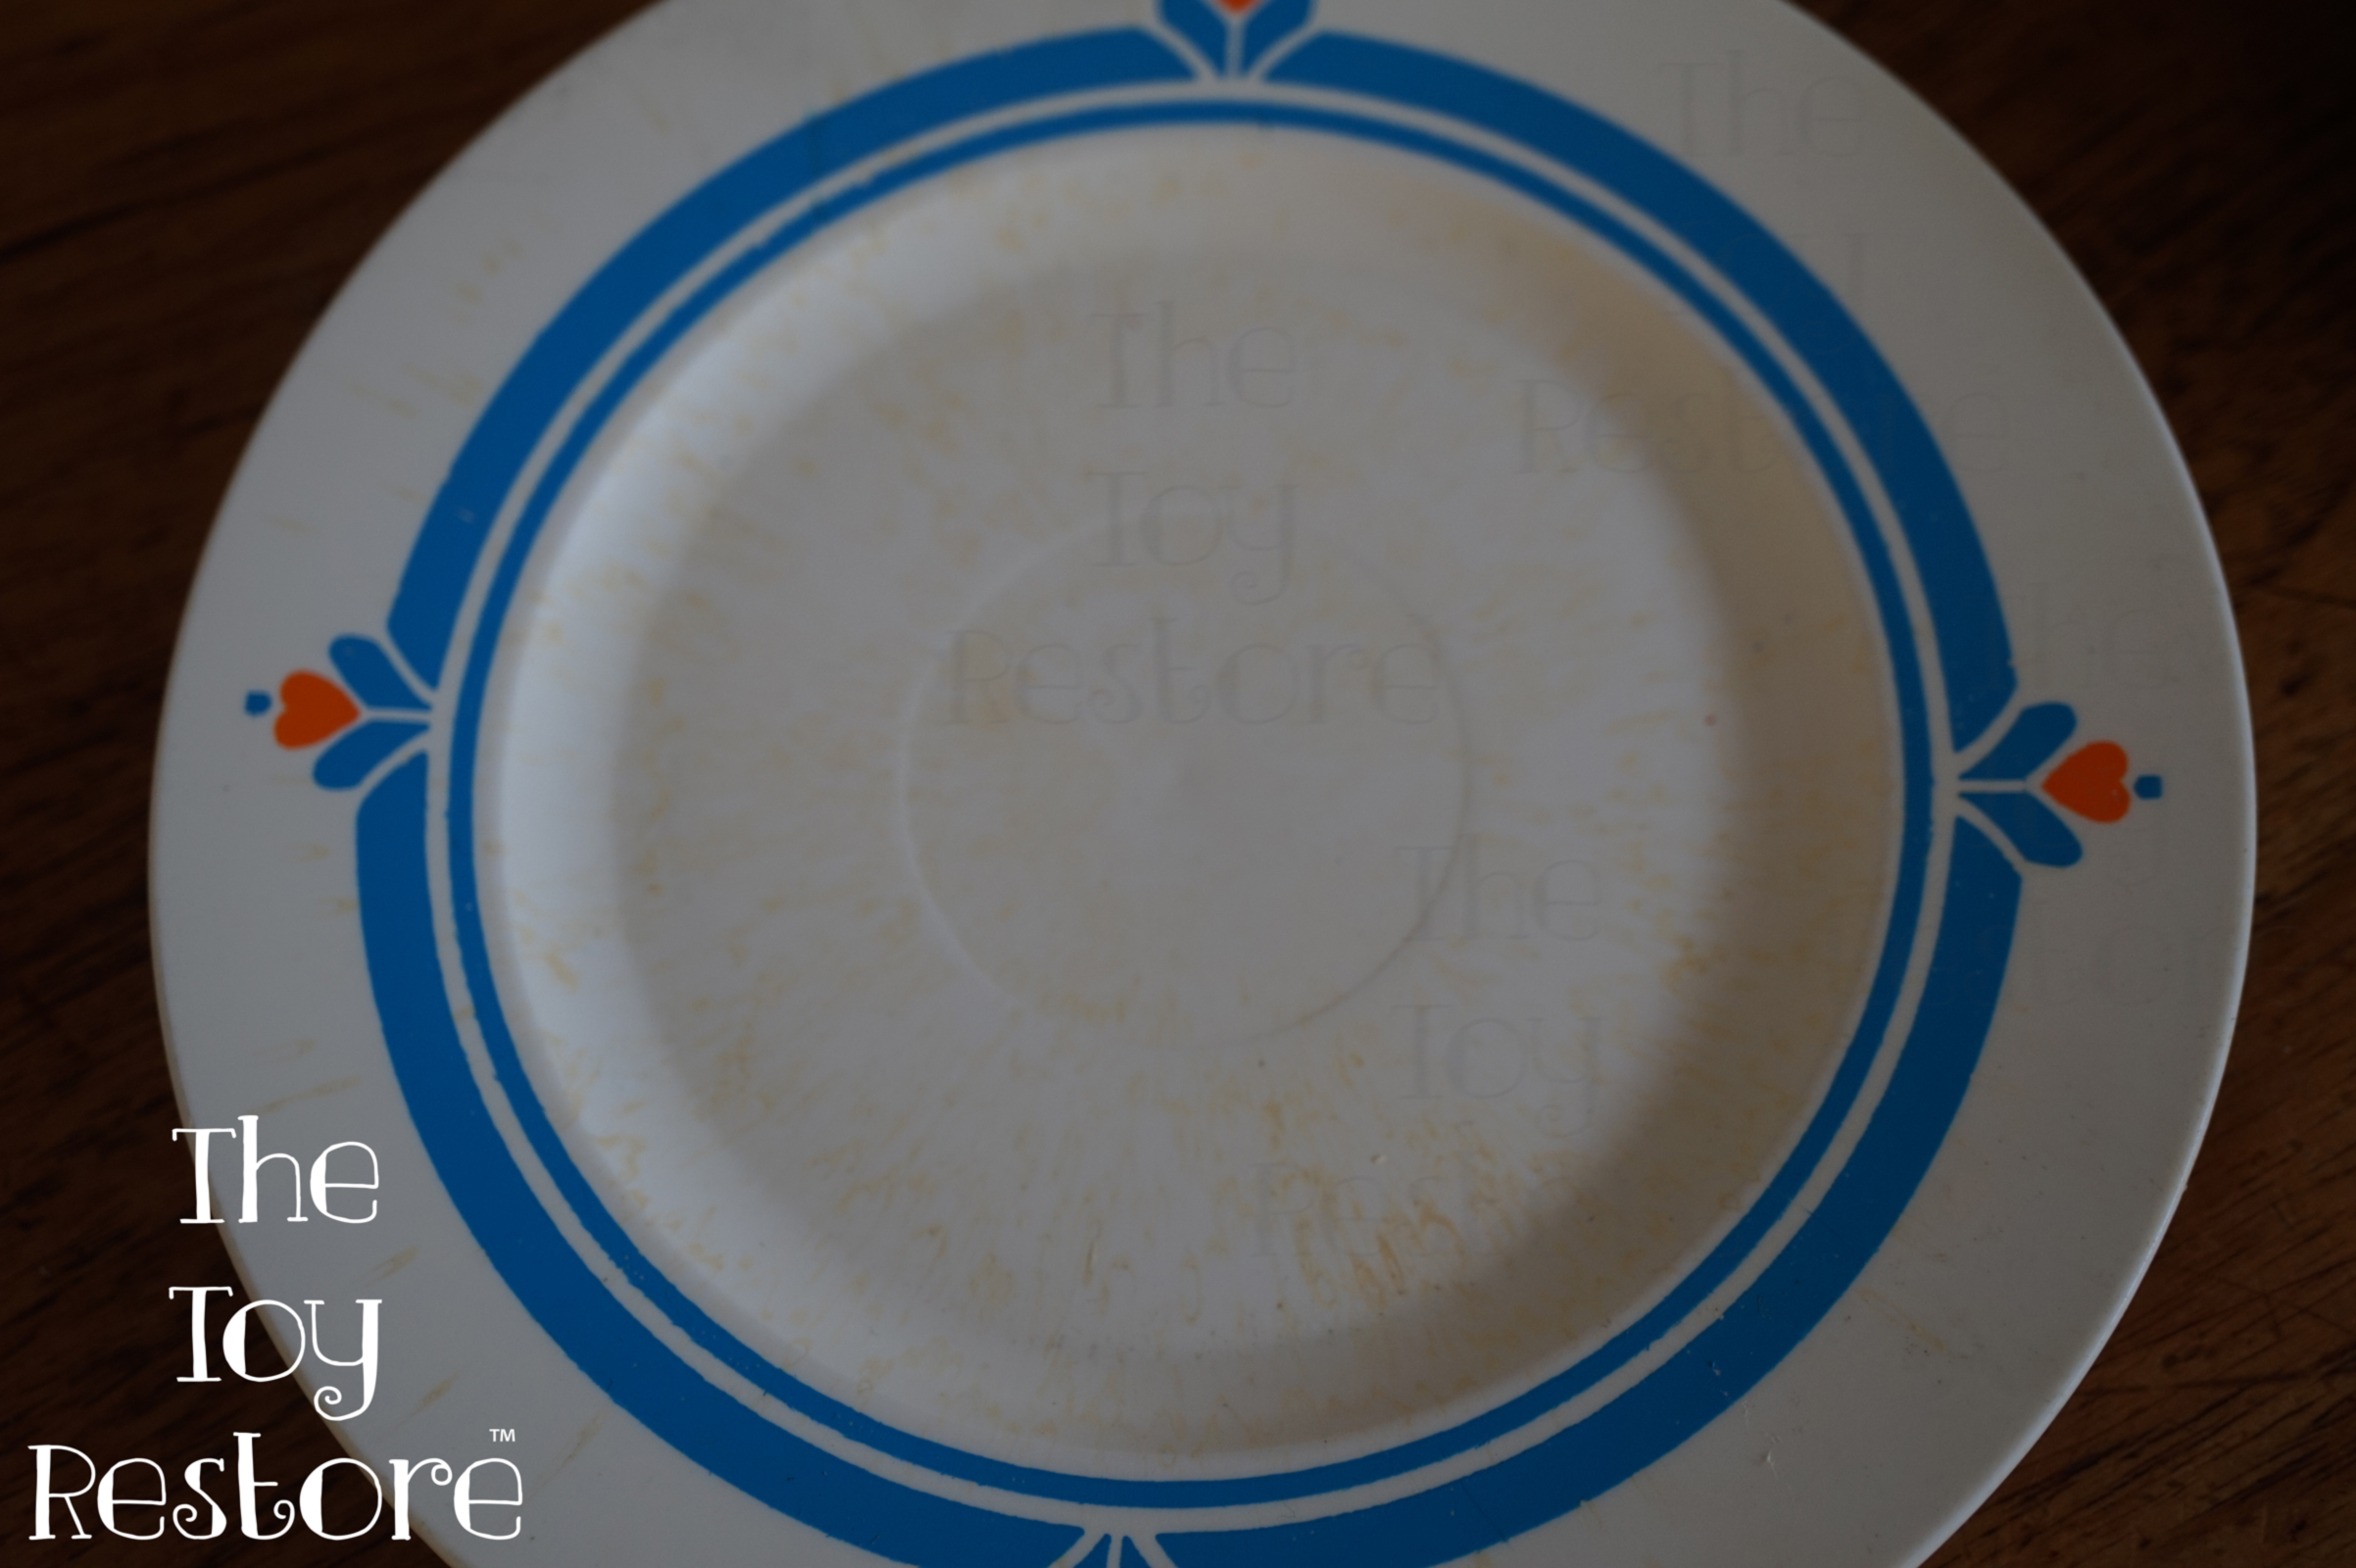
One such instance involved a Fisher Price Fun with Food dish that became blotchy because I didn’t apply an even coat of bleach.
Fisher Price Fun with Food dish, got blotchy from not having an even coat.
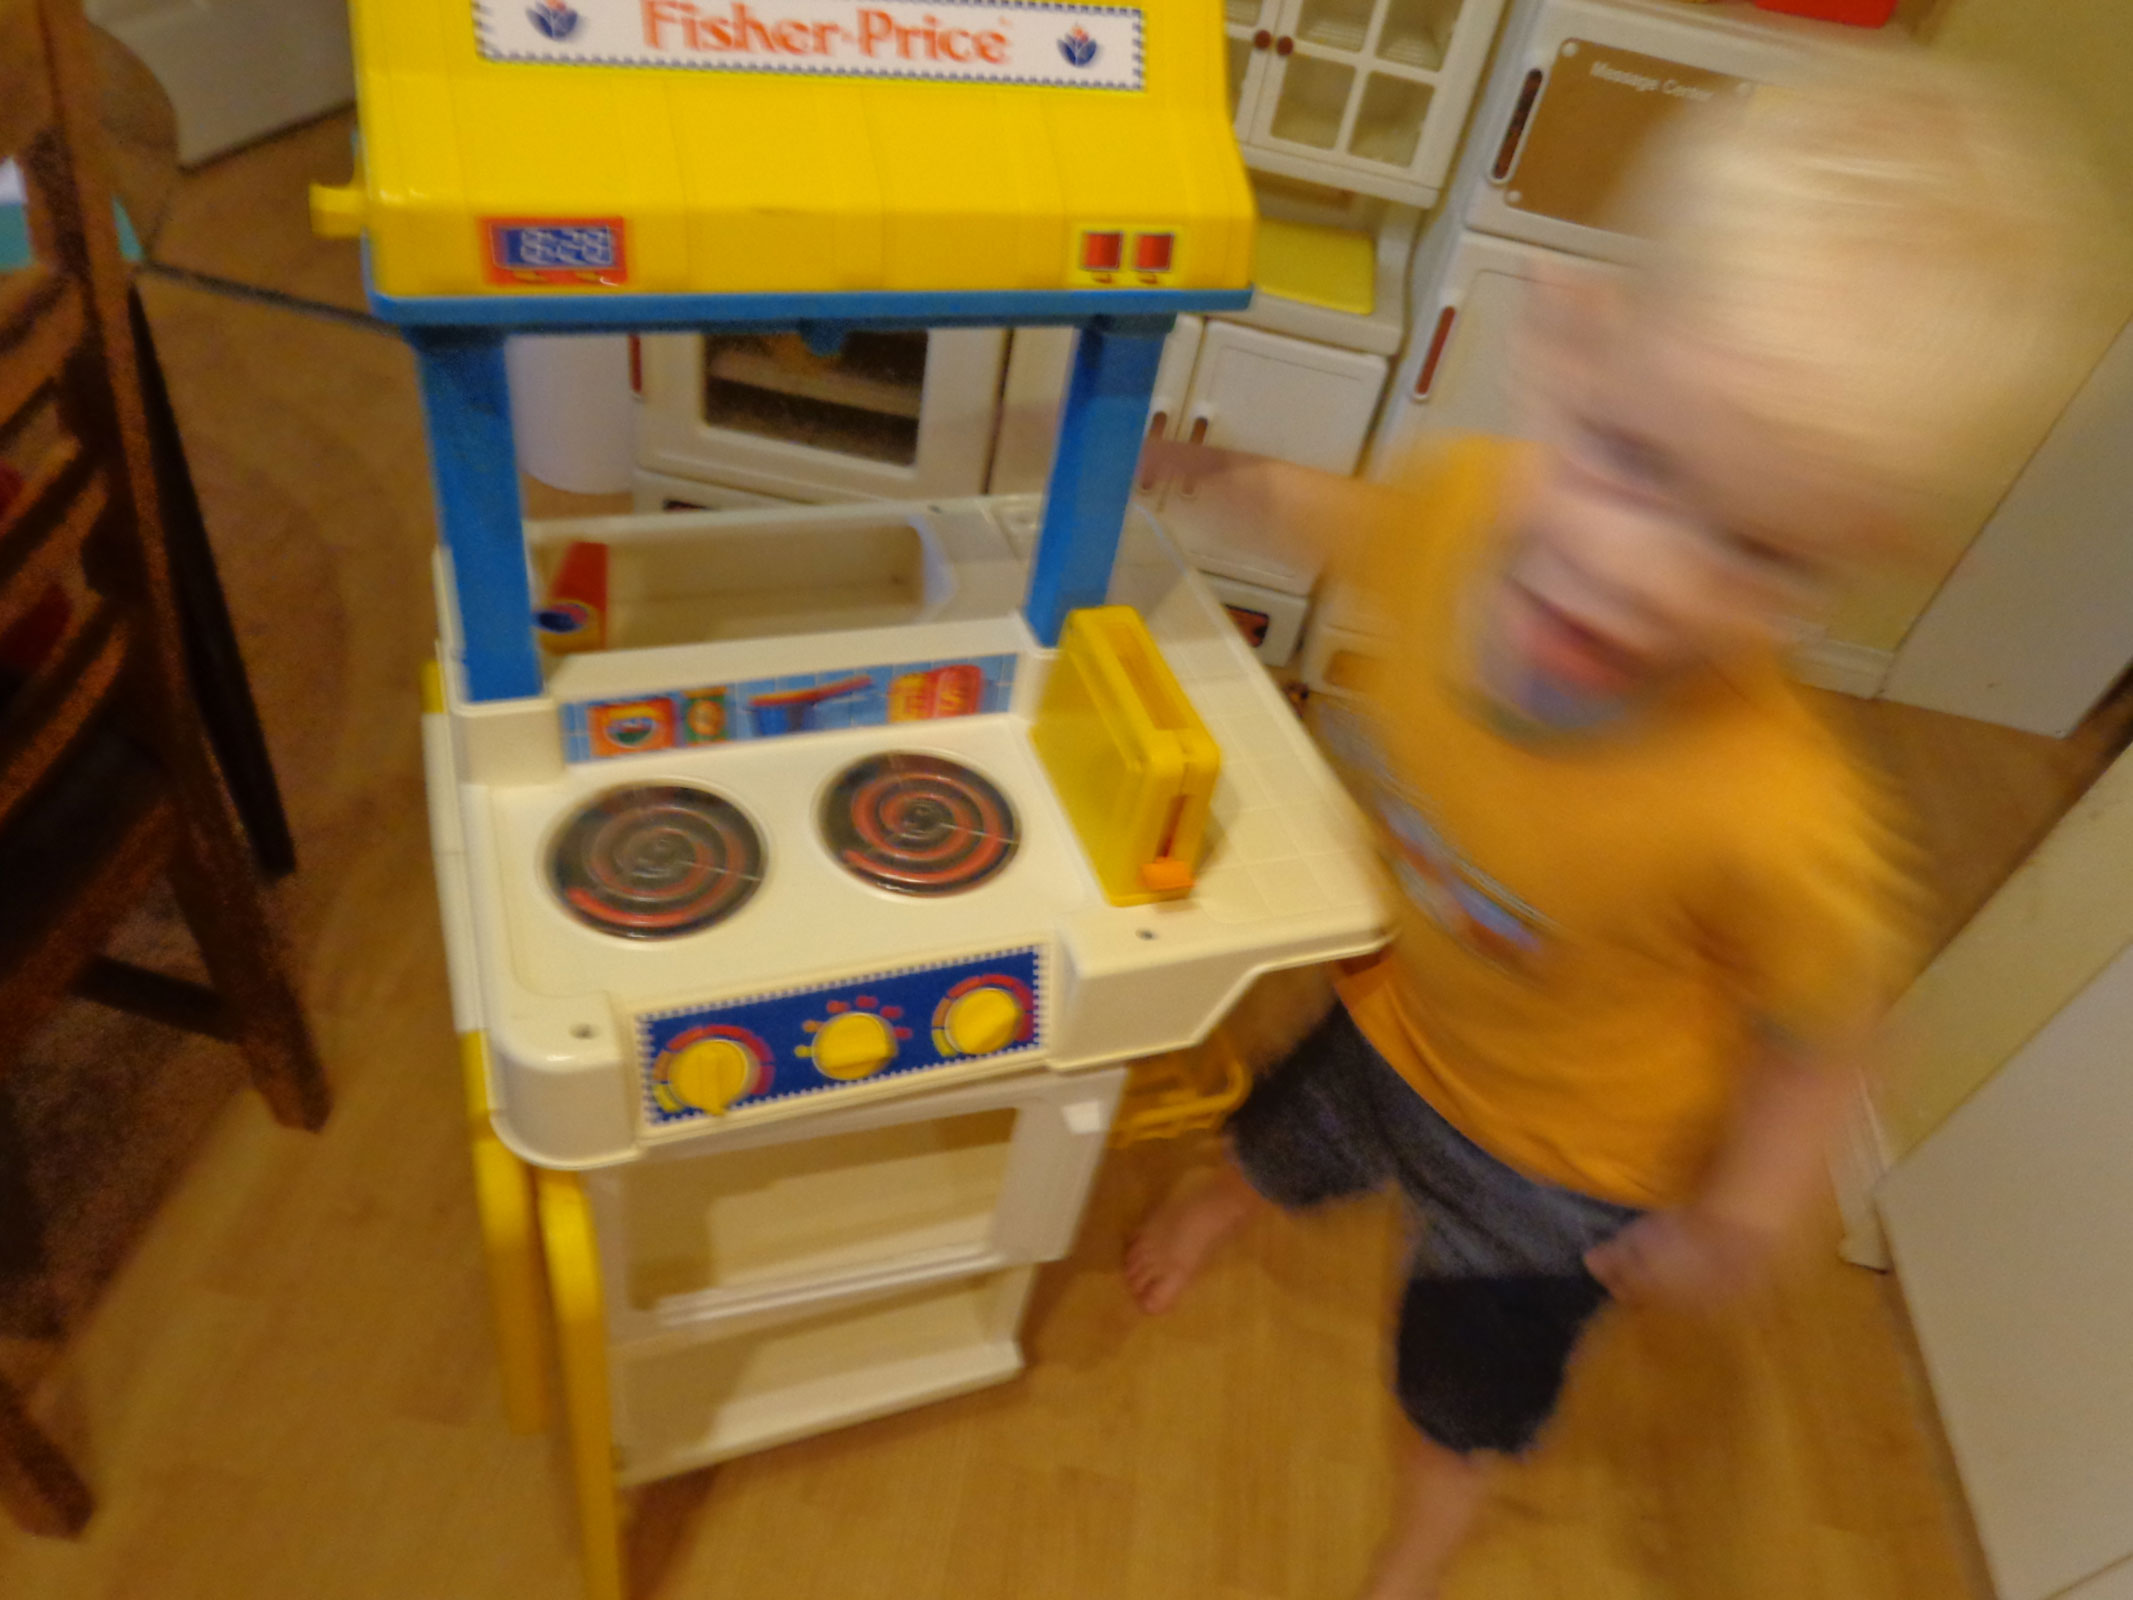
My kids Vintage Fisher Price Magic Burner Kitchen, that they loved.
Sunlight Also Removes Marker Stains
I’ve found that sunlight is great for removing marker and pen stains from plastic furniture items for kids, which I often find at thrift stores. A simple exposure to sunlight is usually enough to remove these stains, depending on the season.
Does the Time of Year Matter for Sunlight Whitening?
In Canada, we experience stronger sunlight and longer daylight hours during the summer months (July and August). This heat speeds up the chemical reaction, making it the ideal time for whitening toys.
Can You Overdo It? Yes, Color Can Fade.
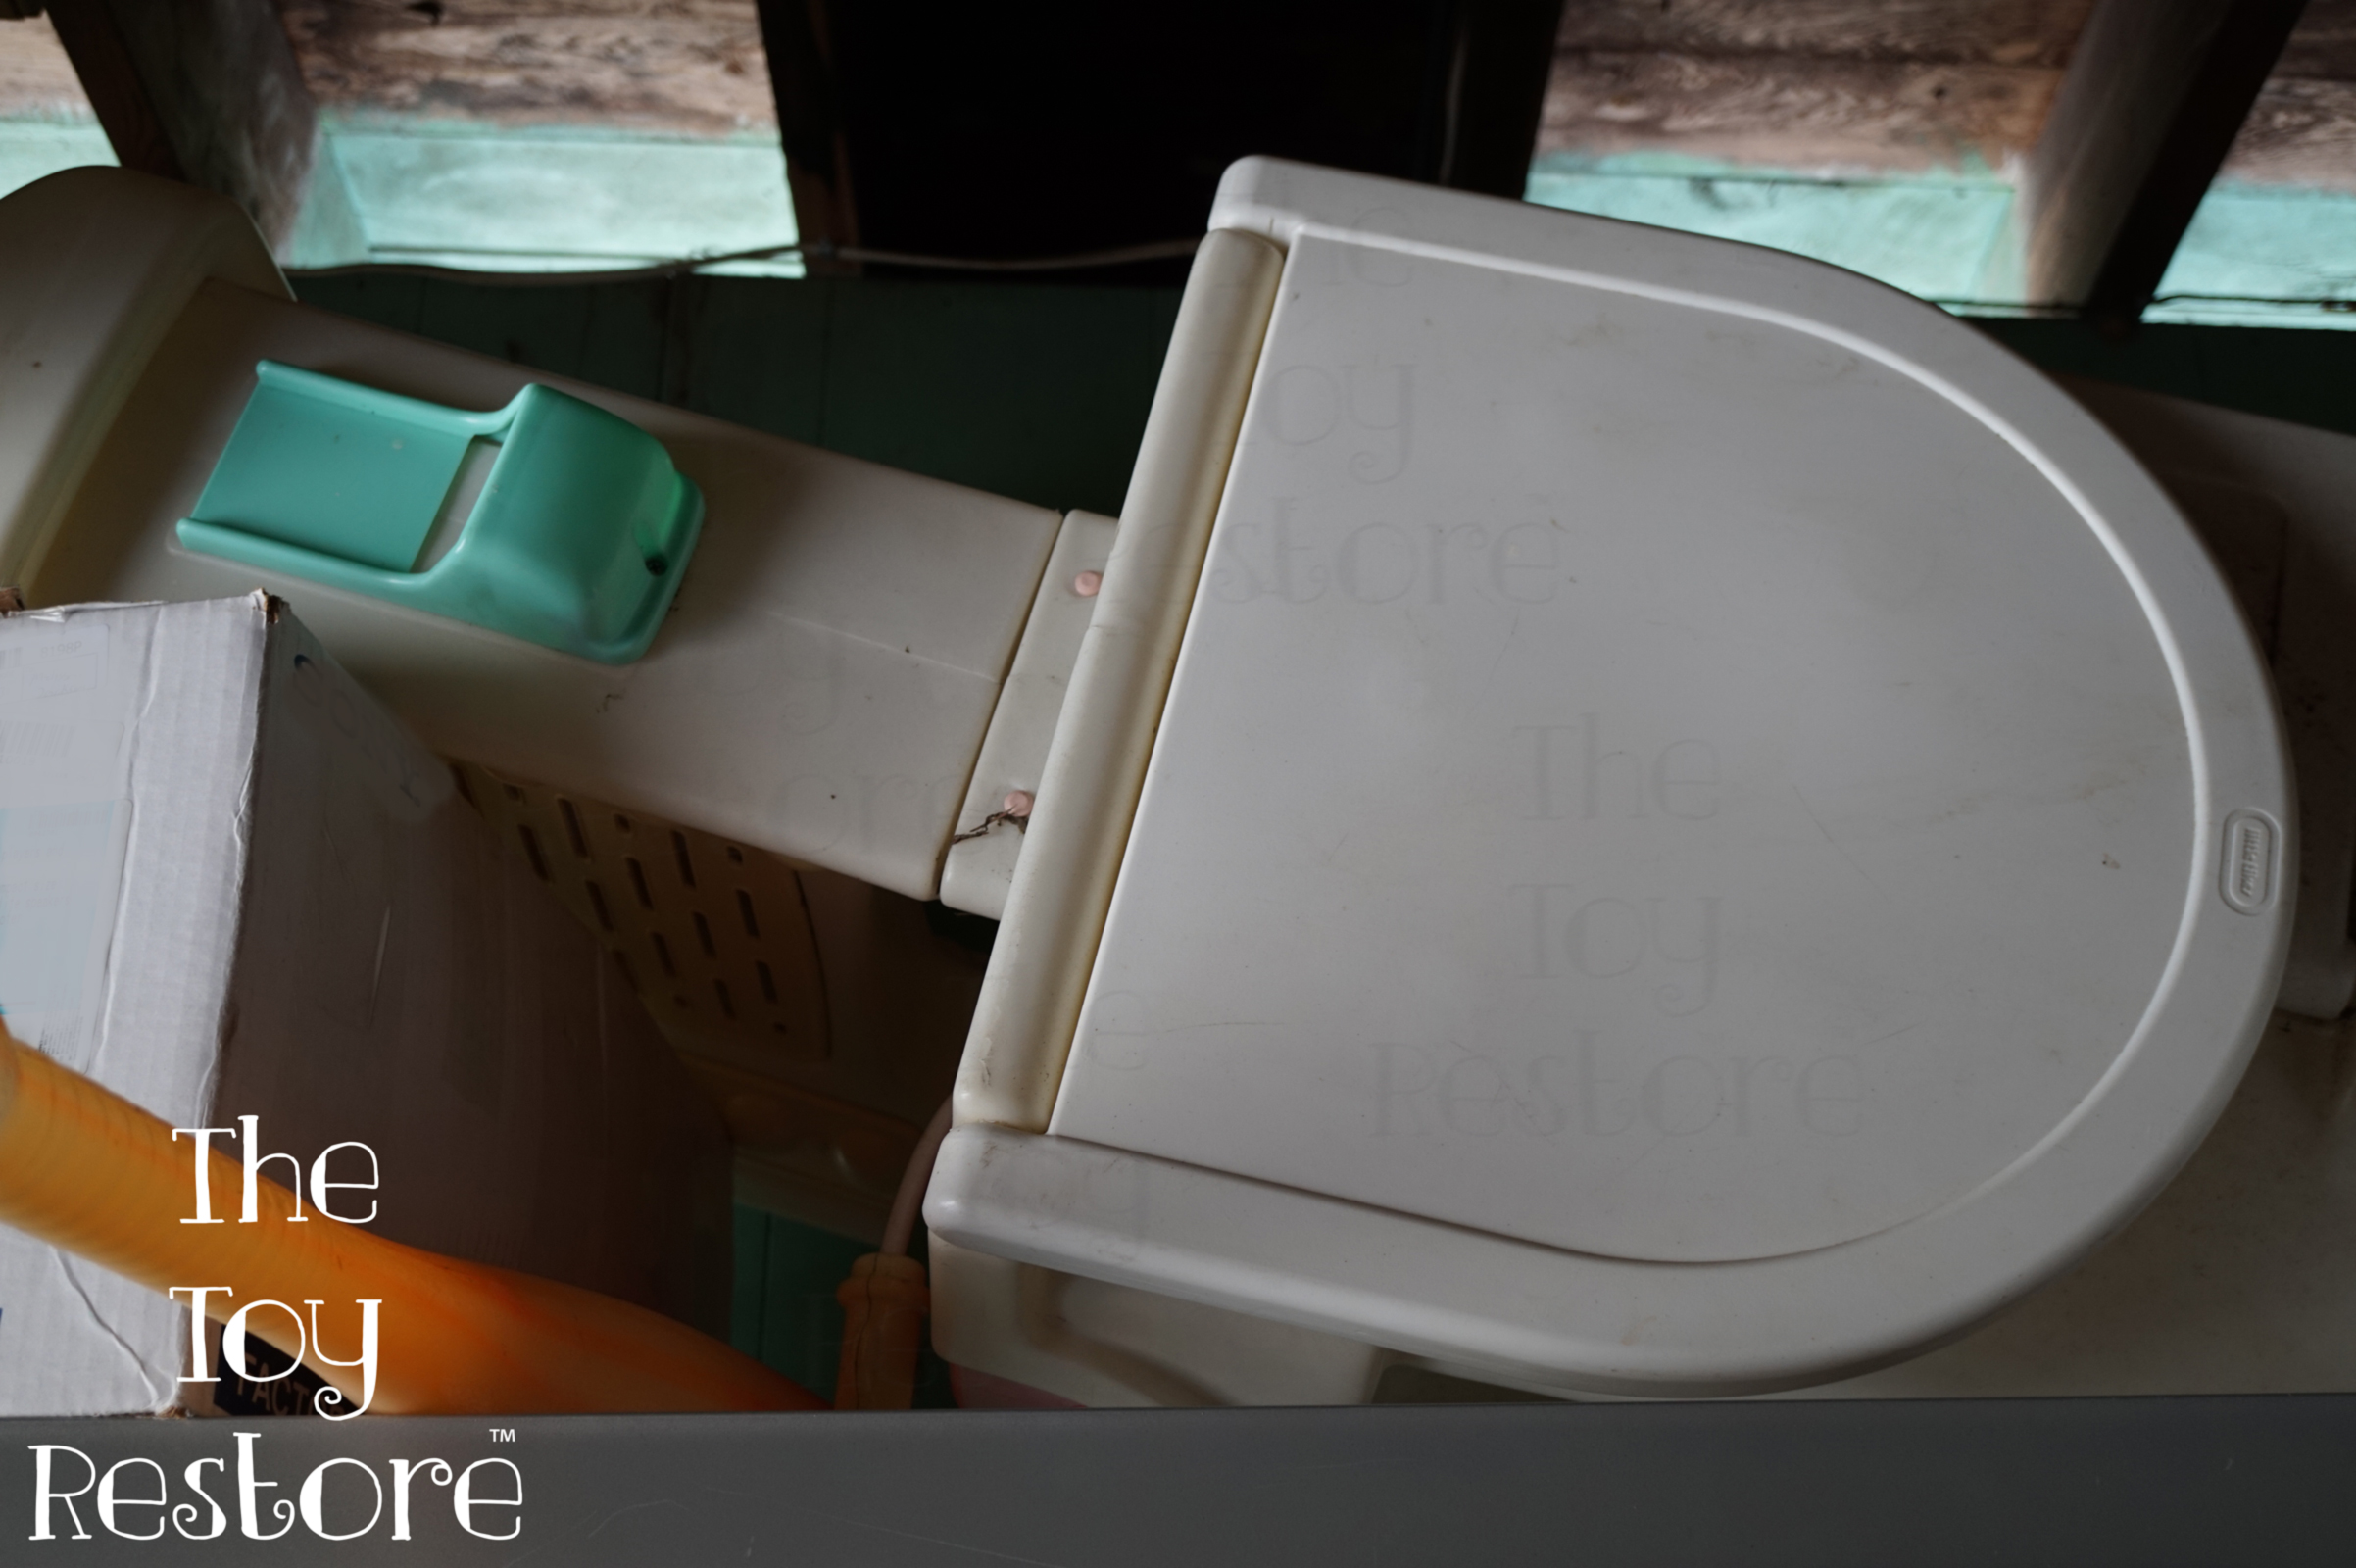
Yes, over-bleaching is a real concern. Colors like pink and purple fade quickly, while red will turn into a dull pink. I learned this the hard way when I left a Vintage Little Tikes Beauty Salon outside in the shade for about six months. It turned white, even though it had been kept in a shaded spot.
Sun Bleached Vintage Little Tikes Beauty Salon
Yes, Plastic Can Become Brittle!
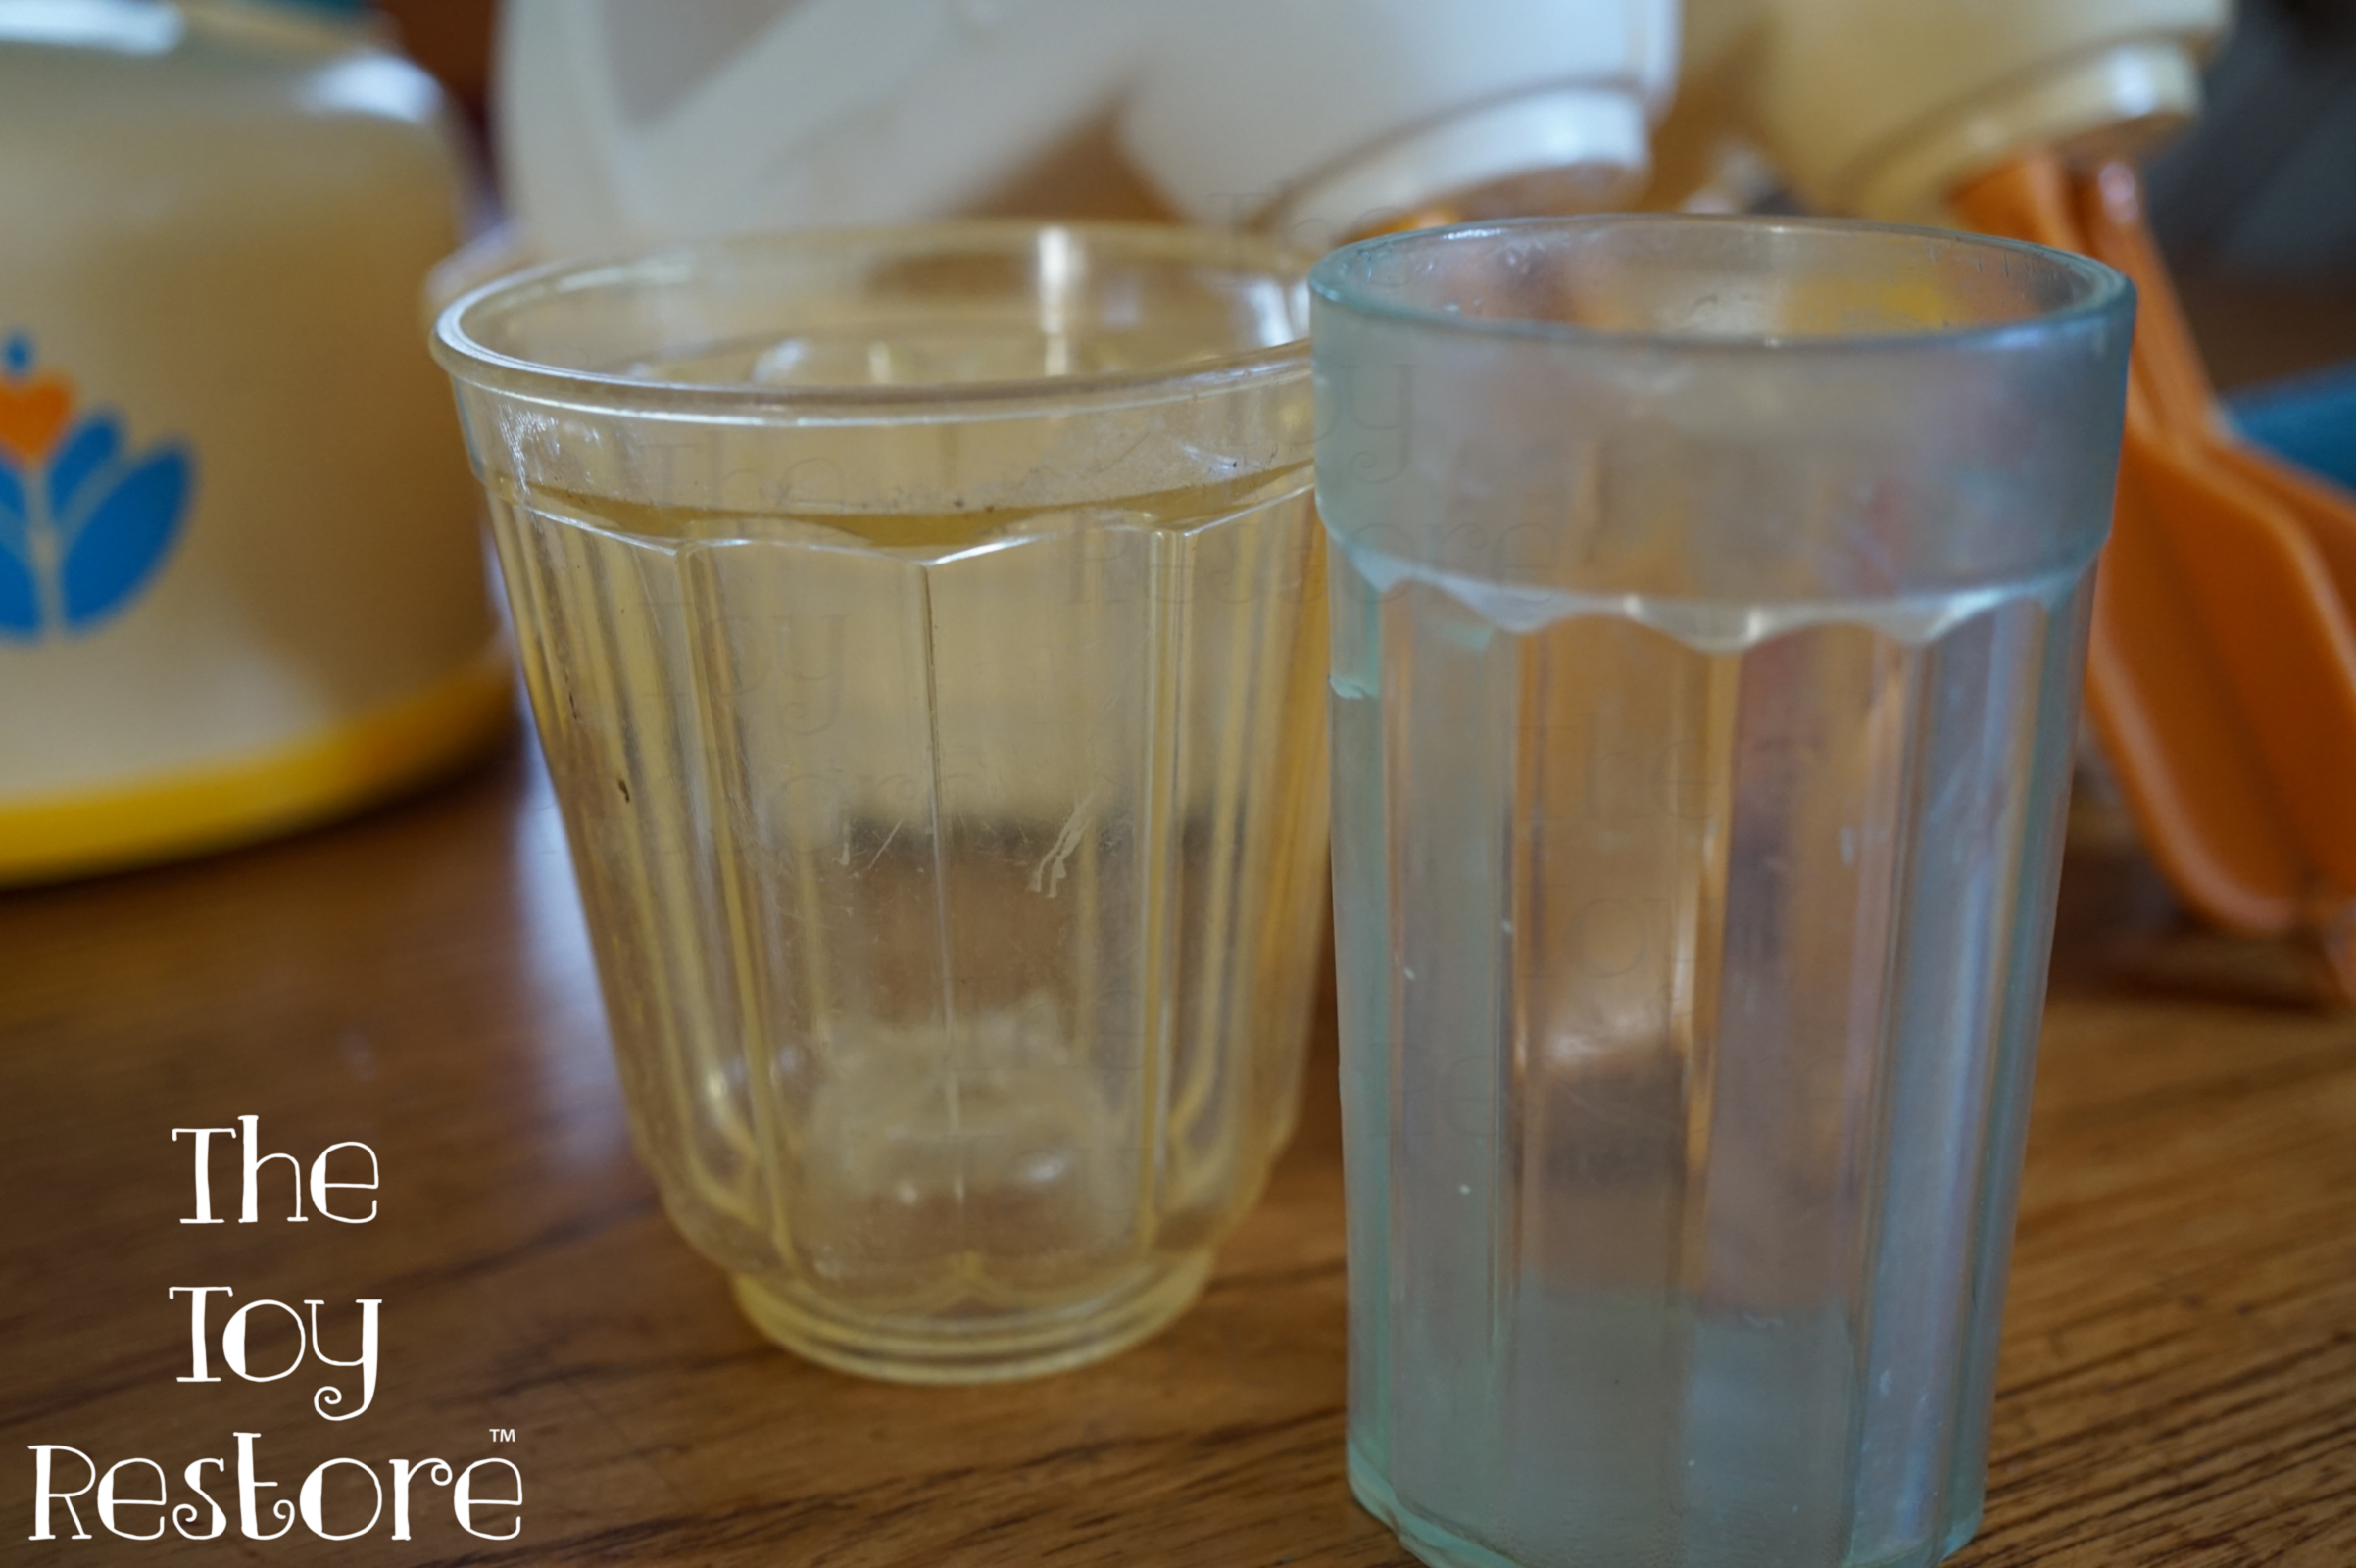
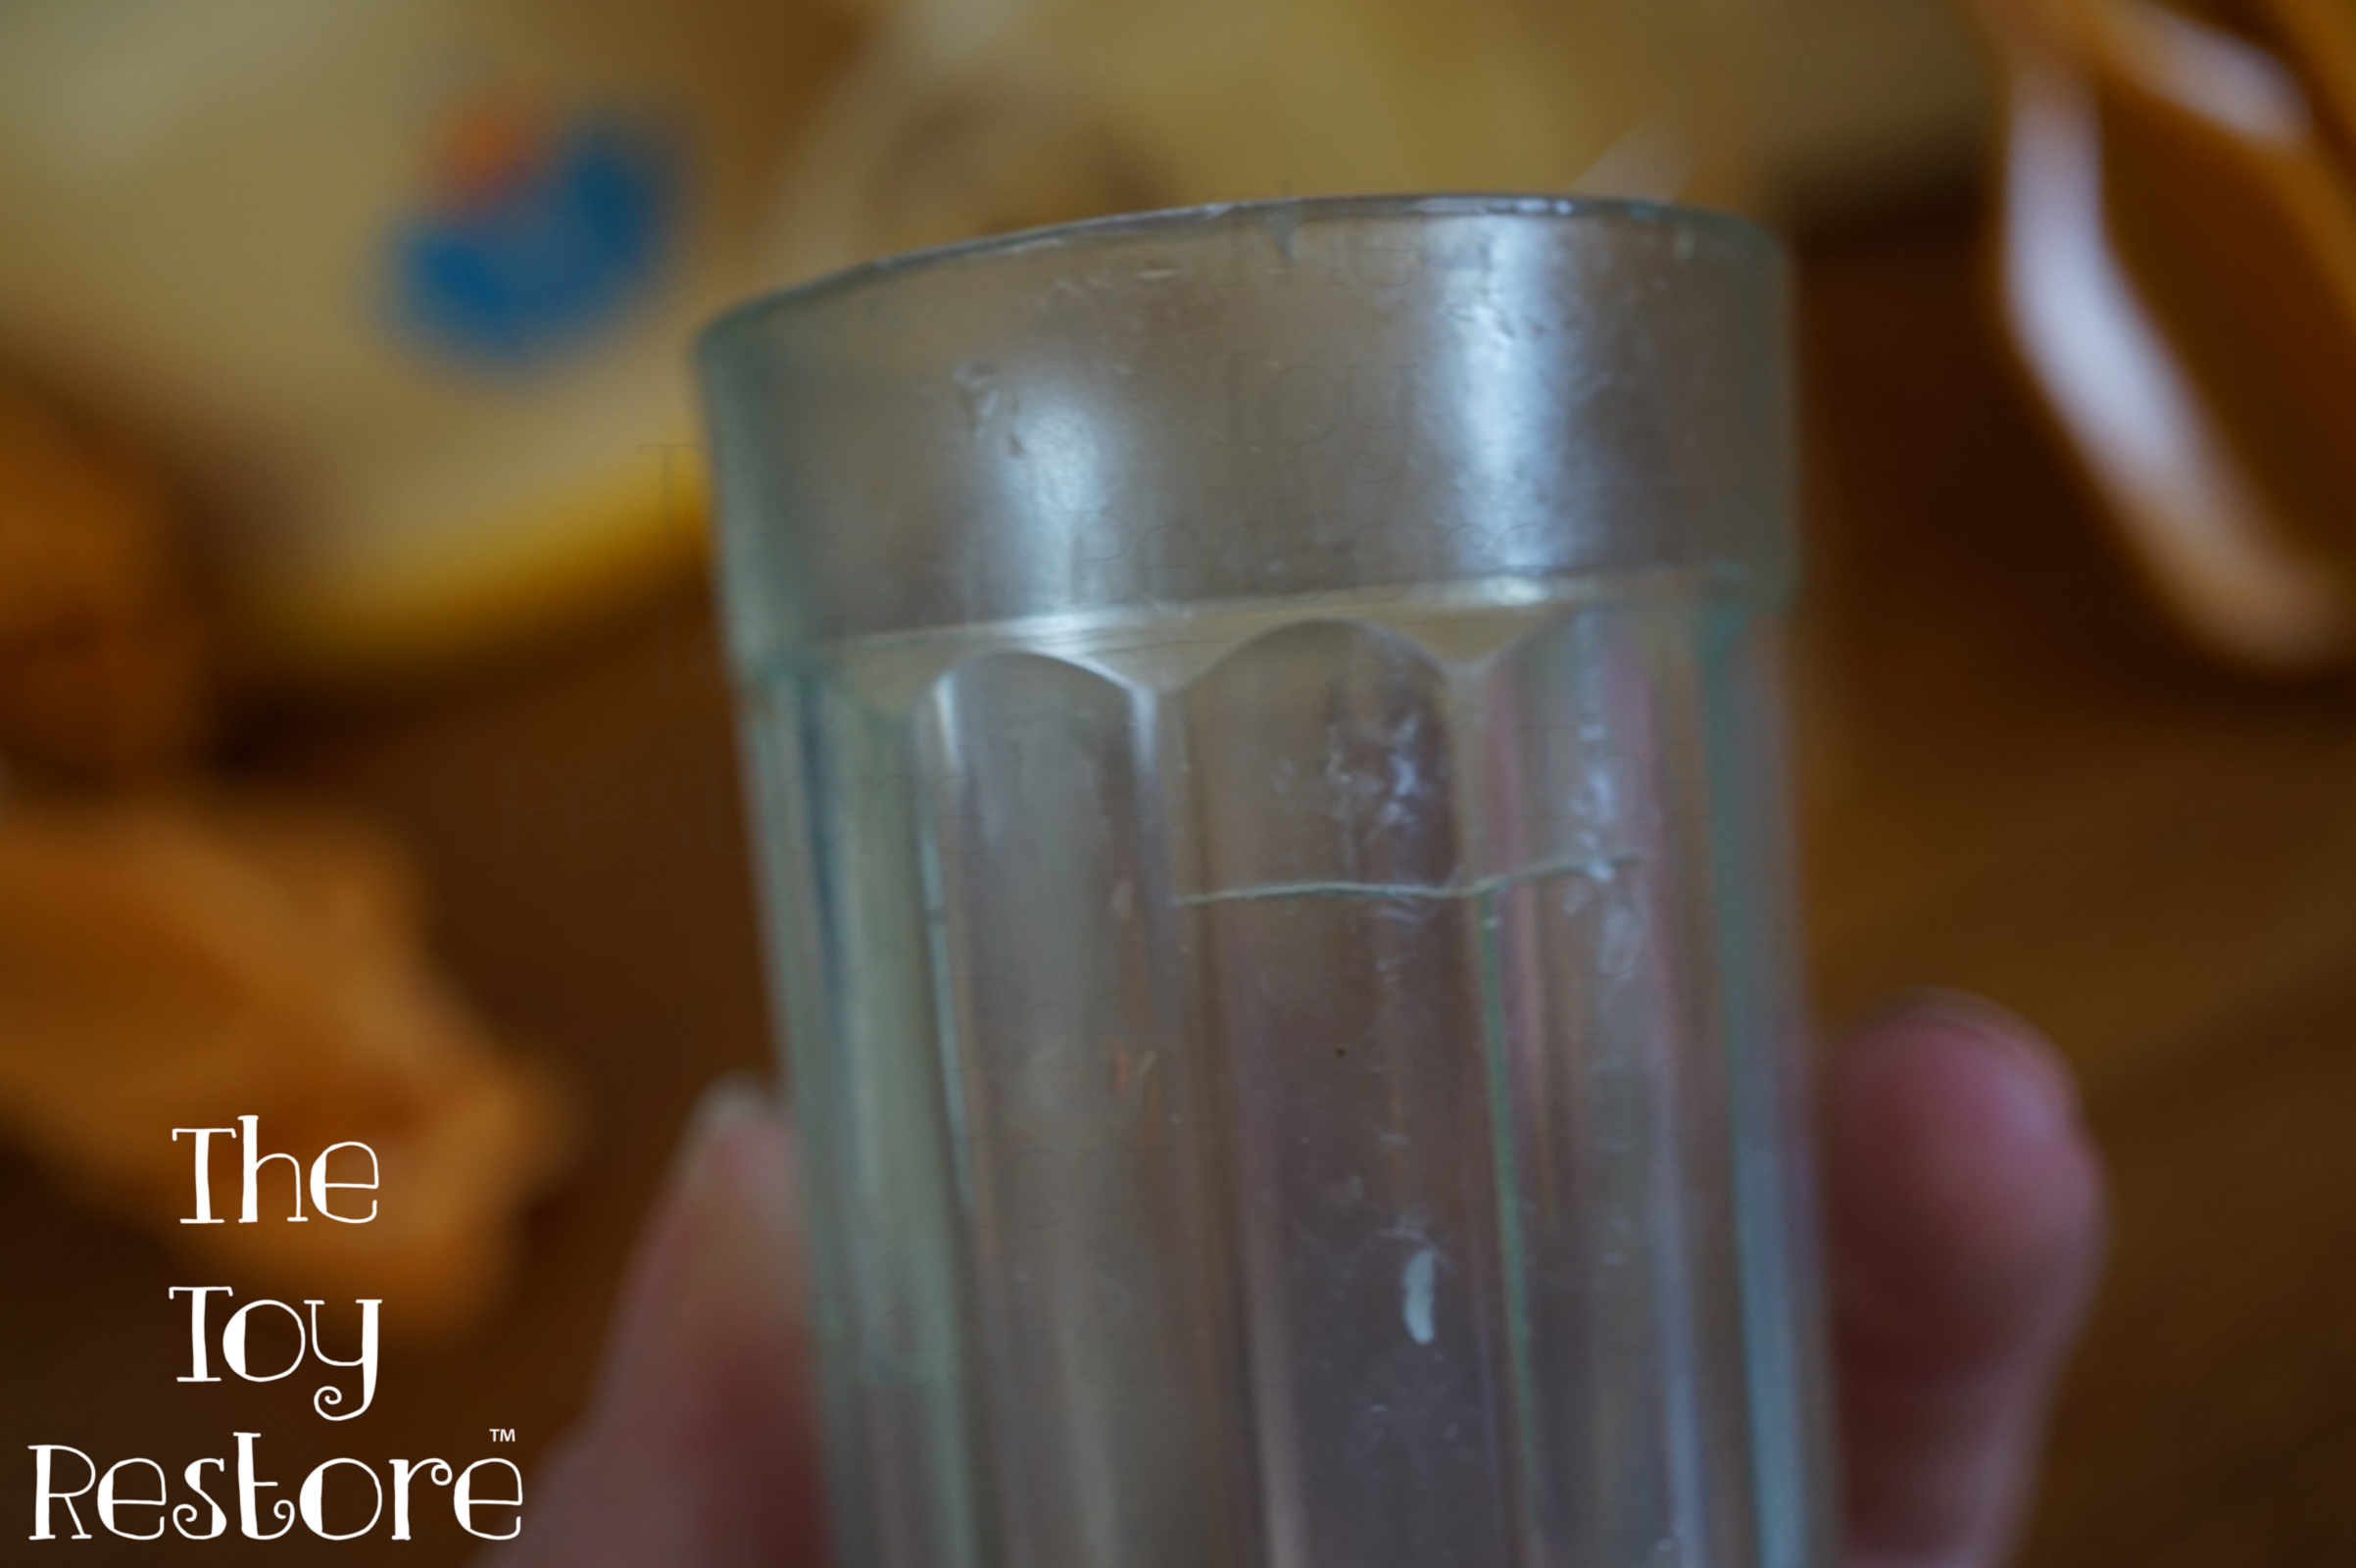
I once tried to whiten some clear Fisher Price Fun with Food glasses, but I got distracted and forgot about them. When I returned, they had become brittle and crumbled along the edges. This is a prime example of over-bleaching.
The reason for this is that when you bleach plastic, you’re removing the bromine from the surface. Without the bromine, the plastic becomes much less flexible and more prone to cracking.
Fisher Price Fun With Food clear glasses can become brittle is bleached too long
Similarly, vintage Little Tikes play kitchen knobs can become brittle if left outside for too long. So, if you have to remove parts from vintage toys, be extra cautious.
What Happens to Colored Plastic When You Overdo It?
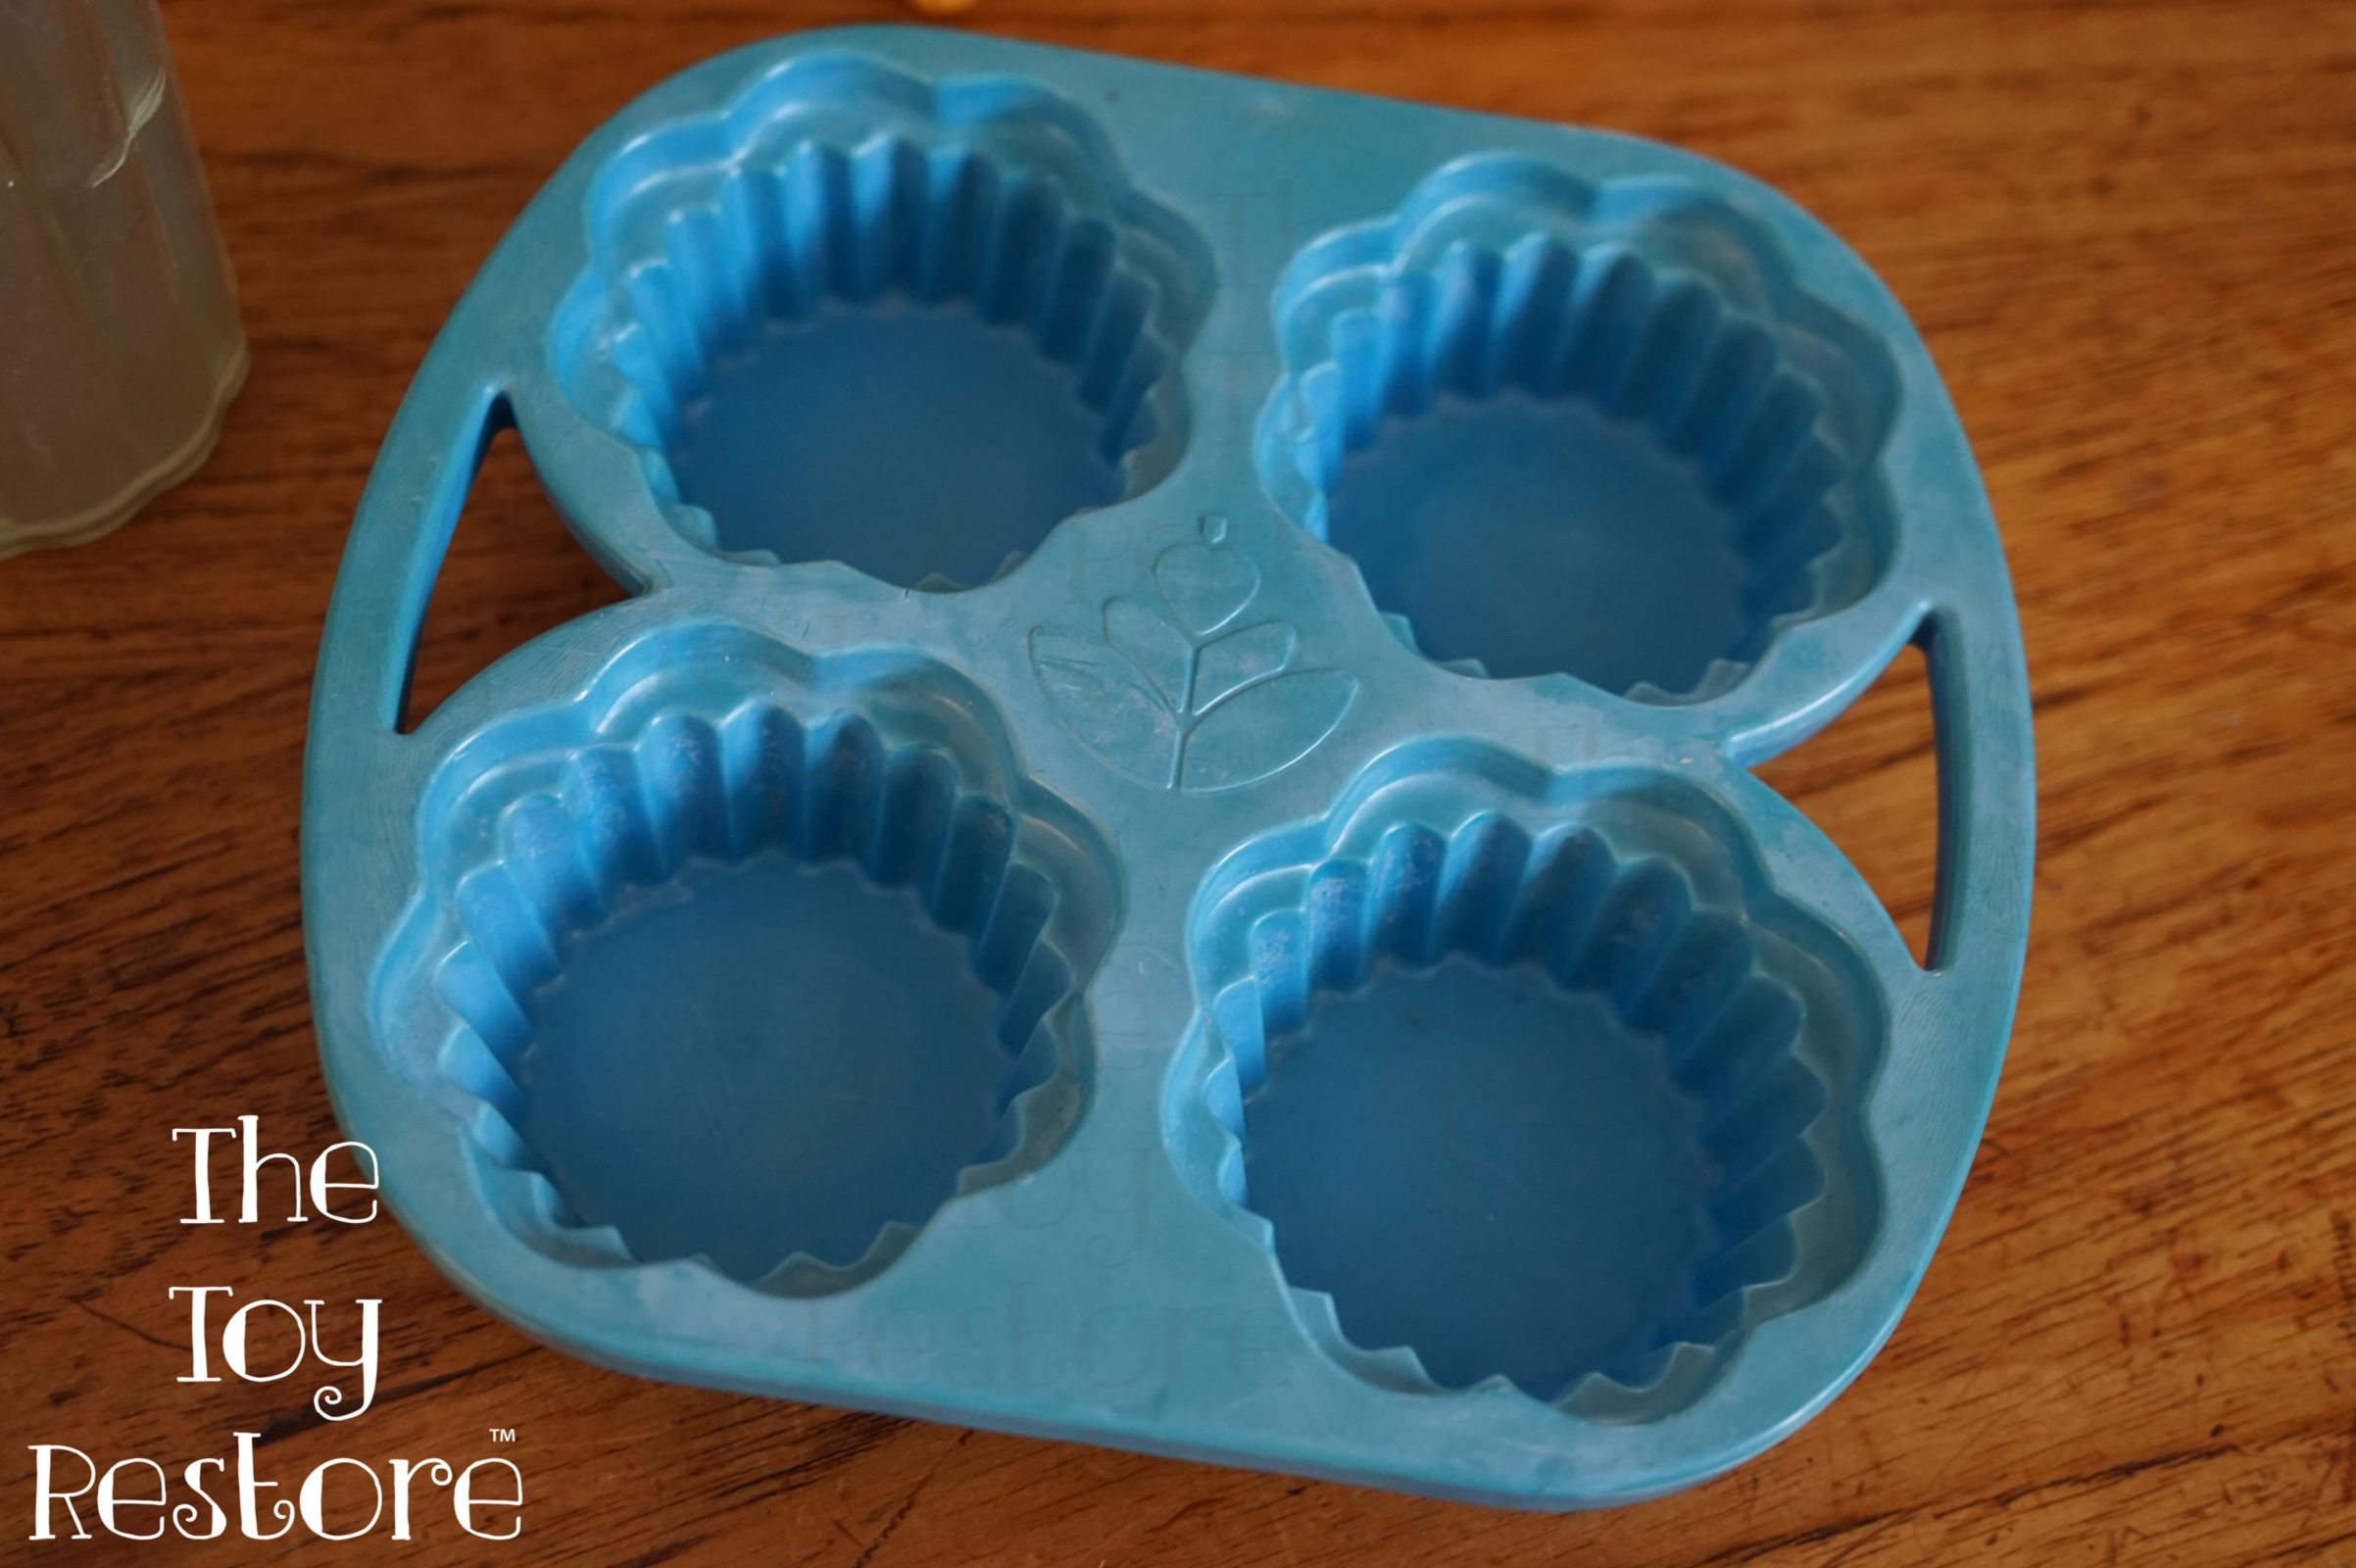
Colored plastic can fade to white if over-bleached. In cases where the bleach isn’t applied evenly, it can turn blotchy. I made this mistake with a Fisher Price Fun with Food cupcake tray, which ended up turning white and blotchy because I left it in the solution too long.
Fisher Price Fun With Food CupCake pan, was bleached too long. It got white and blotchy
Learning from Mistakes
While I’ve shown mostly mistakes in this post, I’ve had plenty of successful projects too. Sometimes learning from mistakes is the best way to improve. I hope my experiences help others avoid similar pitfalls.
I’m not a chemist, so if you notice any errors in my explanation, feel free to reach out and let me know!
Conclusion: Keep Experimenting and Be Careful
Restoring yellowed plastic toys can be a fun and rewarding process, but it’s important to proceed cautiously and carefully monitor your progress. The key takeaway is to avoid overdoing it and to always test a small area first. With time, patience, and the right techniques, you can bring those vintage toys back to life.
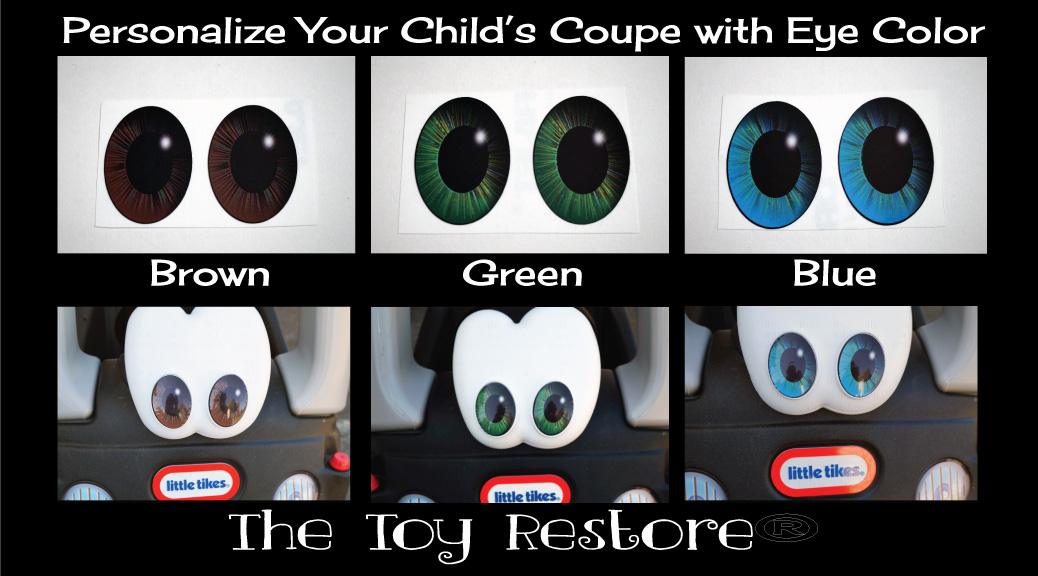
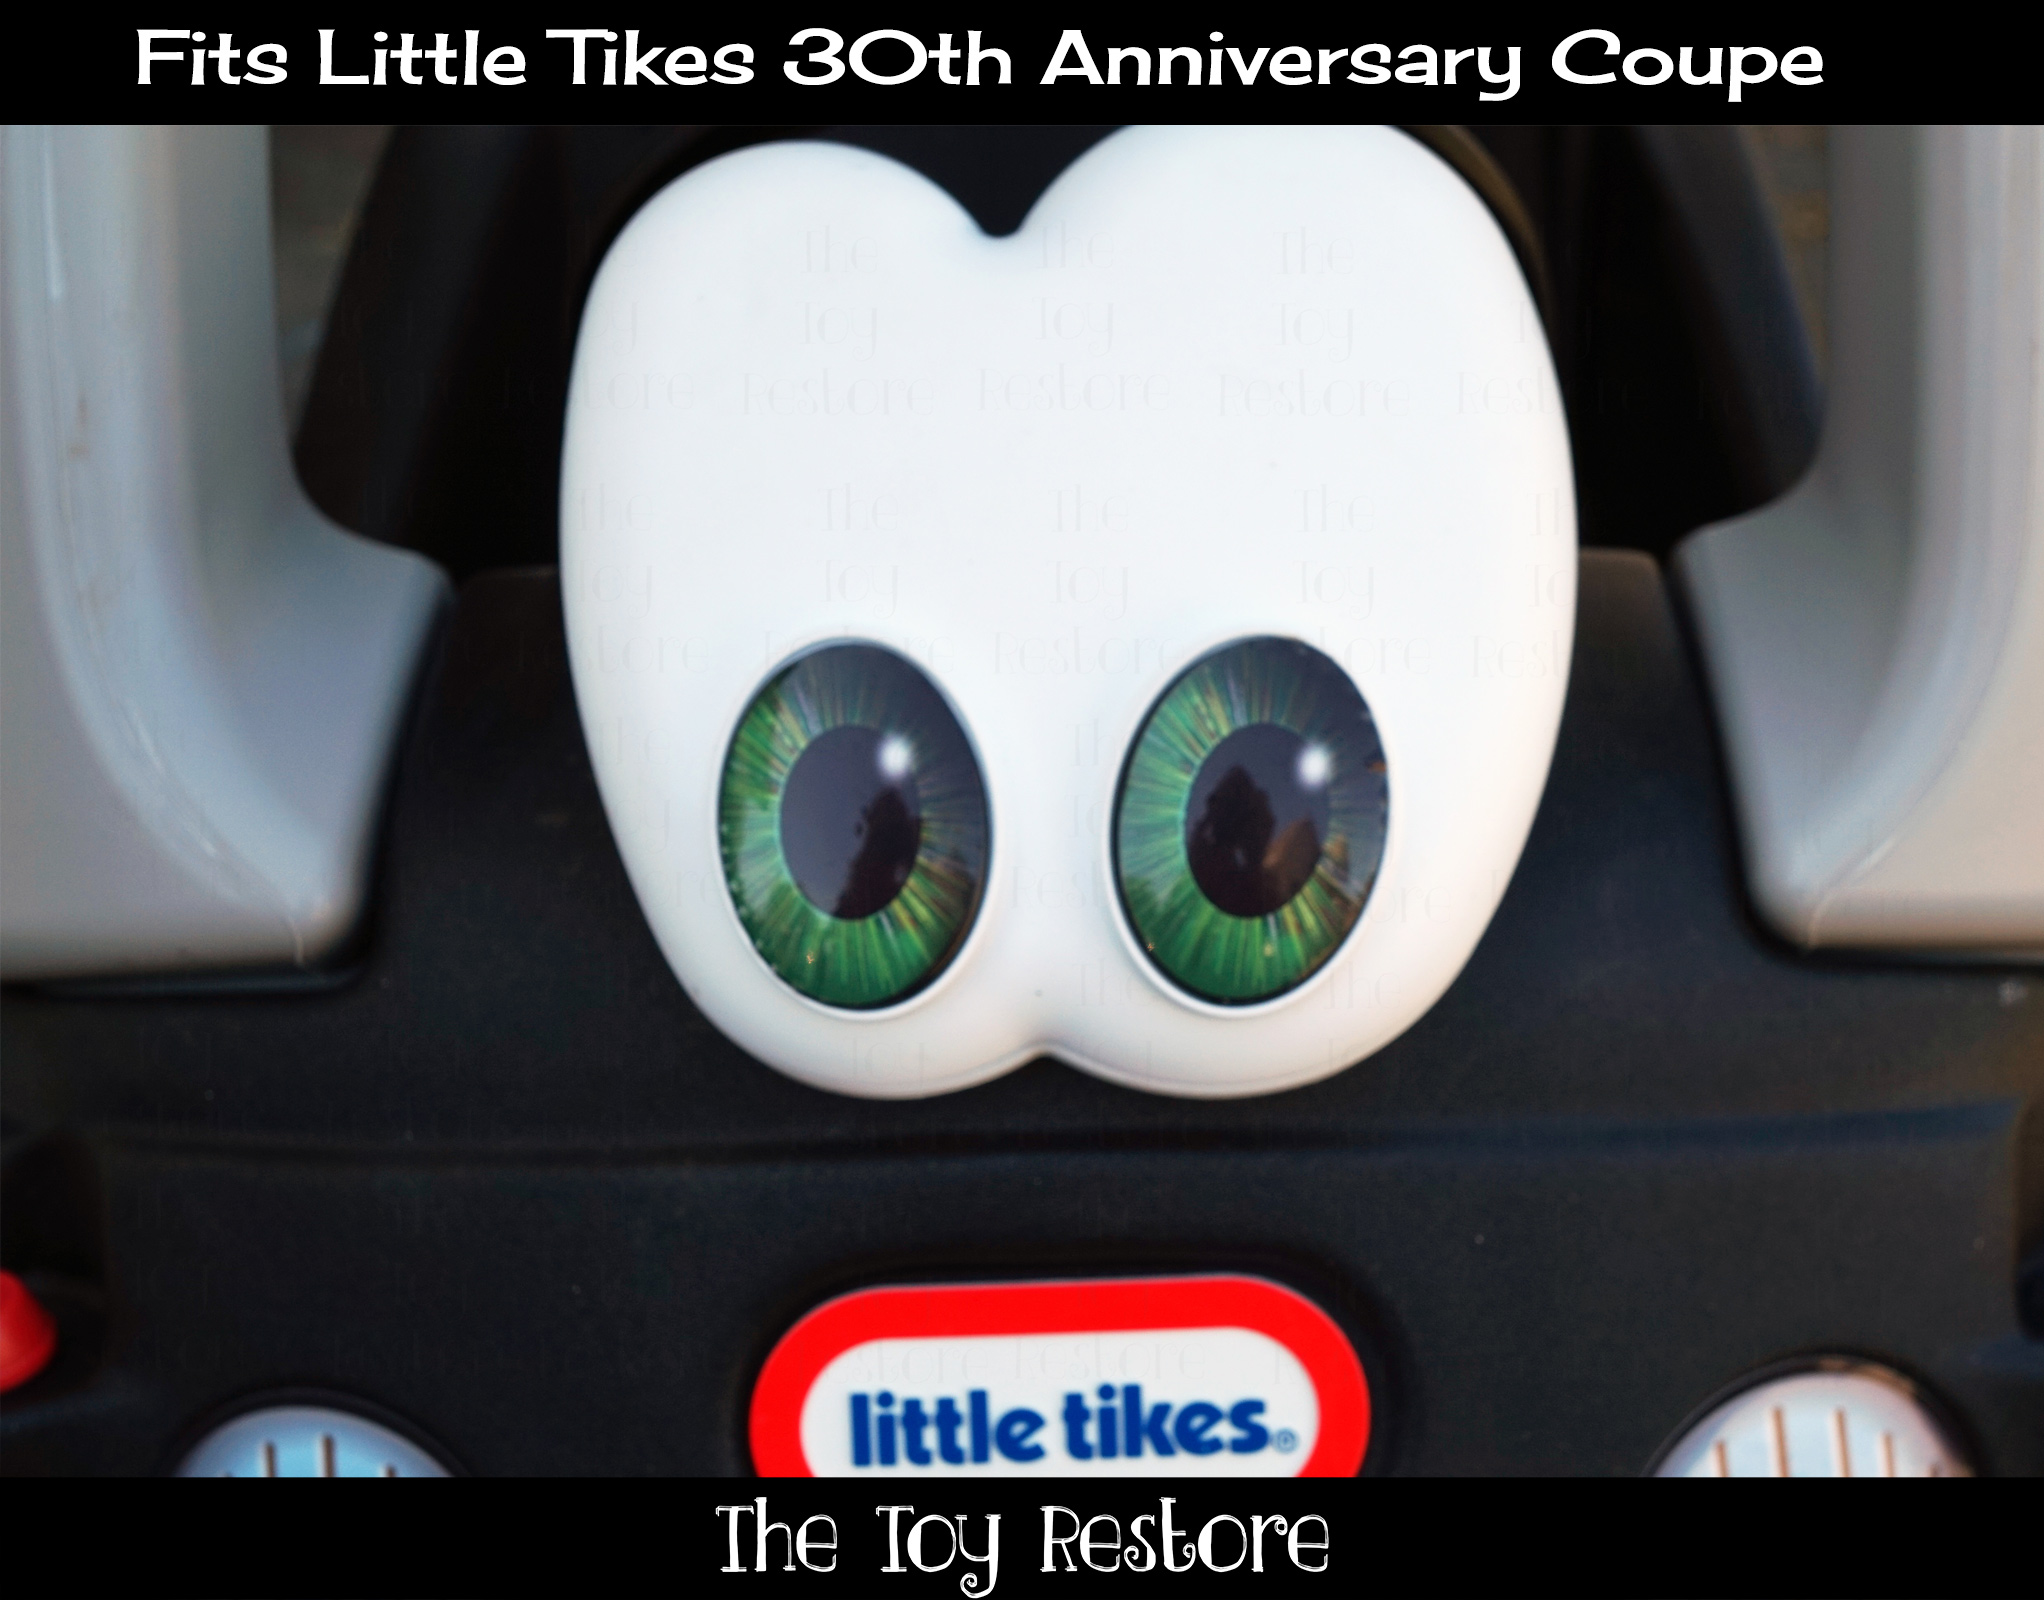
Customize Childs Little Tikes 30th Anniversary Coupe with Eye Color
Customize Childs Little Tikes 30th Anniversary Coupe with Eye Color
I came up with three designs, all of which can be changed in many ways. It is a fun way to personalize your child’s cozy coupe. All decals are 100% waterproof, UV proof for 4-5 years, and are machine cut for accuracy. I also stand behind all my decals. If you have any problems with them, within a year or two of purchase, I will gladly ensure you are happy with your purchase. I want to keep these awesome toys out of our landfills, so I want my decals to last.
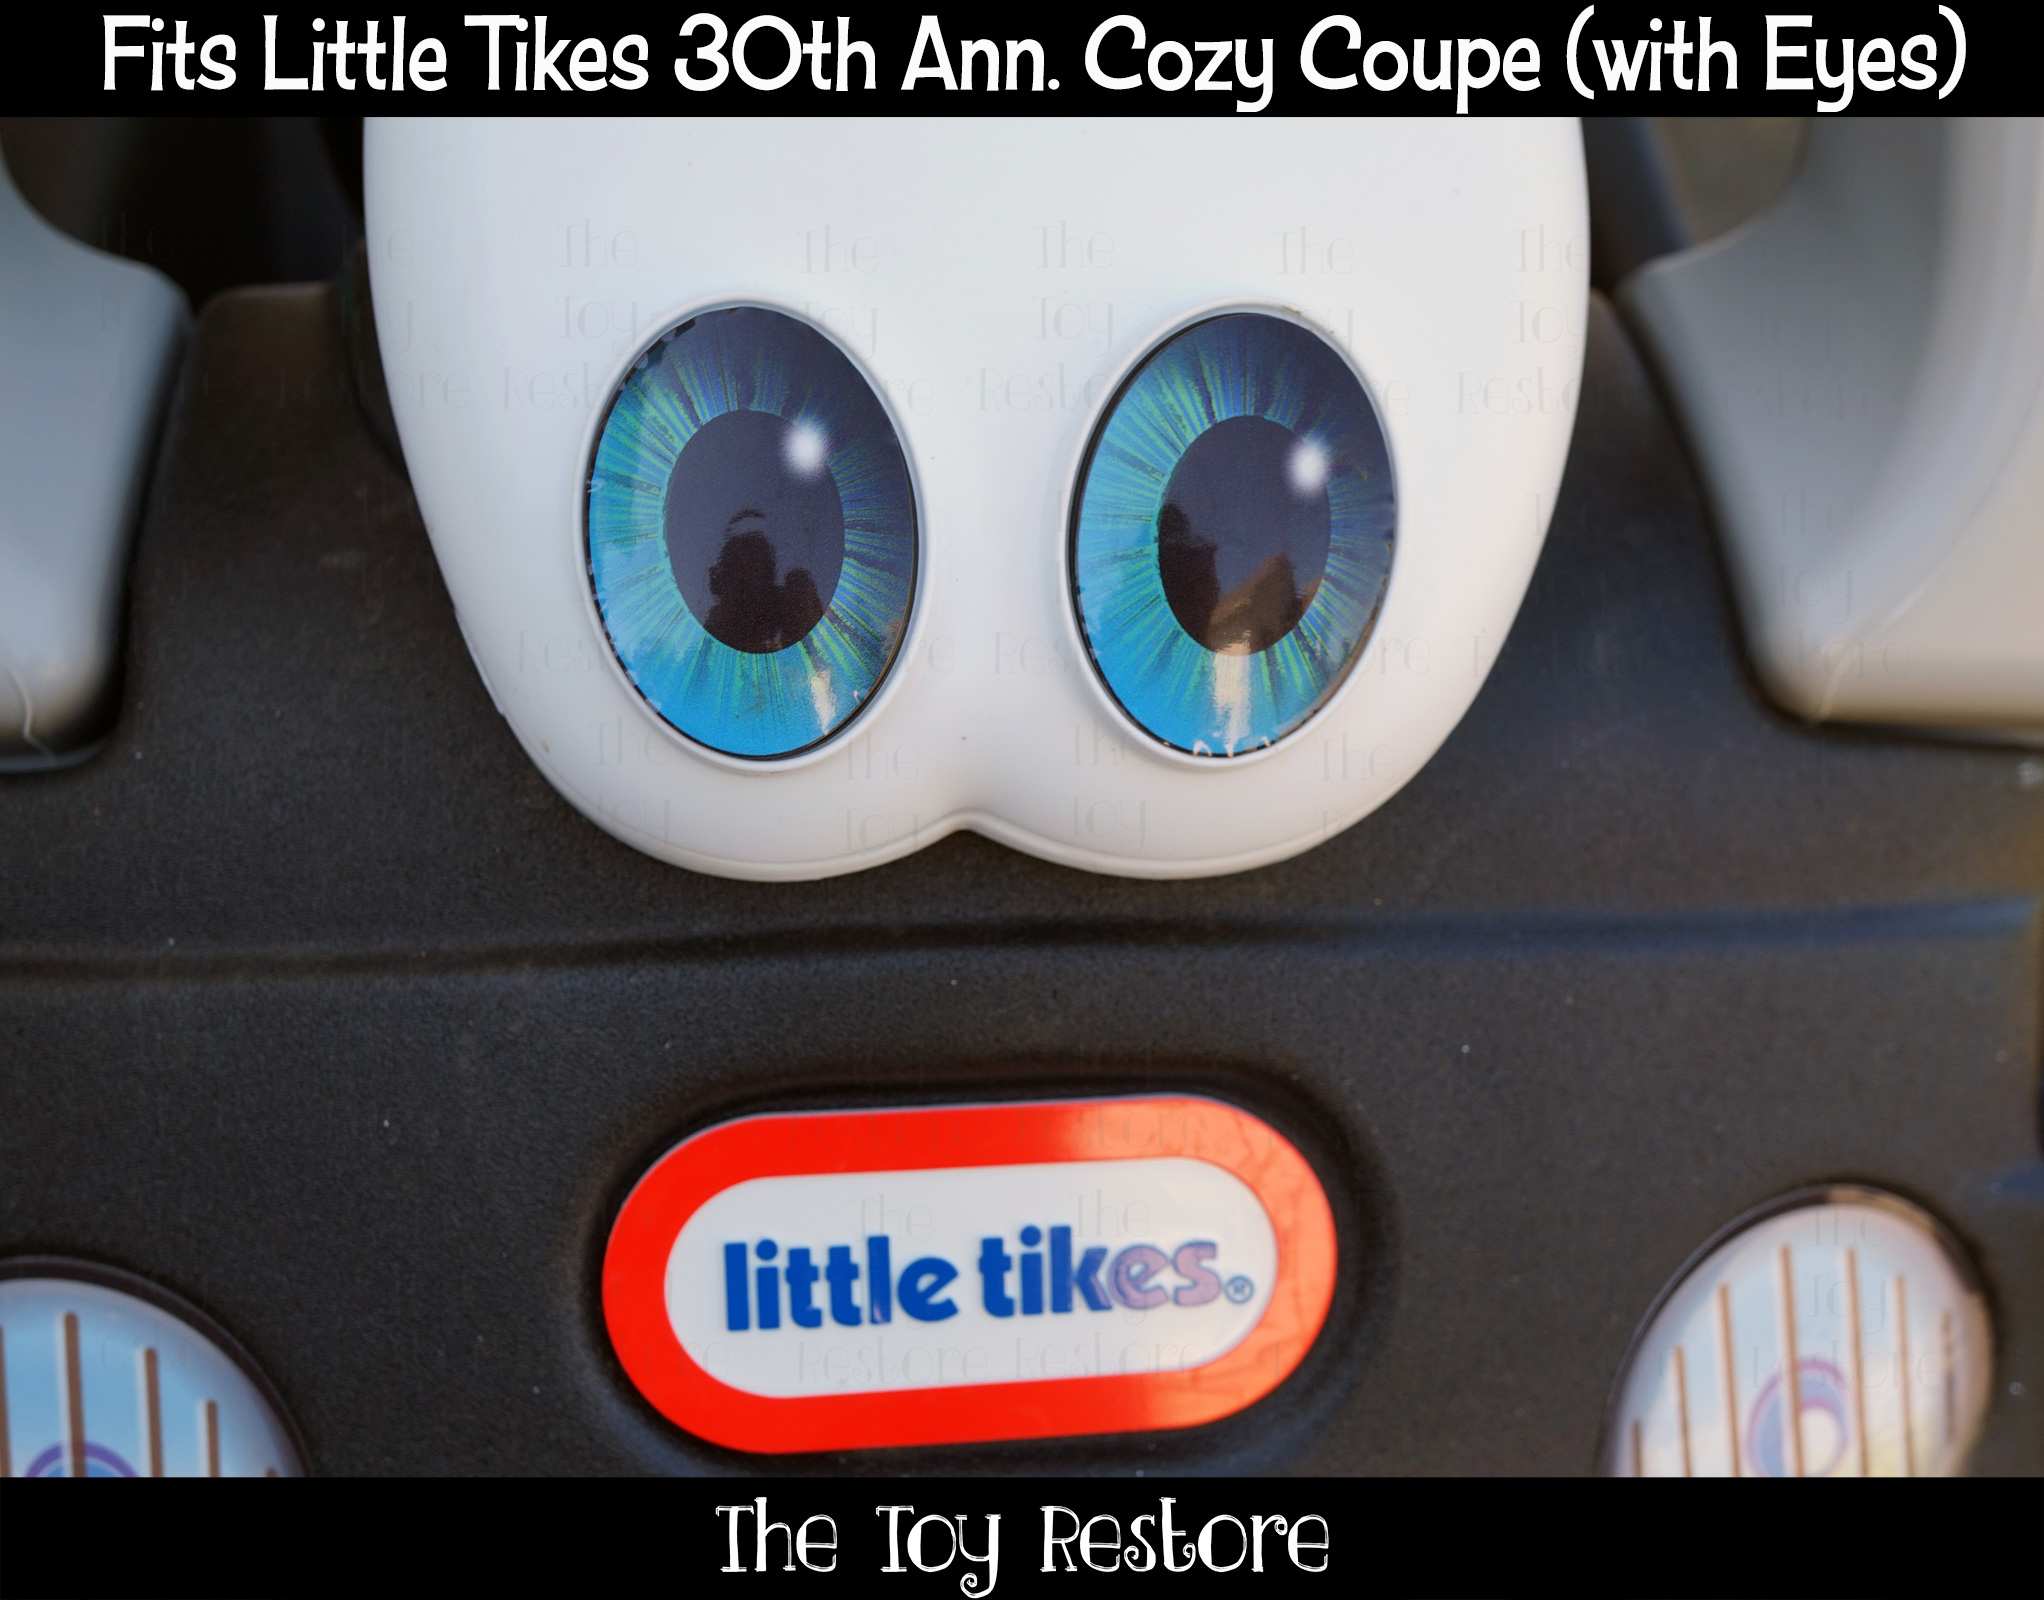
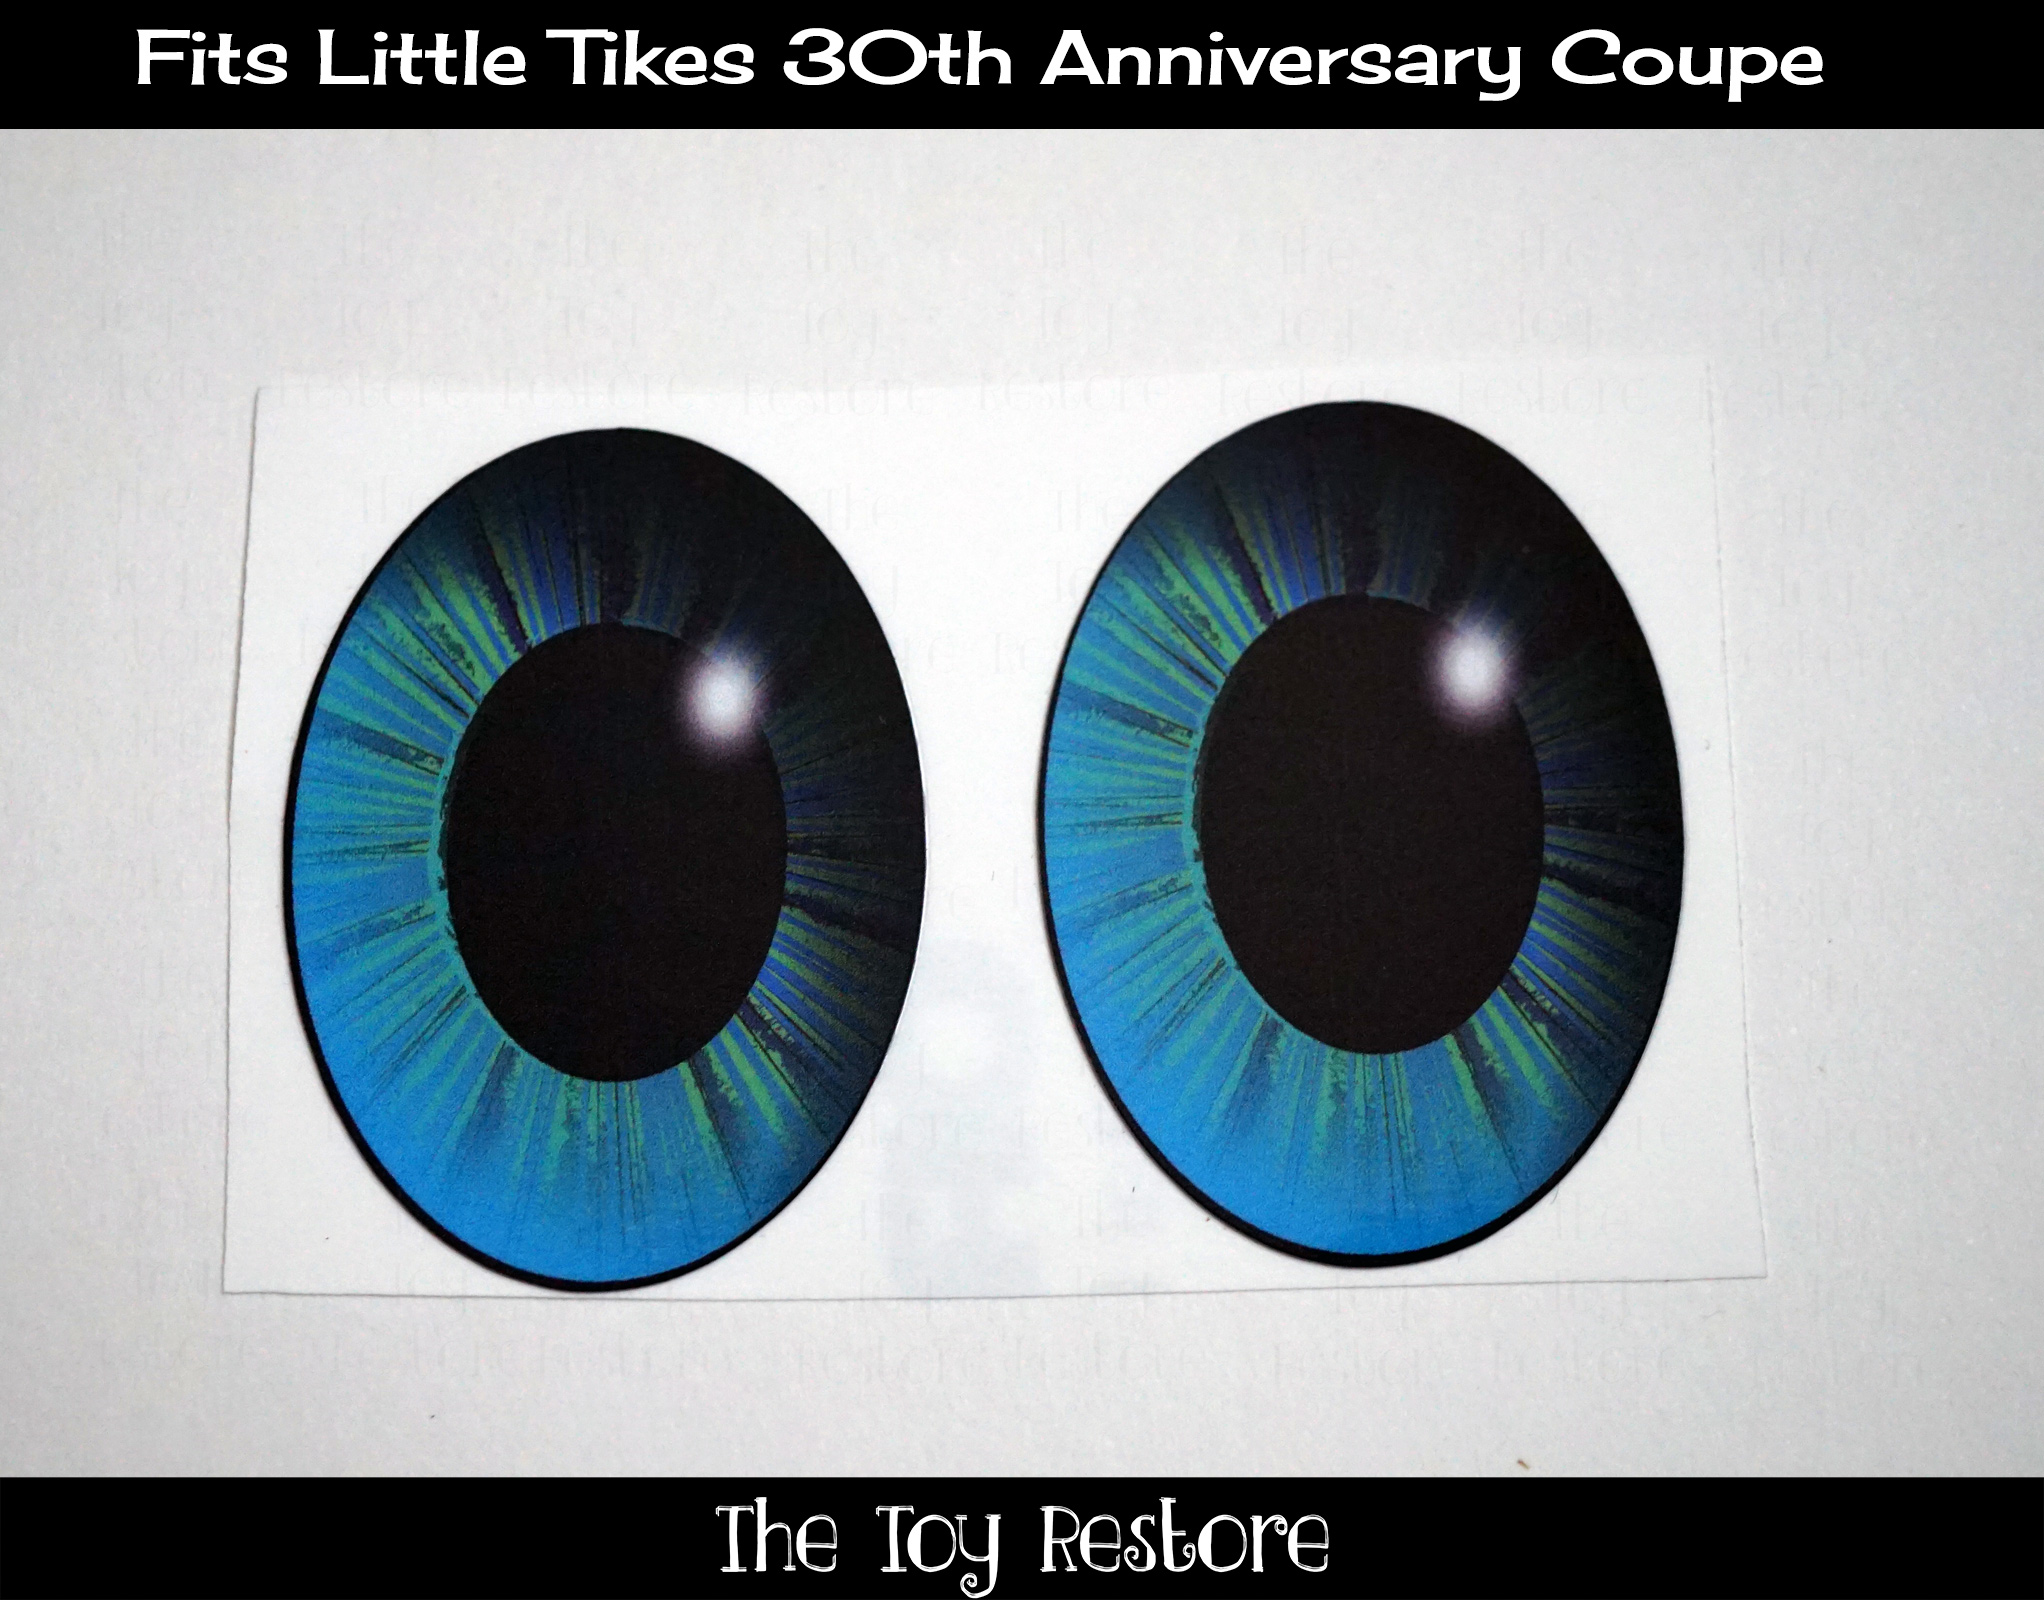
Customize Childs Little Tikes 30th Anniversary Coupe with Eye Color : Blue Eyes
Customize Childs Little Tikes 30th Anniversary Coupe with Eye Color Color
Here is my design for the blue eyes decal to be placed right over top of the pupil, on the molded plastic screw in eyes, which came factory with this model.
Customize Childs Little Tikes 30th Anniversary Coupe with Eye Colorblue
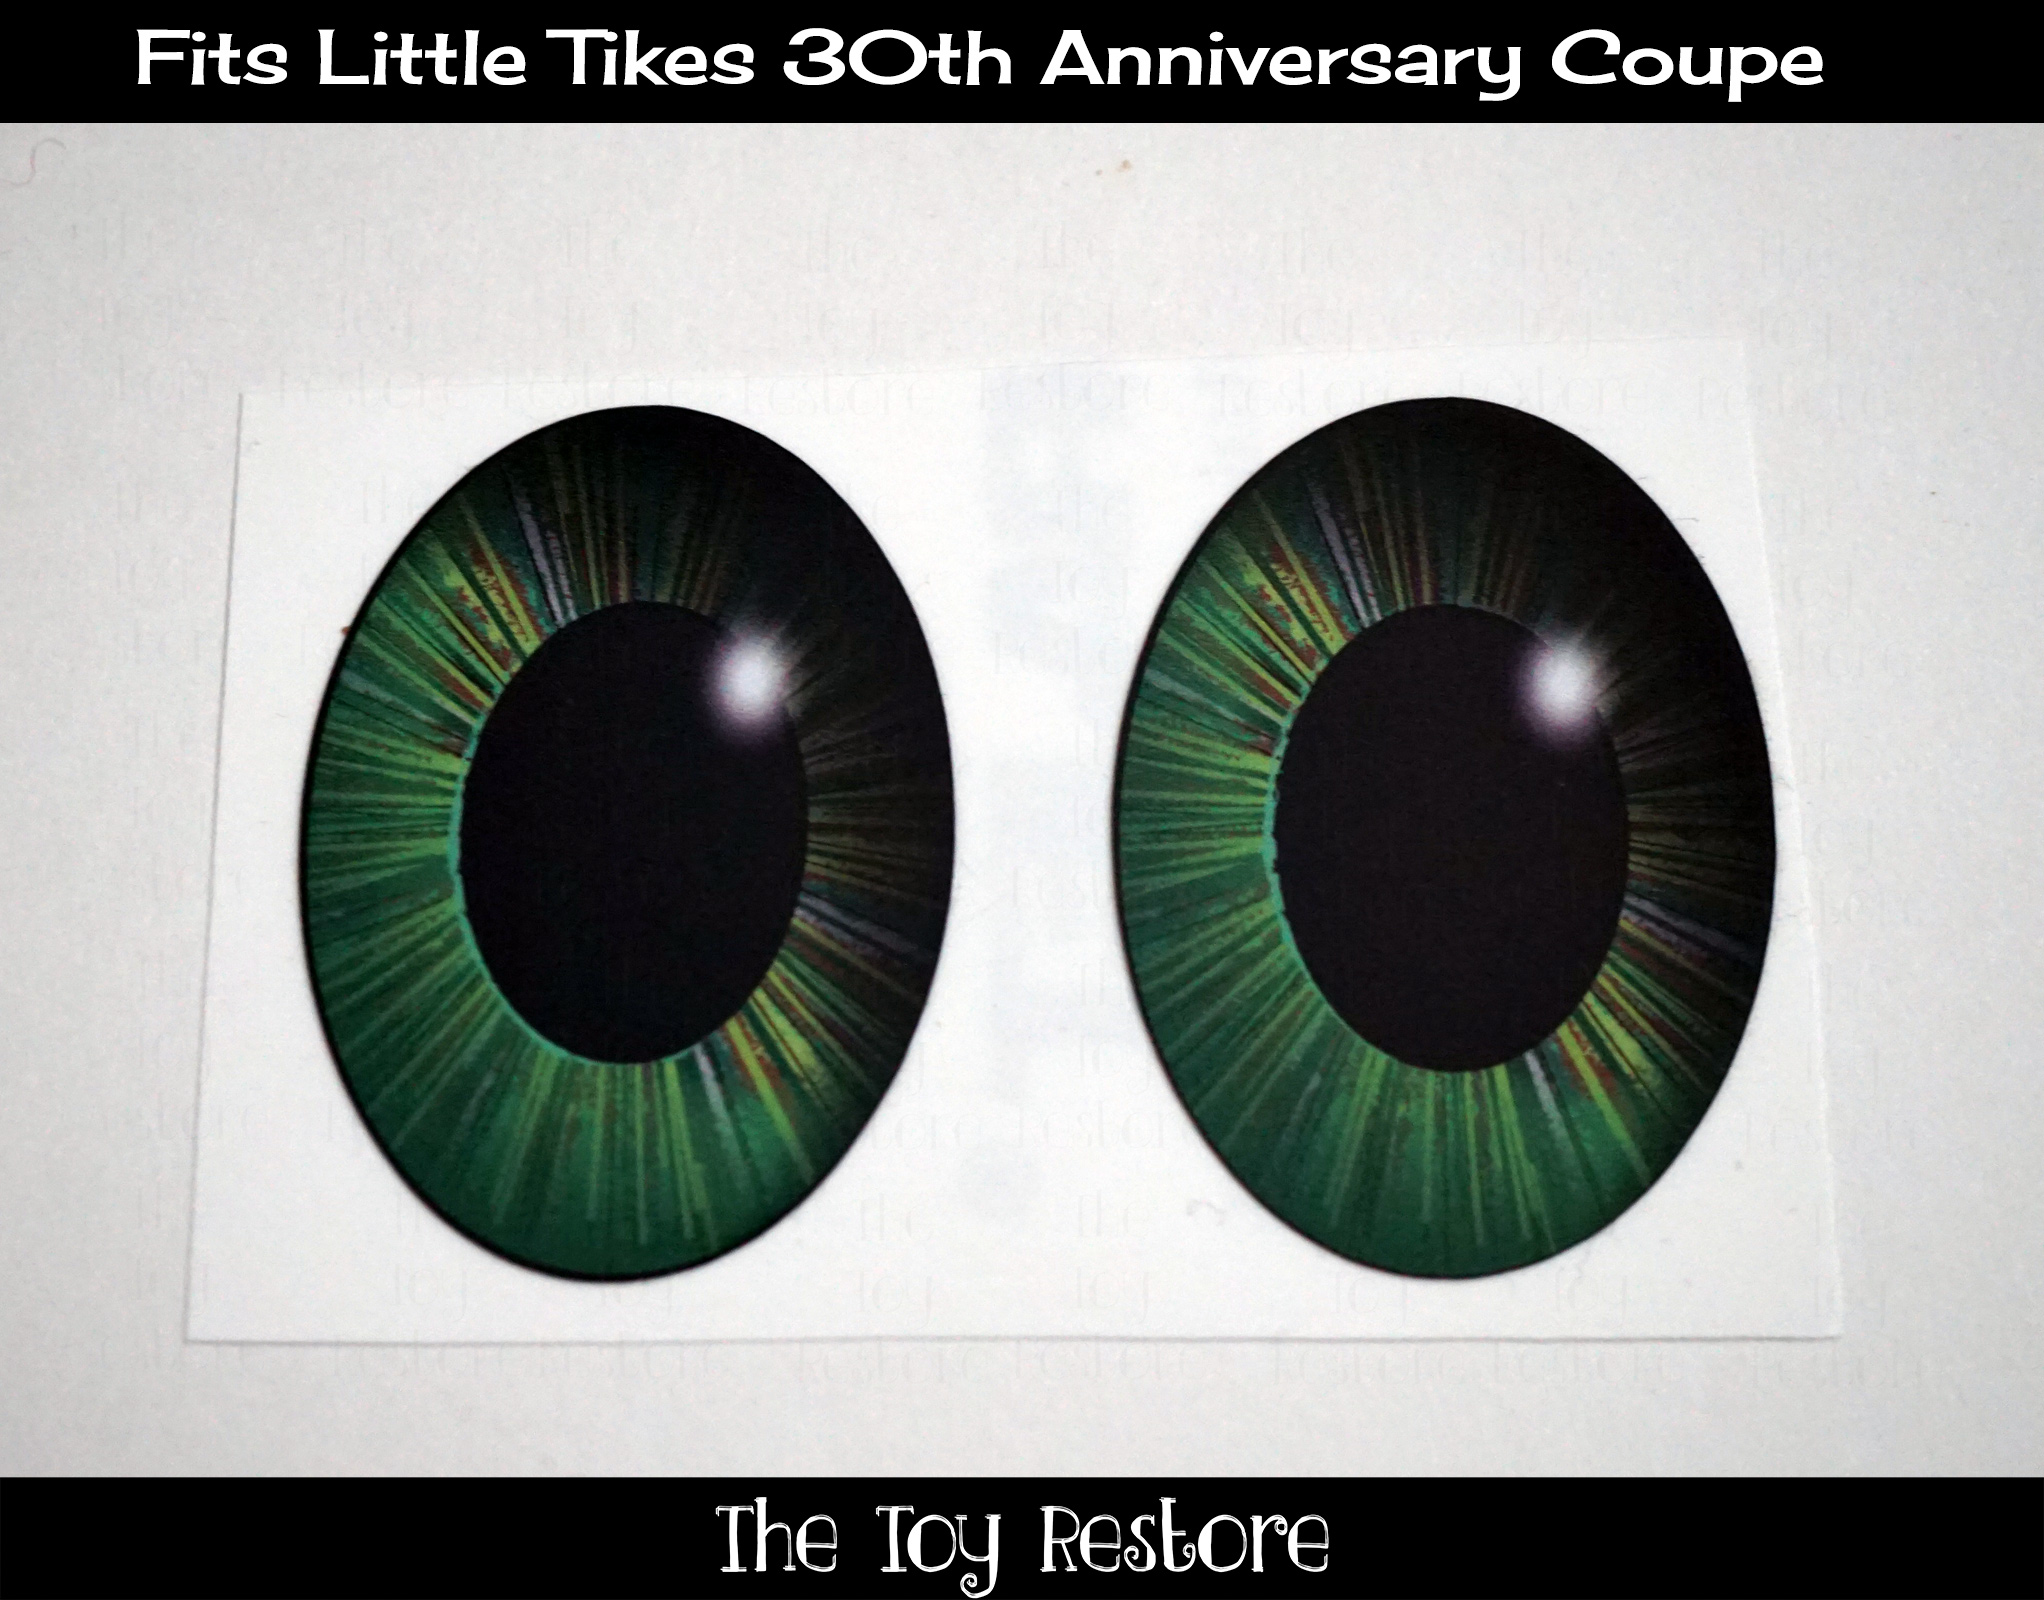
Customize Your Childs Little Tikes 30th Anniversary Coupe with Green Eyes
Customize Childs Little Tikes 30th Anniversary Coupe with Eye Color green
Here is my design for the Green eyes decal to be placed right over top of the pupil, on the molded plastic screw in eyes, which came factory with this model.
Customize Childs Little Tikes 30th Anniversary Coupe with Eye Color green
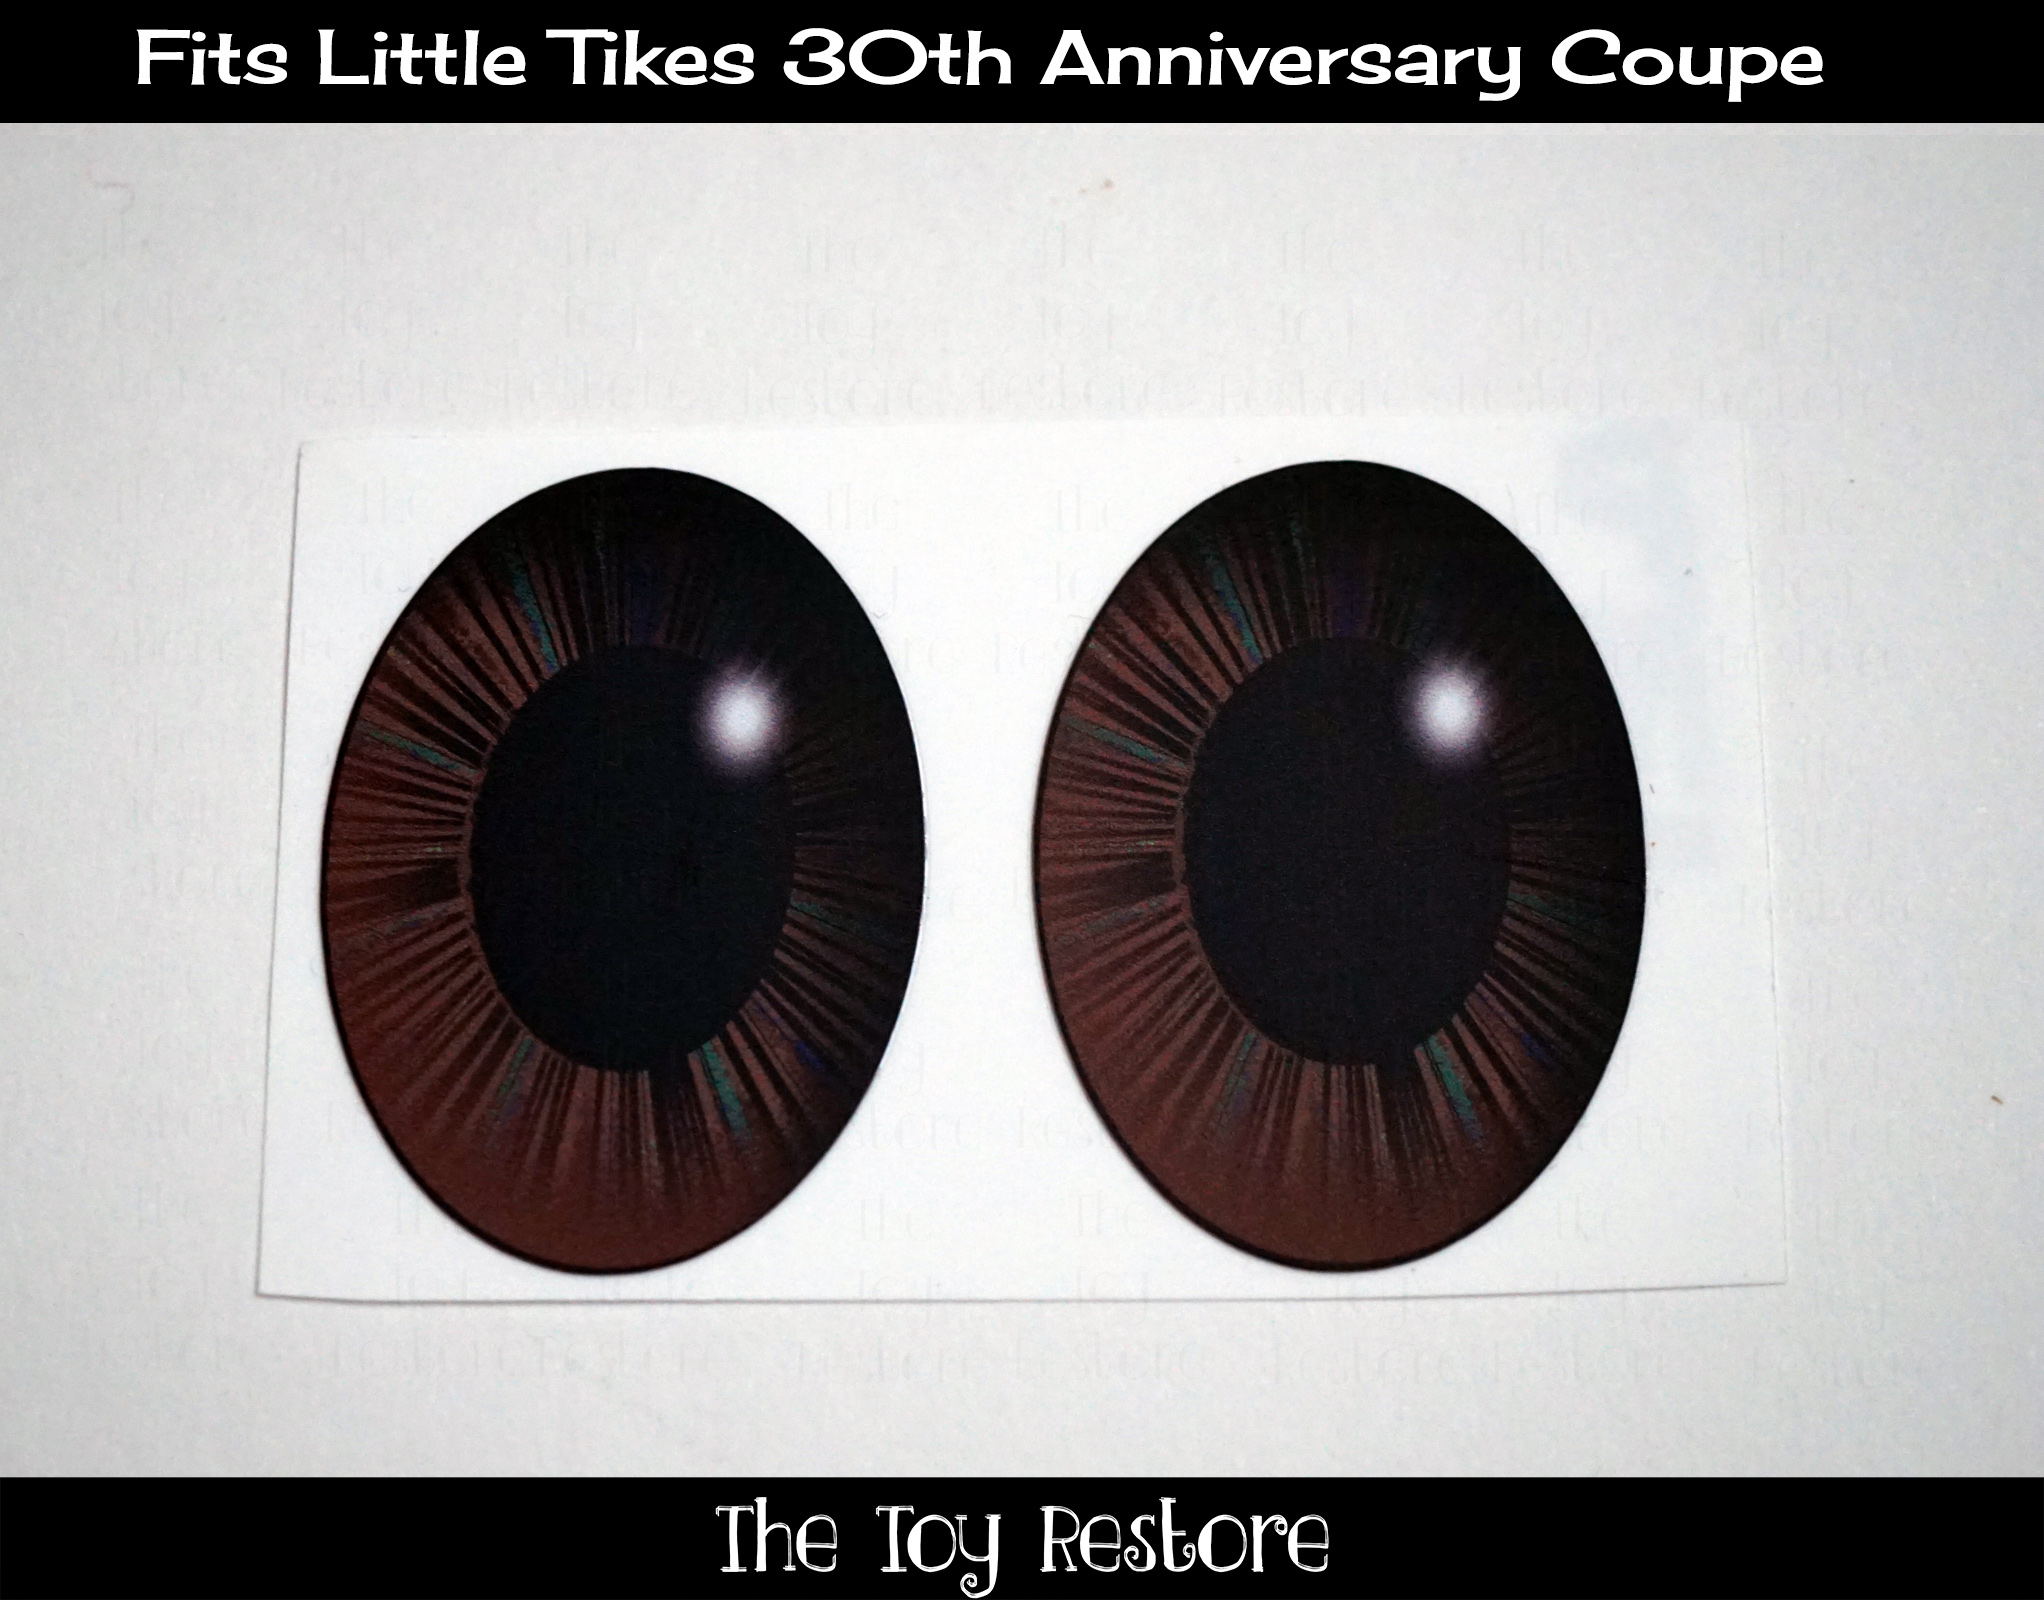
Customize Your Childs Little Tikes 30th Anniversary Coupe with Brown Eyes
Customize Childs Little Tikes 30th Anniversary Coupe with Eye Color brown
Here is my design for the brown eyes decal to be placed right over top of the pupil, on the molded plastic screw in eyes, which came factory with this model.
Customize Childs Little Tikes 30th Anniversary Coupe with Eye Color brown
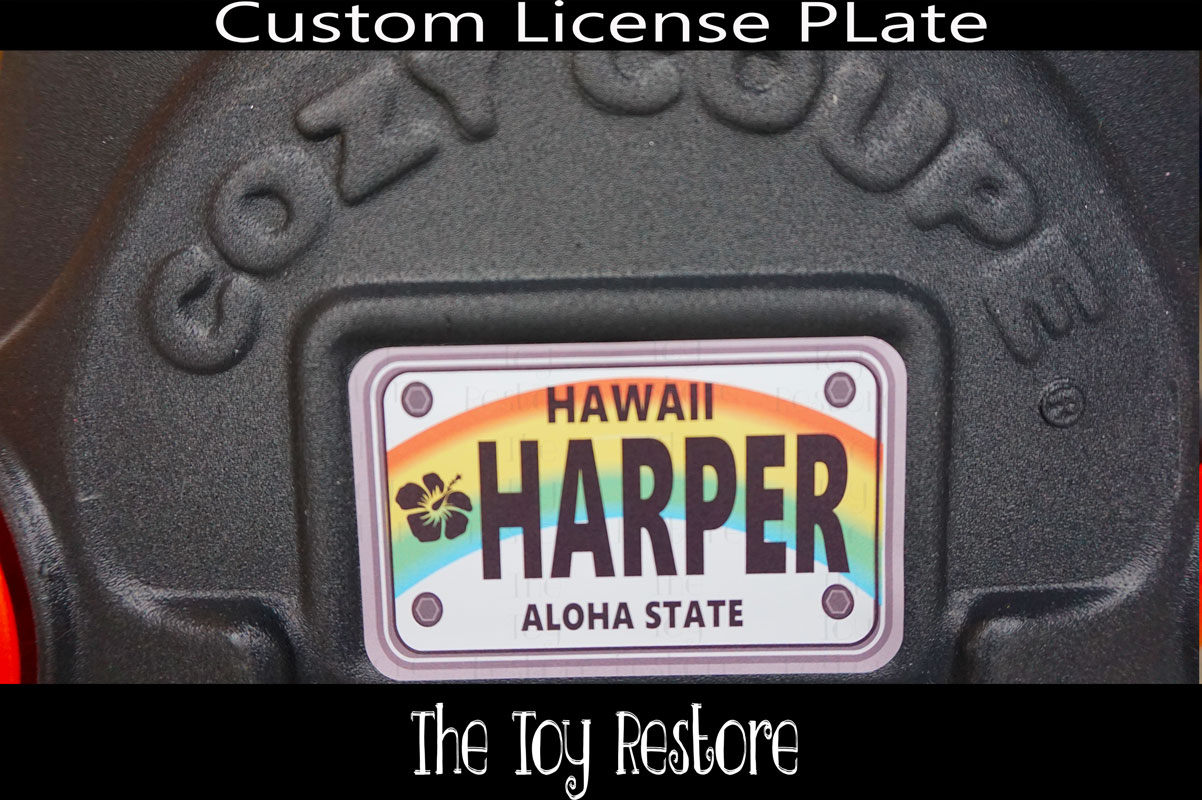
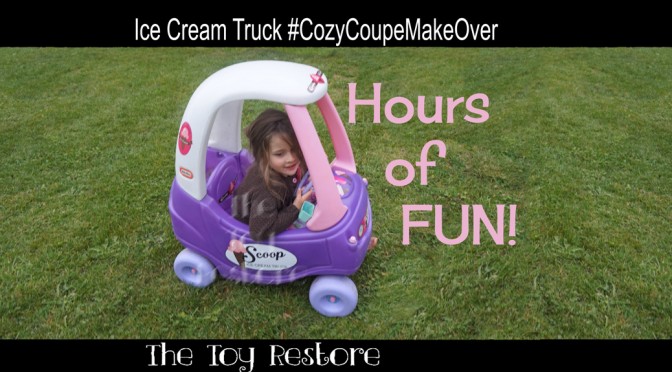
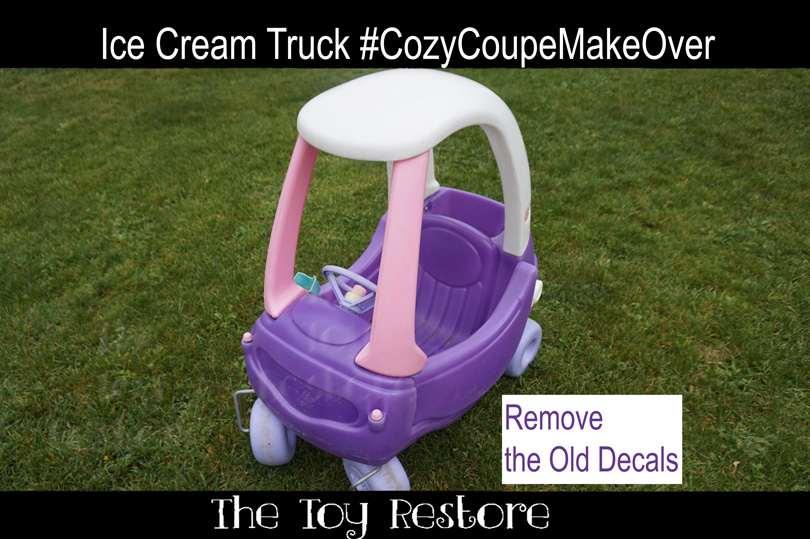
Upcycling: Ice Cream Truck Cozy Coupe Makeover. What kids doesn’t love icecream, and what kids doesn’t love the idea of driving thier own car! Put those two ideas together and you have the Icecream Cozy Coupe Truck. For this Cozy Coupe Redo I used a Princess model of the Cozy Coupe II, so I didn’t have to paint it.
Upcycling: Ice Cream Truck Cozy Coupe Makeover: Find a Second Hand Coupe
An Icecream Truck Cozy Coupe Makeover: Remove the Old Decal, and Throughly Wash it.
An Icecream Truck Cozy Coupe Makeover: Remove the Old Decal, and Throughly Wash it.
Removing the old decals is a bit of work, but well worth the effort. I have a more detailed instructions on removing decals here. Once the old ones are going you can do so much to change the car. You can repaint it, or add new decals. I sell new decals for most of the Little Tikes foot to floor cars on Ebay, and Etsy. For this particular Cozy Coupe Makeover, I used my set here. But I have lots of other styles that would look nice on this cozy coupe without having to repaint it.
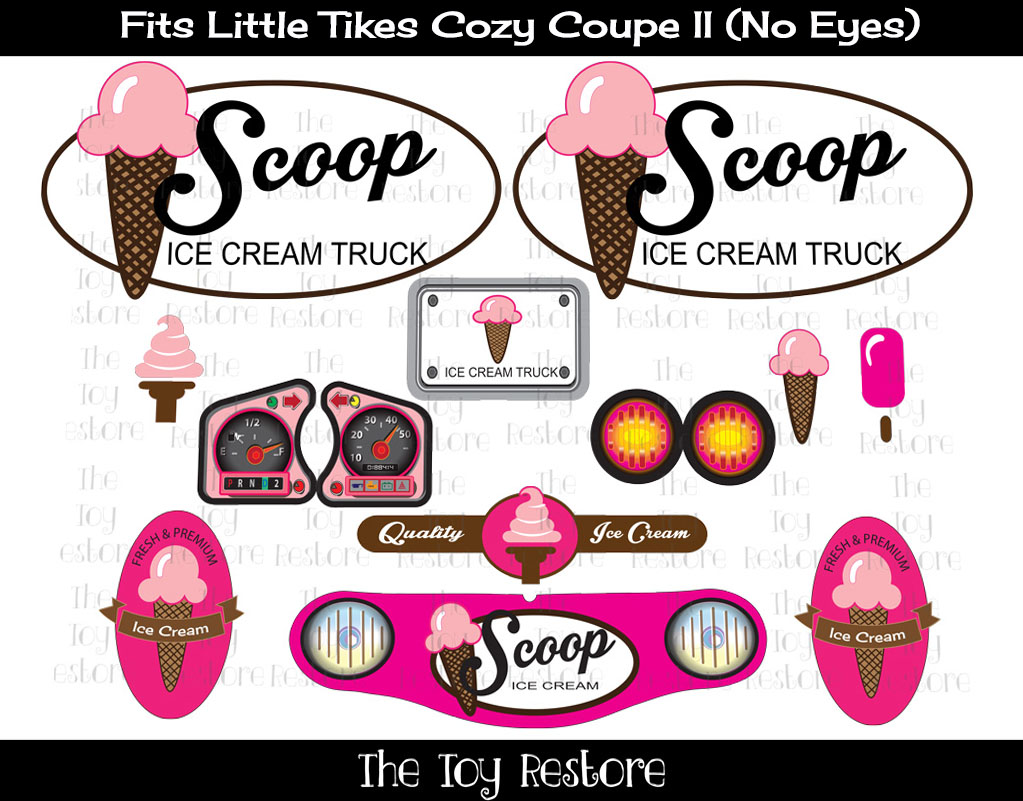
Upcycling: Ice Cream Truck Cozy Coupe Makeover : Apply the New Decals
Upcycling: Ice Cream Truck Cozy Coupe Makeover : Apply the New Decals
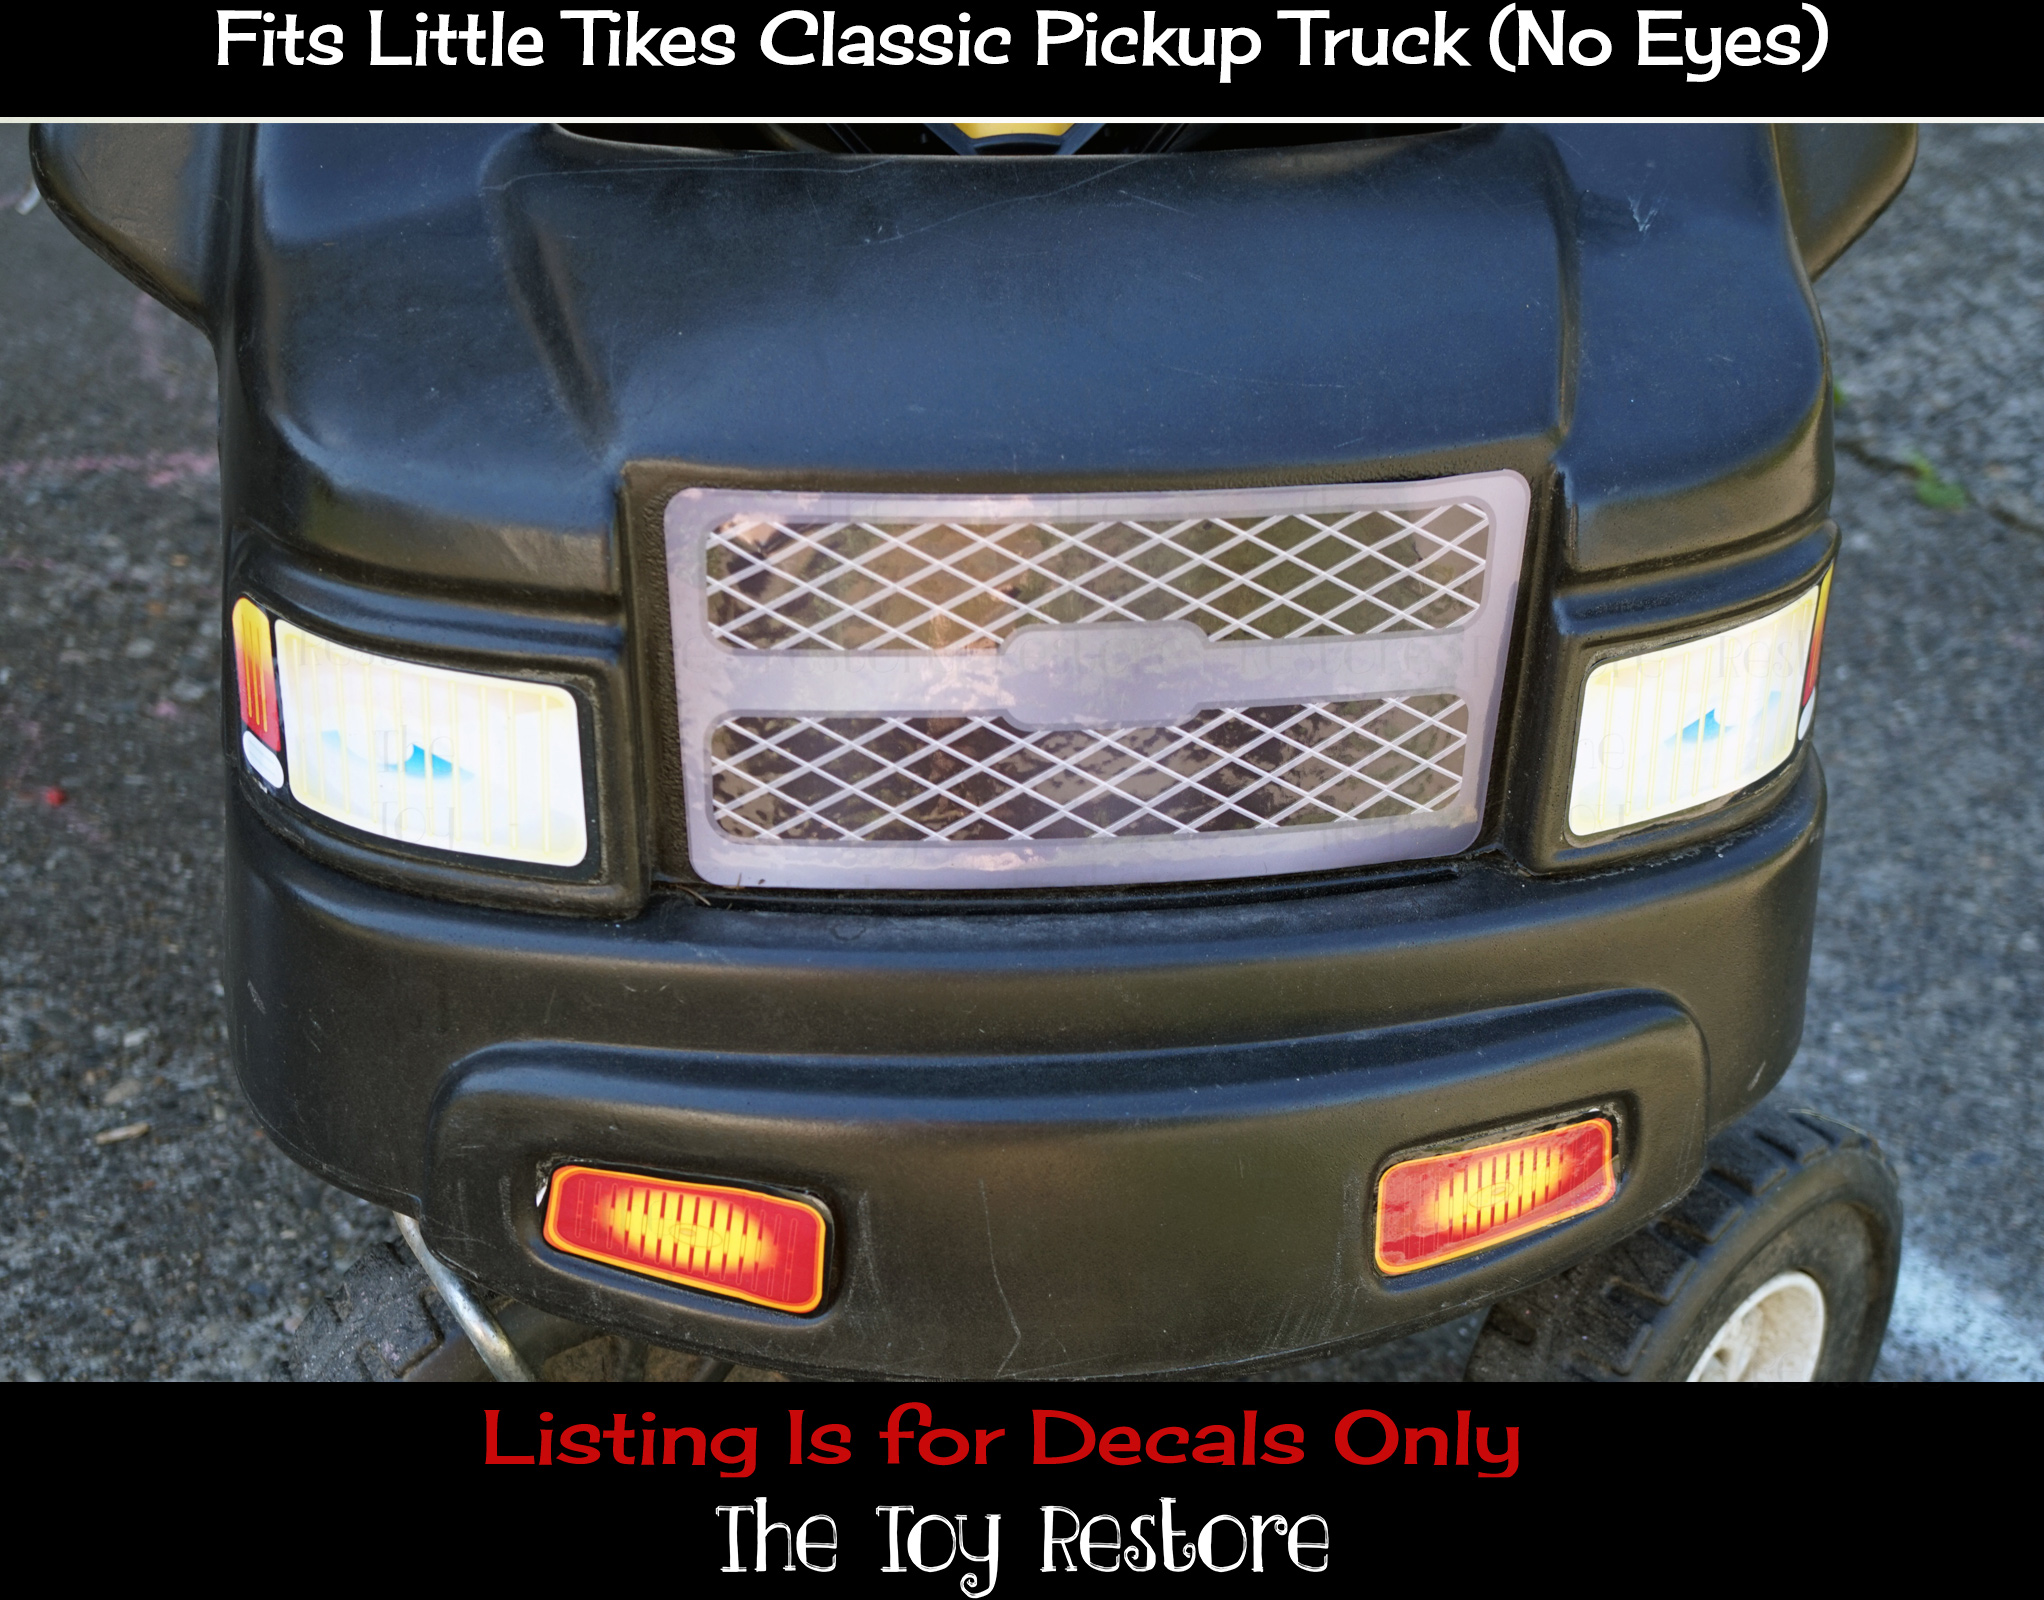
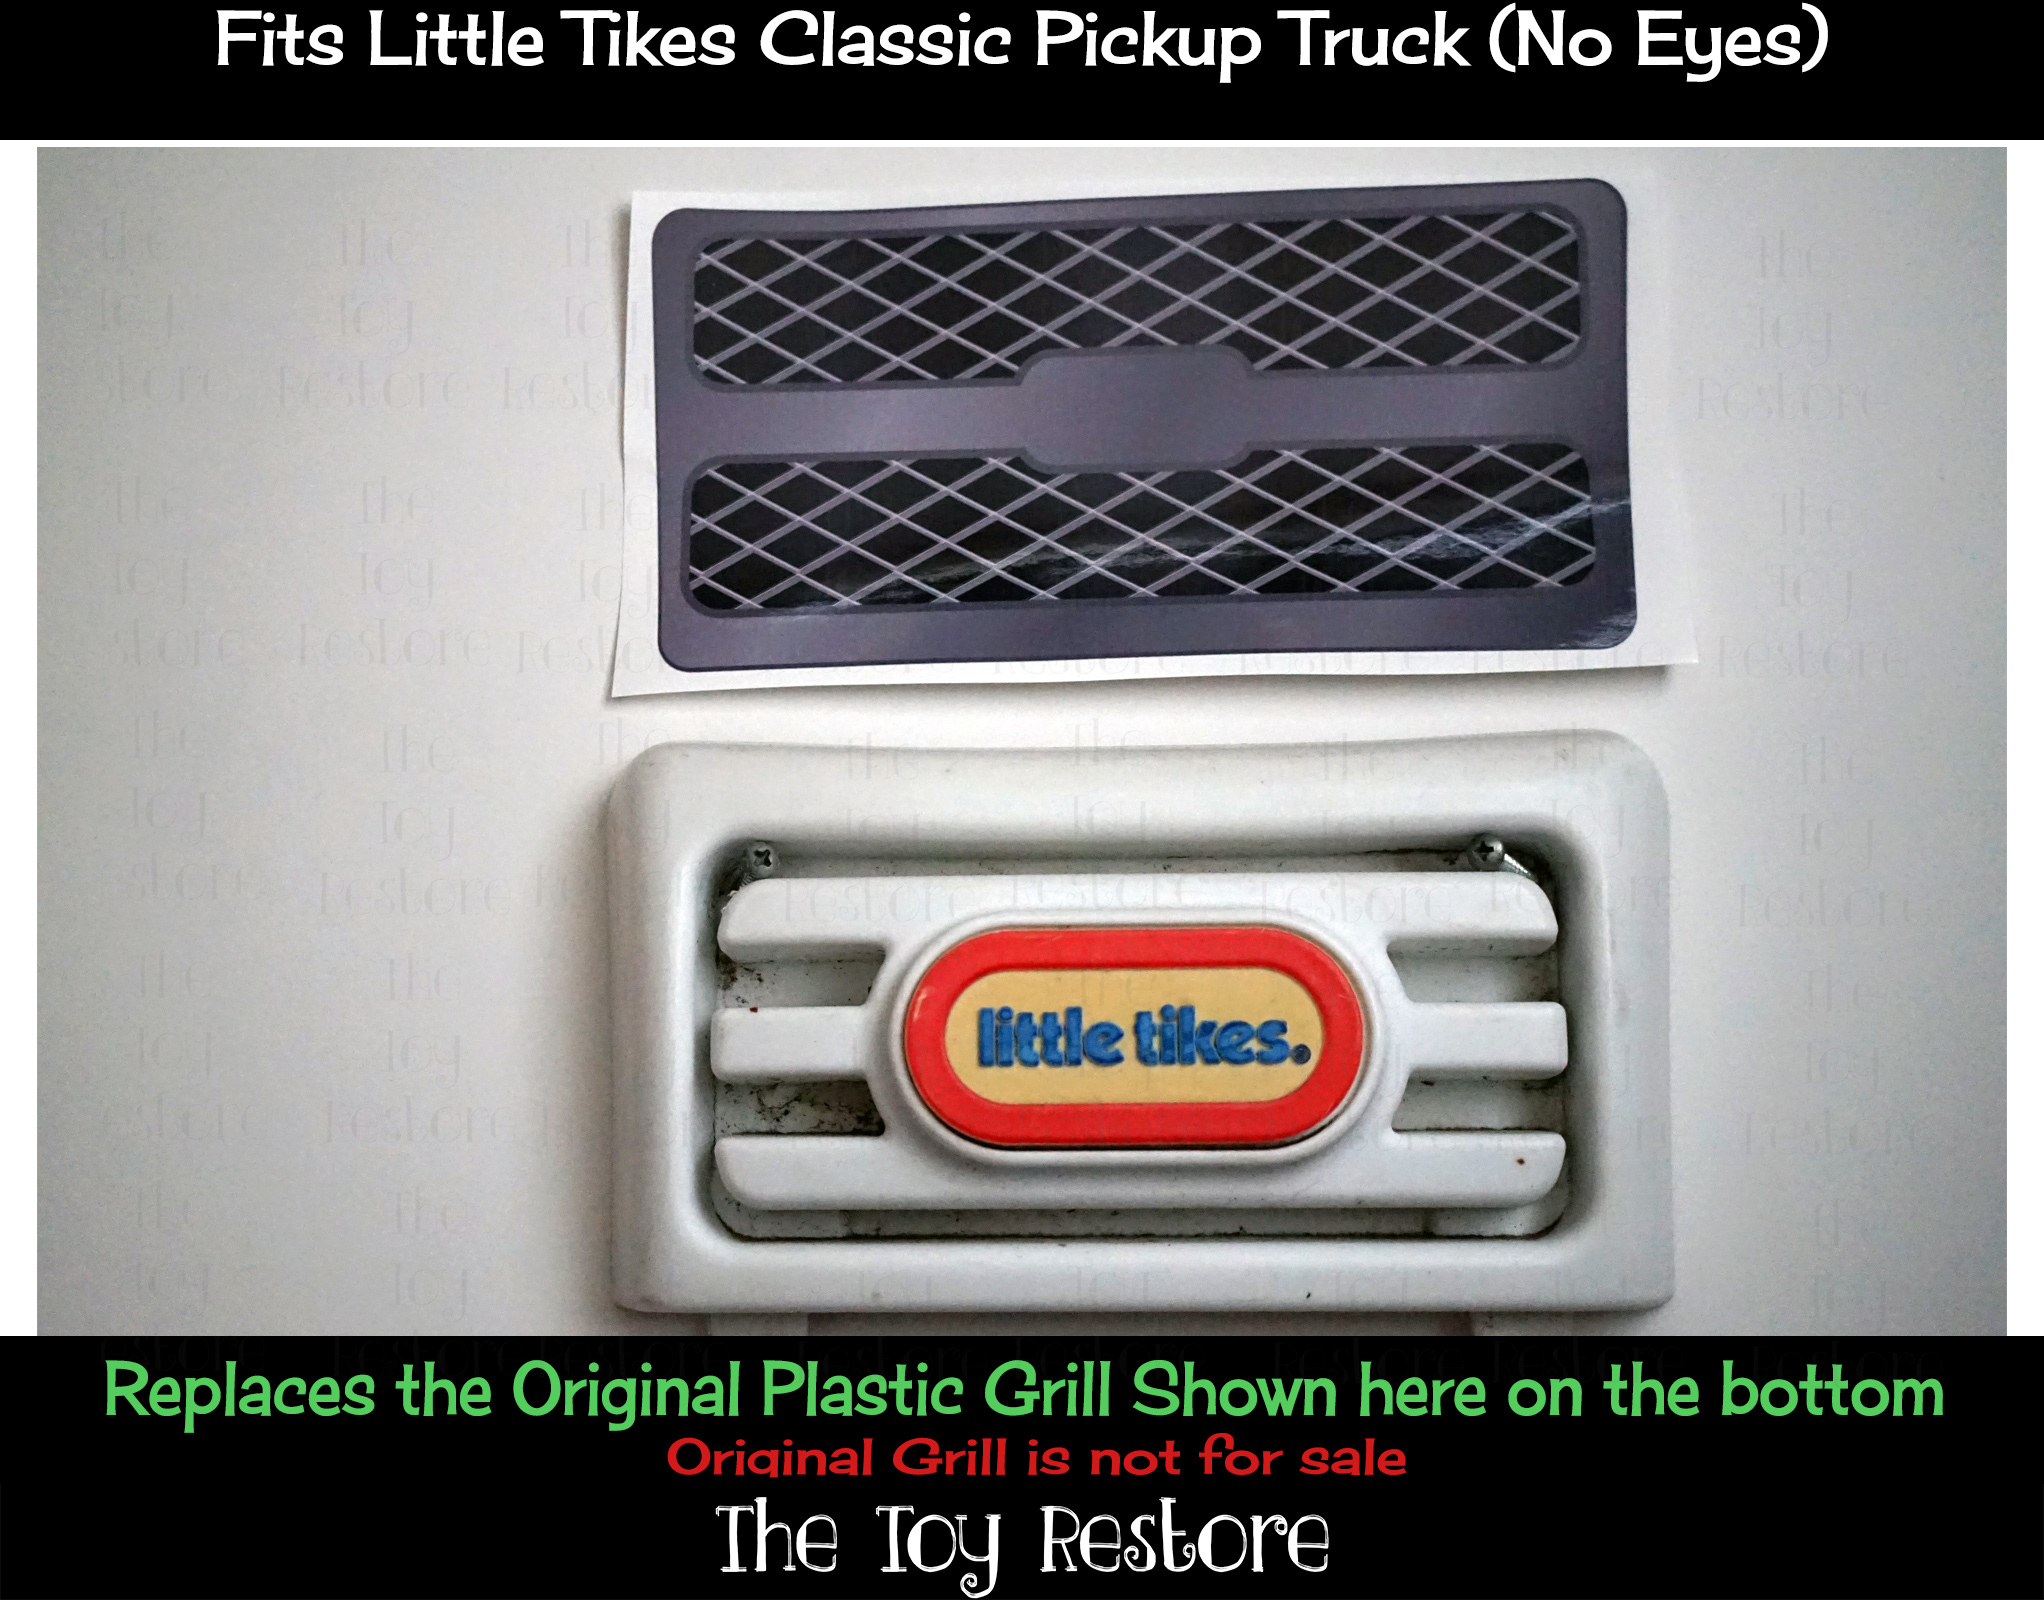
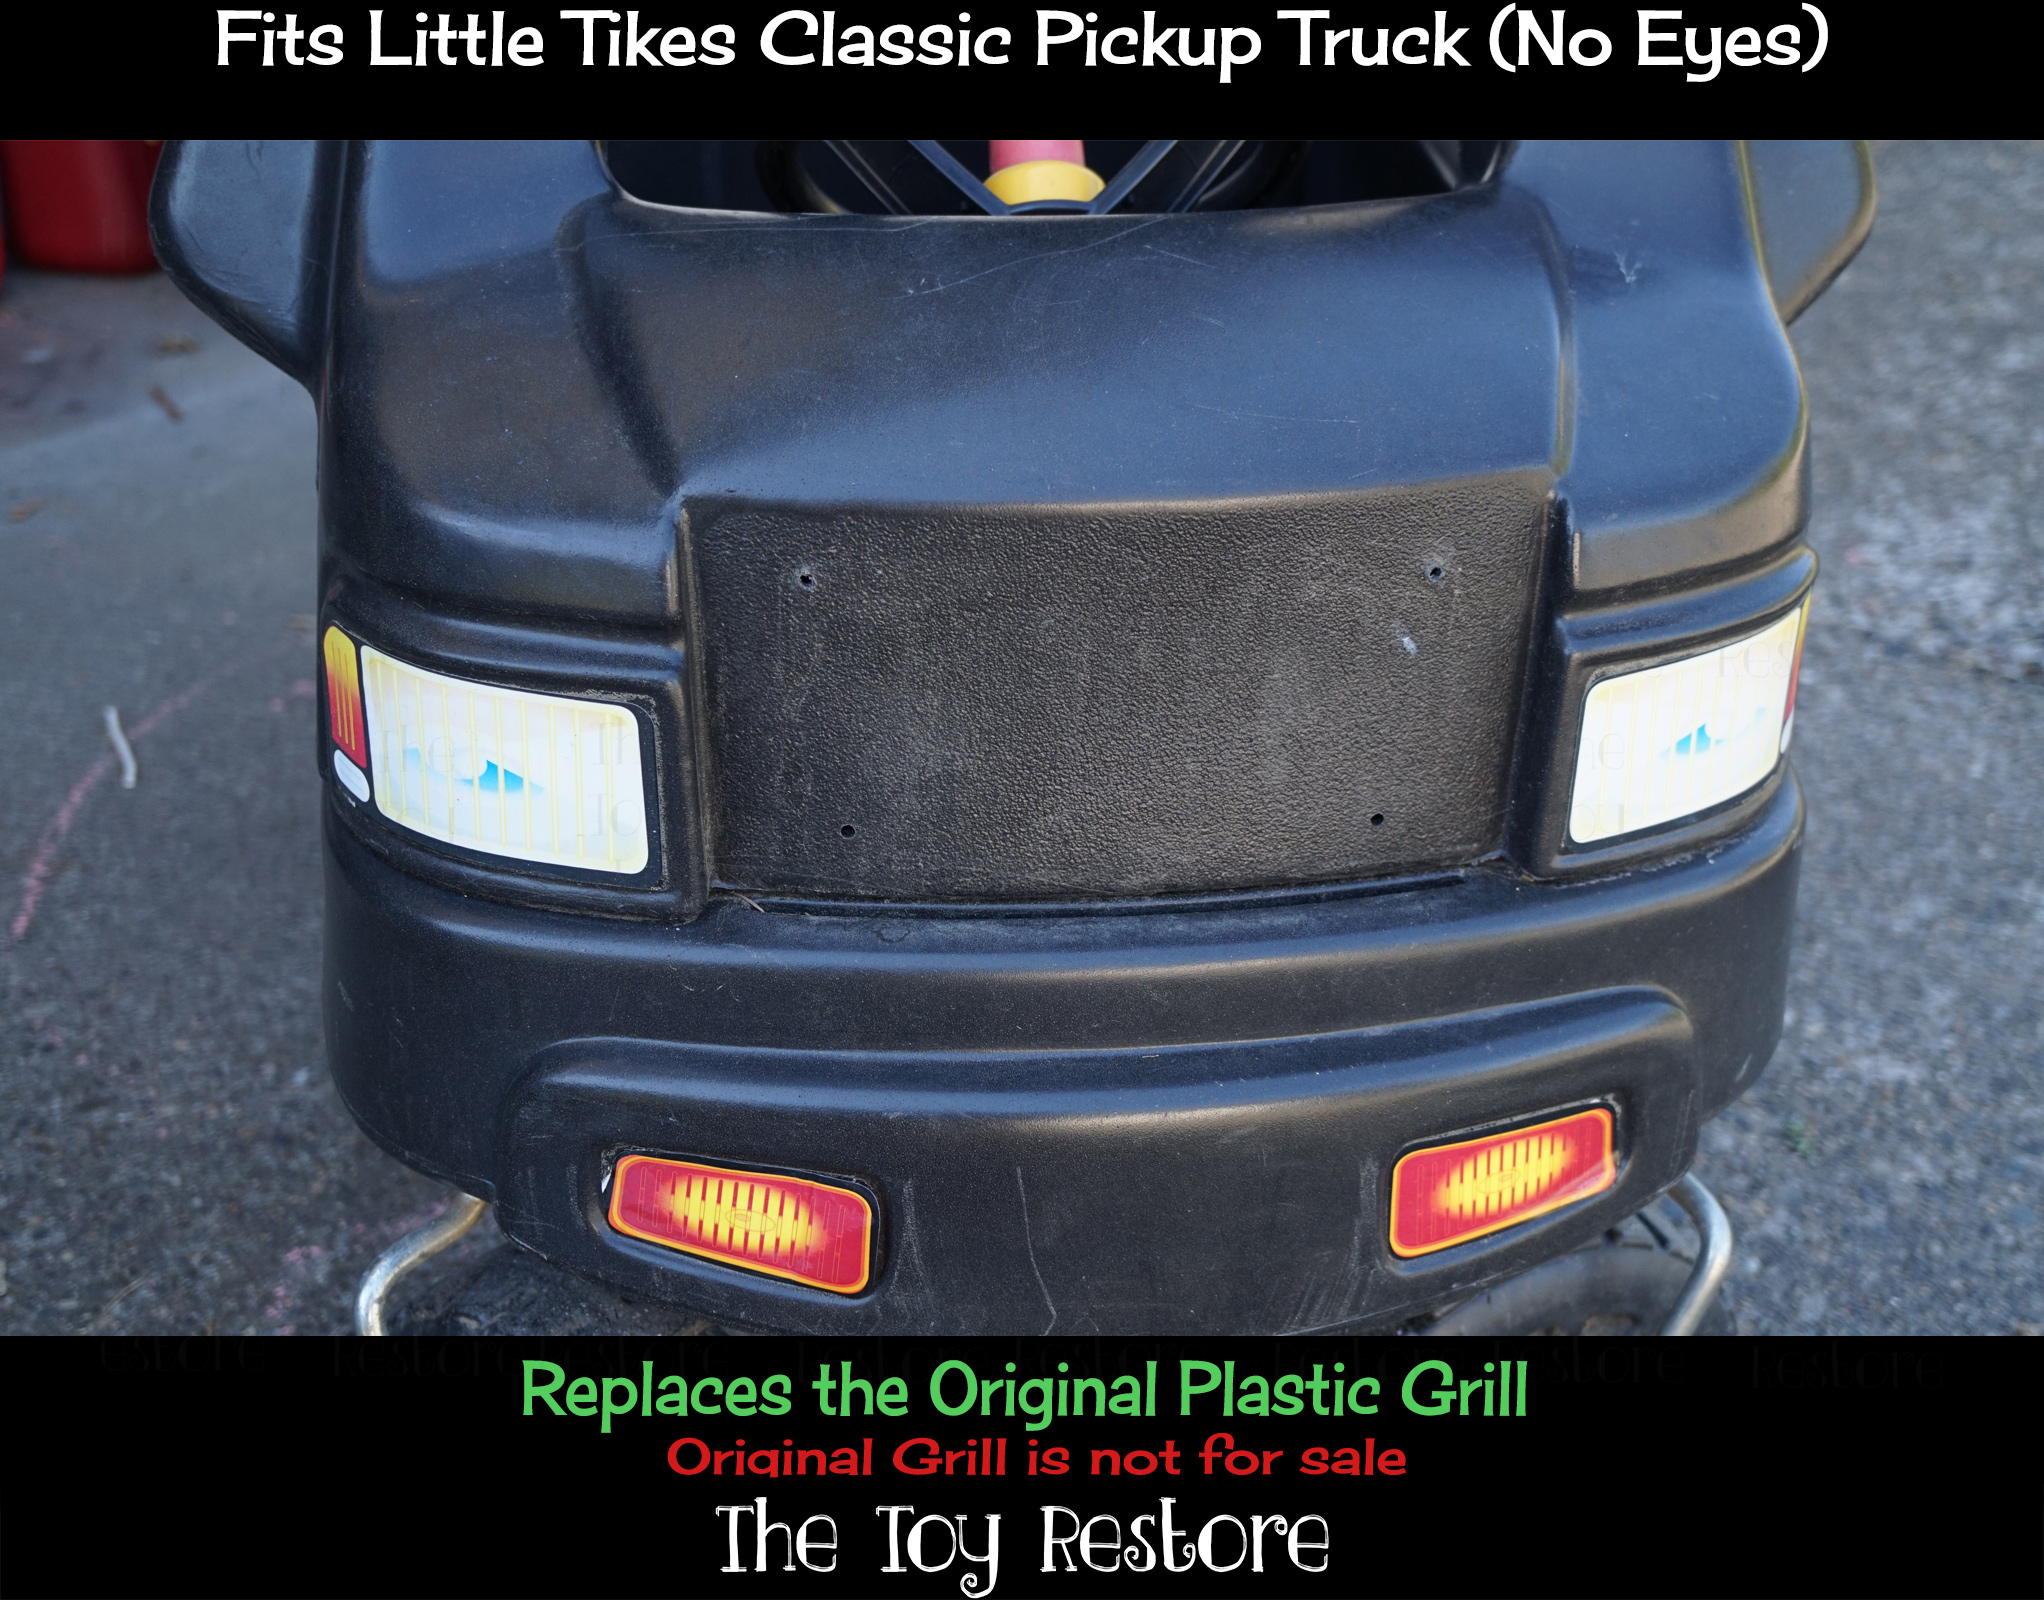
My kits contain everything that you need to make your coupe look like an ice cream truck. The front grill, the license plate, the dash, mirror, tail lights, door logos, front logo, and 2 logos for the back pillars, and some extra ice cream decals.
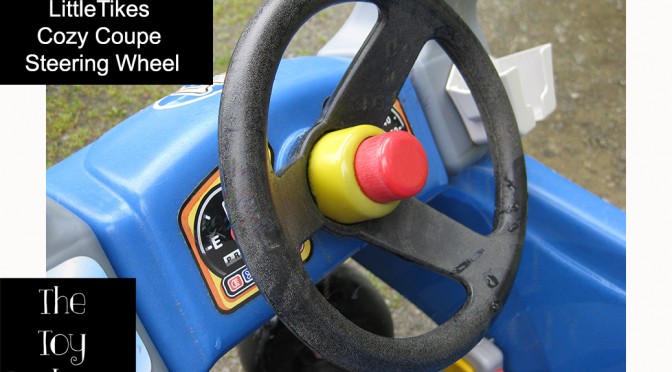
Little Tikes Cozy Coupe Steering Wheel Replacement
How to Fix Little Tikes Cozy Coupe Steering Wheel
Here is a quick overview of how to replace a steering wheel on the Little Tikes Cozy Coupes. For the purposes of this post, I am using a 1990s Little Tikes Cozy Coupe. I will add measurements in the future to be sure that this can be used for other car replacments.
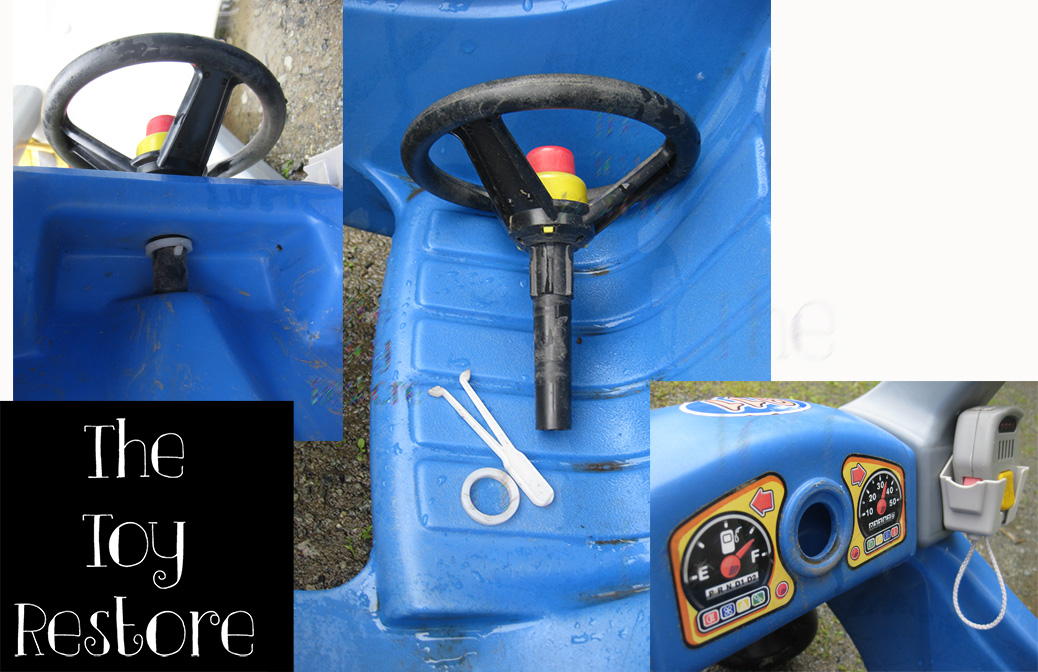
Little Tikes Cozy Coupe Steering Wheel Replacement 2
The basic set-up is simple. There is the steering wheel, a washer, and a steering wheel clip. All your car needs is the right size of hole, both in diameter, and in depth. I am pretty sure you could modify the replacement parts to fit different dimensions though. That will have to wait for another post. 🙂
Little Tikes Cozy Coupe Steering Wheel Replacement 4
So the steering wheel clip slides into the bottom of the steering wheel, with the “Y” end up. Push it up until the clip ends pop out of the holes in the tube.
Little Tikes Cozy Coupe Steering Wheel Replacement Title
Put the steering wheel into the hole, and underneath, before it goes through the other side, hold the washer on the underside of the hole, and thread the washer and the otherside of the hole onto the bottom tube of the steering wheel. The washer will slide upwards and over the two nobs that are expsoed from the steering wheel clip inside the steering wheel. If you need to take it off again, push in the two exposed clips and let the washer slide back down the tube again.
Little Tikes Steering wheel underneath
I will get the dimensions and add to this post as soon as I can.
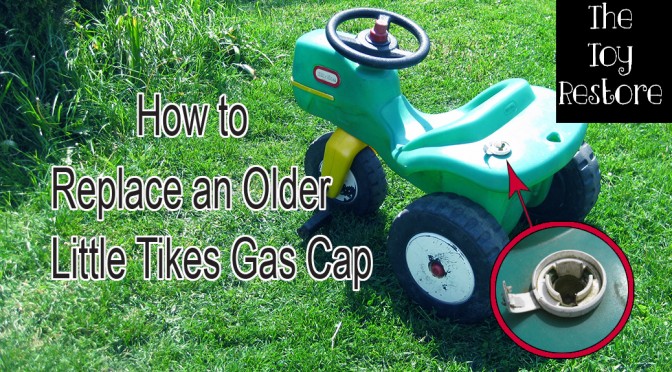
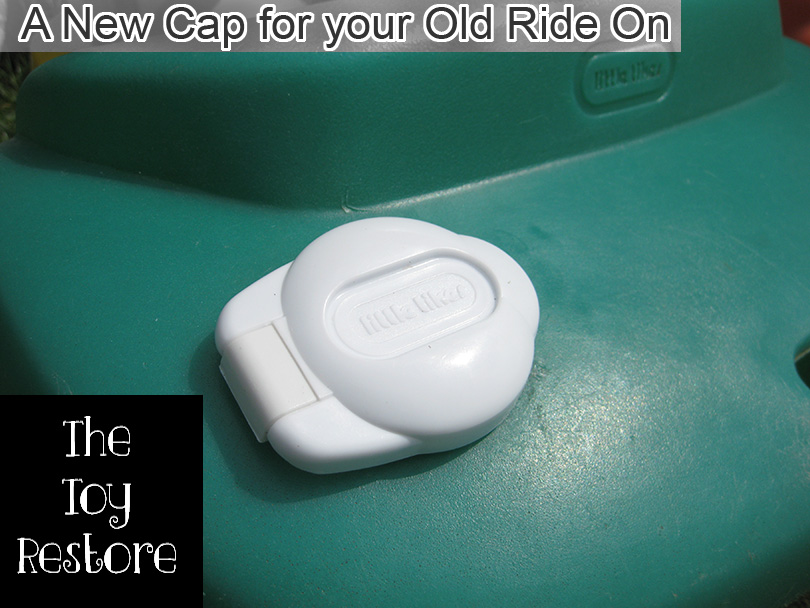
What child doesn’t like to fill up their car with gas? Usually when I find a vintage Little Tikes ride on the first thing gone is the gas cap. Here’s how I fix the gas cap on these toys. They originally had flimsy plastic tabs to hold the top of the gas cap on, and they broke off over the years. With design changes, the newer Little Tikes replacement parts don’t fit the older ones anymore, but you can easily make them fit, by drilling a hole.
How To Fix Vintage Cozy Coupe Gas Cap : Each Project is Different
As with any case of modifying new replacement parts to fit older toys, these instructions will vary depending on future design changes on the gas cap. In this case, I used a replacement part from a 1990s version Little Tikes Cozy Coupe, on a vintage Little Tikes petal tractor. I believe the 30th Anniversary model is the same basic design as well, but I have to double-check my measurements on that, and I will update this post when I do.
How To Fix Vintage Cozy Coupe Gas Cap :
Find the Replacement Part
Call the 1-800 number on your toy, or visit the Little Tikes website to see if they offer replacement gas caps. If not you can easily find sellers on Ebay who will offer them. If I have any available you can order them HERE.
How To Fix Vintage Cozy Coupe Gas Cap :
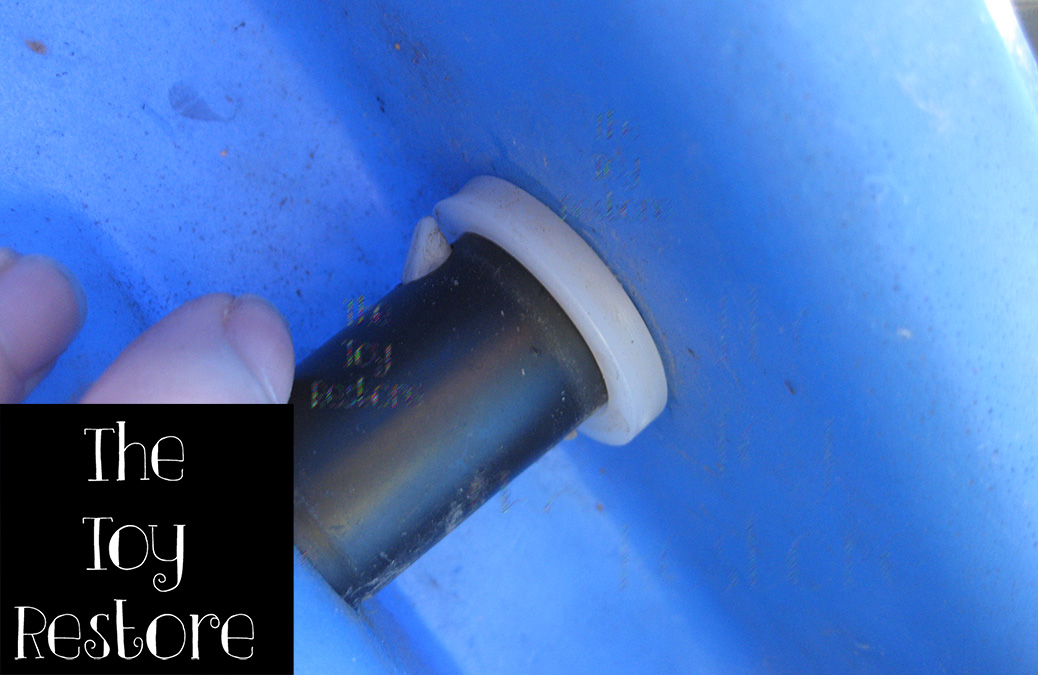
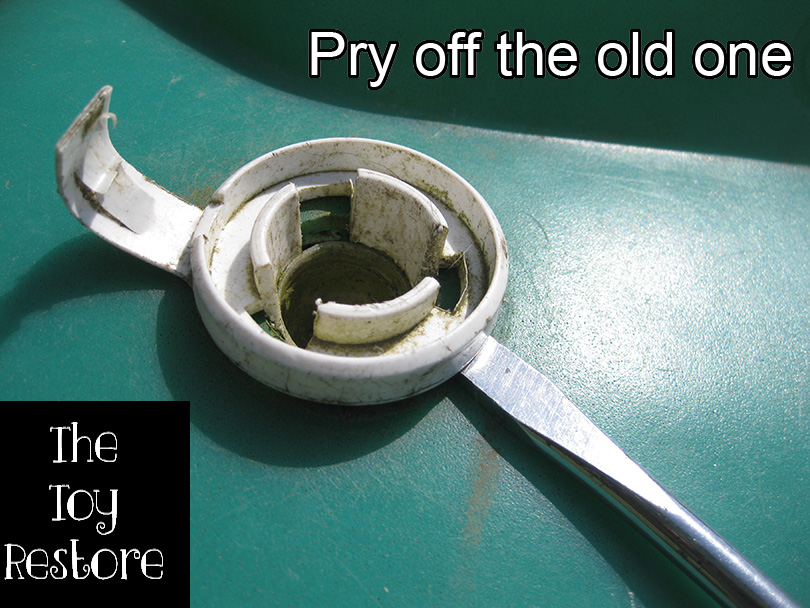
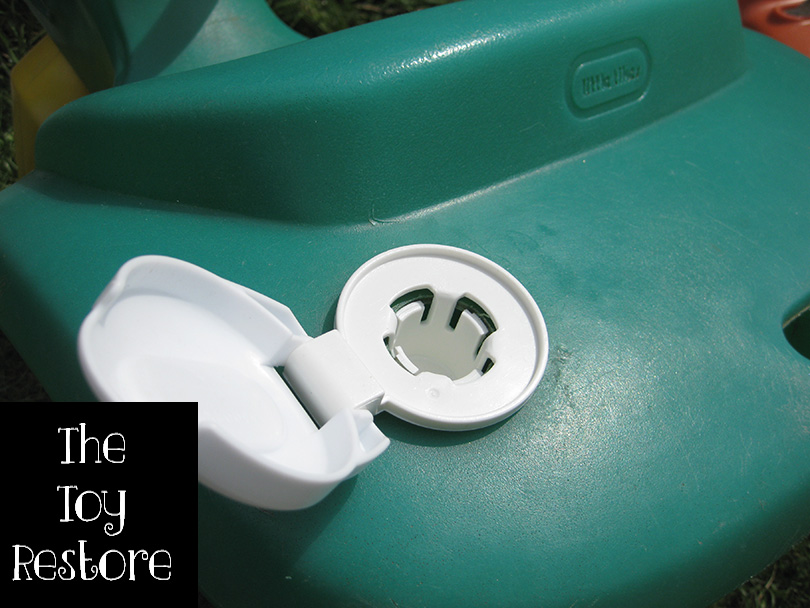
Remove the Old One
Pry off the old one, and clean the plastic.
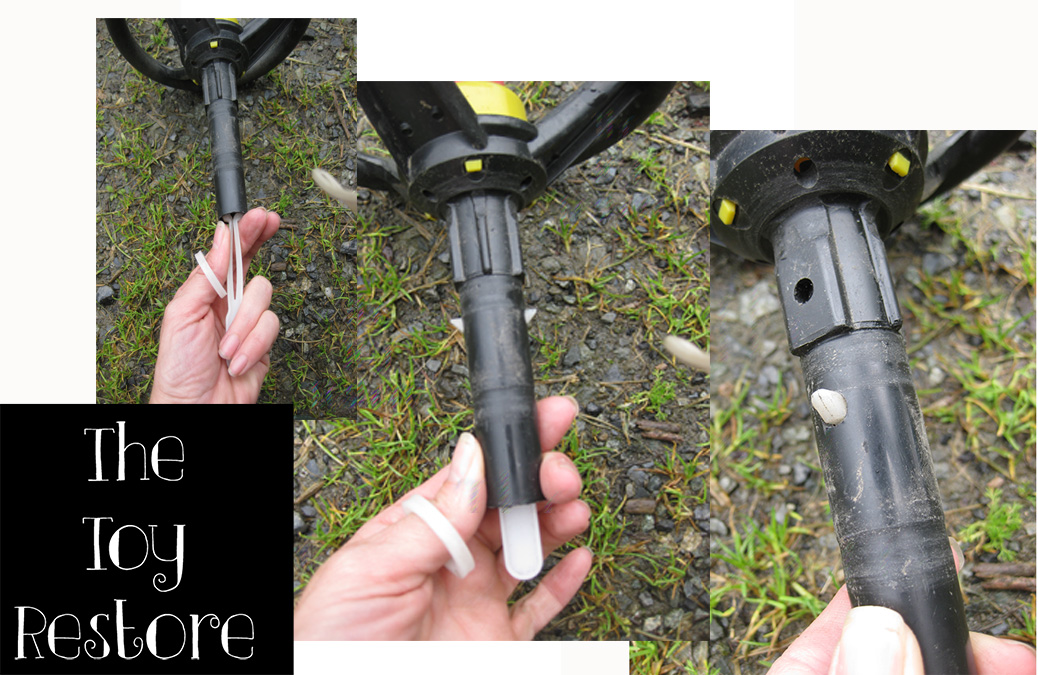
How To Fix Vintage Cozy Coupe Gas Cap : Replacing an old style Little Tikes gas petro cap with a new one
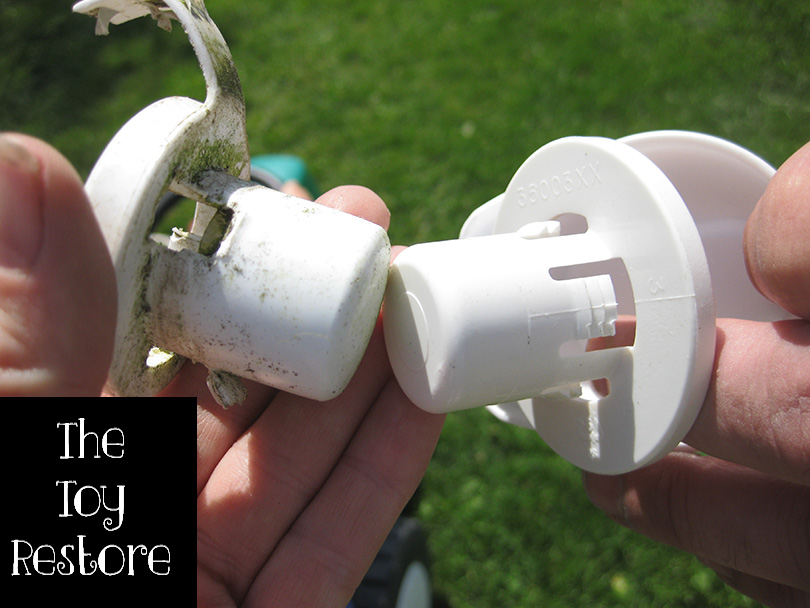
When you compare the vintage style to the newer style, you will note that the vintage one has a larger diameter then the newer one. Luckily there is a smaller plastic column in the newer one to help hold it in place, otherwise the newer gas cap would just fall out.
How To Fix Vintage Cozy Coupe Gas Cap : A comparison of an early 1990s vintage gas / petrol cap versus a newer late 1990s – early 2000s Little Tikes Cozy Coupe gas cap.
How To Fix Vintage Cozy Coupe Gas Cap :
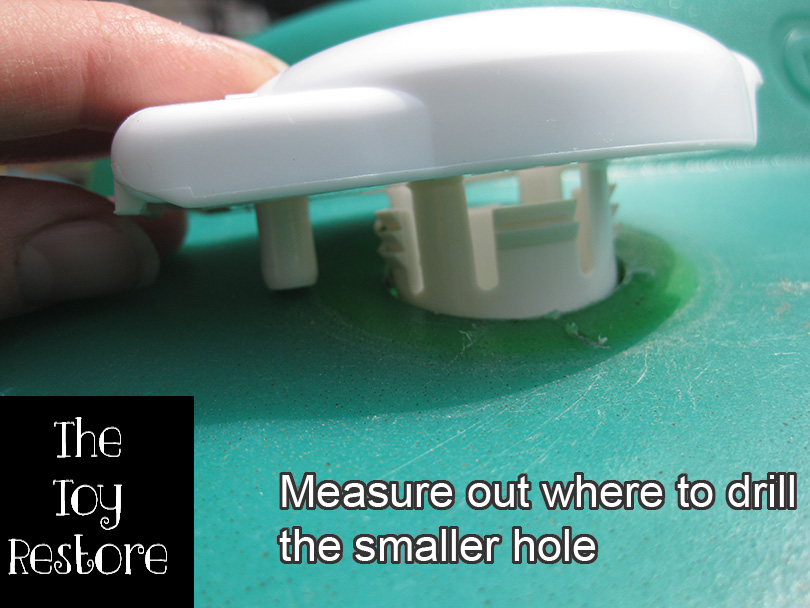
Measure
How To Fix Vintage Cozy Coupe Gas Cap : Measure out there to drill the smaller hole for the Little Tikes Ride-On
Just for when the design changes, you should double-check to see where to drill your hole. When I first did this, I didn’t measure a thing, I just eye-balled it all. I marked the place to drill the hole, in the above photo, and I eye-balled the drill bit size, as in the next photo.
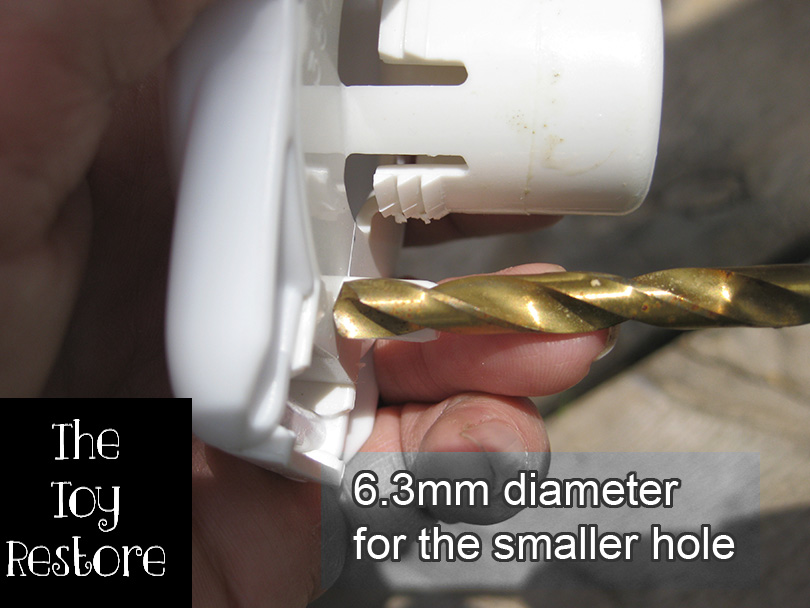
How To Fix Vintage Cozy Coupe Gas Cap : Find the right grill bit. You can eye-ball the size by placing the bit in front of the plastic column. If you should barely be able to see it on each side.
When eyeballing things, you want the drill bit to be the same size or slightly smaller. So place the grill bit in front of the plastic column, if you can slightly see the plastic column on each side of the grill bit, then you have a good size. You don’t want it too small, or too large. If you make it too small you can re-drill it with a larger grill bit, or crave it larger with a box cutter. I measured the plastic column for the newer replacement part and it is 6.3mm, so 6 mm grill bit would work fine. I will add the equivalent imperial measurement when I find my imperial drill bits, or my scientific calculator.
How To Fix Vintage Cozy Coupe Gas Cap :
Drill the Hole
How To Fix Vintage Cozy Coupe Gas Cap : For my example, using a 1990s version replacement gas / petrol cap on a vintage Little TIkes petal tractor, I drilled the hole 10mm from the outside edge of the large hole, to the center of the smaller hole.
Drill your hole, and push in the new cap. Hopefully it all fits snuggly, if not, you could thicken the larger column of plastic on the replacement cap with electrical or duct tape to make a snug fit. But I have never had to resort to that, the drilling always seems to work out fine for me. You could also choose to turn the cap a different direction and drill again. The first hole would be hidden behind the cap.
How To Fix Vintage Cozy Coupe Gas Cap :
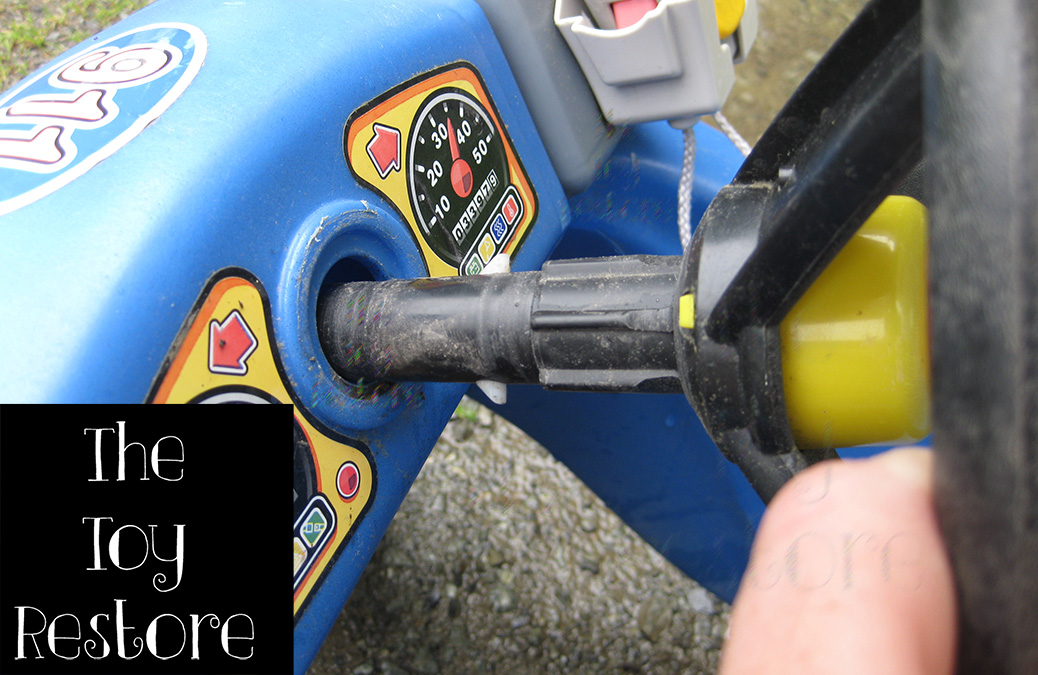
Pop it in
How To Fix Vintage Cozy Coupe Gas Cap : New gas / petrol cap for your vintage little Tikes ride on.
How To Fix Vintage Cozy Coupe Gas Cap : New gas / petrol cap for your vintage little Tikes ride on.
Please feel free to ask me questions, I will gladly update this file as I can.
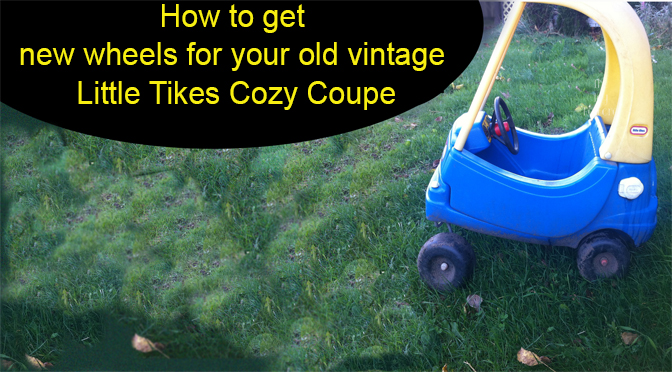
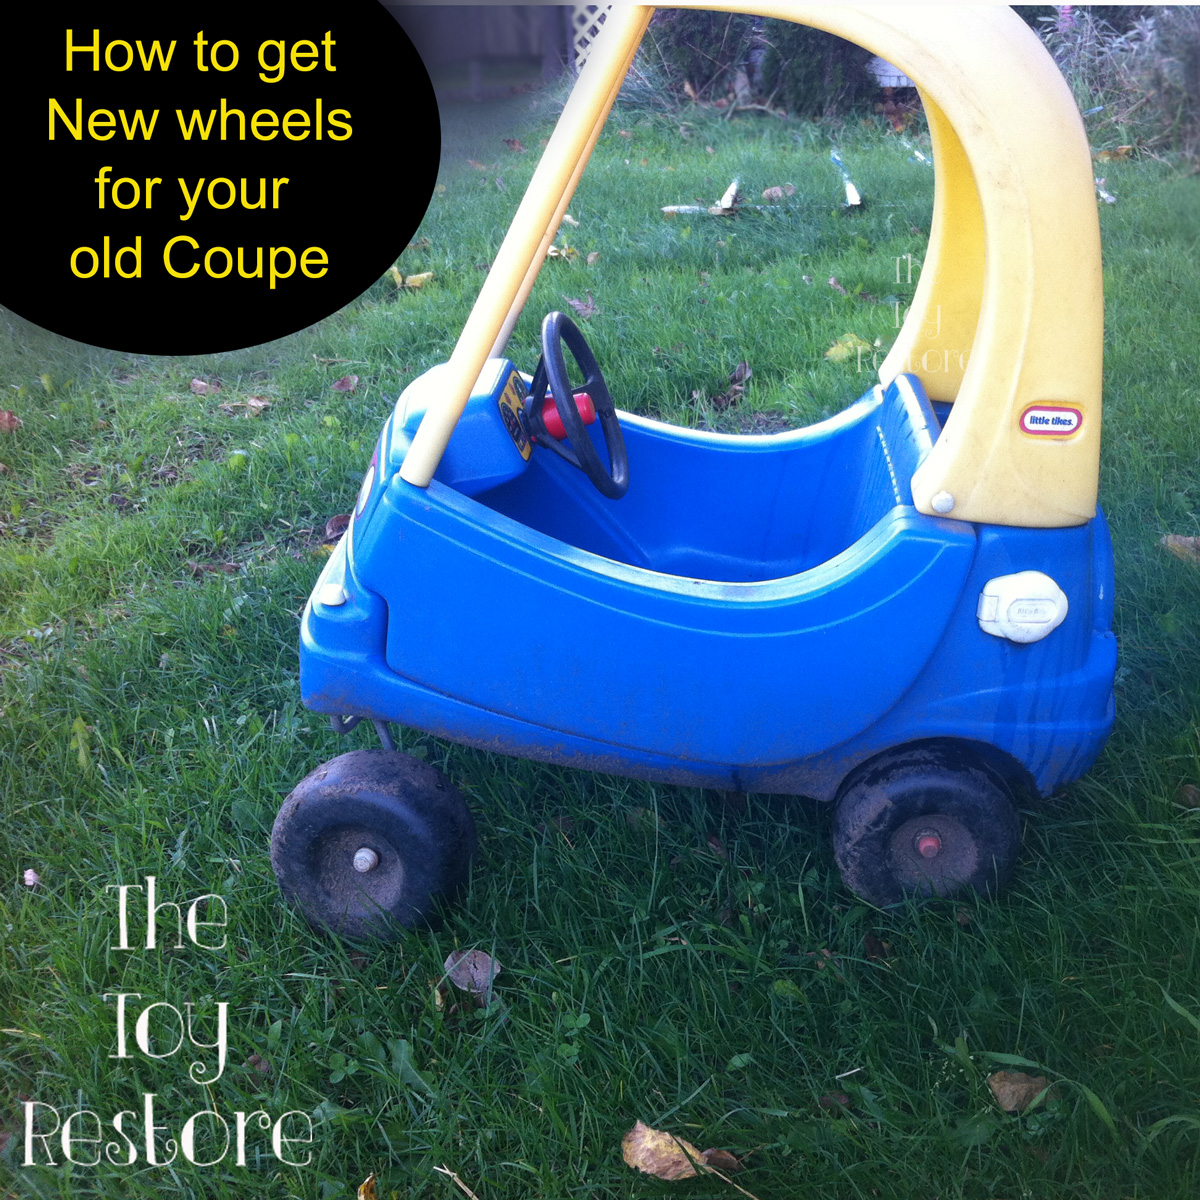
How to Fix Little Tikes Cozy Coupe Wheels or Tires
How to Fix Little Tikes Cozy Coupe Wheels or Tires : Replace a missing tire with new parts
How to Fix Little Tikes Cozy Coupe Wheels or Tires. I cannot tell you how many Cozy Coupes from Little Tikes I rescued from the garbage, or recycling, just because they were missing a tire, or front wheel assembly. Maybe people don’t have the time, or energy to fix them, but maybe they just don’t think they can. So here’s what I know of how to fix them, in the hopes that more are rescued from the landfills.
How to Fix Little Tikes Cozy Coupe Wheels or Tires:
Find Replacement Parts
Little Tikes offers lots of replacements parts, and you can get them from just calling the 1-800 number that is printed on your toy, or on their website. If they don’t have cozy coupe kits with the wireforms available anymore, then you can find sellers on Ebay who will offer what you need.
How to Fix Little Tikes Cozy Coupe Wheels or Tires :
Vintage 1980s Original Model Cozy Coupe: Front wheel Assembly Replacment
With the older 1980s vintage models, the front wheels, and wireforms are quite different from the newer models, but you can modify the newer parts to fit them. The major differences are in the wireforms.
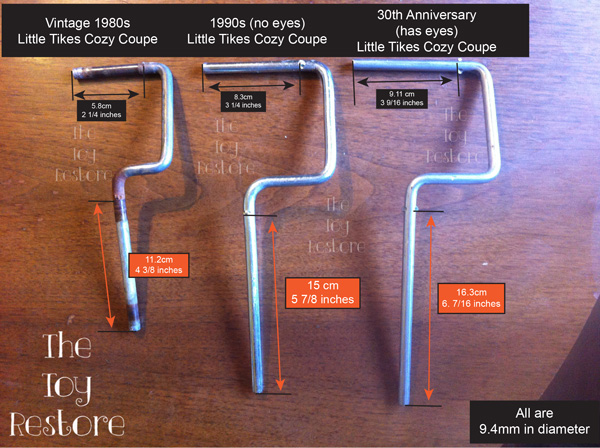
Front Left Little Tikes Cozy Coupe wireform comparisons. and measurements, Vintage 1980s vs 1990s model (no eyes) vs the 30th anniversary, (has the eyes). These measurement go from the edge of the rod, to the notch that catches the washer to hold the tire or bushings in place.
All the wireforms have this notch. My measurement are from this notch to the end of the rod. This is the important measurement to understand.
How to Fix Little Tikes Cozy Coupe Wheels or Tires :
Equal Sizes for Both Front, or Both Back is Important
There are two forms needed for the front, a right and a left. If you are unsure which one you need, I’ll put that to an end now. You need both, as the angle is different, and the newer tires are larger so you have to replace both wireforms and tires at the same time. If both your vintage tires are still useable then you could use them. The idea is that it must be the same on both sides. So the tires must match, and the wireforms must match each other.
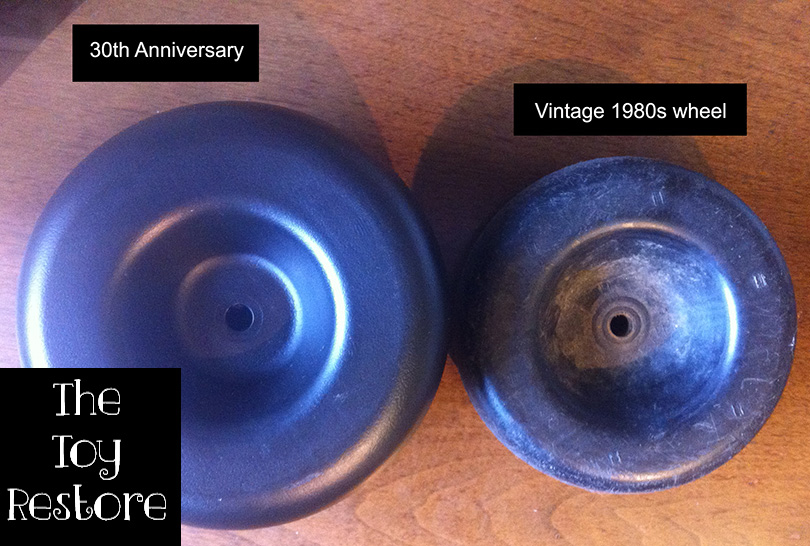
Comparison of vintage Little Tikes cozy coupe tire vs a 30th Anniversary model coupe
Yes it sounds expensive, but if you sell the parts you don’t need, that can cut the cost down a bit. I know it is not hard to list them on Ebay and sell them. Maybe have a peak on Ebay first to see if someone is selling a vintage tire, or wireform before ordering new parts from Little Tikes.
How to Fix Little Tikes Cozy Coupe Wheels or Tires :
Removing The Old Parts
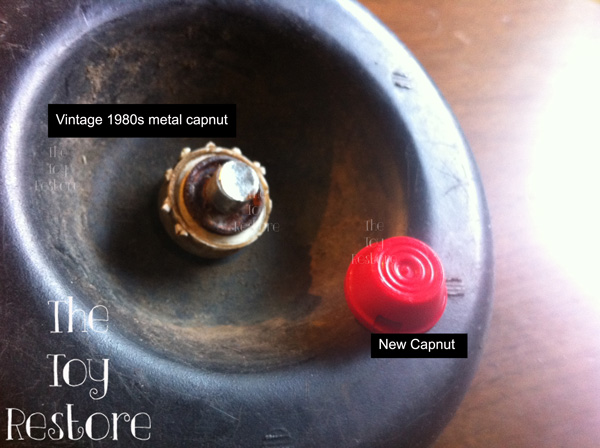
A word about dismantling your older coupe. If you can avoid pulling off the old version cap nuts, do it, as they are VERY hard to pry off. And if someone knows a trick to this I would love to hear it.
Old Little Tikes vintage cozy coupe cap nuts, vs the new cozy coupe cap nuts. These cap nuts are quite universal too.
I think I found the easiest way to get them off is with a pry bar and a hammer and just tapping the pry bar with a hammer to wiggle it off. But rarely any of them were able to put back on. I just pull off the top cap nut and the rest of the wheel assembly will come off all together.
Removing just the top cap nut will leave you with the vintage wheel assembly still all together. Ready to sell on Ebay to someone else.
How to Fix Little Tikes Cozy Coupe Wheels or Tires:
Save Your Old Parts if Possible
Definitely try to save the original bushings, as they are shorter, and can make assembly easier. If you don’t have them, or you are going to use them with on another car, you can use the newer ones, but then you need to increase the length of your upper straight length, the part that goes through the body of the car.
How to Fix Little Tikes Cozy Coupe Wheels or Tires:
Measure Your Cut
Once you have both tires and wireforms off, put on the new version ones. They will be too long for the older coupe, but you can measure them out on where to cut them. The length will change depending on whether you have the old or new bushings. So measure them with the bushings you are going to use. Give yourself a good 2 cm of clearance on the top. If you find the wheel is a little loose you can pry off the newer version cap nut much easier recut the wireform, and put it back on. Obviously if you cut it too short, you won’t be able to use it, so really put a lot of thought into the length. And as I said before, you have to replace them with either two new wheel assemblies, right and left sides, with wireforms, and wheels, or find some vintage parts you need, and replace them. If you end up replacing with all new parts, please sell the old stuff you had. I promise you there is someone out there who needs that left tire you don’t anymore. 🙂
How to Fix Little Tikes Cozy Coupe Wheels or Tires
Make Your Cut
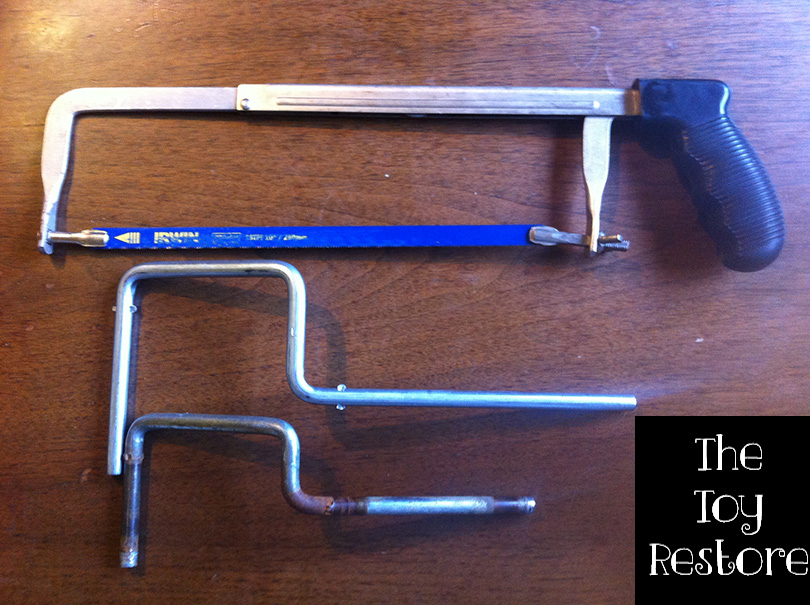
So here you are, you have two new 30th anniversary wireforms, and two new tires from a 30th anniversary, how do you make it fit your coupe. Easy cut it with a hack saw to the right length.
Just cut it with a hack saw
A vise grip holding it to a work bench makes life easier, but I have to admit I have tried several Macguiver type set-ups and it still worked out fine.
I’ll be adding more to this hopefully adding links and more pictures and stuff. Please feel free to ask questions. I will try to answer as quickly as I can.